Tag Archive for: ACJWM

Custom Tie Dye Ribbon Tutorial

Custom Tie Dye Ribbon Tutorial is what we have for you today. Do you ever look at a project and think Wow! Those two or three colors would look awesome with this creation but can’t figure out how? PROBLEM SOLVED! I have an inexpensive way for you to create your own Custom Tie Dye Ribbon for your projects that won’t break the bank! Ready? Let’s do this!

Supplies Needed for the Custom Tie Dye Ribbon Project

Alcohol Ink

Isopropyl Alcohol

Paper Clips

Seam Binding

Plastic Baggies or a Jar you don’t mind getting stained

Clothes Pins (yay remmebered!)

Paper towels or I used make up pads

GLOVES if you don’t want to get ink all over your hands because YOU WILL

For this project, I used Chameleon Ink refill colors Y03, V04 and BG4 for the alcohol ink colors.

I also used white seam binding.

For the seam binding, there is a small pin in it to hold the ribbon. Take it out but be sure to keep it as it comes in handy for storage!

To begin, take the amount of ribbon you need for your project and cut it off of your roll. For this ribbon, I am making it a little bit messy looking on purpose to I am just randomly bunching my seam binding ribbon together as shown.

Twist the seam binding and clip one end of it in the clothespin.

Twist and clip the other end so it looks like the above and set aside.

For the second Custom Tie Dye Ribbon, wrap your ribbon neatly around your hand as shown above.

Take out four paper clips and place them on the ribbon as shown above.

This is the back side of the ribbon. Notice that the paperclips are placed differently to get a different effect.

Using your baggy as an ink catch all, place your ribbon inside the bag. Carefully place a small amount of alcohol ink inside your bag of the first color.

Add the second color to your bag. I put WAYYY too much of the first color in however you will see what I do with the extra in a little bit.

Close your baggy and Smoosh, yes I said SMOOSH, your colors inside the bag. This is what your bag will look like, A MESS! Set your Custom Tie Dye Ribbon aside.

Take out your second baggy and place a few drops of the colors you wish to use inside the baggy.

Using your clothes pin seam binding ribbon, strategically place the ink on various parts of the ribbon.

Take out your first inked creation and set aside to dry.

With the extra ink inside the baggy from the first creation, I placed some more seam binding ribbon and smooshed it to see what effect I would get. Set it aside to dry.

Take out the inked ribbon with the clothespins from the bag once they have dried. These are still a little bit wet.
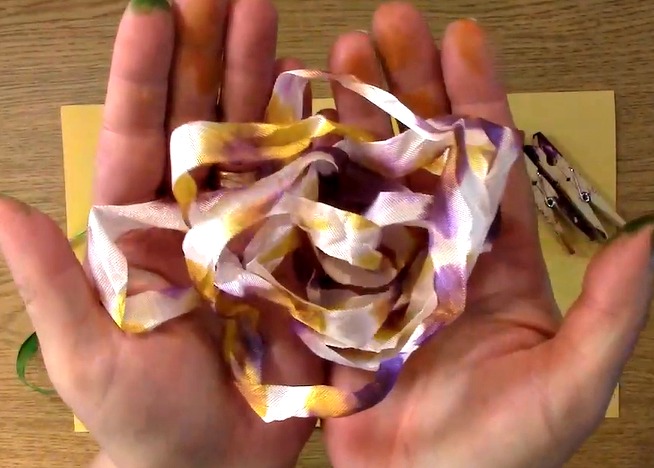
This is what it looks like! I love it! What do you think?

I used WAY TOO MUCH ink for the first ribbon project. LESSON LEARNED however, I do like how it came out so maybe it wasn’t so bad after all!

You will need to carefully take off the paperclips so the ribbon doesn’t snag. ANOTHER lesson I learned…

This is what the ribbon looks like although it is still quite wet as you can see by the look of my fingers.

The results of the ribbon as it is drying.
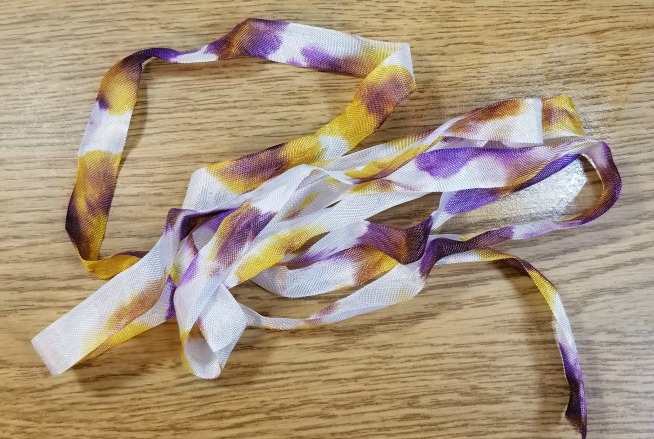
This is what the purple and yellow ribbon looks like once it is completely dry.

When the yellow and blue ribbon is completely dry, this is what it looks like. I am glad you can see more of the blue now and it doesn’t look all green!

This is the extra piece of ribbon I put in the baggy just to see what it looked like. I know I can use this on a future project!

Here are all of them side by side completely dry. Which would you want to try?

For this weeks giveaway, we are giving away $15 credit to our store!

For last weeks giveaway, we are giving away $15 credit to our store!

The winner is Teresa G.

Please be sure that you  send me a message letting me know which post you won on and your contact info and I can send your code for your store credit to you!

Winners, please send me an message HERE and I will get your prize out to you!

For all of our giveaways including this one, in order for you to qualify for an entry to win, you would need to be a follower on YouTube, subscribe to our mailing list/blog posts (found on our blog page) and you may also comment on this blog post for an additional entry to win! When you subscribe, you will receive an e-mail on Mondays with our latest blog post. BE SURE TO READ IT to check to see if you are a winner EVERY WEEK. If you do not contact me within two weeks of the announcement of winning, you will forfeit your prize. NO EXCEPTIONS. Thank you for your understanding.

NOTE: If you are subscribed with two different names and I am unable to match you with your subscription to the blog and the YouTube Channel, you will be ineligible to win as I can’t decipher if you are a matching subscriber to both. Thank you for your understanding.

We hope you will subscribe to our YouTube Channel, Blog/Newsletter updates and check out our website!

As always, we appreciate your visit and we hope you enjoyed going on A Creative Journey with Melissa. 

melissa-written-signature


SAVE MONEY – Dollar Store Embellishment Custom Coloring

SAVE MONEY – Dollar Store Embellishment Custom Coloring is what we have for you today. I bought some pearl embellishments at the dollar store. I am going to show you how to custom color them for any project and save money while doing it!

Supplies Needed for the SAVE MONEY – Dollar Store Embellishment Custom Coloring Project

Alcohol Markers or Pens

Embellishment

Project you are trying to color match

This all started when I was at the dollar store and saw these.

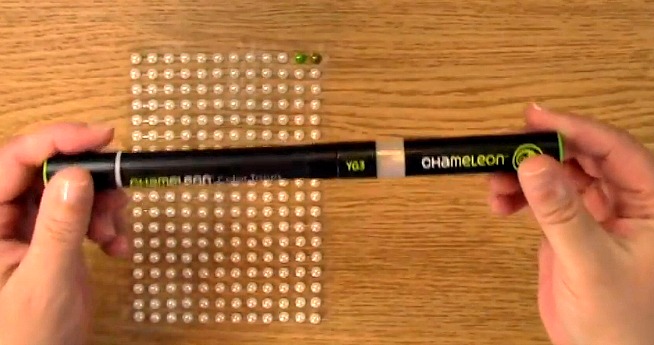
There are 216 self adhesive pearls for ONE DOLLAR!  Now, I am going to show you how to create your own colors for these so you can use them on any of your projects!

Here you can see that there is an adhesive line that the pearls are on. You can cut those however it works best for you.

For the SAVE MONEY – Dollar Store Embellishment Custom Coloring tutorial, I am using OL3 and YG3 chameleon pens to color the pearls for my project.

To begin, take out your OL3 chameleon pen.

Using the brush nib of your chameleon pen for your SAVE MONEY – Dollar Store Embellishment Custom Coloring project, color the embellishment completely so there isn’t any white showing through. I think it’s a pretty good match! What do you think?

Take out your YG3 chameleon pen and color your second pearl.

What a difference in the two colors! I really like them both but the first one matches my project better.

This is what happens when I colored the pearl with the YG3 and then colored on top of that OL3 and this is what it looks like on the right. I really like it!

For this weeks giveaway, we are giving away $15 credit to our store!

For last weeks giveaway, we are giving away $15 credit to our store!

The winner is Mary V.

Please be sure that you  send me a message letting me know which post you won on and your contact info and I can send your code for your store credit to you!

Winners, please send me an message HERE and I will get your prize out to you!

For all of our giveaways including this one, in order for you to qualify for an entry to win, you would need to be a follower on YouTube, subscribe to our mailing list/blog posts (found on our blog page) and you may also comment on this blog post for an additional entry to win! When you subscribe, you will receive an e-mail on Mondays with our latest blog post. BE SURE TO READ IT to check to see if you are a winner EVERY WEEK. If you do not contact me within two weeks of the announcement of winning, you will forfeit your prize. NO EXCEPTIONS. Thank you for your understanding.

NOTE: If you are subscribed with two different names and I am unable to match you with your subscription to the blog and the YouTube Channel, you will be ineligible to win as I can’t decipher if you are a matching subscriber to both. Thank you for your understanding.

We hope you will subscribe to our YouTube Channel, Blog/Newsletter updates and check out our website!

As always, we appreciate your visit and we hope you enjoyed going on A Creative Journey with Melissa. 

melissa-written-signature

Coloring Do’s, Don’ts, Results & Lessons Learned

Coloring Do’s, Don’ts, Results & Lessons Learned is what we have for you today. I love to color and shade. I thought it would be a good idea to show you what I would do to utilize two different colors and join them together for a creation. Coloring Do’s, Don’ts, Results & Lessons Learned – This post is a perfect example of me being human.

Personally, I don’t like edited videos because to me it makes me feel stupid when I make mistakes all of the time and everyone else has these BEAUTIFUL PERFECT videos and I am JUST ME. I am a one shot video kind of girl unless I REALLY mess up and I will just do the whole thing over again. Honestly, I think that has happened 5 times in the past 3 years and had to be redone due to language.. OOPS!

I have been told that people like my videos because I am real and show how to correct the problems I have made. I am actually good with just me so let’s see how this turned out, shall we? Can you hear my eye roll? LOL Trust me, it’s well deserved.

Supplies Needed for the Coloring Do’s, Don’ts, Results & Lessons Learned Tutorial

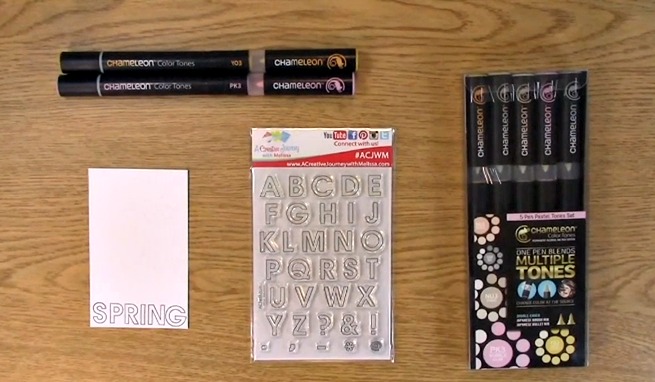
Chameleon Alcohol Pens

A Creative Journey with Melissa Everyday Alphabet Outline Upper Case and Symbols Large Stamp Set or your favorite A Creative Journey with Melissa stamp set

Ink

Paper

Stamp Block

TIME!

Take out your A Creative Journey with Melissa Everyday Alphabet Outline Upper Case and Symbols Large Stamp Set

Stamp your letters on your paper. Take out your chameleon pens.

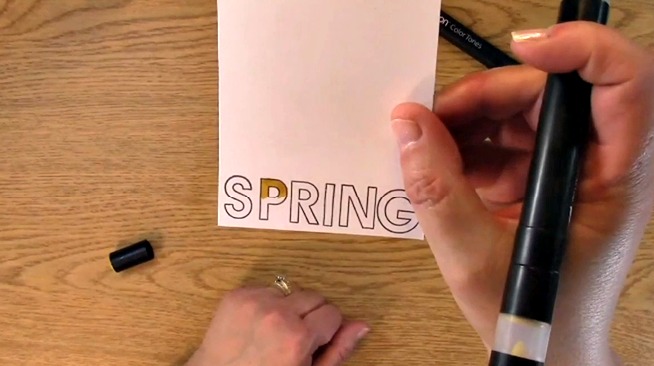
Using a flicking motion, color the top part of your p with the Y03 chameleon pen.

Using your PK3 chameleon pen and click color the pink. This really didn’t come out the way I had hoped. I have my ideas as to why below.

This is how it looked once it was all colored. Honestly, after cutting out the letters and cleaning them up a bit, they wouldn’t be TOO bad… but… I didn’t care for it.

For the next part of Coloring Do’s, Don’ts, Results & Lessons Learned, take out your CG8 Chameleon Pen. I colored the inside the letter I with a flicking motion.

Take out your PK3 Chameleon Pen and also did the flicking color on the opposite side from the gray. I really like the way the pink and gray blended. The middle one is my favorite!

Here, I want to show you that you can do a variance in color with just hand drawn letters too! I started with the CG8 for the top part of the letter S on the right. Using my PK3 Chameleon pen I made the bottom part of the S and blended it with the gray.

I really like how it came out! What do you think? I realize it was done quickly but the possibilities are ENDLESS, right?

I guess the word spring isn’t AS BAD as I thought… sorta… LOL!  I do like how the middle letter I looks with the gray and pink. Typically, coloring looks better once it has dried.

Coloring Do’s, Don’ts, Results & Lessons Learned? Make sure your pen ISN’T OVER FILLED WITH INK, the ink has time to dry because it looks better once it has AND most of all… use lighter colors to start with. I am not saying it wouldn’t look great with darker colors but I think I need more practice. The pink and yellow didn’t turn out as bad as it looked at first but I will have to try that one again and show you an update. I am on a mission!

For this weeks giveaway, we are giving away the Chameleon Pastel pen set and they are great for coloring!

For last weeks giveaway, we are giving away the A Creative Journey with Melissa Birthday Wishes Stamp Set! Not only are the sentiments fantastic, the images are awesome and great for coloring!

The winner for our last blog post giveaway is Maja.

Please be sure that you  send me a message letting me know which post you won on and your contact info and I can get your prizes out to you!

Winners, please send me an message HERE and I will get your prize out to you!

For all of our giveaways including this one, in order for you to qualify for an entry to win, you would need to be a follower on YouTube, subscribe to our mailing list/blog posts (found on our blog page) and you may also comment on this blog post for an additional entry to win! When you subscribe, you will receive an e-mail on Mondays with our latest blog post. BE SURE TO READ IT to check to see if you are a winner EVERY WEEK. If you do not contact me within two weeks of the announcement of winning, you will forfeit your prize. NO EXCEPTIONS. Thank you for your understanding.

NOTE: If you are subscribed with two different names and I am unable to match you with your subscription to the blog and the YouTube Channel, you will be ineligible to win as I can’t decipher if you are a matching subscriber to both. Thank you for your understanding.

We hope you will subscribe to our YouTube Channel, Blog/Newsletter updates and check out our website!

As always, we appreciate your visit and we hope you enjoyed going on A Creative Journey with Melissa. 

melissa-written-signature

Add Hidden Pictures to your Scrapbook Pages

Add Hidden Pictures to your Scrapbook Pages is what we have for you today. I don’t know about you but I always take way too many pictures.  I would rather have too many pictures than not enough. Normally that wouldn’t be a problem except that means I usually get way too many pictures I can’t part with!

Today, I am going to show you how to give yourself a way to add hidden pictures to your scrapbook pages so that you can keep them all!

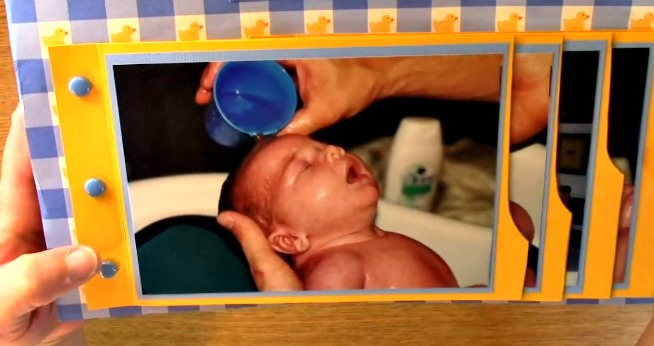
This is a scrapbook page I made for my son Austin’s bath. One important tip here is that you can make any picture mat a pocket. Just apply adhesive to only three sides and you have it! Be sure to write notes in your hand writing for your loved ones.

This is how we are going to be able to add more pictures to your scrapbook. You can even use the front side for pictures and the back side for journaling.. It gives you a bunch of room!

I love how this easy tip allows you to add some fantastic pictures or notes that you may not normally be able to !

We are going to start with our paper and base paper.

First, score your paper on one side. You will need to decide how much you want to do this depending on how large your base paper is. Repeat for all of the papers you are using.

Fold your scored paper. Repeat for all of the scored paper.

Add adhesive on the back of the folded edge.

Place your adhesive on the edge of the paper.

Fold back where the score line is and ensure crease is strong.

Take your second piece of paper and line up to the edge of the last one as shown above. Fold back and ensure crease is strong.

Repeat the placement of the papers. This is how you create the waterfall effect for the papers. What do you think?

Another way you can do the waterfall effect with the papers is vertically. It works either way! You can even do it at an angle across the page!

This is just a close up of Austin tasting snow and being in snow for the first time. I just love the expression on his face. He is so darned cute! I am super blessed to have two amazing sons and an awesome husband.

For our giveaway this week, you can win a store credit so you can pick out your favorite item in our store!

The winner for our last blog post giveaway is Hannah L.

Please be sure that you  send me a message letting me know which post you won on and your contact info and I can get your prizes out to you!

Winners, please send me an message HERE and I will get your prize out to you!

For all of our giveaways including this one, in order for you to qualify for an entry to win, you would need to be a follower on YouTube, subscribe to our mailing list/blog posts (found on our blog page) and you may also comment on this blog post for an additional entry to win! When you subscribe, you will receive an e-mail on Mondays with our latest blog post. BE SURE TO READ IT to check to see if you are a winner EVERY WEEK. If you do not contact me within two weeks of the announcement of winning, you will forfeit your prize. NO EXCEPTIONS. Thank you for your understanding.

NOTE: If you are subscribed with two different names and I am unable to match you with your subscription to the blog and the YouTube Channel, you will be ineligible to win as I can’t decipher if you are a matching subscriber to both. Thank you for your understanding.

We hope you will subscribe to our YouTube Channel, Blog/Newsletter updates and check out our website!

As always, we appreciate your visit and we hope you enjoyed going on A Creative Journey with Melissa. Have a wonderful holiday!

melissa-written-signature

Holiday Stocking Card Using Sign Language Stamps

Holiday Stocking Card Using Sign Language Stamps is what we have for you today. I am always looking for multiple uses for the dies that I have. We invest a lot of money in our crafting tools and I like to think of multiple ways to use them. That is what we are going to do today! Are you ready? Let’s get started!

Here is the creation we are going to make! It is perfect for gift cards for the holidays!

Supplies Needed for the Holiday Stocking Card Using Sign Language Stamps Project

A Creative Journey with Melissa Sign Language Alphabet stamp set

Acrylic Block

Scissors

Black Ink

Paper for Card

Paper for embellishments for stocking

Stocking Die

Glue dot for gift card

Trim for stocking

Adhesive

Here is a close up of the stocking die I used.

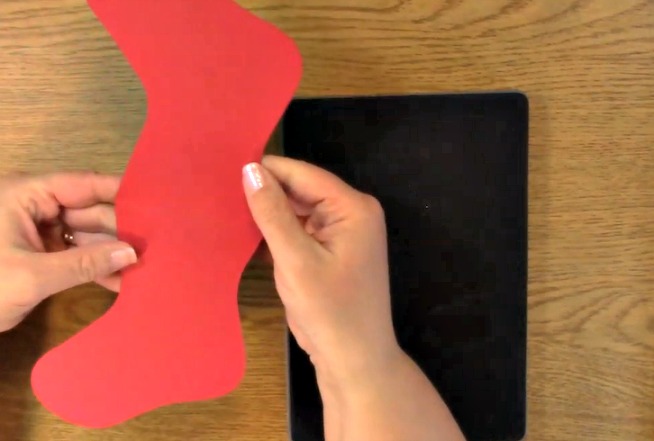
Take out your stocking die, paper, platforms and manual die cut machine. Place your paper on top of the die where you need the white pieces cut. Place your die on top of the clear platform and then place the clear platform on top of the die so it is sandwiched between the two clear platforms.

Here are the pieces that the die cut out for me for the Holiday Stocking Card Using Sign Language Stamps Project.

Take your colored 6″ x 12″ piece of paper out.

Fold your colored paper in half.

Be sure the fold line is BELOW the top of the stocking. This is how you will make it a card!

Using the same sandwich as you did for the embellishment pieces for the stocking, run your die with the folded part BELOW the line where the die will cut. Run your die cut through your machine.

You did it! This is how you create the stocking card for your Holiday Stocking Card Using Sign Language Stamps Project!

This is a close up of the die. I placed my fold approximately 1/4 inch below the cut line for the stocking. Above is the picture is an exaggeration of how much space it was. I just wanted to be sure you were clear which line you were to be sure you placed the fold under for your creation.

Take out your ink and the top of your stocking. Peel off the appropriate letters from your A Creative Journey with Melissa sign language stamp set.

Place the first letter on the block.

Ink your stamp

Stamp your letter on the top of the stocking. Repeat to spell out the word you wish to have.

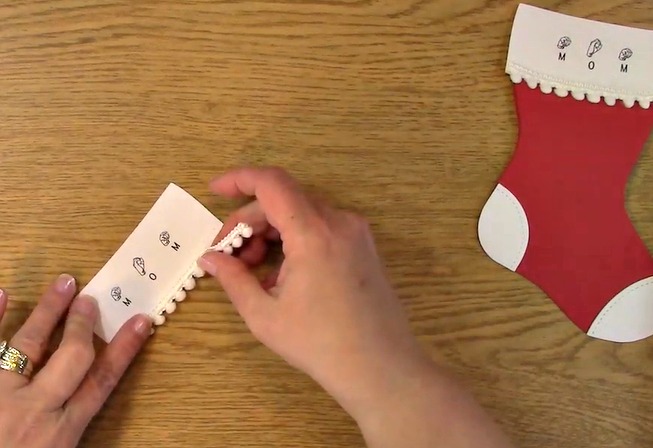
Take out your trim. Place adhesive on the bottom edge of the stocking top. Adhere the trim to the stocking top. Trim off any excess.

Here on the left I put the letters rounded so they followed the trim. On the right I did them straight. Which do you like better?

Place adhesive on the back of the stocking heel and toe pieces. Adhere them to the front of your stocking card.

Take out your stocking top with the trim.

Adhere the stocking top to the front of the stocking card.

You did it! You completed your Holiday Stocking Card Using Sign Language Stamps Project!


First I want to announce the two winners from the Fall/Winter Coffee Lovers Blog Hop $15 store credit.

The winners are:

Cynthia C. and Lucy E.

For last weeks $15.00 store credit prize, the winner is Sydney G.

For this weeks prize, we will be giving away a $15.00 store credit! That way you can decide exactly what you want!

For all of our giveaways including this one, in order for you to qualify for an entry to win, you would need to be a follower on YouTube, subscribe to our mailing list/blog posts (found on our blog page) and you may also comment on this blog post for an additional entry to win! When you subscribe, you will receive an e-mail on Mondays with our latest blog post. BE SURE TO READ IT to check to see if you are a winner EVERY WEEK. If you do not contact me within two weeks of the announcement of winning, you will forfeit your prize. NO EXCEPTIONS. Thank you for your understanding.

NOTE: If you are subscribed with two different names and I am unable to match you with your subscription to the blog and the YouTube Channel, you will be ineligible to win as I can’t decipher if you are a matching subscriber to both. Thank you for your understanding.

We hope you will subscribe to our YouTube Channel, Blog/Newsletter updates and check out our website!

As always, we appreciate your visit and we hope you enjoyed going on A Creative Journey with Melissa.

melissa-written-signature

SUPER EASY Father’s Day Card

SUPER EASY Father’s Day Card is what we have for you today! This card is handsome, elegant and SUPER EASY! What could be better! Before we get started, I wanted to remind  you of an awesome Coffee Lovers Blog Hop I am participating in starting Friday. Be sure to check back or even better.. be sure you subscribe to our email and blog posts and you will get an awesome email about it! Now, are you ready to get CREATIVE?! Me too!


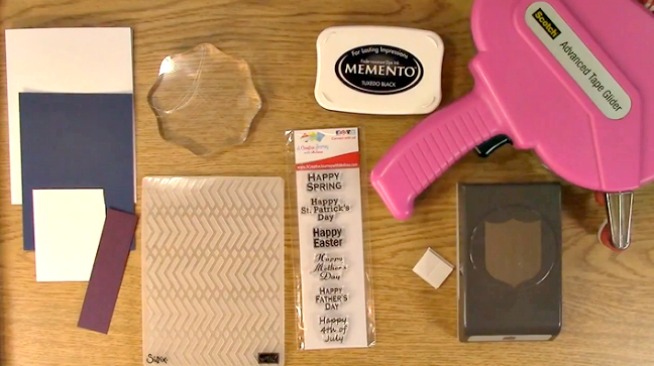
Supplies Needed for the SUPER EASY Father’s Day Card Project

A Creative Journey with Melissa Spring and Summer Holiday Celebrations Stamp Set

Acrylic Stamp Block

Card base

Solid color mat

Solid color strip

White paper to stamp sentiment on

Adhesive

Punch

Embossing folder

Manual Die Cut machine

Ink

3-D Foam Rectangles

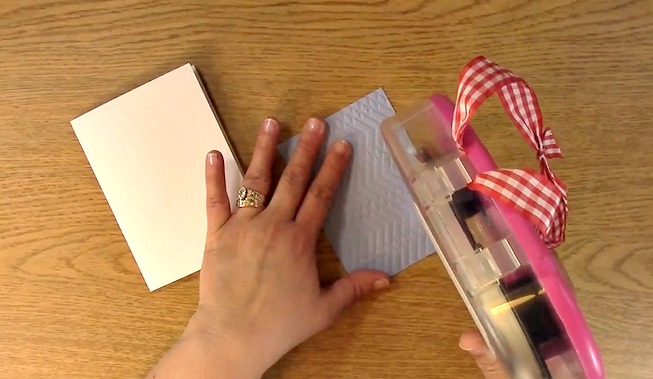
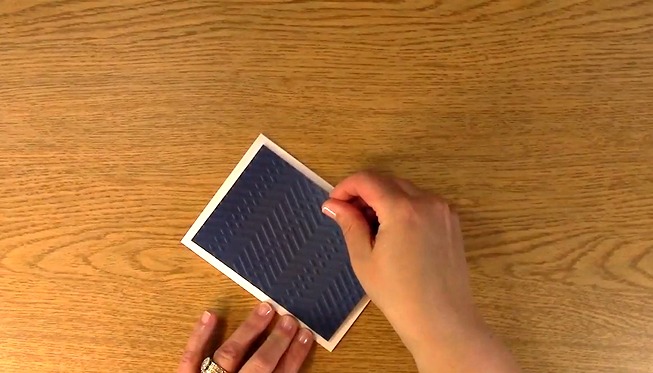
Take out your paper for the mat on your card, embossing folder and your manual die cut machine. Place your paper in your embossing folder.

Place your embossing folder on your platform.

Put your clear platform on top of your embossing folder.

Run your embossing folder through your manual die cut machine.

Isn’t this texture FABULOUS!

Using your adhesive, apply some to the back of your embossed paper.

Apply your embossed paper to your card base.

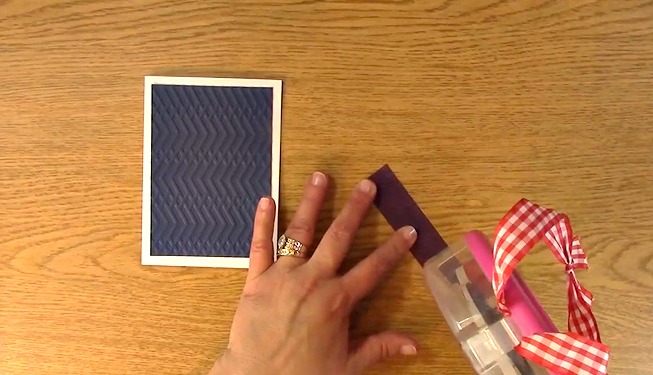
Add some adhesive to the strip of paper.

Adhere the strip of paper to your card.

Take out your Ink, stamps and stamping block. Place your stamp on your block and ink your sentiment.

Stamp your sentiment on your paper.

Take out your punch. I figured out my paper was a bit smaller than my punch’s length so sometimes when you use a small piece of paper you don’t have a big enough piece to use in your punch.

HERE IS A GREAT TIP! USE A POST IT NOTE! It will give you just a little more space for you to be able to place your paper inside your punch and it works perfectly!

Punch out your sentiment.

Place your foam rectangles on the back of your sentiment. Remove the paper from the back of the foam adhesive.

Apply your sentiment to your card.

You have completed your SUPER EASY Father’s Day Card!

Now for this weeks giveaways! I am giving away the A Creative Journey with Melissa Spring and Summer Holiday Celebrations Stamp Set !

Be SURE you are a subscriber to our YouTube channel and to our Blog/E-mail list and make sure your names are matching so I can verify you are subscribed to both to enable you to be eligible to win! Winners announced next week so be sure and check back! Winners will be announced next week on our Mondays with Melissa blog post!

BE SURE TO check to see if you are a winner EVERY WEEK. If you do not contact me within two weeks, you forfeit your prize. Thank you for your understanding.

Now for last weeks giveaway! I am giving away a $15.00 store credit to our store and ANOTHER ONE to one of the wonderful people that wished my hubby HAPPY BIRTHDAY!!!!

The winners are is Denise and Kathy !!!

Winners, please send me your contact information via contact page on our website, which post you are a winner from and I will get your prize out to you! Thank you so much for being a YouTube follower and subscribing to our mailing list/blog posts!

Thank you for joining us for the SUPER EASY Father’s Day Card post. CHECK BACK NEXT WEEK TO SEE IF YOU ARE A WINNER!

Have a wonderful week and thank you for going on A Creative Journey with Melissa.
Scrapbook Expo Class Haul Overview Part 2 – Autism Awareness Interactive Card Revisited

Scrapbook Expo Class Haul Overview Part 2 – Autism Awareness Interactive Card Revisited is what we have for you today.  This is part 2 so if you missed last weeks video and post, please be sure to check the post out HERE.

This is an awesome Autism Awareness Interactive Thank You Card  I created. If you haven’t seen the blog post and video tutorial, please check it out HERE.

Before I get rolling on the Scrapbook Expo Class Haul Overview Part 2, I wanted to tell you what is going on with me. My sweet baby boy Austin is graduating this year from high school. This weekend he went to prom which means the senior festivities have begun. Hard to believe these pictures are 7 years apart. It seems like yesterday he was a baby in my arms. It’s a tear fest.. and will be for at least 6 weeks for sure…

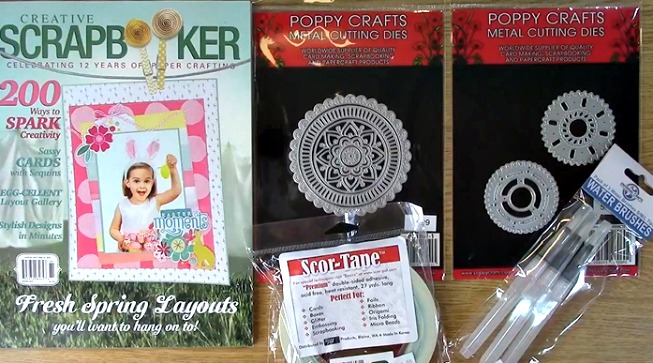
Now for the fun Scrapbook Expo Class Haul Overview Part 2! I was really impressed on the awesome door prize gift that was given by the scrapbook expo this year! This card stock is awesome and I can’t wait to play with it!

I really loved these dies, water brushes, paper tape and of course the AWESOME CREATIVE SCRAPBOOKER MAGAZINE!! I was so grateful to see the Creative Scrapbooker magazine there! They had a wonderful deal and I just really miss the feel of a real magazine. Digital is easy and all but the real magazines are what I miss so I am excited to get my subscription!!

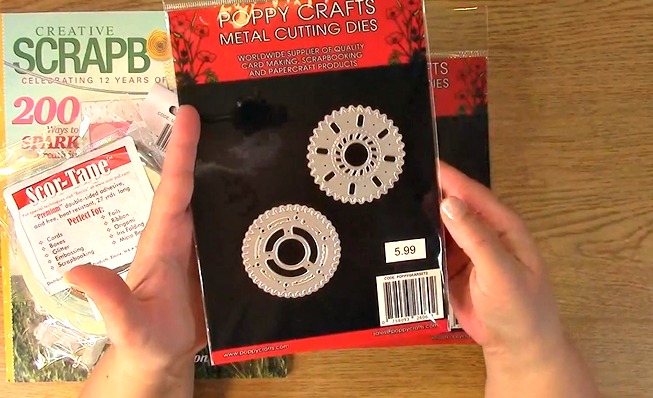
I was really excited about these dies and impressed at the price. This has multiple dies in just one set! PERFECT for creatives!

I saw this and immediately thought of my oldest son. He is studying to be an auto mechanic and I can think of a million things to make with these dies for a scrapbook, card or… the ideas are really endless!

This beautiful paper was a MUST HAVE as part of my Scrapbook Expo Class Haul Overview Part 2! I purchased this for my youngest sons senior pictures. Joanie Vance of Joanie Vance Photography who does all of our family pictures here locally in So Cal ,took some awesome pictures with great texture and color. These papers are going to be PERFECT!!!!

These were perfect for my boys albums and even for some great masculine cards. I can’t wait to play with them!

I bought three of these as part of my Scrapbook Expo Class Haul Overview Part 2… ONE FOR THIS WEEKS GIVEAWAY. So many ideas for a planner, scrapbook, card, journal… Seriously my creative mind is going WILD!

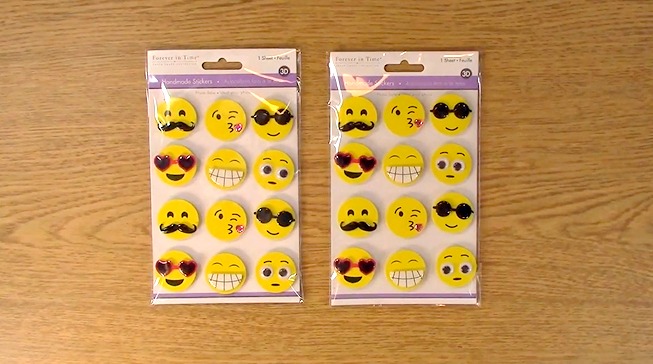
There is nothing like emoji’s to make someones day and THESE MADE MINE! They made me giggle and made me think of my boys so I am sure I am going to enjoy creating with these!

Now for the giveaway goodies!!!!!!!  I will be giving away the above Carpe Diem planner, Simple stories pocket packs AND a $15 store credit to our store for some stamps to help you decorate your new planner! Be SURE you are a subscriber to our YouTube channel and to our Blog/E-mail list and make sure your names are matching so I can verify you are subscribed to both to enable you to be eligible to win! Winners announced next week so be sure and check back! Winners will be announced next week on our Mondays with Melissa blog post!

BE SURE TO check to see if you are a winner EVERY WEEK. If you do not contact me within two weeks, you forfeit your prize. Thank you for your understanding.

For last weeks giveaway we are giving away the TWO prize packages!

The winners are Jessica Marshall and Karen Kochjar!!!

Winners, please send me your contact information via contact page on our website, which post you are a winner from and I will get your prize out to you! Thank you so much for being a YouTube follower and subscribing to our mailing list/blog posts!

Thank you for joining us for the Scrapbook Expo Class Haul Overview Part 2 – Autism Awareness Interactive Card Revisited. CHECK BACK NEXT WEEK TO SEE IF YOU ARE A WINNER!

Have a wonderful week and thank you for going on A Creative Journey with Melissa.

You’re My SUPERHERO Autism Awareness Stamp Set Creation

You’re My SUPERHERO Autism Awareness Stamp Set Creation is what we have for you today. Autism Awareness is imperative to get answers and proper help for those affected. We are creating a a card that can be used to show someone you admire them not just for their bravery in their Autism journey but for any reason!

Supplies needed for the You’re My SUPERHERO Autism Awareness Stamp Set Creation

A Creative Journey with Melissa Awareness Ribbon Set #5 See Autism with your Heart

Stamp Block

Black, Red, Blue and Yellow Ink

Corner Rounder

Adhesive

Paper For Stamping

Blue paper to mat sentiment

Card Base

Scissors

Ribbon (optional)

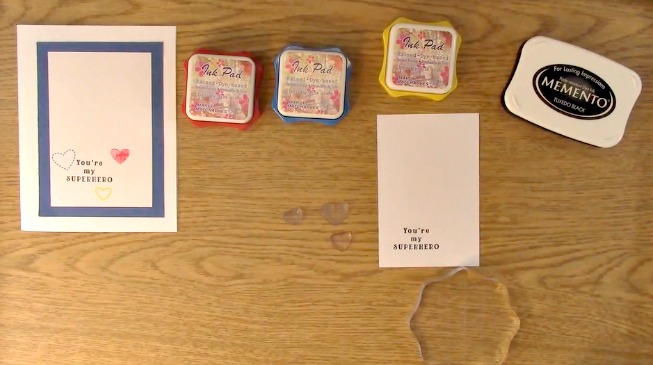
For your 00You’re My SUPERHERO Autism Awareness Stamp Set Creation, take out your stamping block, A Creative Journey with Melissa Awareness Ribbon Set #5 See Autism with your Heart stamp set, black ink, and your paper to stamp sentiments on.

Peel off the sentiment of your choice and place it on your stamp block. Ink your sentiment.

Stamp your sentiment on your paper for your You’re My SUPERHERO Autism Awareness Stamp Set Creation. Return your stamp to the stamp sheet.

Peel off the heart stamps of your choice. Take out your red, blue and yellow ink.

Place your solid heart stamp on your block. Ink your stamp.

NOTE: When I used this ink, I noticed it did a lot of resisting on the stamp unlike when I use memento ink. I didn’t care for the dotted look so I decided to do something a little different.

Lightly after tapping the ink onto the stamp, swipe the stamp across the ink pad. This is what it will look like on the stamp.

Stamp the solid heart image onto your paper.0

This is what it looks like stamped. I love the texture of the ink on the paper. This occurred just by simply swiping the stamp across the ink pad which looks pretty cool, huh?

Once you have stamped your image, be sure to clean off your stamps. I use Stampin’ Up!’s Stampin’ mist. I love how it cleans without residue. I use this for all of my stamps. My friend Brandie is a Stampin’ Up Demonstrator so if you are interested in some, go to Brandie’s website HERE. They also have an awesome scrubbing pad thingy that I use. Like them so much I have two!

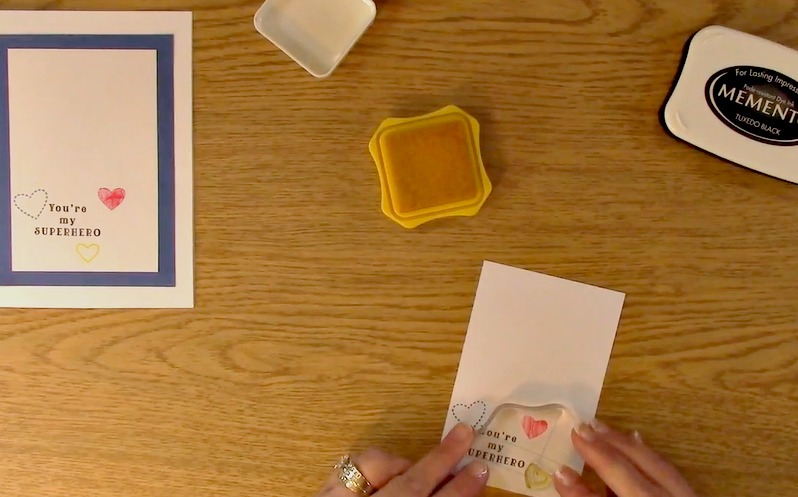
Place your dotted heart on your stamping block. Using the dotted outlined heart from the A Creative Journey with Melissa Awareness Ribbon Set #5 See Autism with your Heart stamp set , ink your stamp with blue ink.

Stamp your heart on your sentiment paper and clean off your stamp.

Place your third heart stamp on your block and ink with your yellow ink.

Stamp your heart image on your sentiment paper as shown. Clean off your stamp and return it to your stamp set sheet.

Take out your blue mat paper.

Using your adhesive, run your adhesive on the back of your sentiment stamped paper.

Adhere your paper to the blue mat paper.

Place adhesive on the back of your blue mat paper and adhere it to your card base.

Be sure to place adhesive to the left of the mat and sentiment paper.

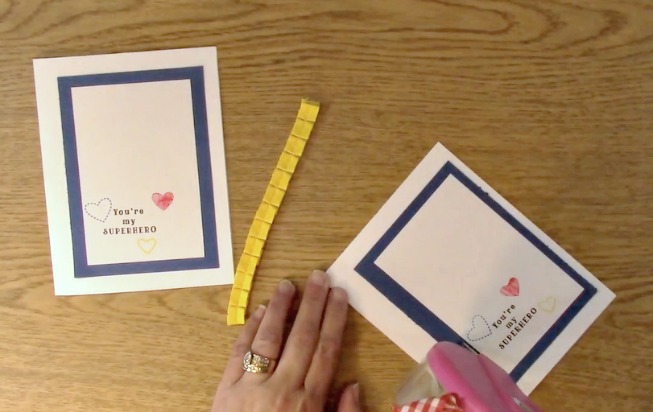
Take your pleated yellow ribbon and adhere the ribbon down the side of the mat and sentiment paper.

This is what it will look like. You would be perfectly fine to leave the card just like this but I decided to take it two steps further.

Take out your corner rounder. I chose to only corner round two of the four corners of my card.

This is what it looks like with the ribbon and corners rounded on the right and without that on the left.

Although I do like the way it looks, I decided to add a few more solid yellow hearts.

I thought it need a little something extra and I think it worked! What do you think?

For this week, we are giving away the A Creative Journey with Melissa Awareness Ribbon Set #5 See Autism with your Heart. Winners announced next week so be sure and check back!

To qualify to win, you must be BOTH:

A public follower on YouTube, subscribe to our mailing list/blog posts and you may also comment on this blog post for an additional entry to win! Winners will be announced next week on our Mondays with Melissa blog post!

BE SURE TO check to see if you are a winner EVERY WEEK. If you do not contact me within two weeks, you forfeit your prize. Thank you for your understanding.

Subscribe to BOTH with MATCHING NAMES to be eligible. If I am unable to match you with your subscription to both the email list and the YouTube Channel, you will miss your chance to win a prize. If I can’t decipher if you are a matching subscriber (if your profile doesn’t show publicly who you subscribe to) and I can’t confirm you have subscribed to both, you will not be eligible. 

For last weeks giveaway we are giving away the A Creative Journey with Melissa Sentiments for All Occasions Stamp set!

 The winner is  Debbie H!

Winner, please send me your contact information via contact page on our website, which post you are a winner from and I will get your prize out to you! Thank you so much for being a YouTube follower and subscribing to our mailing list/blog posts!

Thank you for joining us for the You’re My SUPERHERO Autism Awareness Stamp Set Creation. CHECK BACK NEXT WEEK TO SEE IF YOU ARE A WINNER!

Have a wonderful week and thank you for going on A Creative Journey with Melissa.

Handmade Love Card for ANY COUPLE

Handmade Love Card for ANY COUPLE is what we have for today. Our A Creative Journey with Melissa I Just Love You Stamp Set can cover any configuration of love for your card including Female & Male, Female & Female, Male and Male or any variation you choose to celebrate.

Supplies Needed for the Handmade Love Card for ANY COUPLE Project

A Creative Journey with Melissa I Just Love You stamp set

Acrylic Stamp Block

Red Ink

Gray Ink

White card base

Gray Card Mat

Red Mat for stamped images

Paper to stamp images and sentiment on

White Twine

Scissors

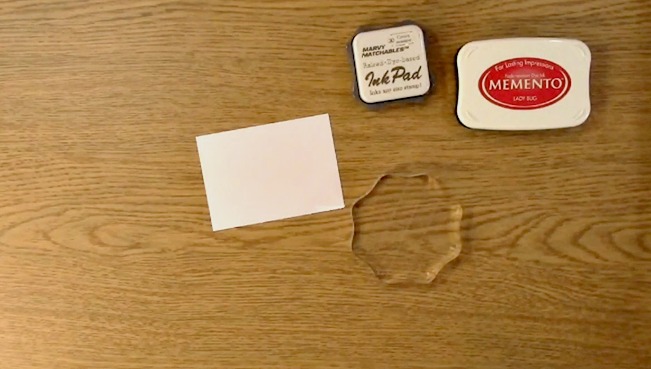
To start, take out your gray ink, white paper and stamp block. Choose the stamp images from your A Creative Journey with Melissa I Just Love You stamp set.

For the Handmade Love Card for ANY COUPLE Project video I chose a female and female for my best friends that have gotten engaged! I am so excited for them! This stamp set is super versatile for any couple!

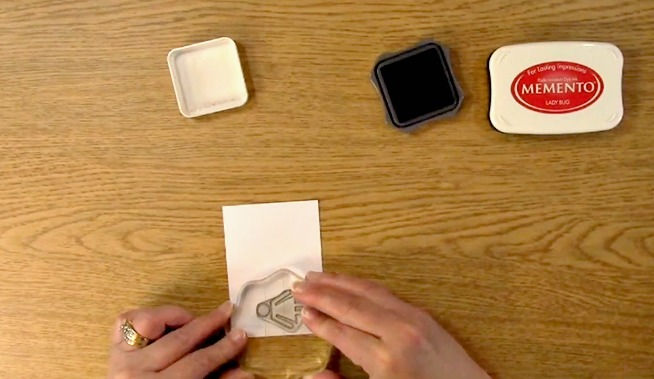
Ink your female image with the gray ink. Stamp as shown above.

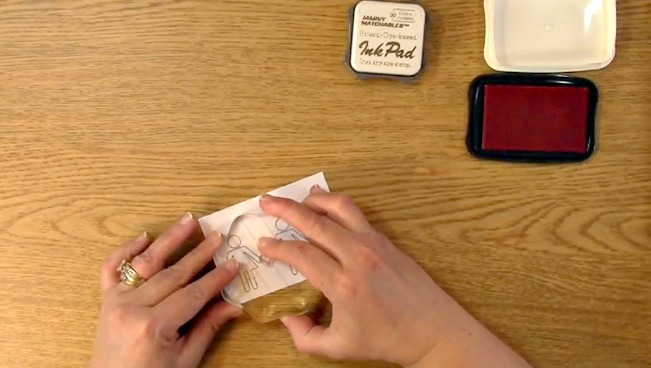
Place ink on your female image again. Stamp next to your other stamped image leaving room for a heart by the hands.

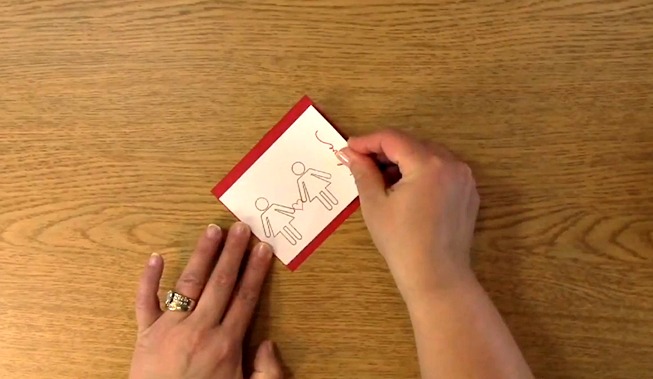
Clean off your stamp and place back on your sheet. Take out your heart image and ink it with red ink. Stamp the heart in between the hands as shown above.

Ink the love sentiment with red ink. Stamp the sentiment on the side of the women images as shown.

This is what it will look like once the stamping has been completed. Place adhesive on the back of the stamped paper.

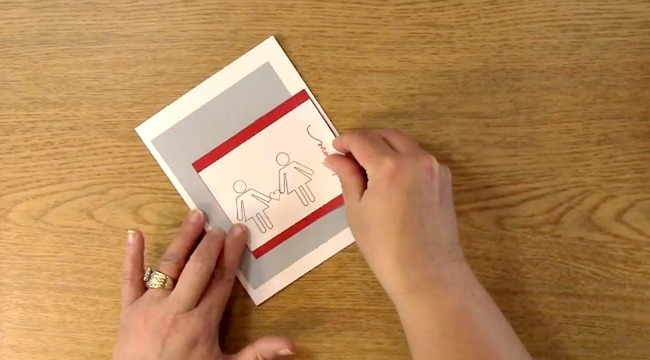
Adhere your paper to the red mat.

Take out your white card base and your gray mat. Place adhesive on the back of the gray mat and adhere to the card base.

Put adhesive on the back of your red paper and images. Adhere to the gray mat on your card base.

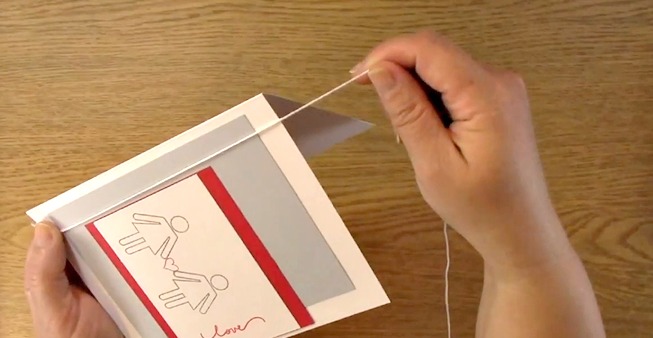
Take out your white twine. Wrap it around your card three times.

Tie a bow with the twine and trim off the excess.

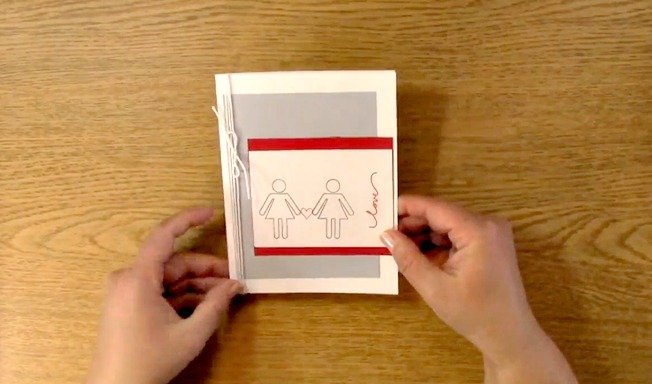
Adjust the twine on  your card as you wish.

This is what the Handmade Love Card for ANY COUPLE Project looks like completed.

Cards are complete!

For this weeks giveaway we are giving away the A Creative Journey with Melissa I Just Love You stamp set. Winners announced next week so be sure to check back!

To qualify to win, you must be BOTH:

A public follower on YouTube, subscribe to our mailing list/blog posts and you may also comment on this blog post for an additional entry to win! Winners will be announced next week on our Mondays with Melissa blog post!

BE SURE TO check to see if you are a winner EVERY WEEK. If you do not contact me within two weeks of the your name being picked, you will forfeit your prize. Thank you for your understanding.

Subscribe to BOTH with MATCHING NAMES to be eligible. If I am unable to match you with your subscription to both the email list and the YouTube Channel, you will miss your chance to win a prize. If I can’t decipher if you are a matching subscriber (if your profile doesn’t show publicly who you subscribe to) and I can’t confirm you have subscribed to both, you will not be eligible.

 For last weeks giveaways we are giving away the

A Creative Journey with Melissa I Just Love You stamp set.

 THE WINNER IS   Marybeth

Marybeth, please send me your contact information via contact page on our website, which post you are a winner from and I will get your prize out to you! Thank you so much for being a YouTube follower and subscribing to our mailing list/blog posts!

Thank you for joining us for the Handmade Love Card for ANY COUPLE Project. I hope I have inspired you to organize yourself even if in just a small way! BE SURE TO CHECK BACK TO SEE IF YOU ARE A WINNER!

Have a wonderful week and thank you for going on A Creative Journey with Melissa.

Marbleize Paper using Shaving Cream

Marbleize Paper using Shaving Cream is what we have for you today! This technique is not only cool but has awesome results! Great ready to get creative and messy!

This is the creation I made. We will be creating the Marbleize Paper using Shaving Cream background paper.

Supplies Needed for the Marbleize Paper using Shaving Cream project

A Creative Journey with Melissa Sign Language Sentiments 2

Hazelnut, Oregano and Mushroom Tim Holtz Adirondack Ink

Shaving Cream

Paper Towels and lots of them

Platter or tray

Toothpicks

Popsicle sticks

Photo Paper/Glossy Paper

Isopropyl Alcohol for clean up

You can use regular card stock for this technique (on the right) however, I prefer the glossy paper (on the left) because I think it looks more vibrant.

Take out your platter and shaving cream.

Put shaving cream all over your platter.

Spread the shaving cream on  your platter all over the bottom of the tray. I used a popsicle stick to spread the shaving cream. This will allow for two pieces of paper to fit onto the tray at the same time.

Add the hazelnut ink to the shaving cream. I added lines of ink to the left side and dots on the right to get two different looks in the same tutorial.

Oregano is the second ink you will add to your shaving cream.

Add Mushroom to your shaving cream.

Using a popsicle stick, spread the ink so it is mixed up. You can do this as much or as little as you want depending on the look you want.

On the right I used the toothpick to give a different look and texture to the shaving cream mix.

I decided to add a little more ink for my Marbleize Paper using Shaving Cream project so if you choose to do the same, YOU CAN!

Mix it up to your liking!

Take out your glossy paper. Place your paper on top of the right colored area.

In this case, we had two areas I wanted to focus on. Place your second piece of paper in the area in which you want the color from.

Push the paper into the shaving cream to get a little more color and effect to the paper.

This is what it looks like once you have removed the paper from the shaving cream. You see why it’s messy now right? LOL

I decided I am going to add even a little more color so here I go adding some dots of alcohol ink!

This is what it looks like after I have added more ink with the shaving cream!

NOTE:Typically, I will do a lot of these at once so I only have to clean up once. If you are doing multiples, I would suggest you do all of the shaving cream and then go back to each step all at once for each creation.

Now it is time to clean off the paper. Place a few paper towels on your work surface. Place your shaving cream colored area face down on the paper towel. Fold the paper inside the paper towel to cover the whole thing.

Starting from the inside toward the outside, smooth out the paper allowing the shaving cream to go to the outside edges.

Open up the paper towel.

This is what it looks like once removed from the paper towel.

Wipe off any excess shaving cream or ink from the back of the paper as well.

I love how the paper that I added more ink to turned out. This looks like a piece of granite to me!

You have finished the Marbleize Paper using Shaving Cream project! Here are all of the varieties I create using the same ink and shaving cream. All I did was create different patterns! Pretty cool, huh? What do you plan on creating using this technique?

Now, for the GIVEAWAY!

 This week we are giving away the A Creative Journey with Melissa Sign Language Sentiments 2 as featured in this post and the above video!!

To qualify to win, you must be BOTH:

A public follower on YouTube, subscribe to our mailing list/blog posts and you may also comment on this blog post for an additional entry to win! Winners will be announced next week on our Mondays with Melissa blog post!

If you do not contact me within two weeks of the announcement of winning, you will forfeit your prize. Thank you for your understanding.

NOTE: Be sure you are subscribed with matching names. If I am unable to match you with your subscription to both the email list and the YouTube Channel, you will miss your chance to win a prize. If I can’t decipher if you are a matching subscriber (if your profile doesn’t show publicly who you subscribe to) and I can’t confirm you have subscribed to both, I won’t be able to enter you in for the prize. **DO NOT COMMENT WITH YOUR ENTIRE EMAIL ADDY. Only give me the first 6 NOT INCLUDING YOUR HOST. Just enough for me to match your name will work perfectly

.

Now, for the last weeks GIVEAWAY the A Creative Journey with Melissa For My Boys Stamp Set ! The winner is Angie!

Angie, please send me your contact information via contact page on our website, which post you are a winner from and I will get your certificate prize out to you! Thank you so much for being a YouTube follower and subscribing to our mailing list/blog posts!

 We hope you enjoyed our Marbleize Paper using Shaving Cream Project! Have a wonderful week and thank you for going on A Creative Journey with Melissa.