Tag Archive for: Coloring therapy

Coloring Do’s, Don’ts, Results & Lessons Learned

Coloring Do’s, Don’ts, Results & Lessons Learned is what we have for you today. I love to color and shade. I thought it would be a good idea to show you what I would do to utilize two different colors and join them together for a creation. Coloring Do’s, Don’ts, Results & Lessons Learned – This post is a perfect example of me being human.

Personally, I don’t like edited videos because to me it makes me feel stupid when I make mistakes all of the time and everyone else has these BEAUTIFUL PERFECT videos and I am JUST ME. I am a one shot video kind of girl unless I REALLY mess up and I will just do the whole thing over again. Honestly, I think that has happened 5 times in the past 3 years and had to be redone due to language.. OOPS!

I have been told that people like my videos because I am real and show how to correct the problems I have made. I am actually good with just me so let’s see how this turned out, shall we? Can you hear my eye roll? LOL Trust me, it’s well deserved.

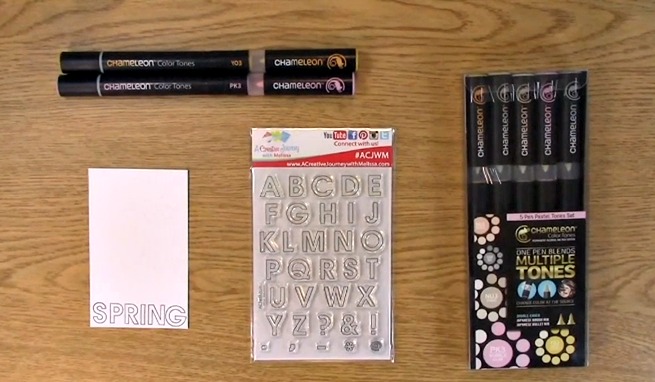
Supplies Needed for the Coloring Do’s, Don’ts, Results & Lessons Learned Tutorial

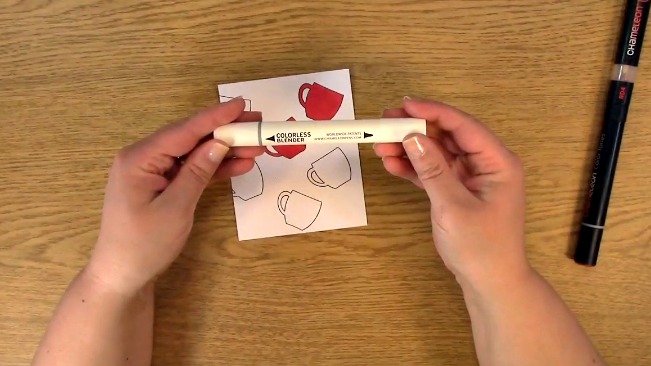
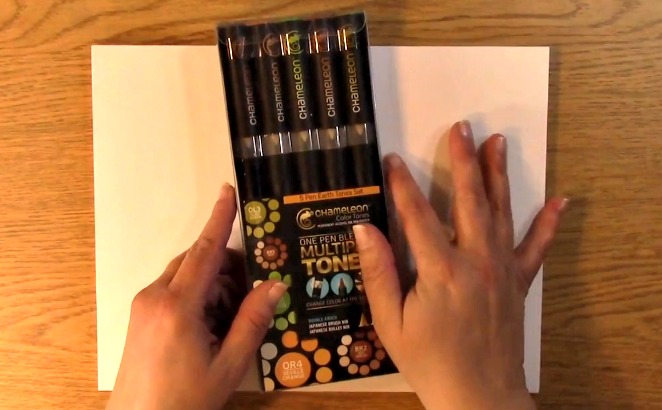
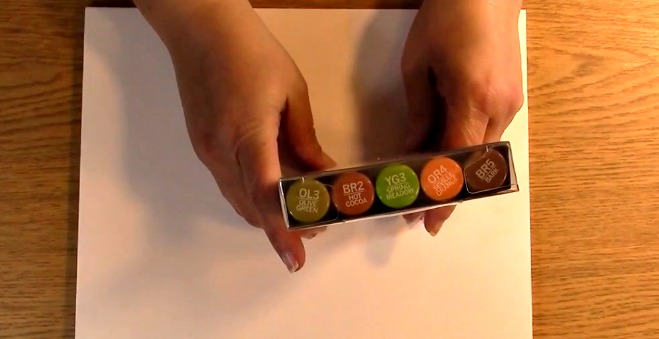
Chameleon Alcohol Pens

A Creative Journey with Melissa Everyday Alphabet Outline Upper Case and Symbols Large Stamp Set or your favorite A Creative Journey with Melissa stamp set

Ink

Paper

Stamp Block

TIME!

Take out your A Creative Journey with Melissa Everyday Alphabet Outline Upper Case and Symbols Large Stamp Set

Stamp your letters on your paper. Take out your chameleon pens.

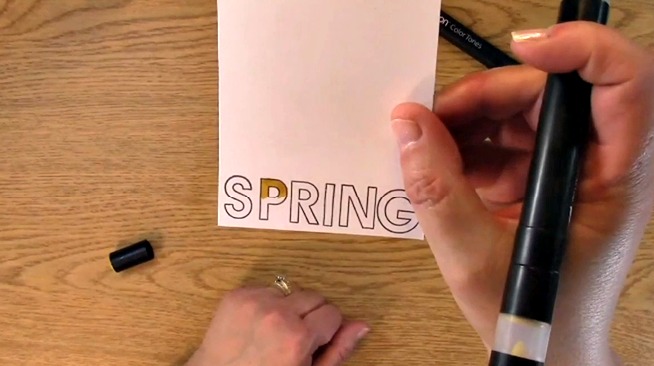
Using a flicking motion, color the top part of your p with the Y03 chameleon pen.

Using your PK3 chameleon pen and click color the pink. This really didn’t come out the way I had hoped. I have my ideas as to why below.

This is how it looked once it was all colored. Honestly, after cutting out the letters and cleaning them up a bit, they wouldn’t be TOO bad… but… I didn’t care for it.

For the next part of Coloring Do’s, Don’ts, Results & Lessons Learned, take out your CG8 Chameleon Pen. I colored the inside the letter I with a flicking motion.

Take out your PK3 Chameleon Pen and also did the flicking color on the opposite side from the gray. I really like the way the pink and gray blended. The middle one is my favorite!

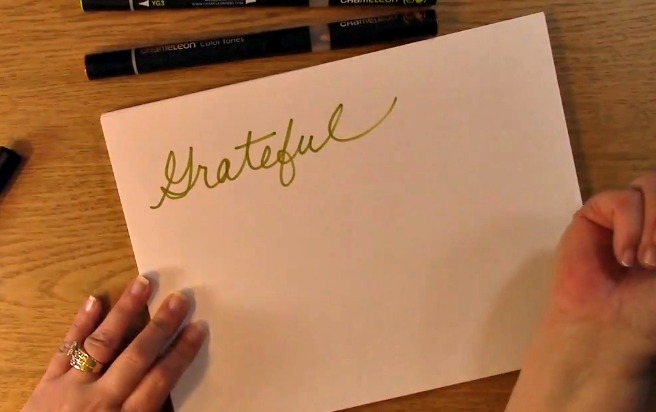
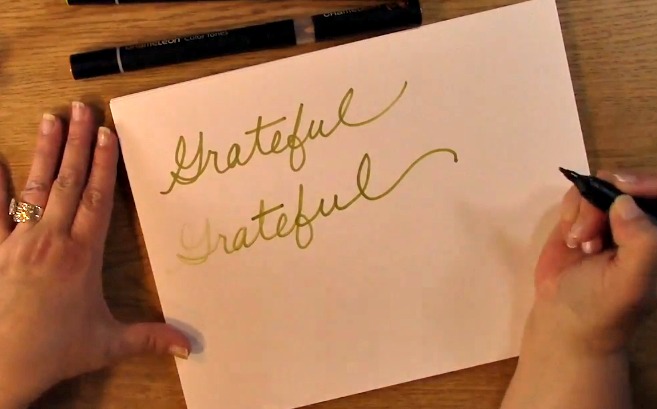
Here, I want to show you that you can do a variance in color with just hand drawn letters too! I started with the CG8 for the top part of the letter S on the right. Using my PK3 Chameleon pen I made the bottom part of the S and blended it with the gray.

I really like how it came out! What do you think? I realize it was done quickly but the possibilities are ENDLESS, right?

I guess the word spring isn’t AS BAD as I thought… sorta… LOL!  I do like how the middle letter I looks with the gray and pink. Typically, coloring looks better once it has dried.

Coloring Do’s, Don’ts, Results & Lessons Learned? Make sure your pen ISN’T OVER FILLED WITH INK, the ink has time to dry because it looks better once it has AND most of all… use lighter colors to start with. I am not saying it wouldn’t look great with darker colors but I think I need more practice. The pink and yellow didn’t turn out as bad as it looked at first but I will have to try that one again and show you an update. I am on a mission!

For this weeks giveaway, we are giving away the Chameleon Pastel pen set and they are great for coloring!

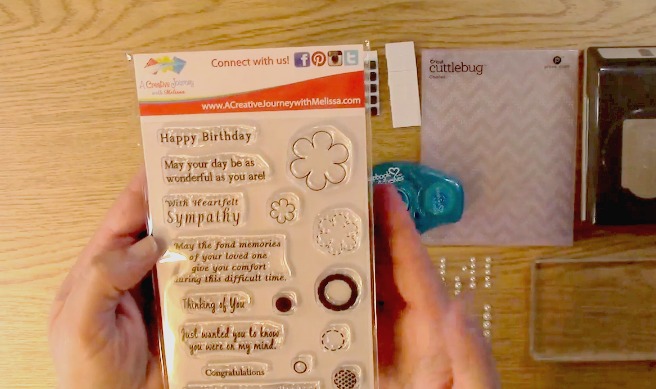
For last weeks giveaway, we are giving away the A Creative Journey with Melissa Birthday Wishes Stamp Set! Not only are the sentiments fantastic, the images are awesome and great for coloring!

The winner for our last blog post giveaway is Maja.

Please be sure that you  send me a message letting me know which post you won on and your contact info and I can get your prizes out to you!

Winners, please send me an message HERE and I will get your prize out to you!

For all of our giveaways including this one, in order for you to qualify for an entry to win, you would need to be a follower on YouTube, subscribe to our mailing list/blog posts (found on our blog page) and you may also comment on this blog post for an additional entry to win! When you subscribe, you will receive an e-mail on Mondays with our latest blog post. BE SURE TO READ IT to check to see if you are a winner EVERY WEEK. If you do not contact me within two weeks of the announcement of winning, you will forfeit your prize. NO EXCEPTIONS. Thank you for your understanding.

NOTE: If you are subscribed with two different names and I am unable to match you with your subscription to the blog and the YouTube Channel, you will be ineligible to win as I can’t decipher if you are a matching subscriber to both. Thank you for your understanding.

We hope you will subscribe to our YouTube Channel, Blog/Newsletter updates and check out our website!

As always, we appreciate your visit and we hope you enjoyed going on A Creative Journey with Melissa. 

melissa-written-signature

Coloring with Chameleon Pens Showing Highlights

Coloring with Chameleon Pens Showing Highlights is what we have for you today. I don’t know about you but I always have a hard time showing the light source and highlights in my coloring. I truthfully think it is a struggle for me just because I get anxiety over it. Although I am a bit insecure and don’t feel I am good at it. If I took a deep breath and just focused, I would be fine… but I psych myself out most of the time.

Today I am going to show you a shortcut I use for Coloring with Chameleon Pens Showing Highlights. It has helped me and I hope it helps you too!

Supplies Needed

Ink

Stamp Block

Chameleon Pens

A Creative Journey with Melissa Coffee, Tea and Wine – OH MY! Stamp Set

Paper

Stamp your images on your paper and take out your RD4 Chameleon Pen.

Remove the blending solution cartridge revealing the pen cap.

Take off the pen cap revealing the nib of your choice.

Place your blending solution cartridge on your pen.

Hold your Chameleon Pen upright for 10-15 seconds.

Notice how the tip of the nib is much lighter in color than the base of it. This is where the blending solution has been placed from the blending solution cartridge.

Color the area where you think the light would hit the stamped image in the picture. This will be very light in color therefore highlighting the area.

Continue to the handle of the cup which will also highlight that area.

Outline the image with your Chameleon RD4 Pen.

By using a flicking motion, color the image from the outside to the inside flicking toward your lightened area.

I am now doing the other side of the cup toward the lightened area.

Here i have colored the whole cup and the highlighted area is obvious but could be even more so.

Here is a close up. You could leave it like this but I don’t care for it. I think it needs to have a more finished and uniform look.

Place your blending solution cartridge on your pen nib again allowing the blending solution onto the tip of the pen nib.

Starting with the lightened area, color the cup over all of the areas you had previously starting with the lightest area first.

Here you can see there is a more uniform colored look and you can also see the highlight.

Here is another way to show the highlight even more. Add the blending solution cartridge on top of the nib.

Once you have had it upright for 5-7 seconds, go over just the area where you were highlighting the coffee cup.

Notice how it is blended however still shows the highlighted area a little more intense now that we have added more of the blending solution to the cup.

Now I am going to add just straight blending solution to the image on the cup to make the highlight even more intense.

This is what it looks like using the colorless blender after the previous steps we have taken.

Now I am going to show you what it looks like if you color the image without blending solution.

Now I am going to use the Colorless blending pen to highlight the area directly without any other addition of blending solution.

Here is a close up of the image once this has been done. Notice how light it is with just the colorless blender at the bottom versus the top right where there were layers of color placed on the cup.

Now you have three different ways you can show Coloring with Chameleon Pens Showing Highlights. I hope I have encouraged you to try to face your fear and just DO IT! YOU CAN!

This week for our Giveaway, we are giving away the A Creative Journey with Melissa Coffee, Tea and Wine – OH MY! Stamp Set shown in the video above.

To qualify to win, you must be BOTH:

A follower on YouTube, subscribe to our mailing list/blog posts and you may also comment on this blog post for an additional entry to win! If you do not contact me within two weeks of winning, you will unfortunately, forfeit your prize. Thank you for your understanding.

NOTE: Be sure you are not subscribed with two different names. If I am unable to match you with your subscription to both the blog and the YouTube Channel, you will miss your chance to win a prize. If I can’t decipher if you are a matching subscriber (if your profile doesn’t show publicly who you subscribe to) and I can’t confirm you have subscribed to both, I won’t be able to enter you in for the prize. **DO NOT COMMENT WITH YOUR ENTIRE EMAIL ADDY. Only give me the first 6 NOT INCLUDING YOUR HOST. Just enough for me to match your name will work perfectly.  Your understanding is appreciated.

Now for last weeks WINNER!!

The WINNER IS  Denise Bryant!!

Denise, please send me your contact information via contact page on our website and I will get your prize out to you! If for some reason, you don’t get a response within 48 hours, please contact me. I have had e-mail issues in the past and would hate to have this happen again and not realize you have tried to contact me. Thank you so much for being a YouTube follower and subscribing to our mailing list/blog posts!

We hope you enjoyed our Coloring with Chameleon Pens Showing Highlights. Have a wonderful week and thank you for going on A Creative Journey with Melissa. Be sure to come back Friday as we are participating in the 2017 Spring Coffee Lover’s Blog Hop where there are lots of amazing inspiration as well as prizes up for grabs! 

Coloring 3D Embellishments by using Chameleon Pens on Mod Melts

Coloring 3D Embellishments by using Mod Melts and Chameleon Pens is what we have for you today. I love to color and create. Coloring my own embellishments are a plus. How can you go wrong with creating it yourself and saving money! If you missed our blog post and YouTube video on how to create the mod melts, please check it out here.

What you will need for Coloring 3D Embellishments by using Chameleon Pens on Mod Melts:

Chameleon Pens

Mod Melt Creations

Scissors

This is a creation I made in my previous video. Once you have created your mod melt, you will want to wait until it has cooled.

Once it has cooled, you can remove your mod melt from the mold. It comes out very easily as the mod melt mold is made of silicone.

Once you have taken out the mod melt creation, you may want to trim the excess areas if you have them. This will give your creation a cleaner look.

Here are some samples of what you can use for Coloring 3D Embellishments by using Mod Melts and Chameleon Pens.

I colored these tree mod melts with Chameleon Pens. I love how they came out!

Here I colored the flower and slowly graduated the color to make it look like a daisy.

To start Coloring 3D Embellishments by using Mod Melts and Chameleon Pens, I am going to color the reindeer’s body with the Chameleon Pen BR5.

Here is the close up of the colored reindeer. When coloring, be sure you color the edges too so that it gives a clean completed look.

Now, I take out my RD4 Chamelon Pen so I can color the nose of the reindeer to look like Rudolph.

Take out the GR3 Chameleon Pen and color the bow on the reindeer. I love the bright green color next to the brown.

Next, I took out my Chameleon BK5 Pen. I outlined the eyes of the reindeer.

Following the outlining of the eyes, I used the NU1 Chameleon Pen to color the tail of the reindeer.

This is the reindeer close up shot of it colored.

Here are both of the reindeers that I colored. One I colored a little bit darker than the other. I like how they both came out.

This week for our Giveaway, we are keeping with the holiday season and giving away our You’re Snow Wonderful ACJwM Stamp Set 

This stamp set is what we used for our tag on the Creative Gift Idea as well as a number of our other tutorials. This set is versatile and can be used for a background design on your planner, journal, card or scrapbook pages!

To qualify to win, you must be a follower on YouTube, subscribe to our mailing list/blog posts and you may also comment on this blog post for an additional entry to win!

NOTE: If you are subscribed with two different names and I am unable to match you with your subscription to both the blog and the YouTube Channel, you will be ineligible to win as I can’t decipher if you are a matching subscriber to both. DO NOT COMMENT WITH YOUR ENTIRE EMAIL ADDY you subscribed with as I don’t want you to get spam or have your comment go to spam. Just enough for me to match you will work perfectly. Thank you for your understanding.

Now for last weeks WINNERS!!

BOY! Do we have winners!!! We have four winners total. For the 2016 Winter Coffee Lovers Blog hop winners from our blog we have THREE WINNERS!

The winner of the Coffee is my Liquid Therapy stamp set commented

Mayra says:
These are super cute ! Great designs !

The winner of the You’re Snow Wonderful stamp set commented

Teri W. says:
So adorable! You’ve inspired me to make the cocoa holder. Thanks, as always, for being a Super Sponsor.

                                                               The winner of the Coffee, Tea and Wine – OH MY! stamp set commented
                                                                               Ann says: P.S. Thanks for being a Super Sponsor.
                                            The winner of the You’re Snow Wonderful stamp set from our A Creative Gift Idea blog post is
                 Sarah Biswabic says: These look like they will be so fun to make. You could also decorate the bag too. I can’t wait to make some.

Winners, please send me your contact information via contact page on our website and I will get your prizes out to you! Thank you so much ????


We hope you enjoyed Coloring 3D Embellishments by using Mod Melts and Chameleon Pens. We hope you have a fantastic holiday and thank you for going on A Creative Journey with Melissa.


Coloring Therapy – Love your Writing and GIVEAWAY

Coloring Therapy – Love your Writing and a GIVEAWAY is what we have for you today.  Do you remember your Grandparents writing? Do you remember to use your handwriting on items for loved ones? Even if you don’t like your writing it is so important for you to use it. It leaves a legacy for your children, grand children and beyond! Love your Writing is so that you can either practice your writing or just embrace the perfect imperfections of it. Not everyone writes straight, neat, super legible and some only print and don’t use cursive. It is ALL PERFECT! Just be sure to use it!

love-your-writing-and-chameleon-pen-giveaway-a

This is a note that my son Austin wrote to me. PRICELESS. Sadly, it doesn’t have a date but I KNOW it is from Austin because I can tell by his writing. THIS IS WHAT I MEAN!

love-your-writing-and-chameleon-pen-giveaway-b

This is where it is really important. I wrote a little note to Austin telling him what I was thinking while looking at these pics on his scrapbook page.

Writing stories, journaling in your scrapbooks, and signing cards that are in your writing is really a lost art and I encourage you this week to use it! Sometimes, with the new electronic gadgets it is hard to pick up a piece of paper and a pen. It is my preference for lists but I do often use my phone application because of its convenience. What better way to share your amazing writing with Coloring Therapy – Love your Writing.

love-your-writing-and-chameleon-pen-giveaway-c

For Coloring Therapy – Love your Writing, I have used the standard thicker crayola markers for my creation. I don’t particularly think this is great writing but it is mine.

This is nothing fancy just a little poster to encourage you to  love your writing! You can do doodles, patterns, clean and neat, fancy, sloppy or whatever you want to do because its PERFECTLY YOU!

love-your-writing-and-chameleon-pen-giveaway-f

Here I am using Chameleon Pens for Coloring Therapy – Love your Writing. I love to use them to color but I also love to use them to write. They are refillable and you can replace the nib so they are a great forever pen set! If you aren’t familiar with Chameleon Pens, check out this video here. I used the Chameleon pen OL3 for the above picture. Just like a regular marker, chameleon pens write clean, neat and have such vibrant colors! Practicing your writing with color can be so therapeutic. You can also get such a different perspective. Maybe my writing isn’t THAT HORRIBLE after all.. well maybe? BUT IT IS IMPERECTLY PERFECTLY ME!

love-your-writing-and-chameleon-pen-giveaway-g

To change it up a bit, here I used the OL3 with the blending solution so you can see the gradient color on the word grateful. It would be really neat if you would repeat words doing this and it would make such beautiful art, don’t you think?

sympathy-card-for-the-loss-of-a-hero-b

The winner of last weeks blog giveaway is Preeti D.! Preeti you are the winner of last weeks Outside and In stamp set giveaway. Please send me your contact information so I can get your set out to you! Thank you so much 🙂

love-your-writing-and-chameleon-pen-giveaway-d

This week we are giving away a set of 5 Chameleon Pens – Pens Earth Tone Set.

To qualify you must be a follower on YouTube, subscribe to our mailing list/blog posts and you may also comment on this blog post for an additional entry to win!

love-your-writing-and-chameleon-pen-giveaway-e

Here are the colors that are included in the 5 pack of pens. Winners announced next week on our blog post????

We really appreciate you taking the time to join us today. We hope you will take the time to remember what is important. BE GRATEFUL. Spend time with those you value because you never know when your time is cut short. Thank you for going on A Creative Journey with Melissa.

melissa-written-signature