Tag Archive for: DIY

SAVE MONEY: Create Custom Candles using Stamps and Photos

SAVE MONEY: Create Custom Candles using Stamps and Photos is what we have for you today. Have you ever seen an awesome candle with a picture on it and thought WOW! That is cool? Well, you are going to learn not only how to do it but how simple it is too! Ready? Let’s get started!

Supplies Needed for the SAVE MONEY: Create Custom Candles using Stamps and Photos Project

A Creative Journey with Melissa For My Boys Stamp Set

Acrylic Stamp Block

Embossing/Heating Tool or Hair Dryer

Scissors

Memento Ink

Inexpensive Candle

Scotch Tape

Tissue paper

Wax Paper

Copy Paper

Candle

This candle was created with out using stamps.

I used the A Creative Journey with Melissa For My Boys Stamp Set for the sentiment on this candle.

To begin the Create Custom Candles using Stamps and Photos Project,

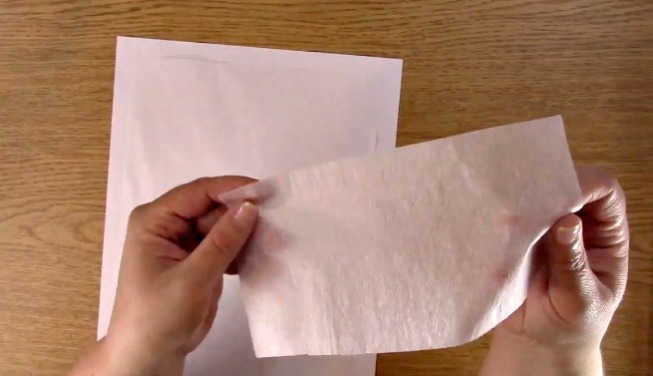
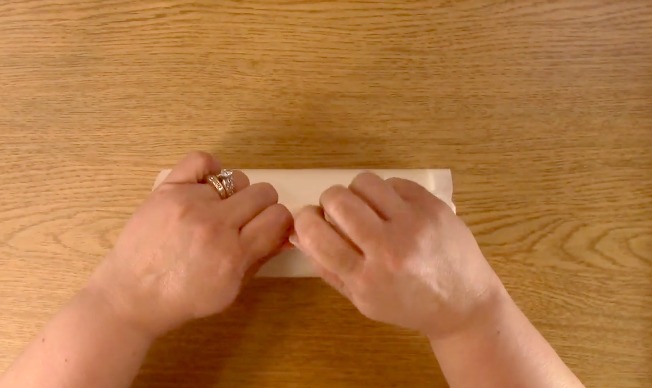
take out your scotch tape, copy paper and tissue paper. Cut a piece of tissue paper that will fit on the copy paper and in the area in which you wish to print.

Use the copy paper as a guide to where your picture will print and place your tissue paper accordingly.

sing the scotch tape, tape the edges of the tissue paper to the copy paper. specifically the corners and in between the corners.

This is the tissue paper I used. This is not fancy tissue paper. This was generic white tissue paper and nothing fancy about it.

Double check to be sure that the edges of the tissue paper are not sticking up. You do not want them to get caught in the printer.

I used a rear feeding printer. My Epson 3640 feeds either way and this is not a fancy printer.

I believe I got it on sale for under $150.00 and I love it! The normal settings for general printing is what I used. I did not set it to the picture settings. The concern I had was that my front loading printer would rip the tissue paper or get caught. When the paper goes through the printer, it looks like the above picture which could cause more issues.

Now I am ready to print! I placed my paper in the printer facing up in the rear feeder. I simply used Microsoft word to print the picture.

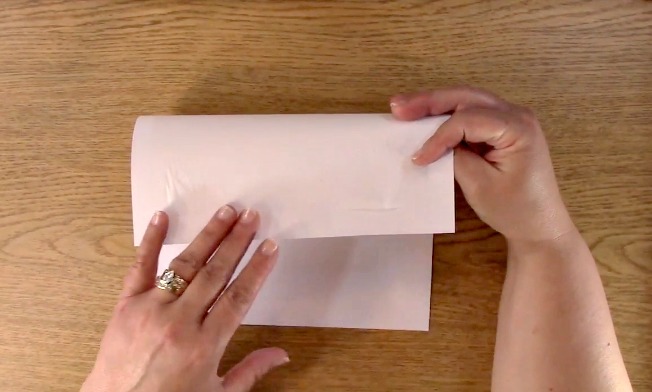
This is what it looked like once it had been printed.

If you look closely (look at the circle) there is a little splotch of ink from the printer. I have no idea why but don’t worry! We will be cutting that area off so it won’t end up on the candle.

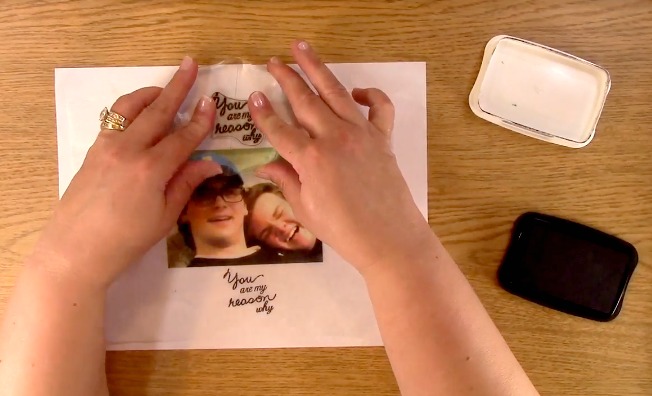
Take out your A Creative Journey with Melissa For My Boys Stamp Set for the sentiment for the Create Custom Candles using Stamps and Photos Project. Place your sentiment on your acrylic block.

Ink your sentiment and stamp it where you would like it on your tissue paper.

Well, I don’t like what it looks like.. It is a little crooked.

Well, if this happens to you, don’t worry! Improvise for your Create Custom Candles using Stamps and Photos Project!

The good news? I can stamp it on the top of the picture and I actually think I like it more!

Take out your scissors. Trim the tissue paper so that it will fit on your candle only keeping the areas in which you want to end up on your candle.

This is what I ended up with. You can see how transparent it is.. you can even see my fingers through the picture! Pretty cool, huh?

Now for the fun! I used an Ikea candle but you could really use any candle. Dollar store candles would work fine.

Take out your wax paper. I used wax paper I had in the house. Again, nothing fancy. Cut a piece that will fit around your candle with a little extra. This helps to hold the candle when using the heating tool.

Place your tissue paper image on your candle.

I used scotch tape to line up the image on the candle and then removed it before I went any further.

Take out your wax paper. Carefully, roll the candle with image so that it stays in place.

Roll up the other side of the wax paper.

Gather the wax paper at the top.

Fold over the wax paper as shown. This helps to create a small handle for you to hold onto.

This is a top view to show you how it looks once folded.

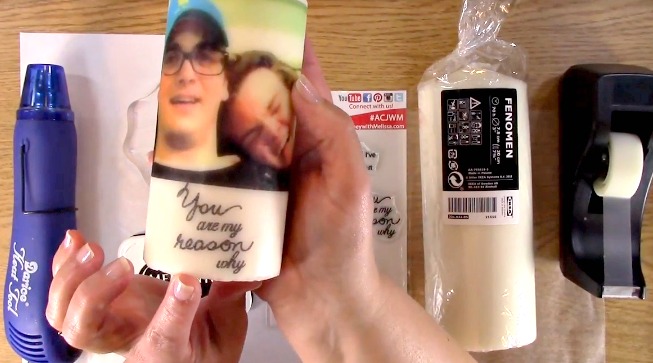
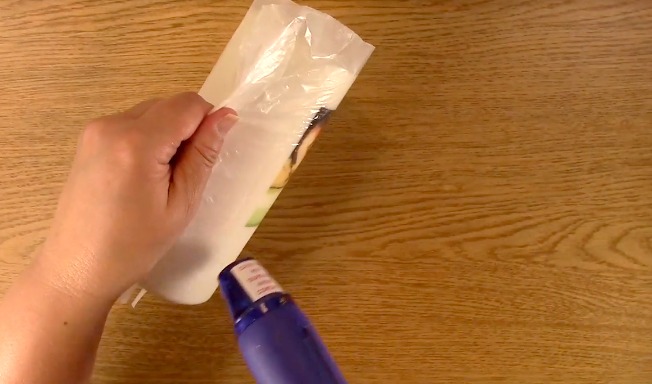
Take out your heating tool and turn it on. Moving the heating tool back and forth with some space between it and the candle, begin to heat the image. Notice how dull and how it looks like it has a matte finish.

As you heat the image, it starts to look shiny and almost 3-D of color compared to what it looked like in the beginning. Look at the difference between the top and the bottom of the image on the candle.

Make sure you heat the entire image. This is what allows the image to embed in the candle.

Take special care of the edges of the tissue paper.

You want to be sure it is heated thoroughly.

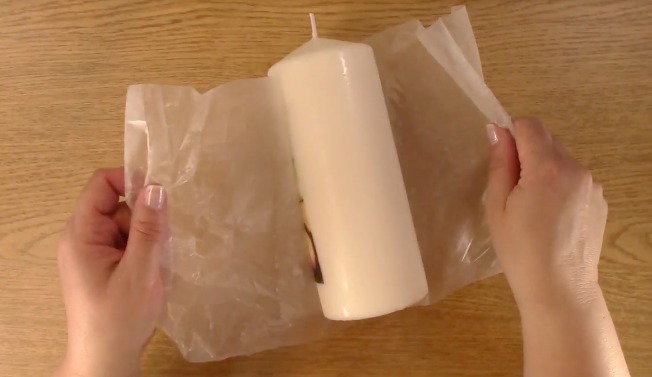
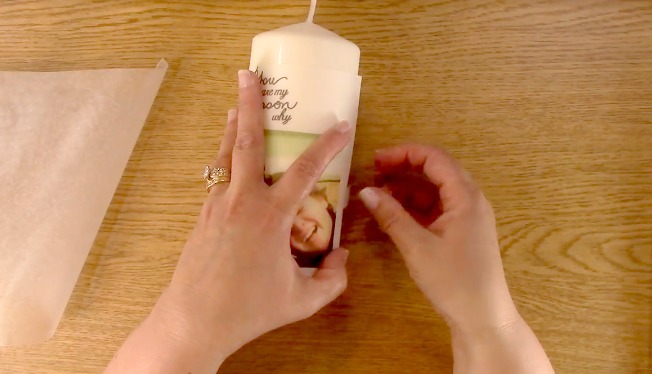
Once you have finished heating the image completely, slowly and carefully take off the wax paper.

This is what it looks like as it is coming out of the wax paper. PRETTY NEAT, HUH?

Here is a close up of what the candle looks like once it is complete.

Whether you like the SAVE MONEY: Create Custom Candles using Stamps and Photos Project  with a sentiment, a picture, stamped images or a combination of all of it, the possibilities are ENDLESS!

Now, for the GIVEAWAY!


 This week we are giving away the A Creative Journey with Melissa For My Boys Stamp Set as featured in this post and the above video!!

To qualify to win, you must be BOTH:

A public follower on YouTube, subscribe to our mailing list/blog posts and you may also comment on this blog post for an additional entry to win! Winners will be announced next week on our Mondays with Melissa blog post!

If you do not contact me within two weeks of the announcement of winning, you will forfeit your prize. Thank you for your understanding.

NOTE: Be sure you are subscribed with matching names. If I am unable to match you with your subscription to both the email list and the YouTube Channel, you will miss your chance to win a prize. If I can’t decipher if you are a matching subscriber (if your profile doesn’t show publicly who you subscribe to) and I can’t confirm you have subscribed to both, I won’t be able to enter you in for the prize. **DO NOT COMMENT WITH YOUR ENTIRE EMAIL ADDY. Only give me the first 6 NOT INCLUDING YOUR HOST. Just enough for me to match your name will work perfectly.

Now, for the last weeks GIVEAWAYS! We are giving away TWO STAMP SETS!

The winner of the A Creative Journey with Melissa Tie Die and Splatter Stamp Set is Babe O!

The winner of the A Creative Journey with Melissa Spring and Summer Holiday Celebrations Stamp Set  is KT!

Babe O. and KT, please send me your contact information via contact page on our website, which post you are a winner from and I will get your certificate prize out to you! Thank you so much for being a YouTube follower and subscribing to our mailing list/blog posts!

 We hope you enjoyed our SAVE MONEY: Create Custom Candles using Stamps and Photos Project! Have a wonderful week and thank you for going on A Creative Journey with Melissa.  


Make your own Action Spring Wobble for your Creations

Make your own Action Spring Wobble for your Creations is what we have for you today. Who doesn’t like a little movement with their creations? I know I sure do so what better way to do so and save money by making some yourself?! Let’s get CREATIVE!

Supplies Needed to Make your own Action Spring Wobble for your Creations

Wire Cutter (or scissors work great too)

26-28 gauge wire (very thin)

Screw driver or something wire can be wrapped around

Adhesive

Scotch Tape

2 pieces of Paper to Attach Spring

Embellishment

Base for Embellishment

 Here is a close up of what we will be making. It works with just about everything and you can adjust the size of the spring action wobble by adjusting the size of the spring.

I used the above wire to Make your own Action Spring Wobble for your Creations. It is very thin. I used 26-28 gauge wire and it works perfectly!

 Take out the screw driver or the item you are wrapping your wire around.

Using the wire and leaving a little tail of it, start to wrap the wire around the screw driver.

 I wrapped it about four times.

Push the wire down so it is more condensed. Wrap 4-5 more times. Condense again.

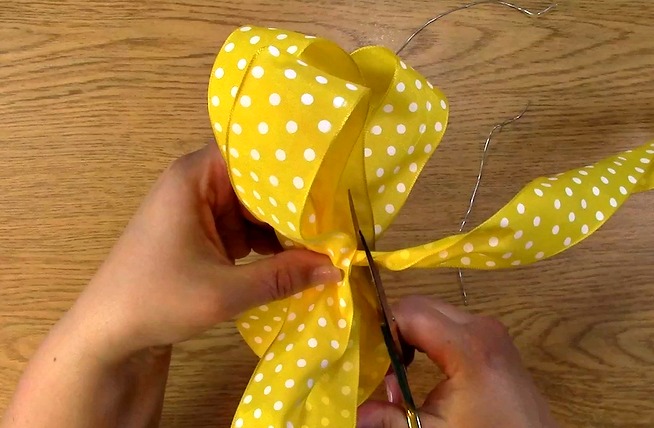
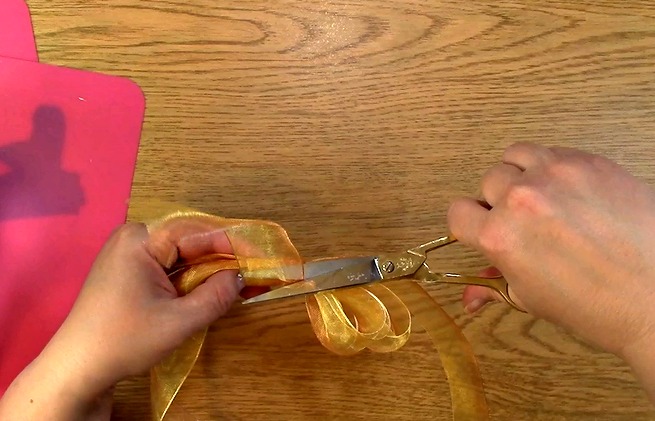
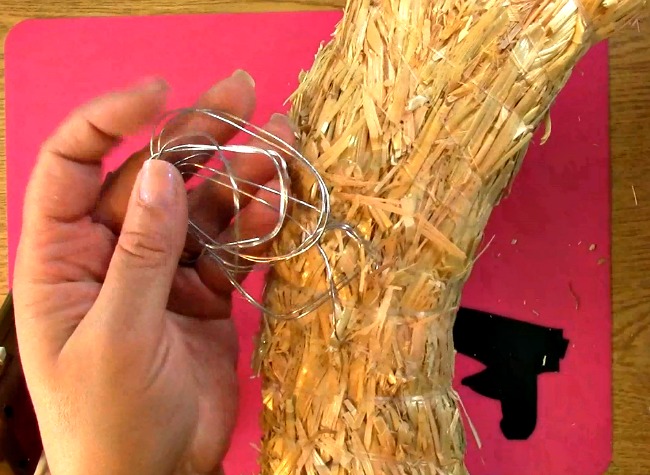
Trim the wire leaving a 1/4 of an inch for later attachment.

 Here is a close up of the wire spring you will use for the Make your own Action Spring Wobble for your Creations before I pull it off of the screw driver.

 This is what the wire spring will look like once it is pulled off of the screwdriver.

Take a small piece of tape and place it on TOP of one end of the wire.

This is what it will look like once you have placed the tape on it.

Place the tape with the wire sticky side down on the paper.

Here is a close up of what it looks like.

Place tape on the other side of the wire as shown.

Squeeze both sides together to make sure they are stuck. Pull it apart to the width of the desired spring action wobble.

Trim the edges of the paper so that your spring action wobble will fit on your element.

This is the side view and what it will look like when you make your own Action Spring Wobble for your Creations!

This is a top view of what the element looks like. It will fit perfectly on the coffee cup from the A Creative Journey with Melissa Coffee is my Liquid Therapy Stamp Set. Let’s add it to our embellishment!

Add adhesive to the back of the coffee cup. Make sure you have enough to cover the spring action wobble.

Place the spring action wobble down on the coffee cup.

Add adhesive to the decorative paper base where you want to place your spring action wobble and place your embellishment on your base paper.


YOU ARE DONE!

You know how to Make your own Action Spring Wobble for your Creations and can make them for all of your creations!!!

Now, for the GIVEAWAY!

This week for our Giveaway, we are giving away the A Creative Journey with Melissa Coffee is my Liquid Therapy Stamp Set.

To qualify to win, you must be BOTH:

A public follower on YouTube, subscribe to our mailing list/blog posts and you may also comment on this blog post for an additional entry to win!

If you do not contact me within two weeks of the announcement of winning, you will forfeit your prize. Thank you for your understanding.

NOTE: Be sure you are subscribed with matching names. If I am unable to match you with your subscription to both the email list and the YouTube Channel, you will miss your chance to win a prize. If I can’t decipher if you are a matching subscriber (if your profile doesn’t show publicly who you subscribe to) and I can’t confirm you have subscribed to both, I won’t be able to enter you in for the prize. **DO NOT COMMENT WITH YOUR ENTIRE EMAIL ADDY. Only give me the first 6 NOT INCLUDING YOUR HOST. Just enough for me to match your name will work perfectly.

 For last weeks giveaway of the A Creative Journey with Melissa Spinner Greetings Stamp Set

 Sandy F. is the winner!

Sandy F., please send me your contact information via contact page on our website, which post you are a winner from and I will get your certificate prize out to you! Thank you so much for being a YouTube follower and subscribing to our mailing list/blog posts!

We hope you enjoyed our Shaker Card Embellishment Using Packaging Project! Have a wonderful week and thank you for going on A Creative Journey with Melissa.  

Create your own Cork Wreath Part Three: Technique and Finishing Touches

Create your own Cork Wreath Part Three: Technique and Finishing Touches is what we have for you today. We are going to clean up our wreath to get rid of our little glue strings that tend to happen when using hot glue and create a bow to finish off your wreath! If you haven’t seen our other posts in this series of three, please check out PART 1 HERE and PART 2 HERE.

But first… before we get started with the Create your own Cork Wreath Part Three: Technique and Finishing Touches,

I have an awesome tip for you thanks to my friend Sheila!

technique-and-finishing-touches-b

You know how when working with hot glue you have those pesky little strings… Well my friend Sheila told me of an awesome tip! Use a hair dryer or heat embossing gun and you will heat those little buggers away! I used mine (shown above) It works perfectly!

technique-and-finishing-touches-c

A BONUS TIP!

If you plan to have your wreath for a variety of themes like holiday, birthday, summer, etc. I would suggest you place some velcro at the top of the wreath so you can change the bows out rather easily. Using velcro will not only make it easier it will allow you to change them out without much fuss and make your wreath more versatile throughout the year! Now…. Onto the bows, shall we?

technique-and-finishing-touches-d 
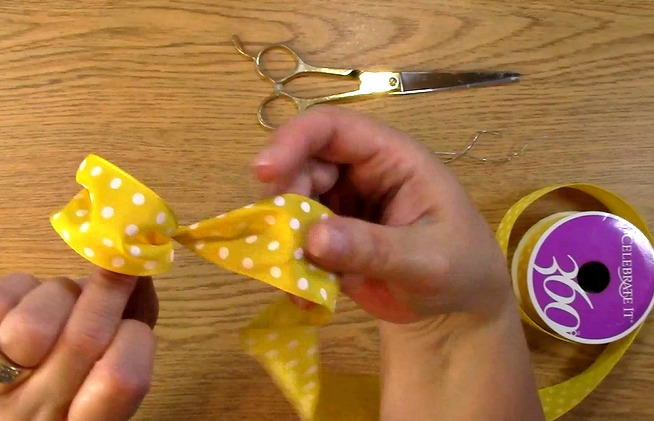
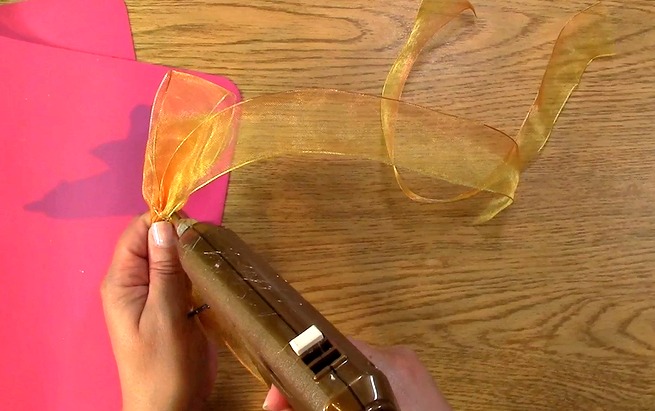
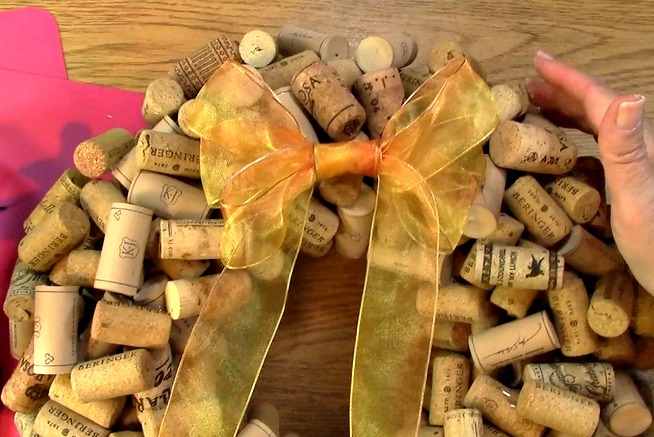
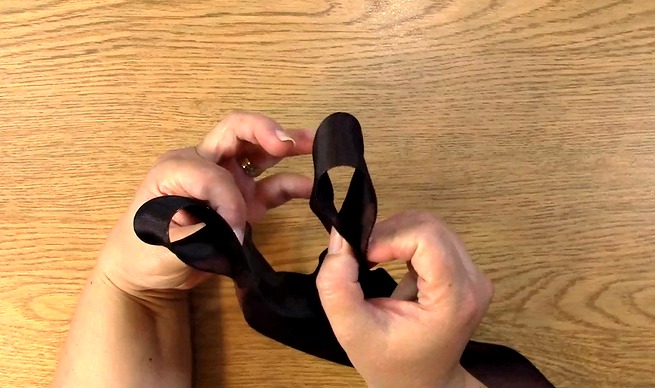
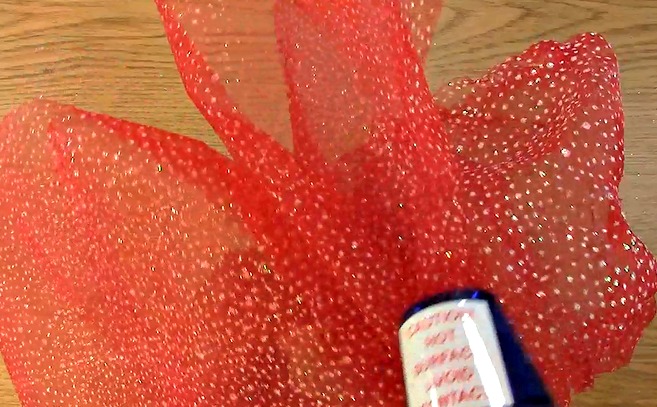
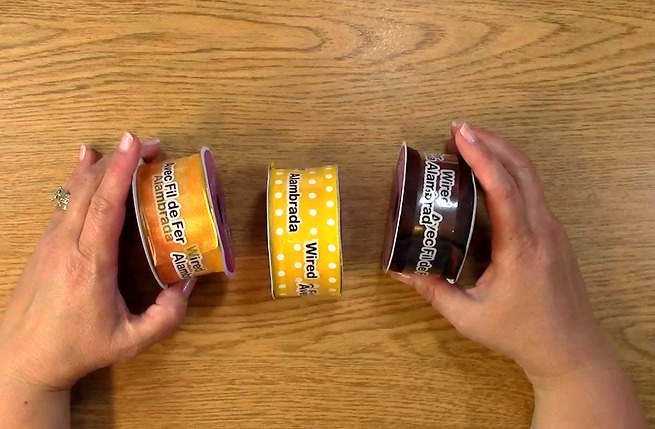
There are a number of bows you can make. Here I am going to just show you three of them and another technique with mesh ribbon. Here are three of the ribbons I am using for my project. You can always double or triple the amount of ribbon you use for your bow creation as well as add multiples together for a thicker more full looking bow.

technique-and-finishing-touches-e

For the Technique and Finishing Touches, you want to start with wired ribbon. It makes it easier to bend and adjust and it will stay. You can use ribbon without wire but it does make it a little more difficult to keep the bow in place.

To start, you will want to take out the ribbon of your choice.

technique-and-finishing-touches-f

First, you will want to take the ribbon and make a loop like shown, This will be the front of the ribbon.technique-and-finishing-touches-g

You will then fold three loops, each being a bit larger than the next for the ribbon. Be sure that the design is facing outward so the ribbons decorative appearance is on the visable part of the creation. technique-and-finishing-touches-j

You will repeat this three or more times. For video and creation purposes, I only did this three times. If I was to make a large bow for a larger wreath, I would probably make at least six or more for a fuller bow. technique-and-finishing-touches-l

Cut the end of the ribbon just a little bit past where you have it held in the middle of the bow.technique-and-finishing-touches-m

This will be how it looks.
technique-and-finishing-touches-o
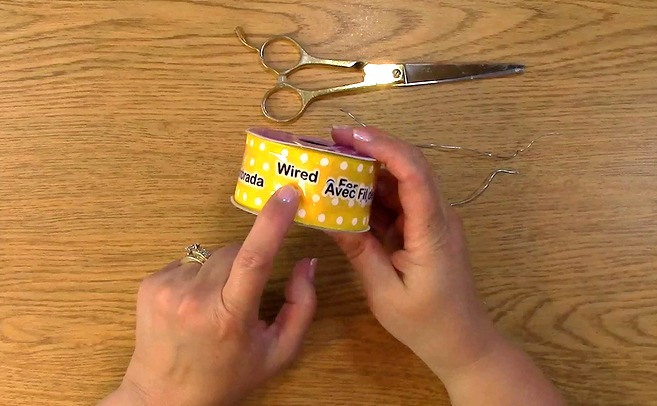
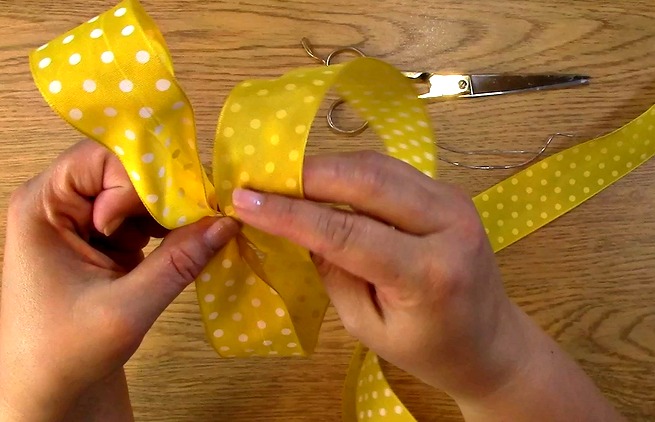
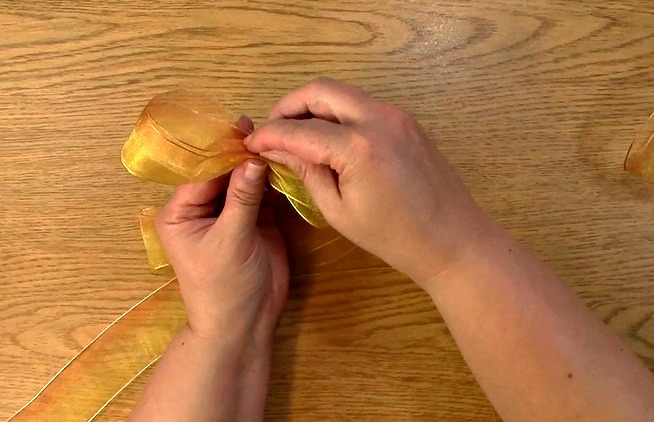
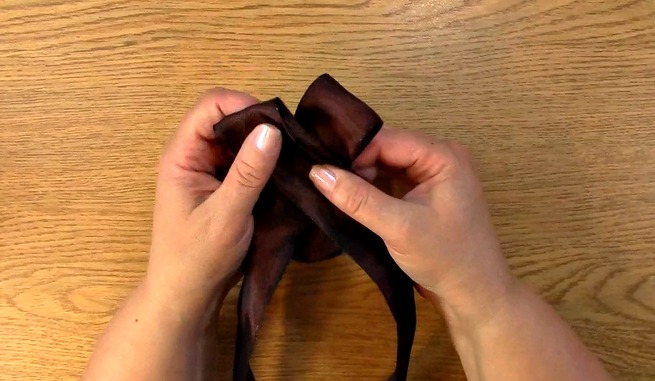
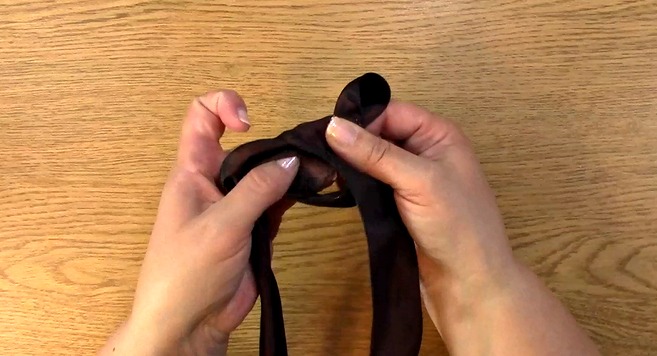
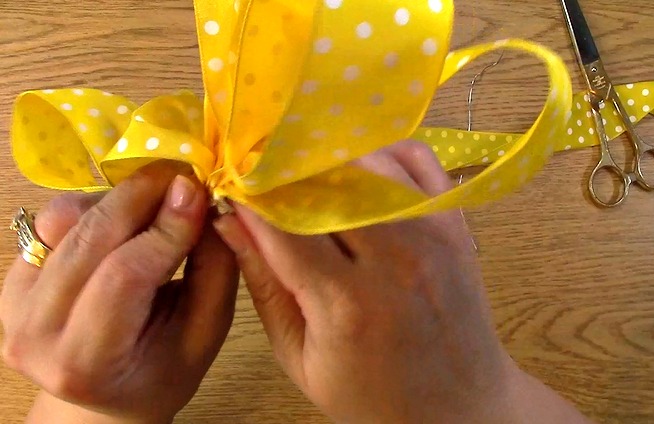
While still grabbing the ribbon, you will want to place some floral wire or wire around the area in which I am gripping to keep the ribbon bow in place.

technique-and-finishing-touches-p

This is what it will look like once you have placed the wire around the ribbon center. technique-and-finishing-touches-r
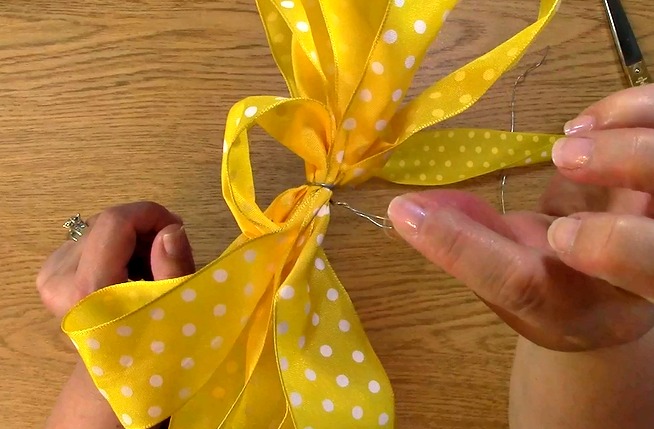
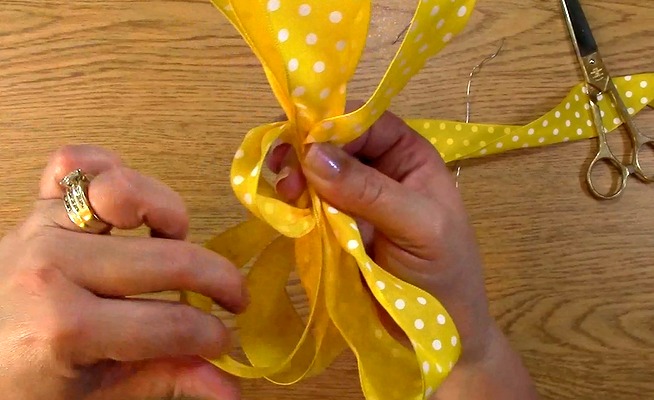
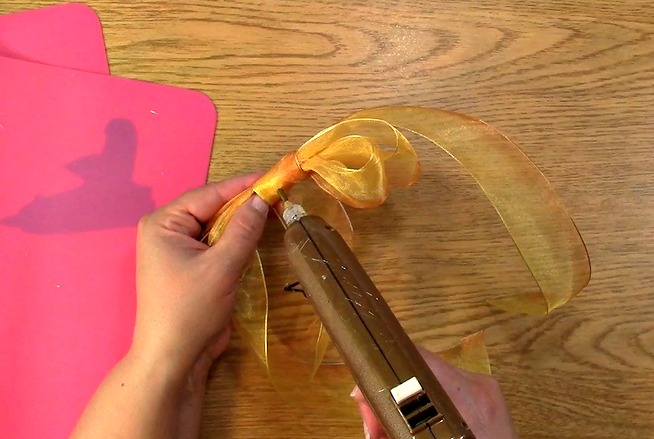
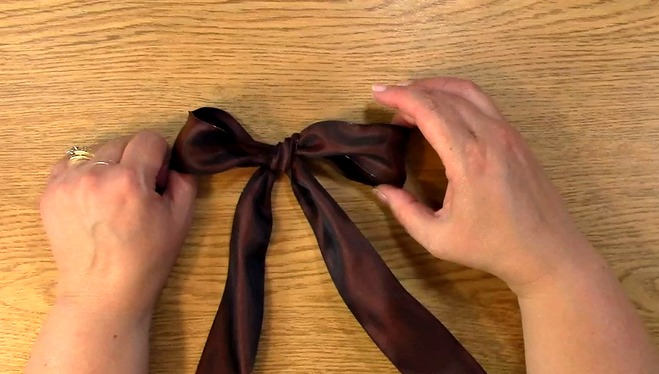
Now for the fun stuff! You get to fix the bow to make it fancy! You can puff it out or adjust it to your liking.

technique-and-finishing-touches-s


Now for the second bow Technique and Finishing Touches…

You will want to start with at least three different sizes of ribbon one larger than the other. The sizes I used are approximately 30″, 24″ and 12″. The fuller the bow, the more sizes and variations you will want to use. You will want to place your ribbon on a sturdy surface and folded in an awareness ribbon shape like shown. technique-and-finishing-touches-t

Take the ribbon and pinch the center. Take out the second piece of ribbon.

technique-and-finishing-touches-u

Fold the second piece of ribbon and gather in the middle.

technique-and-finishing-touches-x

Place a small amount of hot glue to the gathered two pieces of ribbon. This will be used to hold the third piece of ribbon in place.

technique-and-finishing-touches-y

Take the third piece of ribbon and wrap it around the center of the ribbon holding the gathered area in place. Apply hot glue to the end of the ribbon to secure it in place.

technique-and-finishing-touches-z

Trim the ribbon and adjust to beautify the ribbon for your creation,

technique-and-finishing-touches-za

This is the completed ribbon.

technique-and-finishing-touches-zb

On the third bow Technique and Finishing Touches,

take the ribbon you are going to use. Make two “rabbit ears” like you would for tying your shoe laces.

technique-and-finishing-touches-zc

Cross one of the ears over the other.

technique-and-finishing-touches-zd

You will then fold one of the ears over the other and push it through towards you .

technique-and-finishing-touches-ze

Pull tightly to secure your bow. Adjust your bow to the desired look you want for your creation.

technique-and-finishing-touches-zf

For this creation, we are going to use glittered mesh.

You can make a number of things with this amazing material but what you may not know, you can use a heat gun on it and give it a different look.

technique-and-finishing-touches-zg

It will melt the material and make it curl up at the ends. It really gives a great look for your creations. Play with it!

YOU WILL LOVE IT!

Thank you so much for joining us today for Create your own Cork Wreath Part Three: Technique and Finishing Touches. We hope you will be sure to stay tuned as we are going to be participating in an amazing coffee lovers blog hop with amazing prizes and awesome inspiration you will not want to miss!

We hope you enjoyed our bow creations and going on A Creative Journey with Melissa.

melissa-written-signature

Create your own Cork Wreath Part Two: Putting it Together

Create your own Cork Wreath Part Two: Putting it Together is what we have for you today. We have a tutorial on video above as well as the pictorial below.

The original video was over an hour and a half long (1:48 to be exact).

In the editing process I sped up the time so that all you actually have slowed is when I am speaking with tips, techniques and suggestions. Everything else is sped up to not make the video longer. I really wanted to do this video so that you can see from beginning to end what is needed to be done. As I said in my video the wreath is not a difficult project.

It only takes about two hours of time for the larger wreath.

A little under an hour and a half for the smaller one. To find out exactly what you need to create one of the smaller wreaths, go to my first Create your Own Cork Wreath blog post here for info. Hopefully this will give you the courage to try it out! There are so many wine drinkers out there that this could be a great gift or even a great craft fair product to sell! Be sure to ask your friends to save their corks and you can TRY IT! Sooo… let’s get started!

Create your own Cork Wreath Part Two b

Here is the first of two wreaths that I have made. There are two different types of patterns I used to place the corks her

Create your own Cork Wreath Part Two a

We are going to recreate this one again for this pictorial and the video.

Create your own Cork Wreath Part Two c

First, be sure you have your wire or whatever you plan to use to hang your wreath in place before you start to apply your corks. This will ensure it’s usability as well as ease for the person you are either gifting it, selling it or even for yourself!

Create your own Cork Wreath Part Two d

The first thing you are going to want to do for the Create your own Cork Wreath Part Two is get out your hot glue gun, corks and a protective mat (Hot Glue Gun Helpers set including the protective surface Mat) Place your protective mat down. I placed my corks on the inside of the wreath for visibility. Plug in your hot glue gun approximately twenty minutes before you plan on starting. What I did was I got my glue gun plugged in and then I pulled everything out and got situated to get ready to create. It worked out perfectly!

*NOTE* You will  want to be sure that you have gone through your corks and made sure that you have enough to do this project.

I was so fortunate to have one of my BFF’s which I am also lucky enough to have as my next door neighbor, give me a whole box of corks that had been collected over some time. I was so excited I thought of a few ideas and here is one of them!

A HUGE thank you to ROBIN for the corks for these wreath projects!

Create your own Cork Wreath Part Two d

Once your glue gun is heated properly, you will want to take out your unwrapped wreath with the flat part on the work surface. The flat side will be the back of the wreath. It is important that you use the flat side so when someone hangs the wreath, it will lay flat on the surface.

Create your own Cork Wreath Part Two b

You will want to adhere corks to the wreath to essentially cover the wreath. There are a few different ways to do so. This is the first one. You can use this by itself (I would have been a little more careful, lined up the corks better and closer together so it was covered more had this been the final look of the wreath.)

The other way you can do it is the way we are going to show you in this tutorial.

 There are a few ways you can adhere the corks.Create your own Cork Wreath Part Two p

The three ways I have done in this video are zig zag, directly on the corks and a long line. I have found the line isn’t the most effective when gravity is involved. The corks will slip down and I ended up doing more redo’s with that.

Create your own Cork Wreath Part Two l

If you use the hot glue line technique, it works great for when you are doing the circle around the top of the wreath when the cork is supported like shown. This was very effective.

Create your own Cork Wreath Part Two h

I would suggest the following as the best two to techniques to use for the majority of the corks.

Create your own Cork Wreath Part Two g

The first is using a zig zag line approximately two to three inches wide and almost as tall as the corks that you are using. This works well as long as you make sure you have enough glue on the area where the corks are going to go.

Create your own Cork Wreath Part Two s

Another other way you can adhere them is to place the hot glue directly on the cork in a thick line.

Create your own Cork Wreath Part Two i

You are going to start gluing the corks on the top part of the wreath going all the way around. Once you have used either of those techniques, you will then press your corks on the desired area. Complete putting on corks all around the top of the wreath.

Create your own Cork Wreath Part Two n

Next, you are going to put glue on the inside of the circle of corks you just placed.

Create your own Cork Wreath Part Two o

Place them all of the way around the wreath.

Create your own Cork Wreath Part Two p

The next layer so to speak of corks you are going to place is the inside of the wreath layer.

For this, you will want to turn your wreath upside down so that the back of the wreath is facing you. You can place a line of glue or I would suggest gluing each cork individually for the best adhesion.

Create your own Cork Wreath Part Two q
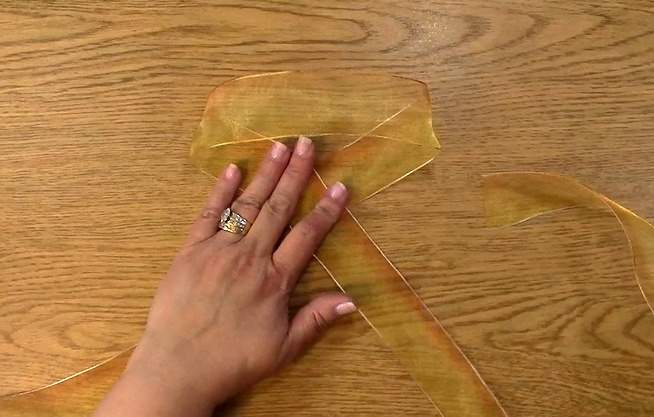
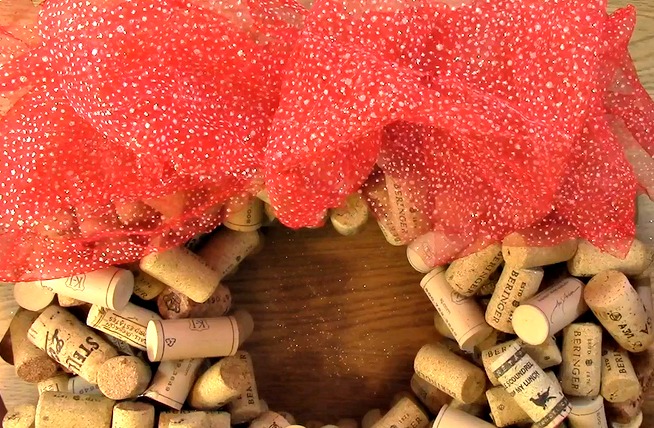
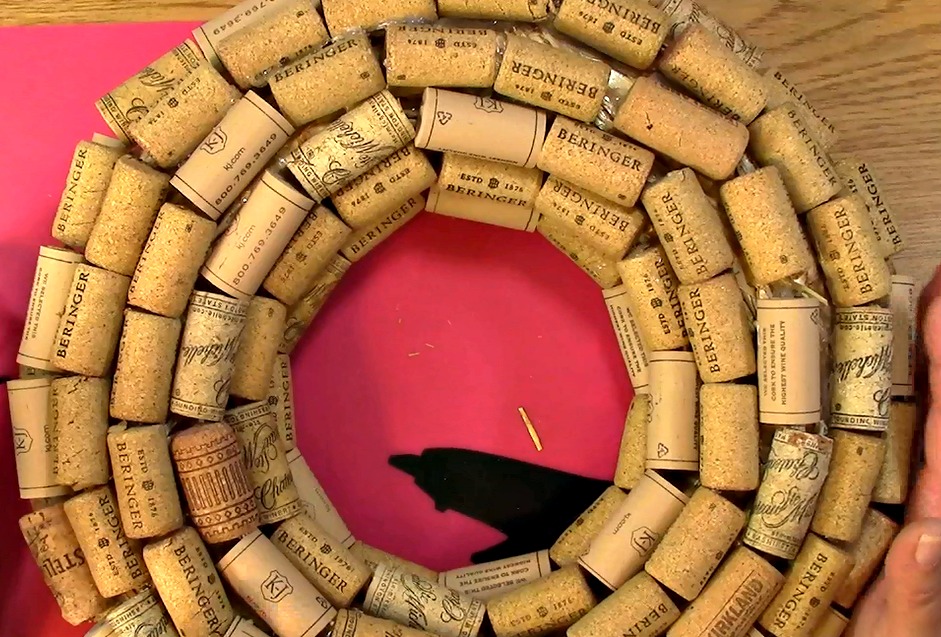
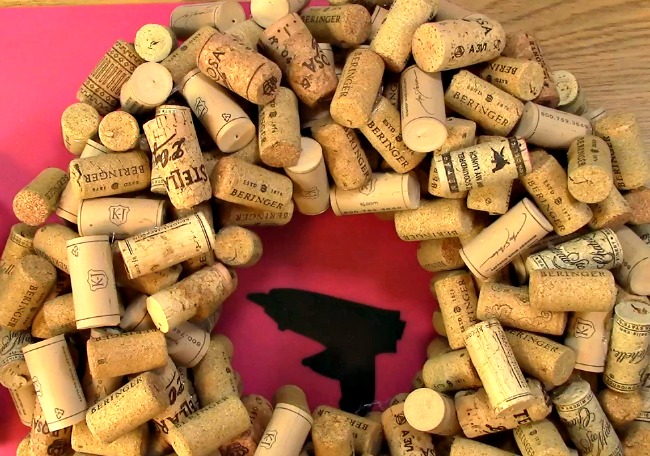
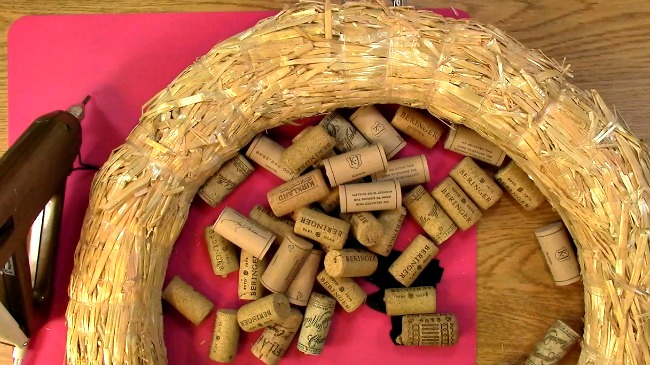
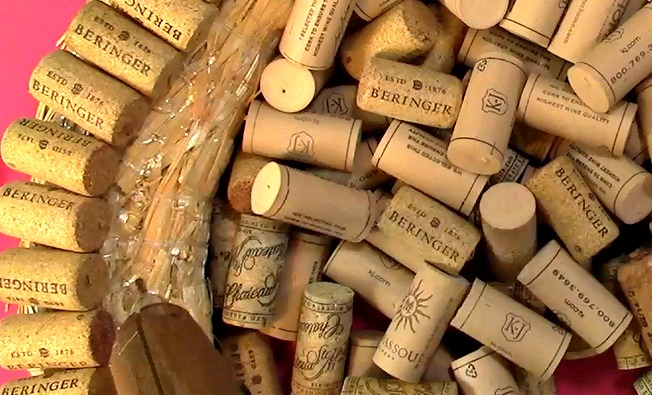
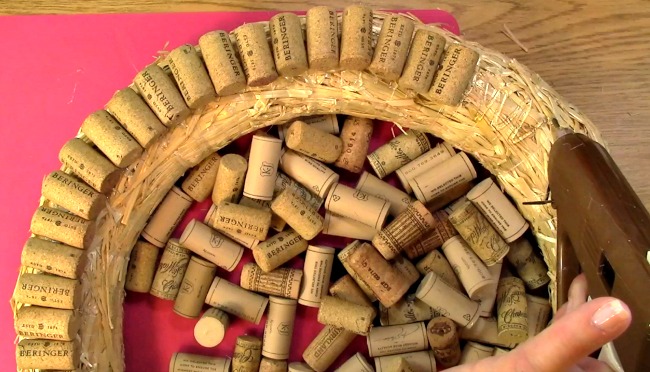
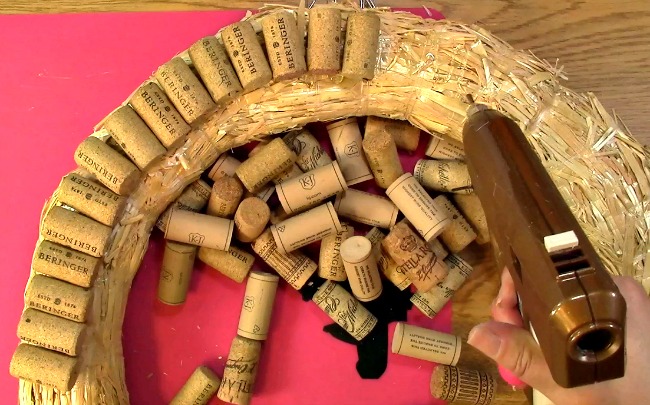
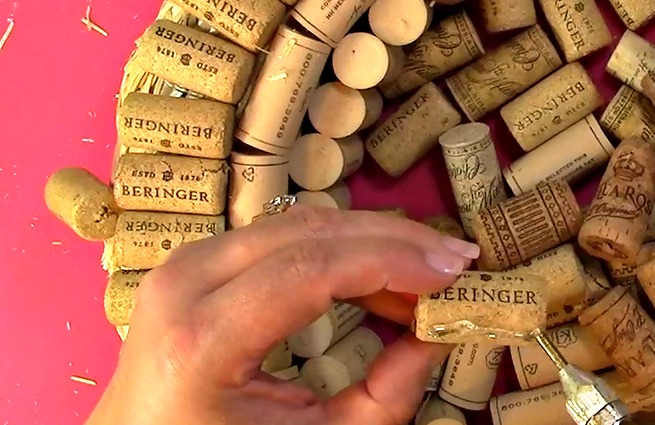
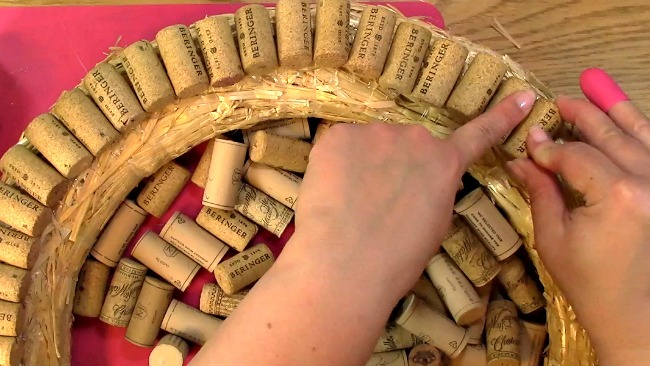
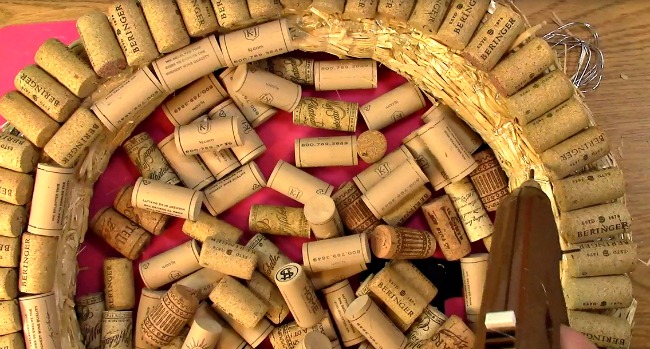
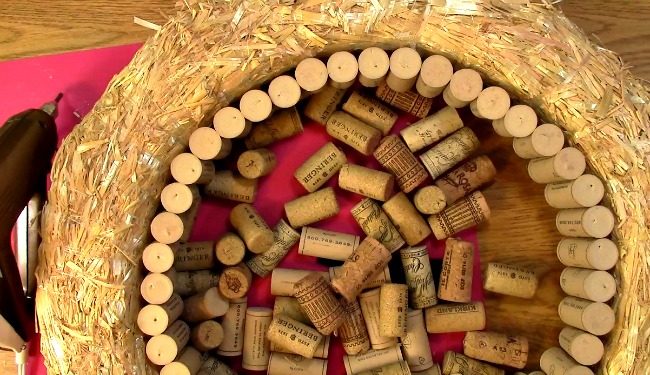
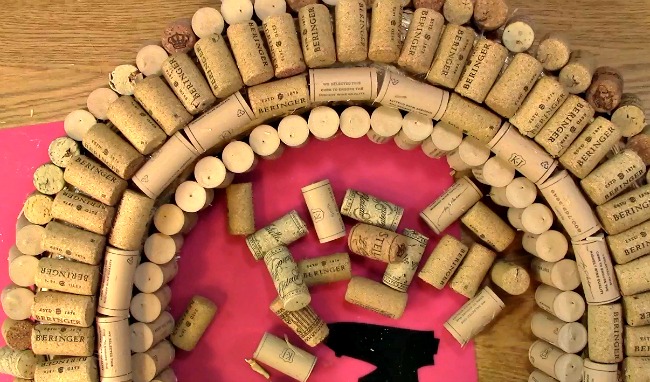
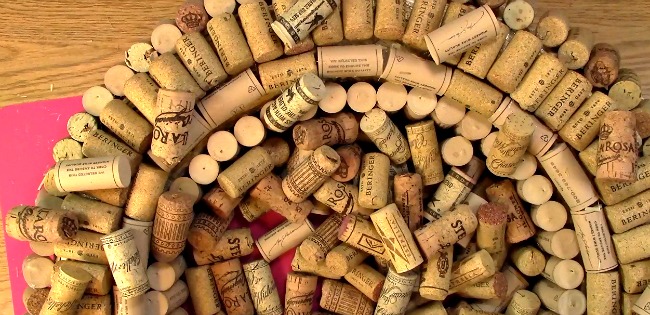
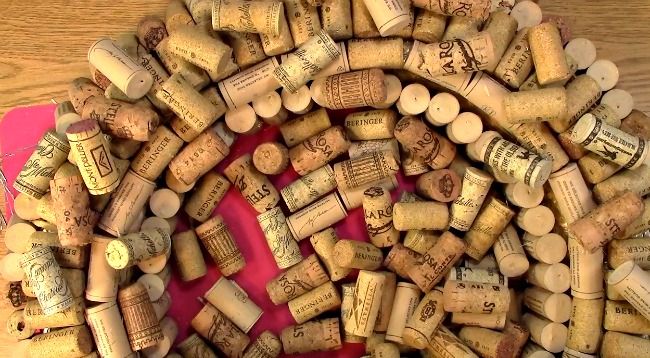
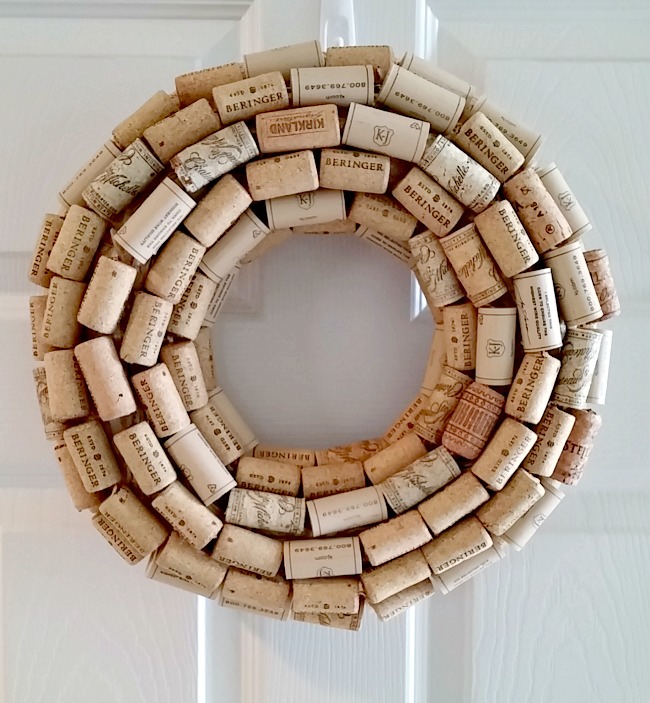
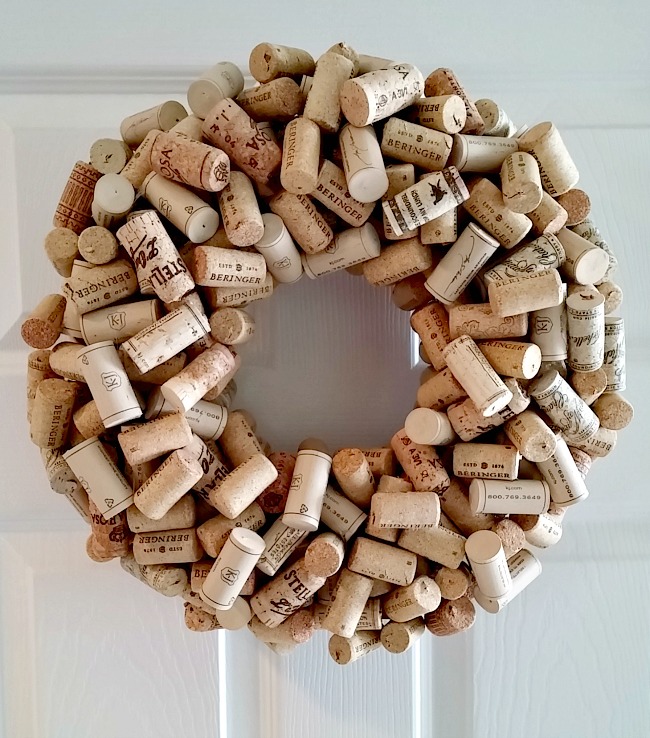
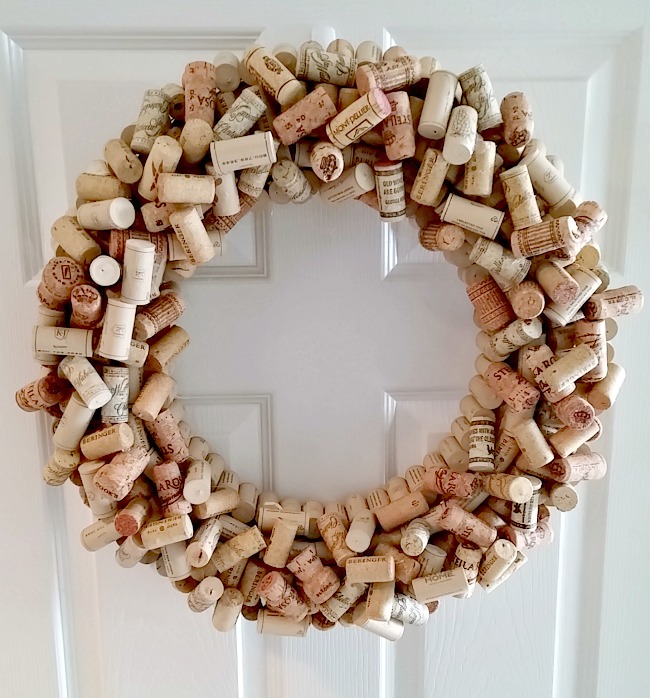
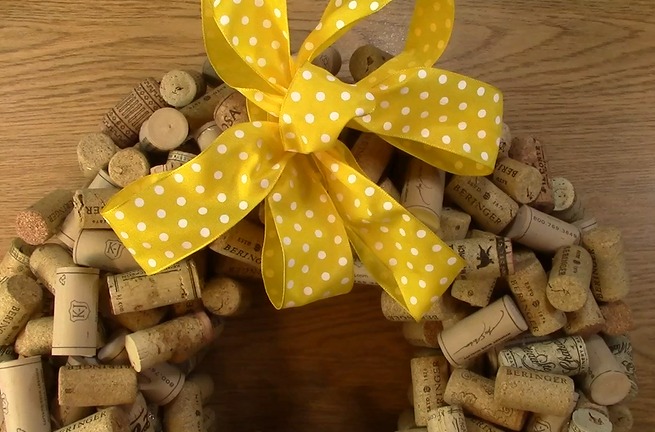
You will then place your corks vertically along the inside of the wreath as shown.

Create your own Cork Wreath Part Two r

This is how it looks once completed.

Create your own Cork Wreath Part Two u

Just to be sure that all of the corks have adhered properly, gently run your fingers around the corks. If any feel loose or fall off, reapply them. It can happen so just be sure before you start your final layer that all of the corks are in place.

Create your own Cork Wreath Part Two v

Now for my favorite part!

Turn your wreath back around so that the front of the wreath is facing you. Now you will be gluing corks in a random order to cover the top to give it a more 3-D decorated look for the Create your own Cork Wreath Part Two project. I have found it is best for you to individually apply hot glue to each cork. It helps with the random placement.

Create your own Cork Wreath Part Two w

Apply glue and place the corks in random order on the wreath, filling areas where the base wreath may be showing through.

Create your own Cork Wreath Part Two x

Add more to fill up the wreath to add more fullness to the desired look you are aiming for. Once you are done, this is where you would clean up any extra glue, glue strings, etc to give your wreath a great finished look. It is easier to clean up the excess glue once it has cooled.

Here are full pictures of the cork wreaths I created.

Wreath 1

Wreath 1

Wreath 2

Wreath 2 (smaller wreath)Wreath 3

Wreath I made in the video (larger wreath)

Once you are done, you can add ribbon, berries, themed decorations for fall, Christmas, birthdays, even wine bottles and glasses! There are a number of things you can do. For next weeks tutorial I am going to show you how to tie and create a ribbon that will work perfectly for your wreath. I realize it may seem silly but there are different ways to tie a ribbon and they can have all of the difference in the world when creating a gift for someone. You will be able to use this technique not only for your wreath but for cards and future gifts too!

Thank you so much for joining us today for the Create your own Cork Wreath Part Two tutorial.

We are honored you took the time to visit and hope you will create a cork wreath yourself! we hope we have inspired you to get creative and appreciate you going on A Creative Journey with Melissa.

melissa-written-signature