
Explosion Mini Book Part 4
Explosion Mini Book Part 4 is what we have for you today. I wanted to thank you for your patience with me. Thank you all for your well wishes, thoughts, prayers, and cards. I went back to my day job and hit the ground running after my surgery and I think I over did it. I was wiped out last weekend so I wasn’t able to post. The good news? I am baaaaackkkk! If you haven’t seen the previous posts for the first three parts of this project, be sure to check out part 1 HERE, part 2 HERE and part 3 HERE. I am so excited to show you how to put this Explosion Mini Book together! Are you ready? Let’s get started!

Supplies Needed for the Explosion Mini Book Part 4 Project
Front and back cover for your Explosion Mini Book Part 4 Project
Super strong adhesive
Ribbon
Strong adhesive
Inside pages of your Explosion Mini Book Part 4 Project

First, you will want to take out your front cover, your ribbon and your super strong adhesive.

In the middle of the cover (or wherever you want to place the ribbon to tie up your book) place your super strong adhesive as shown above.

Whichever ribbon you choose to use, make sure you “finish the edges” so that they don’t fray.

I used this little tool for my ribbon on my Explosion Mini Book Part 4 that I bought at the Daiso store but more on that later.

Take out your ribbon and fold it in half. Using that middle fold, place that in the center of your cover which will allow the same amount of ribbon on both sides. Place the ribbon on the adhesive. Add adhesive to both of the covers of your Explosion Mini Book Part 4 and set them aside.
NOTE: When measuring the amount of ribbon to use, I used approximately seven widths of the cover. This will allow plenty of ribbon to go around my creation once filled with decor and pictures as well as tie a nice bow. It will depend on the size of the cover so be sure to take that into account.

Take out the three pages for your Explosion Mini Book Part 4.

Place adhesive on the square areas (the part that is not folded as a triangle) of your folded green paper as shown above. Make sure you place your adhesive on the side where the paper is a hill (poking up as shown.) This will help with folding the complete project later.

Pull our your red paper and take your middle paper adhesive side up and turn it upside down so the adhesive side is facing your table now.
Before you place your middle piece of paper adhesive side down on the square as shown above, make sure you fold it to ensure it will fold completely so it will work once it is in your explosion book. This is the front of your pages connected.

This is the back of the pages connected.

Add your second square with adhesive to your third page as shown above. making sure it folds properly.

Make sure the edges aren’t overlapping and that it folds properly.

This is what the front pages look like once they are put together for your Explosion Mini Book Part 4.

Now we are going to place the front cover on the left side square of the paper as shown above and

we are going to add the back cover to the right side square as shown above.

Use your bone folder and press the folds to ensure there is a very crisp crease on all of the areas of the pages.

This is the back of the pages of your Explosion Mini Book Part 4 project.

Here, I am going to slowly unfold the pages so that you can see what it looks like.

As you can see it looks complicated but once this unfolds, you are going to be amazed at how easy it is to fold it back up.

Here are your unfolded pages! YOU DID IT! Now, to add the covers…

I added one more piece of adhesive on top of the ribbon to ensure it’s adhesion onto the inside pages.

Take your folded inside papers and place the outside unfolded square piece on top of your ribbon. Press firmly on your paper to ensure adhesion to the front cover.

Take your back cover and place it centered on the top of the inside square as shown above. Press firmly to ensure adhesion to the paper and the back cover.

Now as a side note, I told you I would show you my ribbon tool. I bought this at Daiso a few years ago however it seems to work pretty well. 
If you look at the top of the upper area of the ribbon sealer tool, you will see a line on the tool which actually heats up! Be careful, you will burn yourself… lesson learned!

Take your ribbon and place it on top of the heated area. You will want to hold it for a few seconds to ensure that the ribbon does seal so it won’t unravel.

Here you can see the hole where it sealed. Worked great!
You need to repeat it so that it is sealed across the whole piece of ribbon for your Explosion Mini Book Part 4. Now you need to make sure you tie a pretty bow around your Explosion Mini Book Part 4! You did it!
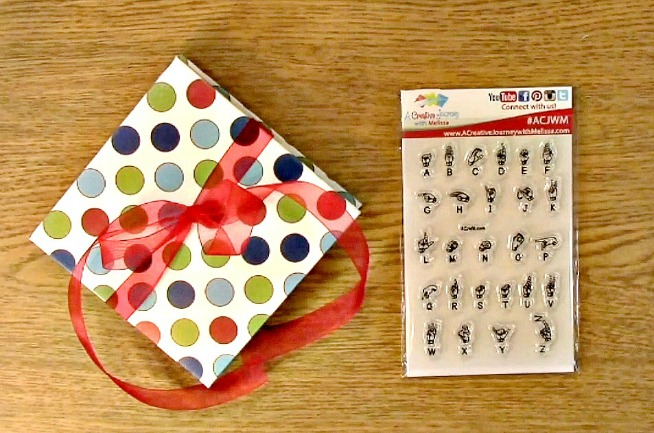
For this weeks giveaway, we are giving away one of our most popular stamp sets the A Creative Journey with Melissa Sign Language Alphabet Stamp Set.
It would be a perfect addition to your awesome new Explosion Mini Book Part 4 Project!

For last weeks giveaway, we are giving away $15 credit to our store!
The winner is Holly S!
Please be sure that you send me a message letting me know which post you won on and your contact info and I can send your code for your store credit to you!
Winners, please send me an message HERE and I will get your prize out to you!
For all of our giveaways including this one, in order for you to qualify for an entry to win, you would need to be a follower on YouTube, subscribe to our mailing list/blog posts (found on our blog page) and you may also comment on this blog post for an additional entry to win! When you subscribe, you will receive an e-mail on Mondays with our latest blog post. BE SURE TO READ IT to check to see if you are a winner EVERY WEEK. If you do not contact me within two weeks of the announcement of winning, you will forfeit your prize. NO EXCEPTIONS. Thank you for your understanding.
NOTE: If you are subscribed with two different names and I am unable to match you with your subscription to the blog and the YouTube Channel, you will be ineligible to win as I can’t decipher if you are a matching subscriber to both. Thank you for your understanding.
We hope you will subscribe to our YouTube Channel, Blog/Newsletter updates and check out our website!
As always, we appreciate your visit and we hope you enjoyed going on A Creative Journey with Melissa.
