Tag Archive for: Father’s Day Card

Monochromatic Father’s Day Card

Monochromatic Father’s Day Card is what we have today. I realize Father’s Day was yesterday but you can use this idea for any card you want to create for any occasion! You could use this for a birthday, anniversary, wedding or just about any occasion!

Supplies needed for the Monochromatic Father’s Day Card 

A Creative Journey with Melissa Spring and Summer Holiday Celebrations Stamp Set

Acrylic Block

Ink

Punch

Two pieces of Colored paper – Monochromatic

Paper to stamp sentiment on

Scoring board and scoring tool or bone folder

3-D Foam

For this project, I started with a A2 card which is 8.5″ x 5.5″. This is half of a regular 8.5 x 11″ piece of paper.

Score 2 1/8 ” on each side as shown.

Fold the flaps inward on your Monochromatic Father’s Day Card showing you the gate fold of the card.

Take your 1″ x 8.5″ piece of paper and wrap it around the card with the opening in the front as shown.

Using the sentiment of choice, place it on your acrylic block. Ink your stamp and stamp your sentiment on the paper.

This is what it looks like once it is done. I always do an extra just to be sure I have one available if needed.

Using your punch, face the punching area toward you so you can see what area you are punching.

Squeeze the punch and you will punch out the sentiment for your Monochromatic Father’s Day Card.

Place your 3-D foam on either side of the strap for your card as shown.

Wrap the strap around your card ensuring it is even.

Place your sentiment on the 3-D foam adhesive. This now creates the band for your gate folded card on your Monochromatic Father’s Day Card.

To remove the band,


slide it downward or upward.

Remove the band off of the Monochromatic Father’s Day Card. YOU DID IT! Pretty easy technique for a cool and different look!

For this weeks giveaway we are giving away the A Creative Journey with Melissa Spring and Summer Holiday Celebrations Stamp Set

For all of our giveaways including this one, in order for you to qualify for an entry to win, you would need to be a follower on YouTube, subscribe to our mailing list/blog posts (found on our blog page) and you may also comment on this blog post for an additional entry to win! When you subscribe, you will receive an e-mail on Mondays with our latest blog post. BE SURE TO READ IT to check to see if you are a winner EVERY WEEK. If you do not contact me within two weeks of the announcement of winning,you will forfeit your prize. NO EXCEPTIONS. Thank you for your understanding.

NOTE: If you are subscribed with two different names and I am unable to match you with your subscription to both the blog and the YouTube Channel, unfortunately you will be ineligible to win as I can’t decipher if you are a matching subscriber to both. Thank you for your understanding.

For last weeks giveaway we are giving away a store credit for $15.00 to pick whatever you like that will get you inspired to be CREATIVE!

The winner is Cheryl G !

Winners, please send me an message HERE and I will get your prize out to you!

We hope you will subscribe to our YouTube Channel, Blog/Newsletter updates and check out our website!

Thank you for joining us and we hope you enjoyed going on A Creative Journey with Melissa.

melissa-written-signature


Tie Dye and Splatter Fathers Day Card

Tie Dye and Splatter Fathers Day Card and two new products is what we have for you today! We hope you had a fabulous Father’s day and we are excited to show you this CAS Father’s Day card and how you can use the two featured stamp sets for multiple reasons and multiple way

Not only was it Father’s Day yesterday, it was also my beautiful sisters birthday as well as my 23rd Wedding Anniversary! What better reason for a great sale, right? Be sure to use the coupon code above to save 23% off  your order! Are you ready to get CREATIVE? Let’s get started!

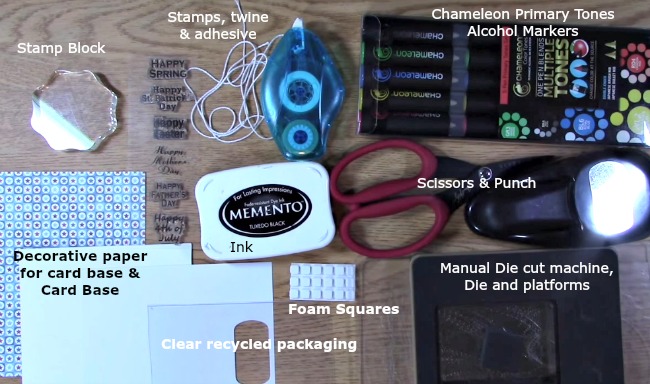
Supplies Needed for the Tie Dye and Splatter Fathers Day Card Tutorial

Acrylic Stamping Block

A Creative Journey with Melissa Tie Die and Splatter Stamp Set

A Creative Journey with Melissa Spring and Summer Holiday Celebrations Stamp Set

Desert Sand Memento Ink

Toffee Crunch Memento Ink

Rich Cocoa Memento Ink

Adhesive

3-D foam square or dot

1 1/4″ circle punch

Paper to stamp sentiment on

Card base

Card Mat and matching 1/4 – 1/2″ matching strip of paper

Paper to stamp background design on

Scrap Paper to stamp on or protected work surface

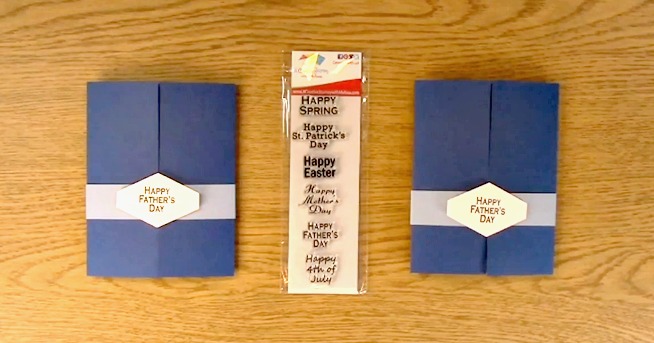
This is the Tie Dye and Splatter Fathers Day Card we are making. I used neutral colors but you can use any color combo you wish. I love how versatile this set is. There are numerous ways to create with it! I will show you some examples later in this post.

To begin, take of the three splatter stamps from their storage sheet. You are using all but the smallest one in  your set.

Here we have two new products! I always try our products out first so when I say I like something, I REALLY DO! I use them myself! We have two new stamp blocks and I LOVE THEM! I love the grip, the smoothness (is that a word?) and comfort of the block! We have others as well if you would like to check them out here.

Although I don’t need to use one block per stamp as one block is enough, I am using them for demonstration purposes.  You will either want to place whichever stamp you wish to work with first or you can utilize the blocks you may have in your stash and use three of them. I am using my 2.5″, 3.5″ and 4.25″ Inch Round Acrylic Stamping Block with Alignment Lines and Finger Grips as well.

For this example of the Tie Dye and Splatter Fathers Day Card,

we are making a smaller version of it. Instead of using the entire stamped image on the paper, I am using smaller amounts of it. This still allows me to create the same color effect but we don’t have as much paper area to work with.

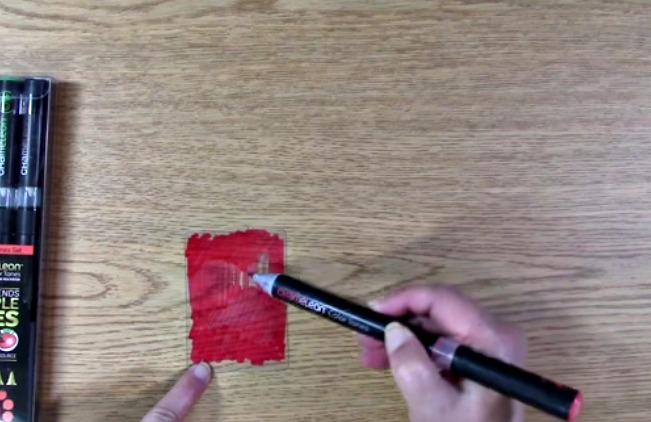
We are going to start with the Toffee Crunch Memento Ink. Place your stamp on your acrylic block and ink  your stamp. As you can see I placed the stamped image a little off the edge of the paper. This will give a great effect of the color but not overload the paper with one image.

When I am creating with repeating images, I like to create in odd numbers. Here I used three because it is a larger image.

Now we are going to be using Desert Sand Memento Ink for the Tie Dye and Splatter Fathers Day Card.

Place your stamp on your acrylic block. Ink your stamp and stamp your image on your paper.

As you can see, I didn’t place my stamp on my ink completely. I am going to show you how I fixed it. It’s not perfect but it does the job 🙂

I reinked the image and restamped it on top of the image that was missing ink.

It worked out pretty well. Still a little lighter on the inside than I would like but it looks OK. Repeat stamping the same image five times in various locations on the paper. I could have restamped it again but was afraid it would look a bit too much so I am happy with it like this.

Place your smallest stamp on your acrylic block. Ink your stamp and stamp your image on your paper. I stamped this image seven times in various places.

This is what it looked like once I was finished with the three colors. What do you think?

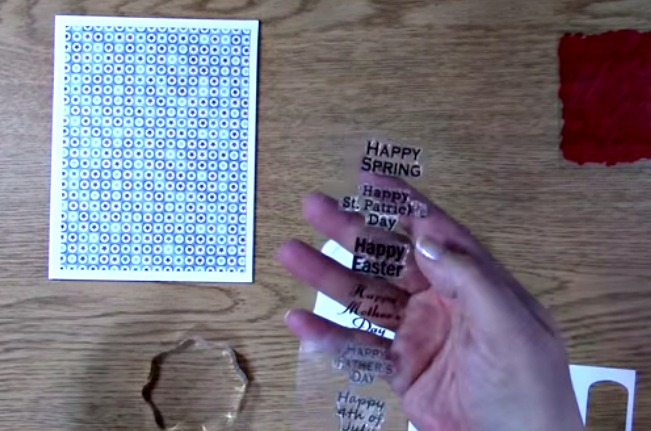
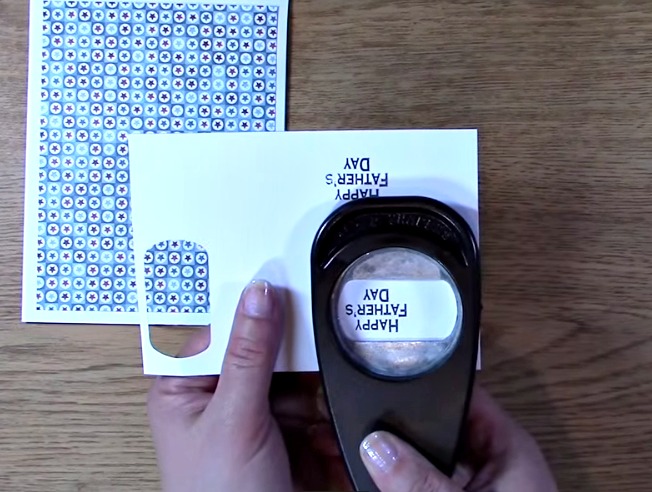
Now we are taking out the Spring and Summer Holiday Celebrations Stamp Set. We are using the Happy Father’s Day stamp.

Place your sentiment on your block and ink it. Stamp your sentiment on your paper. I usually do a few extra so I have them on hand when I may need them.

Take out your 1.25″ circle punch and punch out your sentiment for the Tie Dye and Splatter Fathers Day Card.

Remove one side of the protective paper on your foam square or dot. Place your foam dot or square on the back of your sentiment and set aside.

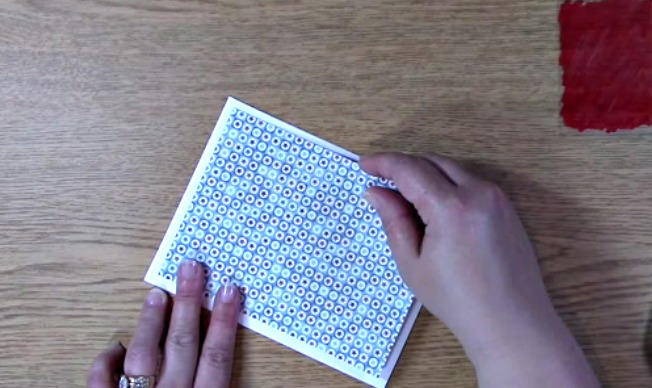
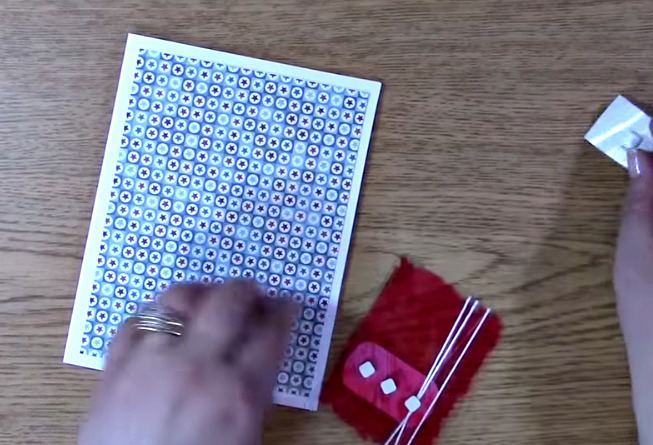
Add adhesive to the back of the background stamped paper.

Adhere the background stamped paper to your solid colored paper mat.

Place adhesive on the back of the solid colored mat.

Adhere the mat to the Tie Dye and Splatter Fathers Day Card base.

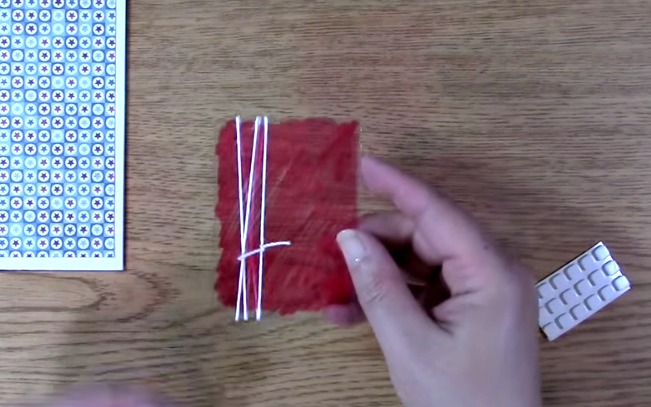
Apply adhesive to the back of the mat strip of paper.

Adhere to the card front approximately 2/3 down on the card as shown.

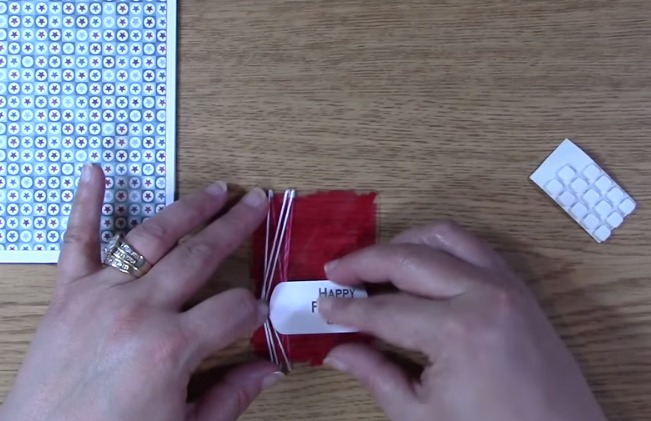
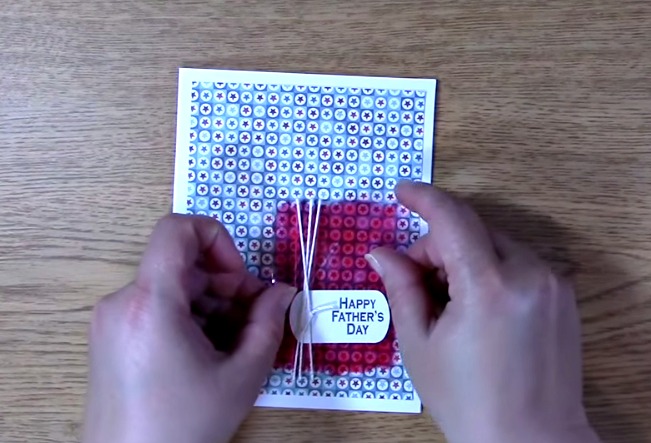
Take your sentiment and remove the protective back paper from the foam square or dot. Adhere the sentiment to your card front as shown.


Here is the A7 amd A2 version of the same card! You are done with the Tie Dye and Splatter Fathers Day Card!

Here is another card I created using the

A Creative Journey with Melissa Tie Die and Splatter Stamp Set and the A Creative Journey with Melissa Spring and Summer Holiday Celebrations Stamp Set. If you would like to see the super easy blog post and tutorial, check it out here.

For this festive Halloween card I used the A Creative Journey with Melissa Tie Die and Splatter Stamp Set and the A Creative Journey with Melissa Fall and Winter Holiday Sentiments Stamp Set.

Now, for the GIVEAWAYS!

This week for our Giveaways, we are giving away TWO STAMP SETS so we will have TWO WINNERS NEXT WEEK!!

First we are giving away the

A Creative Journey with Melissa Tie Die and Splatter Stamp Set

Next we are giving away the

A Creative Journey with Melissa Spring and Summer Holiday Celebrations Stamp Set

To qualify to win, you must be BOTH:

A public follower on YouTube, subscribe to our mailing list/blog posts and you may also comment on this blog post for an additional entry to win! Winners will be announced next week on our Mondays with Melissa blog post!

If you do not contact me within two weeks of the announcement of winning, you will forfeit your prize. Thank you for your understanding.

NOTE: Be sure you are subscribed with matching names. If I am unable to match you with your subscription to both the email list and the YouTube Channel, you will miss your chance to win a prize. If I can’t decipher if you are a matching subscriber (if your profile doesn’t show publicly who you subscribe to) and I can’t confirm you have subscribed to both, I won’t be able to enter you in for the prize. **DO NOT COMMENT WITH YOUR ENTIRE EMAIL ADDY. Only give me the first 6 NOT INCLUDING YOUR HOST. Just enough for me to match your name will work perfectly.

 For last weeks giveaway of the Oxford Cuttlebug Embossing Folder

Heather W. is the winner!

Heather W., please send me your contact information via contact page on our website, which post you are a winner from and I will get your certificate prize out to you! Thank you so much for being a YouTube follower and subscribing to our mailing list/blog posts!

We hope you enjoyed our Tie Dye and Splatter Fathers Day Card! Have a wonderful week and thank you for going on A Creative Journey with Melissa.  

GO GREEN CRAFTS! Alcohol Markers and Packaging for an Embellishment

Who doesn’t like GO GREEN CRAFTS? I love to find uses for otherwise thrown out items or to repurpose items too. In this tutorial we will color with Chameleon Alcohol Markers and will reuse packaging material for an embellishment on a Father’s Day card. Whether you like to learn by video or pictorial, we have you covered!  This tutorial will open up a HUGE MOUNTAIN of ideas and we hope you share what you do! Let’s get rollin’!

Here are the supplies you will need to create this card:

 2 1/2″ Round Clear Stamp Block

Decorative Paper

Card Base

Paper to Stamp Sentiment on

Spring and Summer Holiday Celebrations Stamp Set

Adhesive

White Twine

Scissors

Punch

Manual Die Cut Machine (sizzix)

Die and Platforms

Chameleon Primary Tones Alcohol Markers

Clear Recycled Packaging

Foam Squares

Ink

supplies text

Take your recycled packaging material, die, manual die cut machine and platforms out.  Place your recycled plastic material on the die where you want it to cut.

place material on die

Run the die through the machine with appropriate platforms. Take out the die cut piece for your creation.

die cut material

Take your crimson red out of your primary pack of Chameleon Markers. Color the recycled piece of plastic. Set aside to dry.Color plastic material

Take our your card base, adhesive and decorative paper. Place adhesive on the back of the decorative paper and adhere it to the base card. Set aside.
adhere decorative paper to card base

Take out your stamps, ink, stamp block and paper.

take out stamps

Place stamp on the block and ink your stamp.

ink your stamp

 Stamp your sentiment on your paper. Take your punch out and punch out your sentiment. Set it aside.

punch out sentiment

Take your twine and wrap it around your colored embellishment three times. Tie the twine in a knot. Trim excess twine.

wrap twine and cut Colored material

Take foam squares and place them on the back of the punched out sentiment. Adhere to the front of the colored embellishment.

Place foam squares on sentiment and adhere to colored embellishment

Turn over the colored embellishment and place foam squares on the back of the embellishment. Be sure to take care when placing the adhesive squares so that it doesn’t show through on your creation.

apply foam to the back  behind sentiment

Adhere the embellishment to your card base.

adhere embellishment

Your card is complete! Below are the examples of how your coloring can change the look of the card. One has more coloring than the other. I am not sure which one I like better. How about you?

Thank you for joining us today. We hope you enjoyed this tutorial and it opens up the options of what you can do with alcohol makers. You can use alcohol markers to color any non porous surface such as glass, plastic and even metal. You can also use them on porous surfaces like wood. Try different things and be sure to let us know what you think and share your project!

melissa-written-signature