Explosion Mini Scrapbook Part 1
Explosion Mini Scrapbook Part 1 is what we have for you today. I love to create items for loved ones and this is a great way to give a gift from the heart! Once you create one.. You will be obsessed.. I apologize now! LOL Let’s get started!

The first lesson I have learned from creating these is DO NOT USE WIRED RIBBON for your closure. It falls apart as you can see.

This is the front of the Explosion Mini Scrapbook Part 1.

Here is the side view of the Explosion Mini Scrapbook. I will be showing you step by step how the Explosion Mini Scrapbook opens up and OH MY the possibilities!

As you can see it starts to unfold and you can see the added decor inside the Explosion Mini Scrapbook Part 1.

This is the inside of the Explosion Mini Scrapbook Part 1. I love the colors and decor and how it coordinates with the whole project.

Here is the left side of the Explosion Mini Scrapbook Part 1.

This is the middle of the Explosion Mini Scrapbook Part 1.

Here is the right side of the Explosion Mini Scrapbook Part 1.

This is the back of the Explosion Mini Scrapbook Part 1. You have so many places to put journaling and pictures!

Today, we are showing you how to create the front and back covers for your Explosion Mini Scrapbook. This is the front side of your covers.

This is the inside of the cover.

I started with a 5.5″ square piece of mat board. I purchased this at Aaron Brothers which now has been bought out by Michael’s in my area. You can use chip board but I would suggest you use a thicker piece to ensure durability.

Measure your decorative paper one inch larger than your mat board. This paper is 6.5″ square.

Apply adhesive to your at board.

Place your mat board onto the paper centered.

Using your sturdy work surface, fold your paper on the corners of the mat board.

This is what it will look like when you do one side. Repeat for all four sides.

Once you have folded in all four sides, cut a triangle off the corners. This will give you a cleaner edge for the corners.

Apply adhesive to the paper and to your mat board to ensure adhesion.

Fold your paper and press the adhesive to the mat board. Repeat for the opposite side.

Cut all four corners of the paper on the non adhered paper.
You need to cut them like this.

Trim off the triangle as shown.

Fold in your paper as shown above.

Apply adhesive to the paper and mat board. Press the paper firmly onto the mat board. This is what it looks like once it is done.

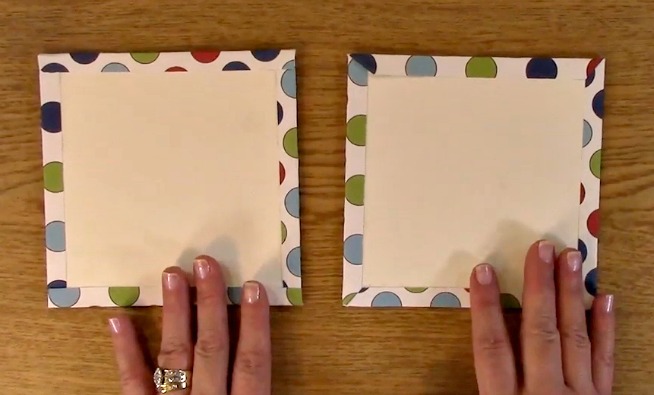
Here I have done the edges two ways. Beveled edge or the square edge. I really don’t have a preference besides they are going to be covered by the inside paper anyway so it really is your preference.

This is a close up of the beveled edge.

If you want to have the beveled edge, you can do this by trimming off a triangle from the paper as shown above.

Here is a close up of both corners. Which do you like best?

Here is the completed front and back covers! Are you excited for the next video? Be sure to stay tuned where I show you how to cover these covers with clear shelf liner… YES I FINALLY REMEMBERED WHAT IT IS CALLED!! LOL

For this weeks giveaway, we are giving away $15 credit to our store!

For last weeks giveaway, we are giving out Words of God stamp set!
The winner is Jensie.
Please be sure that you send me a message letting me know which post you won on and your contact info and I can get your prizes out to you!
Winners, please send me an message HERE and I will get your prize out to you!
For all of our giveaways including this one, in order for you to qualify for an entry to win, you would need to be a follower on YouTube, subscribe to our mailing list/blog posts (found on our blog page) and you may also comment on this blog post for an additional entry to win! When you subscribe, you will receive an e-mail on Mondays with our latest blog post. BE SURE TO READ IT to check to see if you are a winner EVERY WEEK. If you do not contact me within two weeks of the announcement of winning, you will forfeit your prize. NO EXCEPTIONS. Thank you for your understanding.
NOTE: If you are subscribed with two different names and I am unable to match you with your subscription to the blog and the YouTube Channel, you will be ineligible to win as I can’t decipher if you are a matching subscriber to both. Thank you for your understanding.
We hope you will subscribe to our YouTube Channel, Blog/Newsletter updates and check out our website!
As always, we appreciate your visit and we hope you enjoyed going on A Creative Journey with Melissa.


