Tag Archive for: Mondays with Melissa

Chameleon Pen Colored Wedding Card

Chameleon Pen Colored Wedding Card is what we have for you today! I love creating cards and love even more to give them! I love having a lovely card to give but sometimes time isn’t in the cards so to speak … Yes pun intended.. LOL This is why I like to create CAS – Clean and Simple cards. You can get the look of an elegant handmade card that only takes minutes! Ready to get CREATIVE? Let’s do this!

Supplies for Chameleon Pen Colored Wedding Card Project

A Creative Journey with Melissa Wedding and Celebrations Stamp Set

Acrylic Stamp Blocks

Gelly Roll Star Dust Glitter Pen

Chameleon Pen NU1

Corner Rounder

Black Ink

Card Base

Mat

Paper to stamp sentiment on

Adhesive

Scissors (optional)

Twine (optional)
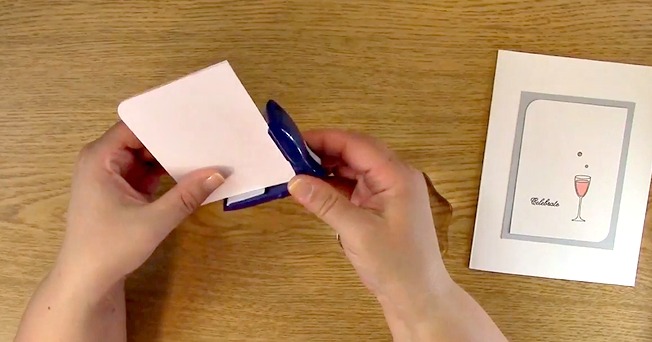
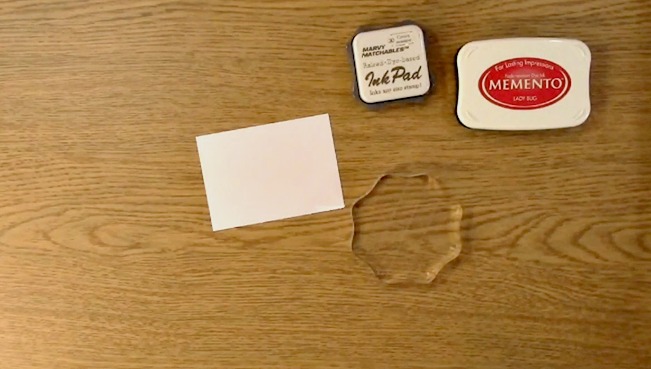
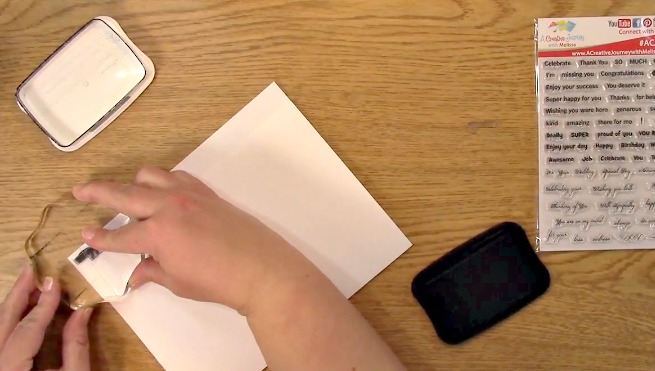
Take out your paper to be stamped on. Using the corner rounder, round the corners of only two sides.  I chose the opposite sides as shown.

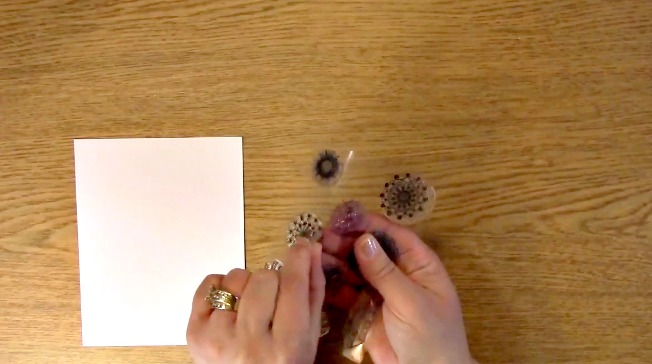
Take out your A Creative Journey with Melissa Wedding and Celebrations Stamp Set. Place the glass along with two of the bubbles.

Ink your stamps for the Chameleon Pen Colored Wedding Card.

Stamp your images on your paper as shown above.

.

Place your sentiment on your stamping block. Ink your sentiment and stamp your sentiment on your paper.

This is what it will looked like once stamped.

Take out your NU1 Chameleon Pen to get ready to color your Chameleon Pen Colored Wedding Card.
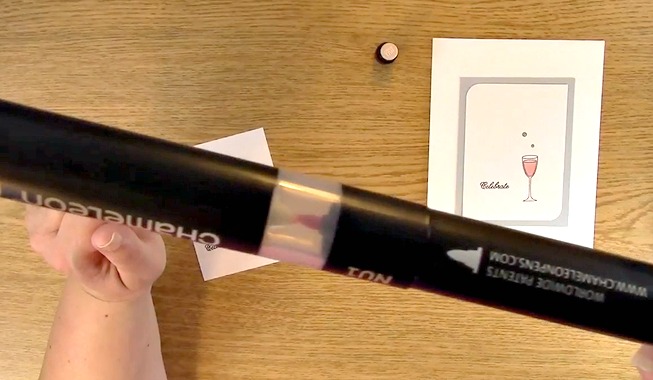
Remove off your pen cap from the bullet nib side. Take off the cap from the blending solution chamber. Place your blending solution top on to the pen so the nibs are touching as shown above.

Wait approximately 5-10 seconds with the pen upright. This will allow the blending solution to combine with the pigment side.

For your Chameleon Pen Colored Wedding Card, color the area where you want it lightest first. I chose the top part of the liquid. Be sure to fill in the color completely. Using a flicking motion upward from the bottom of the liquid, I colored to show the bottom was a little bit darker in color.
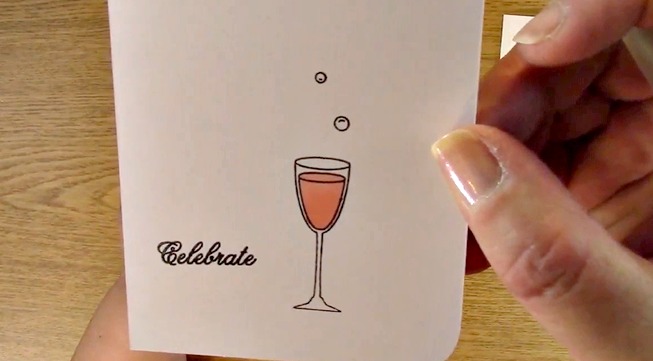
This is what it looks like once I finished coloring the liquid.

Take out your Star Dust Gelly Roll Pen. Here I have colored in one of the bubbles to show you the difference between the coloring and not. I prefer it with the glitter, what do you think?

I colored both bubbles in with the glitter pen. Now, take out your adhesive and place adhesive and apply adhesive to the card mat. Do this in case your gelly roll glitter is still wet. Place your stamped and colored image paper onto the mat. Be sure it has adhered.

Apply adhesive to the card base and adhere the mat. This is what it looks like once this is done. If you notice, I changed the design a little bit from my first example. I moved the mat and image to the right bottom corner.

I also got an idea to add a little silver and white twine to the side of the card. Thought I would dress it up a little. I wrapped the twine around the card three times and tied a bow.

Trim off the excess twine.

Here are your finished cards! Both CAS but one with a little extra sparkle!

For this weeks giveaway we are giving away the A Creative Journey with Melissa Wedding and Celebrations Stamp Set

Winners announced next week so be sure to check back!

To qualify to win, you must be BOTH:

A public follower on YouTube, subscribe to our mailing list/blog posts and you may also comment on this blog post for an additional entry to win! Winners will be announced next week on our Mondays with Melissa blog post!

BE SURE TO check to see if you are a winner EVERY WEEK. If you do not contact me within two weeks of the your name being picked, you will forfeit your prize. Thank you for your understanding.

Subscribe to BOTH with MATCHING NAMES to be eligible. If I am unable to match you with your subscription to both the email list and the YouTube Channel, you will miss your chance to win a prize. If I can’t decipher if you are a matching subscriber (if your profile doesn’t show publicly who you subscribe to) and I can’t confirm you have subscribed to both, you will not be eligible.
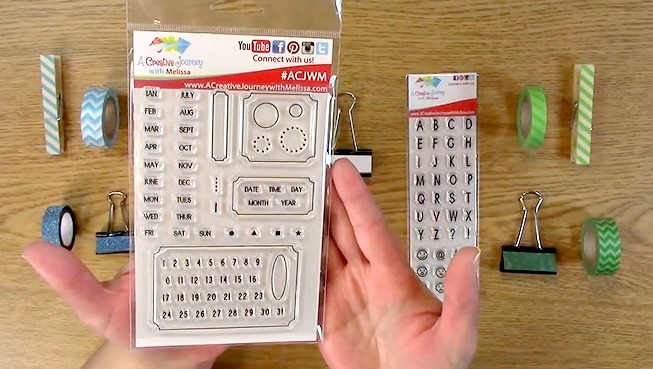
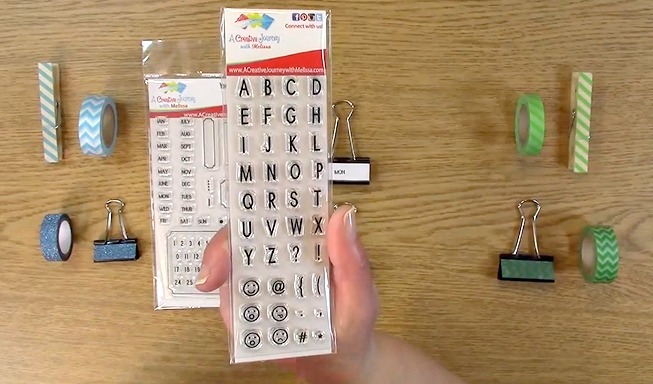
For last weeks giveaway we are giving away the A Creative Journey with Melissa A Date to Remember Stamp Set to Rita W

and the A Creative Journey with Melissa Everyday Alphabet Uppercase and Emoticon stamp set to Lisa B!

Winners, please send me your contact information via contact page on our website, which post you are a winner from and I will get your prize out to you! Thank you so much for being a YouTube follower and subscribing to our mailing list/blog posts!

Thank you for joining us for the Handmade Love Card for ANY COUPLE Project. I hope I have inspired you to organize yourself even if in just a small way! BE SURE TO CHECK BACK TO SEE IF YOU ARE A WINNER!

Have a wonderful week and thank you for going on A Creative Journey with Melissa.

DIY Dollar Store Planner Journal Organizational Clips

DIY Dollar Store Planner Journal Organizational Clips is what we have for you today. What better way to get organized for the New Year than to create your own clips to get organized with crafty dollar store finds! I love to create new things that inspire me. January usually inspires resolutions, organization, and creativity. What better way to be creative but combine the two!

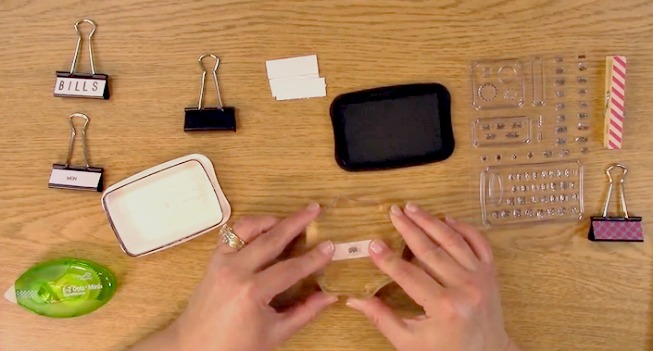
Supplies Needed for the DIY Dollar Store Planner Journal Organizational Clips

A Creative Journey with Melissa A Date to Remember Stamp Set

A Creative Journey with Melissa Everyday Alphabet Uppercase and Emoticon

Acrylic Stamp Block

White paper to stamp on

Scissors

Paper Trimmer

Binder Clips from Dollar Store

Clothes Pins from the dollar store

Washi Tape from my stash

Adhesive

Ink

Here is a sample of the DIY Dollar Store Planner Journal Organizational Clips we will be creating with washi tape.

If you aren’t familiar with washi tape, washi tape is a thin paper tape that is removable and super easy to work with! You can even rip it with your fingers!

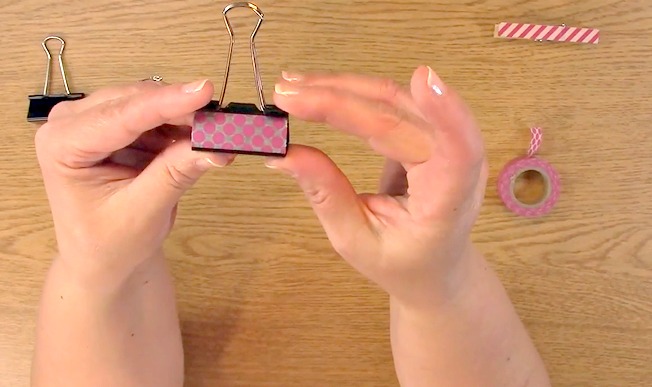
Here is a close up of one of the clips and how simple and easy it can be to create!

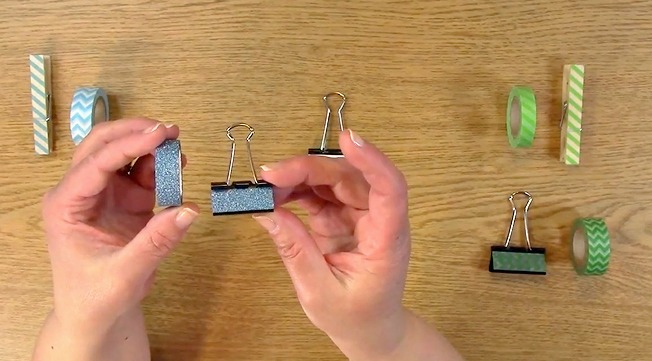
This is what I got at the dollar store… It cost me $3.00 plus tax and I had enough to create 56 DIY Dollar Store Planner Journal Organizational Clips! HOW AWESOME IS THAT!

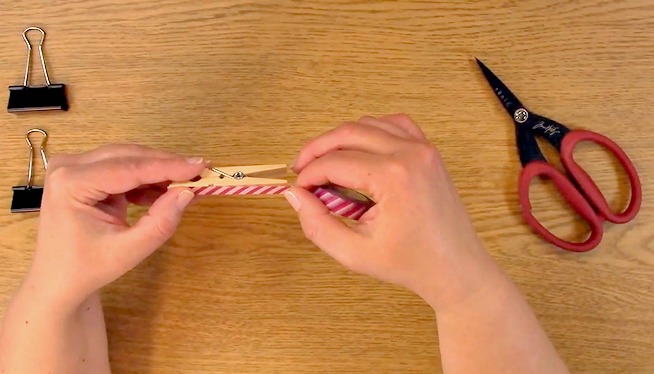
For the clothespin clip I used a thinner washi tape. It just so happen to fit perfectly on this clothespin size!

Here is a close up using the washi tape of the first DIY Dollar Store Planner Journal Organizational Clips.

It is super simple to use the washi tape and you can just rip it with your fingers. It also is super easy to remove and place back on!

Here is the side profile of the DIY Dollar Store Planner Journal Organizational Clips with washi tape.

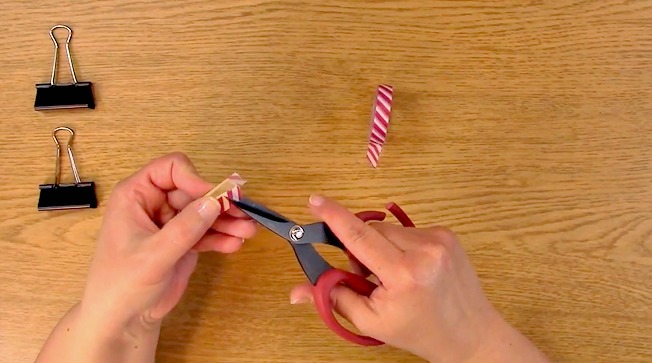
Use your scissors and trim so the edges are even for your DIY Dollar Store Planner Journal Organizational Clips.

Now you will place your washi tape on the other side and rip off the excess.

Use your scissors to trim off the excess more precisely.

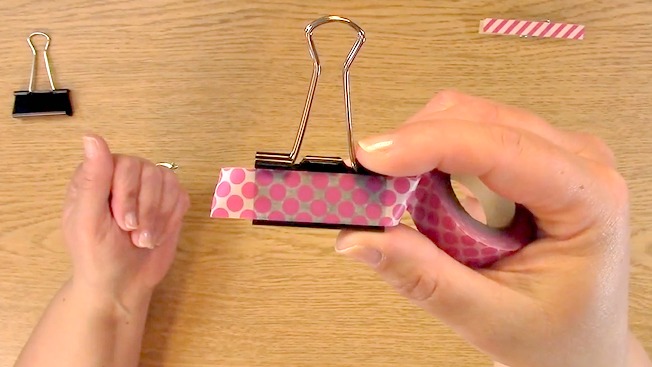
Take out your binder clips and your washi tape. Be sure that the washi tape fits well on the binder clip and use the best size fit for the look you are creating it for.

Place your washi tape on your binder clip as shown above. Rip off the side. leaving a little bit excess.

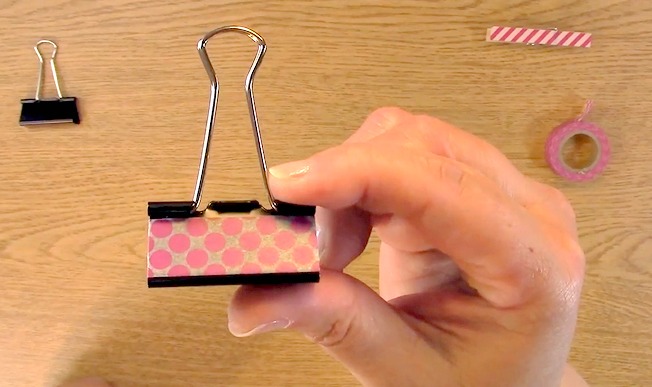
If you slowly rip off the sides of the tape using the binder clip, you can get a really nice finish.

It doesn’t always work perfectly as you can see but it was still usable so I kept it.

If you aren’t sure or want to be sure, just use your scissors for a more precise trim.

Now we are going to create some binder clips with stamps using the A Creative Journey with Melissa A Date to Remember Stamp Set and the A Creative Journey with Melissa Everyday Alphabet Uppercase and Emoticon stamp set.

Take out your stamp block, Jan stamp and ink. Place your stamp on your block and ink. Ink your stamp.

Stamp Jan on your paper for your DIY Dollar Store Planner Journal Organizational Clips.

The first time I stamped Jan, I pushed too hard so it was a bit blurry. I turned over my paper and re-stamped on the other side and pushed a bit lighter and it came out perfect as you can see above.

Take out your A Creative Journey with Melissa Everyday Alphabet Uppercase and Emoticon stamp set.  Take off your M A I L stamps off of your stamp sheet. Place them on your block and ink your stamps.

Stamp your word MAIL on your paper. Apply adhesive to the back of the paper and adhere to your binder clip.

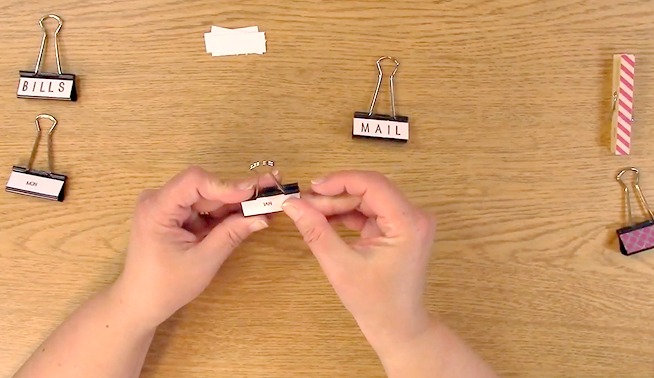
Place adhesive on the back of your JAN paper and apply to a binder clip to add to your DIY Dollar Store Planner Journal Organizational Clips!

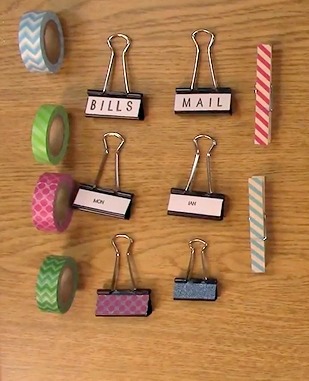
Here are some of the clips I have created! Super simple, inexpensive and will help you organize! ITS A TRIPLE WIN!

For this weeks giveaway we are giving away the A Creative Journey with Melissa A Date to Remember Stamp Set

and the A Creative Journey with Melissa Everyday Alphabet Uppercase and Emoticon stamp set. Winners announced next week so be sure to check back!

To qualify to win, you must be BOTH:

A public follower on YouTube, subscribe to our mailing list/blog posts and you may also comment on this blog post for an additional entry to win! Winners will be announced next week on our Mondays with Melissa blog post!

BE SURE TO check to see if you are a winner EVERY WEEK. If you do not contact me within two weeks of the your name being picked, you will forfeit your prize. Thank you for your understanding.

Subscribe to BOTH with MATCHING NAMES to be eligible. If I am unable to match you with your subscription to both the email list and the YouTube Channel, you will miss your chance to win a prize. If I can’t decipher if you are a matching subscriber (if your profile doesn’t show publicly who you subscribe to) and I can’t confirm you have subscribed to both, you will not be eligible.

For last weeks giveaways we are giving away the A Creative Journey with Melissa I Just Love You stamp set.

 THE WINNER IS  Jessica M

Jessica M, please send me your contact information via contact page on our website, which post you are a winner from and I will get your prize out to you! Thank you so much for being a YouTube follower and subscribing to our mailing list/blog posts!

Thank you for joining us for the Handmade Love Card for ANY COUPLE Project. I hope I have inspired you to organize yourself even if in just a small way! BE SURE TO CHECK BACK TO SEE IF YOU ARE A WINNER!

Have a wonderful week and thank you for going on A Creative Journey with Melissa.


Handmade Love Card for ANY COUPLE

Handmade Love Card for ANY COUPLE is what we have for today. Our A Creative Journey with Melissa I Just Love You Stamp Set can cover any configuration of love for your card including Female & Male, Female & Female, Male and Male or any variation you choose to celebrate.

Supplies Needed for the Handmade Love Card for ANY COUPLE Project

A Creative Journey with Melissa I Just Love You stamp set

Acrylic Stamp Block

Red Ink

Gray Ink

White card base

Gray Card Mat

Red Mat for stamped images

Paper to stamp images and sentiment on

White Twine

Scissors

To start, take out your gray ink, white paper and stamp block. Choose the stamp images from your A Creative Journey with Melissa I Just Love You stamp set.

For the Handmade Love Card for ANY COUPLE Project video I chose a female and female for my best friends that have gotten engaged! I am so excited for them! This stamp set is super versatile for any couple!

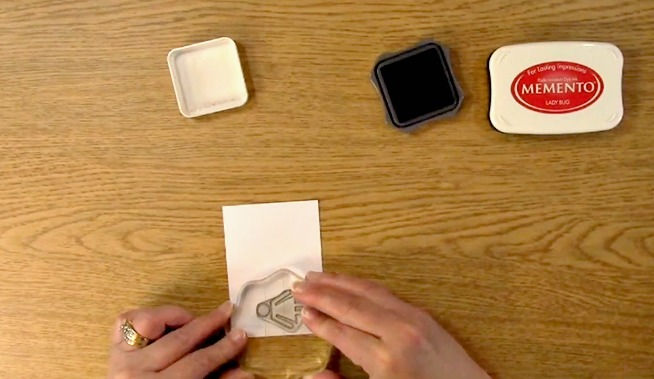
Ink your female image with the gray ink. Stamp as shown above.

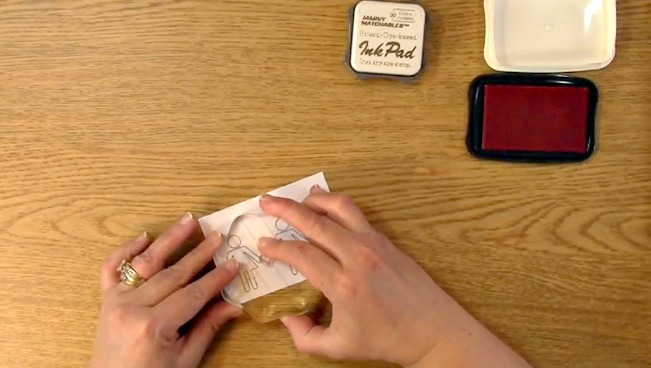
Place ink on your female image again. Stamp next to your other stamped image leaving room for a heart by the hands.

Clean off your stamp and place back on your sheet. Take out your heart image and ink it with red ink. Stamp the heart in between the hands as shown above.

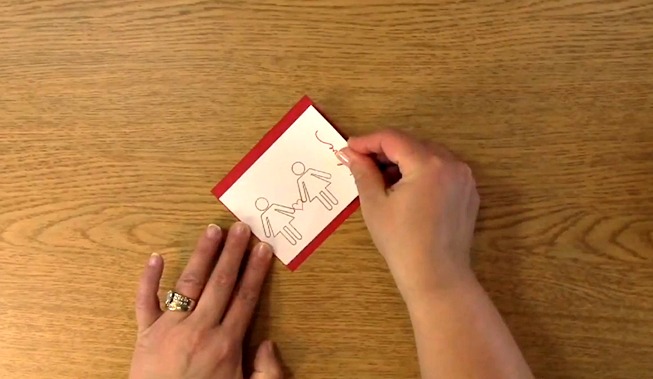
Ink the love sentiment with red ink. Stamp the sentiment on the side of the women images as shown.

This is what it will look like once the stamping has been completed. Place adhesive on the back of the stamped paper.

Adhere your paper to the red mat.

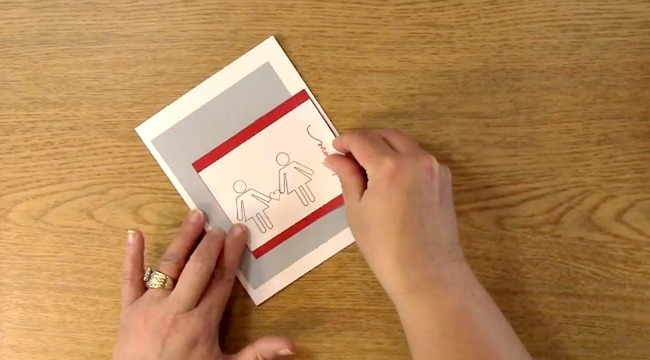
Take out your white card base and your gray mat. Place adhesive on the back of the gray mat and adhere to the card base.

Put adhesive on the back of your red paper and images. Adhere to the gray mat on your card base.

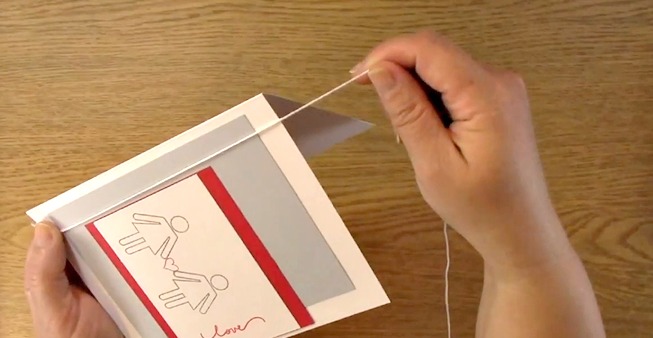
Take out your white twine. Wrap it around your card three times.

Tie a bow with the twine and trim off the excess.

Adjust the twine on  your card as you wish.

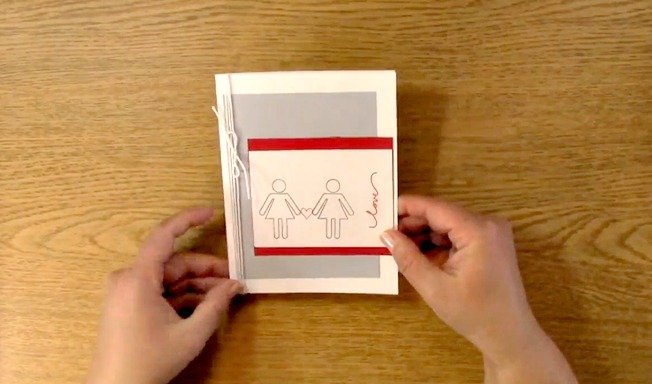
This is what the Handmade Love Card for ANY COUPLE Project looks like completed.

Cards are complete!

For this weeks giveaway we are giving away the A Creative Journey with Melissa I Just Love You stamp set. Winners announced next week so be sure to check back!

To qualify to win, you must be BOTH:

A public follower on YouTube, subscribe to our mailing list/blog posts and you may also comment on this blog post for an additional entry to win! Winners will be announced next week on our Mondays with Melissa blog post!

BE SURE TO check to see if you are a winner EVERY WEEK. If you do not contact me within two weeks of the your name being picked, you will forfeit your prize. Thank you for your understanding.

Subscribe to BOTH with MATCHING NAMES to be eligible. If I am unable to match you with your subscription to both the email list and the YouTube Channel, you will miss your chance to win a prize. If I can’t decipher if you are a matching subscriber (if your profile doesn’t show publicly who you subscribe to) and I can’t confirm you have subscribed to both, you will not be eligible.
 For last weeks giveaways we are giving away the

A Creative Journey with Melissa I Just Love You stamp set.

 THE WINNER IS   Marybeth

Marybeth, please send me your contact information via contact page on our website, which post you are a winner from and I will get your prize out to you! Thank you so much for being a YouTube follower and subscribing to our mailing list/blog posts!

Thank you for joining us for the Handmade Love Card for ANY COUPLE Project. I hope I have inspired you to organize yourself even if in just a small way! BE SURE TO CHECK BACK TO SEE IF YOU ARE A WINNER!

Have a wonderful week and thank you for going on A Creative Journey with Melissa.

I Just Love You Gift Card Holder

I Just Love You Gift Card Holder is what we have for you today. I realize we just barely celebrated the new year and now I am talking about Valentine’s Day. If you have watched any of my recent videos I am clearly on a gift card holder kick. I thought what better way to continue the trend than to create one for a loved one!

Supplies Needed for the I Just Love You Gift Card Holder Project

A Creative Journey with Melissa I Just Love You stamp set

Acrylic Block

Tag Die

Paper for Tag

Paper for Hole on tag

Card Base Paper

Card Mat Paper

Red and Gray Ink

Adhesive

Tim Holtz Die

Sizzix Die Cut Machine

Scissors

First, take out your Tim Holtz Sizzix Die TAG & BOOKPLATES Movers And Shapers Die #656938.

Cover the Tag part of the die with white and cover the hole reinforcement die area with red.

Here is a close up of the paper that is needed for the I Just Love You Gift Card Holder Project.

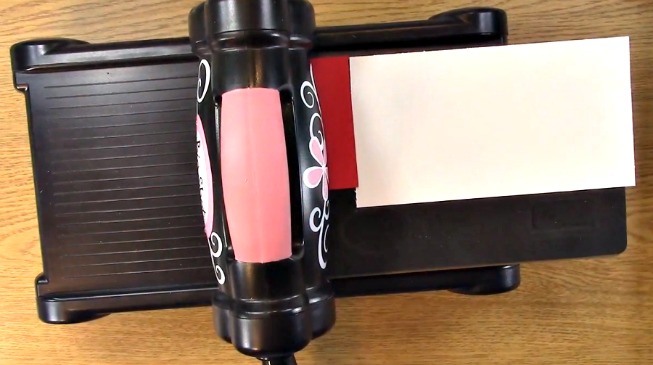
Place your die with the paper on top of your clear platform on your Sizzix Die Cut Machine.

Run your die through your die cut machine.

The tag and hole protector is what you will need for your I Just Love You Gift Card Holder Project.

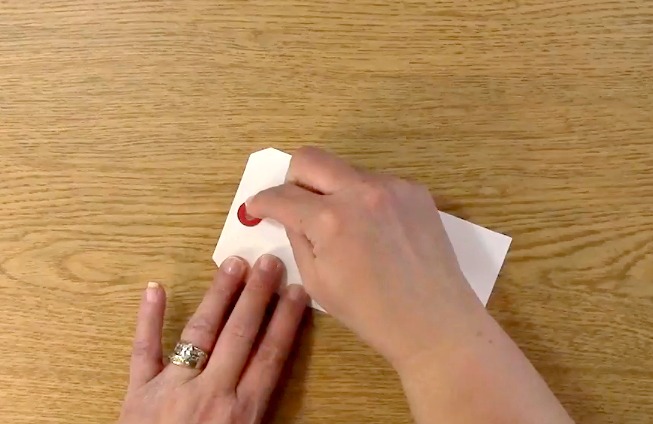
Add adhesive to the back of the hole protector and place on the die cut tag.

Take out your A Creative Journey with Melissa I Just Love You stamp set.

Remove the stamps you need for the I Just Love You Gift Card Holder Project.

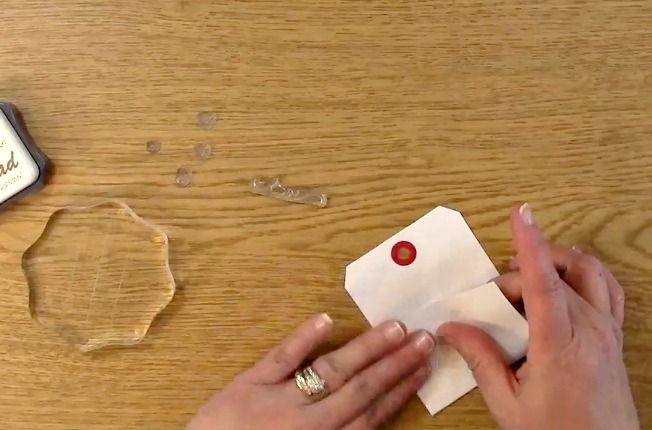
Fold your tag die up from the bottom 2.25″ as shown.

Add adhesive to the left and right side of the folded area of the tag.

Press the adhesive down on both sides to ensure adhesion for gift card placement.

Stamp the love sentiment on the folded up part of the tag as shown above.

Stamp hearts around the sentiment for decor as you feel necessary.

This is what the stamping looks like once it has been completed.

Take out the card base and mat for your I Just Love You Gift Card Holder Project. Apply adhesive to the back of the card mat.

Adhere card mat to the card base.

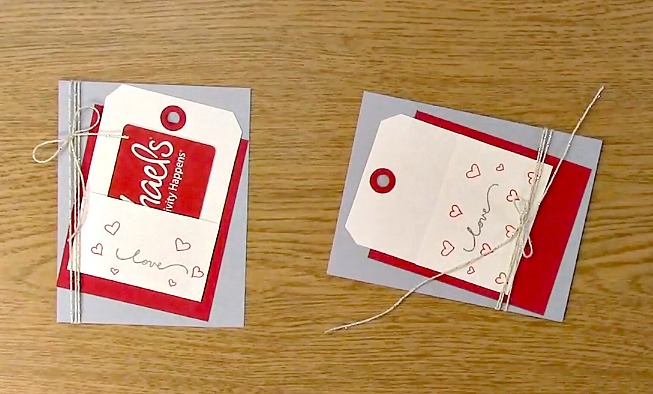
Apply adhesive to the back of the gift card holder tag. Adhere the tag to your card mat as shown.

Take out your twine. I used twine with a little bit of silver for a bit of bling for the creation. Wrap your twine around your project. I wrapped it three times.

Tie a bow on your I Just Love You Gift Card Holder Project and cut off the excess twine. Adjust your twine on your creation as you prefer.

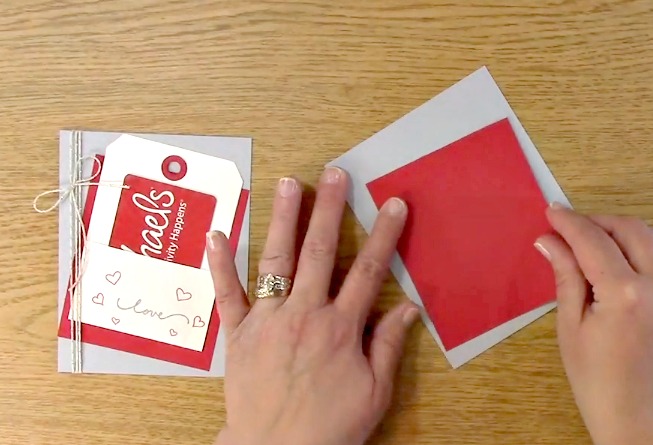
I Just Love You Gift Card Holder Project is complete!


For this weeks giveaway we are giving away the A Creative Journey with Melissa I Just Love You stamp set. Winners announced next week so be sure to check back!

To qualify to win, you must be BOTH:

A public follower on YouTube, subscribe to our mailing list/blog posts and you may also comment on this blog post for an additional entry to win! Winners will be announced next week on our Mondays with Melissa blog post!

BE SURE TO check to see if you are a winner EVERY WEEK. If you do not contact me within two weeks of the your name being picked, you will forfeit your prize. Thank you for your understanding.

Subscribe to BOTH with MATCHING NAMES to be eligible. If I am unable to match you with your subscription to both the email list and the YouTube Channel, you will miss your chance to win a prize. If I can’t decipher if you are a matching subscriber (if your profile doesn’t show publicly who you subscribe to) and I can’t confirm you have subscribed to both, you will not be eligible.
For last weeks giveaways we are giving away both the A Creative Journey with Melissa Sentiments for All Occasion Stamp Set 

and the A Creative Journey with Melissa Everyday Alphabet Upper Case and Emoticon

 THE WINNERS ARE   Eileen F and KT Fit Kitty

Winners, please send me your contact information via contact page on our website, which post you are a winner from and I will get your prize out to you! Thank you so much for being a YouTube follower and subscribing to our mailing list/blog posts!

Thank you for joining us for the I Just Love You Gift Card Holder Project. I hope I have inspired you to organize yourself even if in just a small way! BE SURE TO CHECK BACK TO SEE IF YOU ARE A WINNER!

Have a wonderful week and thank you for going on A Creative Journey with Melissa.

SUPER EASY – Organizing Handmade Cards on a Budget

Currently I am an organized mess but am looking to improve that and soon! One of the things that I do is create numerous cards. I don’t really have a great sorting or organizational system that has worked well so I started thinking… Thinking… I know it’s a scary thought but someone has to do it. I don’t like to spend excess money to organize so I thought what would be the best way to organize on a budget? This is what I came up with.

It’s fast, inexpensive and best of all you probably have all of the items or the like in your home right now!

Supplies Needed for the SUPER EASY – Organizing Handmade Cards on a Budget Project

A Creative Journey with Melissa Sentiments for All Occasions Stamp Set

Acrylic Stamp Block

Stampin’ Up! Paper Trimmer with scoring and cutting blades

Black Ink

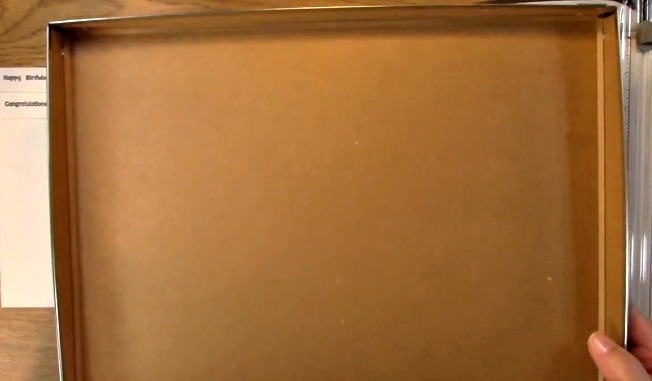
Before we get started on the SUPER EASY – Organizing Handmade Cards on a Budget Project, I wanted to let you now a few things I am using in this video. I use the Ikea boxes to store my cards. They weren’t really organized but at least they were stored. Figured I was at least a quarter of the way there! We call that progress. The boxes come flat and you put them together if I remember correctly.

The cool thing about these besides the large size is that you can decorate them with the kraft paper looking box. It’s a cool way to get crafty and you could also use these as memorabilia boxes. I am not sure if you can still get them however you can use regular photo boxes that you can purchase at stores as well.

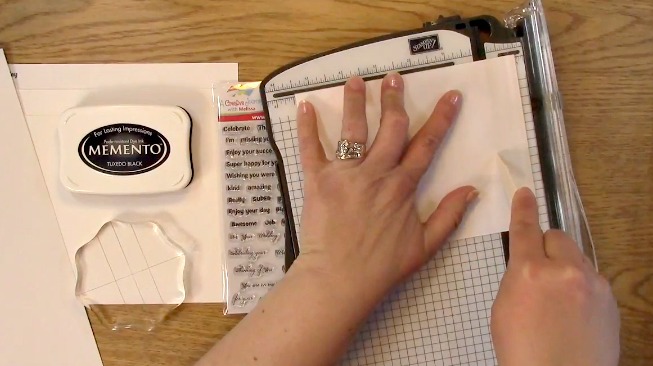
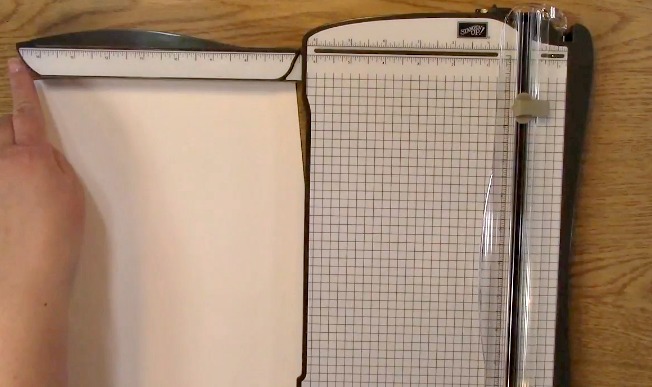
Even if you don’t have a Stampin’ Up! Trimmer and have a trimmer in your tools, you can still use it to score paper if you have a bone folder, embossing tool or a dull pointer. Measure where you want to score your paper using the trimmers measurements. You can see where the score line will go because it is where the crevasse is. Press the bone folder or tool of choice and slide it down with pressure. Don’t be too forceful or you will rip the paper.

Once folded, you will have the same result as if you used a scoring blade. You can also use a straight edge and a dull knife too. An easy fix for those on a budget!

While I am thinking about it, I also wanted to show you how the back of the Stampin’ Up! paper trimmer and many others out there as well. It has a swing arm underneath that you can pull out to measure those larger papers. Perfect for me and the scrapbooking I do!

The other awesome thing about this trimmer is that it doesn’t just measure to 12″ which is a problem for people like me that scrapbook in 12 x 12 sizes. It goes past 14″! AWESOME, right?!

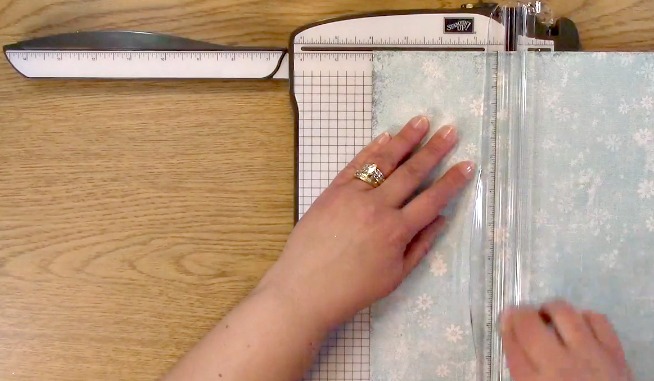
To get started on the SUPER EASY – Organizing Handmade Cards on a Budget Project, take out your 12.’ 25″ x 8.5″paper and your paper trimmer. Score your paper at 5 3/4″. If your paper is larger or smaller, add or subtract the same difference from my measurements to get the same result.

This is what the scored line looks like from the paper trimmer.

Fold along the scored line. Repeat for however many folders you will need for your SUPER EASY – Organizing Handmade Cards on a Budget Project.

This is a sample of what we will be making.

I really like the folder idea to store your cards. This way if you are looking for a certain themed card, you can pull it out and thumb through them to find which one you are looking for.

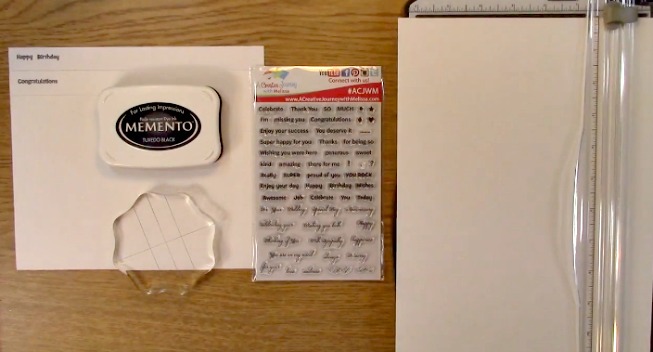
Take out your A Creative Journey with Melissa Sentiments for All Occasions Stamp Set, Acrylic Stamp Block, paper and ink.

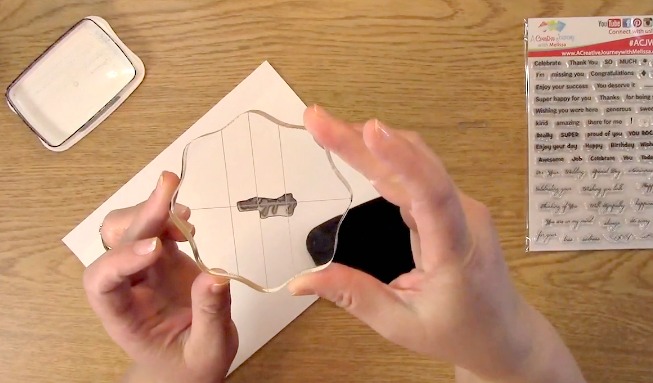
Pick the sentiment that best fits what you would like to have for a folder from your stamp set and place it on your stamp block.

You may notice that the stamp has some stain on it. This will not effect the integrity of the image of the stamp or sentiment. Sometimes I forget to clean my stamps when I am doing a project which can cause this along with using different types of more permanent ink.

Ink your sentiment and stamp your sentiment.

If you notice, the stamped sentiment is clean and clear without any issue and will continue to be.

When you are done you are SUPPOSED to clean off your stamps. I use the stampin up stamp cleaner and scrub pad. Honestly products I have used for numerous years and have continued to on my own stamps.. when I remember.

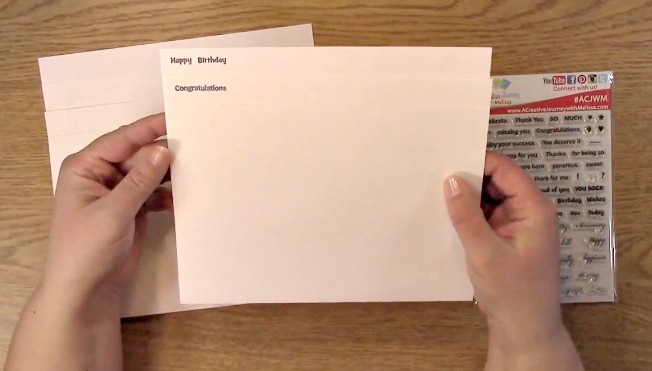
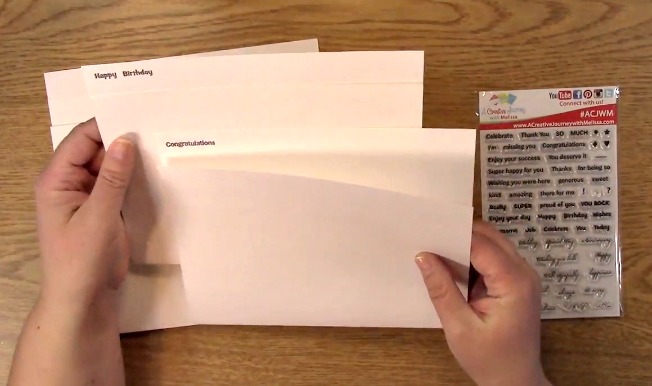
When I get my stamps, I also store the in envelopes. I write the name on the top and store them in alphabetical order. Having the ability to be able to carry them around in a small box and not have to worry about binders is something I prefer. This also works great for me when I go to crops.

Now, we are going to stamp the second sentiment for our SUPER EASY – Organizing Handmade Cards on a Budget Project. Place your stamp on the stamp block and ink.

Stamp your file folder with the sentiment you have chosen.

This is what the second stamped sentiment looks like. Works great! I realize this is probably just the beginning of your list of folders you may want to make but you can get it done! I believe in both of us!

For this weeks giveaways we are giving away both the A Creative Journey with Melissa Sentiments for All Occasion Stamp Set 

and the A Creative Journey with Melissa Everyday Alphabet Upper Case and Emoticon

Winners announced next week!

To qualify to win, you must be BOTH:

A public follower on YouTube, subscribe to our mailing list/blog posts and you may also comment on this blog post for an additional entry to win! Winners will be announced next week on our Mondays with Melissa blog post!

BE SURE TO check to see if you are a winner EVERY WEEK. If you do not contact me within two weeks of the your name being picked, you will forfeit your prize. Thank you for your understanding.

Subscribe to BOTH with MATCHING NAMES to be eligible. If I am unable to match you with your subscription to both the email list and the YouTube Channel, you will miss your chance to win a prize. If I can’t decipher if you are a matching subscriber (if your profile doesn’t show publicly who you subscribe to) and I can’t confirm you have subscribed to both, you will not be eligible.

For last weeks giveaways we are giving away a $15.00 store credit to our store! The winner is Janie R!

         Janie, please send me your contact information via contact page on our website, which post you are a winner from and I will get your prize out to you! Thank you so much for being a YouTube follower and subscribing to our mailing list/blog posts!

Thank you for joining us for the SUPER EASY – Organizing Handmade Cards on a Budget Project. I hope I have inspired you to organize yourself even if in just a small way! BE SURE TO CHECK BACK TO SEE IF YOU ARE A WINNER!

Have a wonderful week and thank you for going on A Creative Journey with Melissa.


DIY Planner, Card or Photo Holder

MERRY CHRISTMAS and HAPPY HOLIDAYS! DIY Planner, Card or Photo Holder is what we have for you today.  This is the perfect project for you to create to tuck in your purse, backpack or briefcase. With all of the pictures you take from the holidays, this would be a great way to send those wonderful memories to your friends and loved ones. EASY RIGHT? Let’s get started!

This is our project we are going to create. Super simple and cute as well as versatile!

Supplies Needed for the DIY Planner, Card or Photo Holder Project

12 x 12″ piece of paper (I used double sided card stock)

Stampin Up Paper Trimmer with Scoring Blade

Scissors

Coordinating Ribbon

Bone Folder

Take out your decorative paper and paper trimmer.

Line up your paper to 4″ on the paper trimmer.

Score your paper at 4″ with your scoring blade.

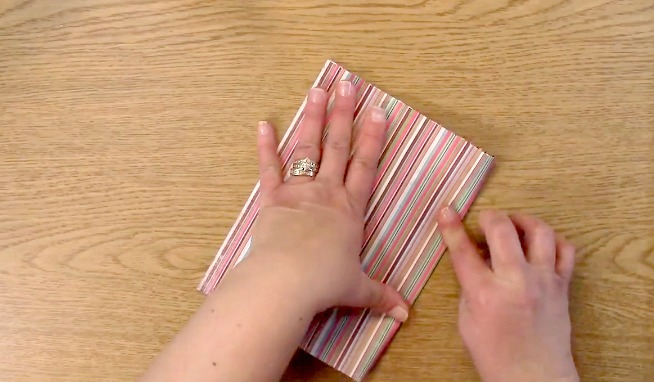
Take your paper out from the trimmer and fold at the score lines.

Pull out your bone folder.

Using your bone folder, push down on the crease to ensure a crisp fold on your DIY Planner, Card or Photo Holder Project.

You can then either turn your paper 1/4 of the way and score your paper at 6″ or you can just fold your paper in half as shown above.

Once again, use the bone folder and press down on the fold to ensure a good crease.

This is what the DIY Planner, Card or Photo Holder Project looks like once it has been folded and creased.

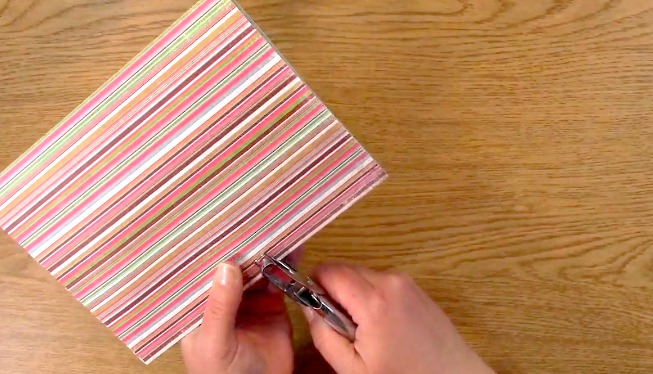
Check to see where the fold is. You want to be sure you punch a hole above the folds.

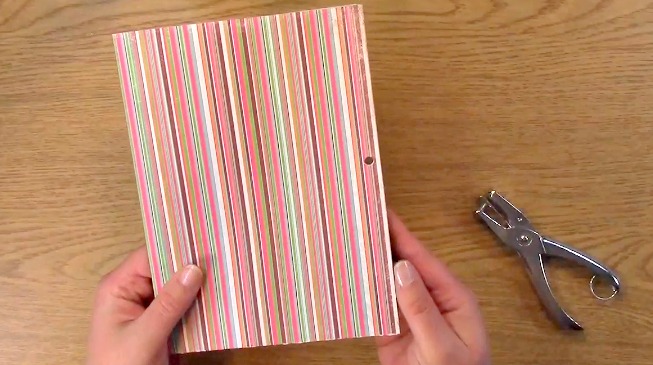
Punch the hole in your paper through all four layers.

This is what it looks like once all holes are punched through.

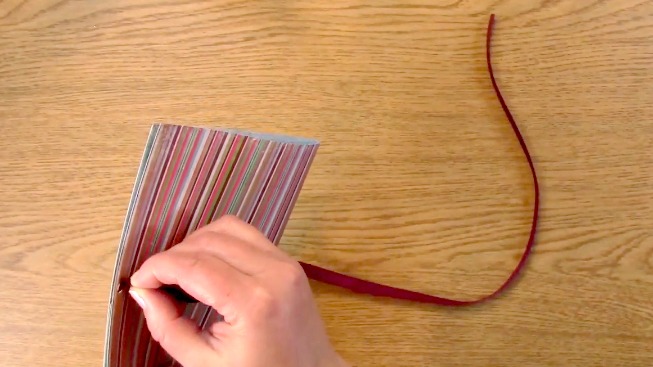
Take out your ribbon and trim off approximately 8-12 inches for your DIY Planner, Card or Photo Holder Project.

Put the ribbon in through the first hole,

Pull the ribbon all the way through all four layers.

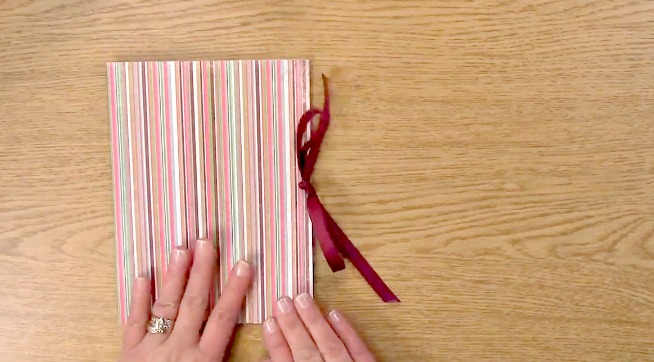
Tie your ribbon in a bow.

You have completed your project! Think of the endless possibilities! You can use this creation for different themes, celebrations, holidays and so much more!

For this weeks giveaway we are giving away a $15.00 credit to our store! Winner announced next week!

To qualify to win, you must be BOTH:

A public follower on YouTube, subscribe to our mailing list/blog posts and you may also comment on this blog post for an additional entry to win! Winners will be announced next week on our Mondays with Melissa blog post!

BE SURE TO check to see if you are a winner EVERY WEEK. If you do not contact me within two weeks of the announcement of winning, you will forfeit your prize. Thank you for your understanding.

Subscribe to BOTH with MATCHING NAMES to be eligible. If I am unable to match you with your subscription to both the email list and the YouTube Channel, you will miss your chance to win a prize. If I can’t decipher if you are a matching subscriber (if your profile doesn’t show publicly who you subscribe to) and I can’t confirm you have subscribed to both, you will not be eligible.

For last weeks giveaways we are giving away the A Creative Journey with Melissa Sentiments for All Occasion Stamp Set

and the Spellbinders Aristocrat Die Cut set.

The winners are  Kim Miller and Malika!

Winners, please send me your contact information via contact page on our website, which post you are a winner from and I will get your prize out to you! Thank you so much for being a YouTube follower and subscribing to our mailing list/blog posts!

Thank you for joining us for the DIY Planner, Card or Photo Holder Project. I hope I have inspired you to create something that can be given as a gift or used for yourself! BE SURE TO CHECK BACK!

Have a wonderful week and thank you for going on A Creative Journey with Melissa.

Sentiments for all Occasions Card

Sentiments for all Occasions Card is what we have for you today along with a multi use die cut set.

What better way to maximize and utilize your supplies with multi use items!

I like to buy things that can be used for numerous things. For me, it allows me to explain the purchase better if they have multiple uses… at least in my mind! LOL

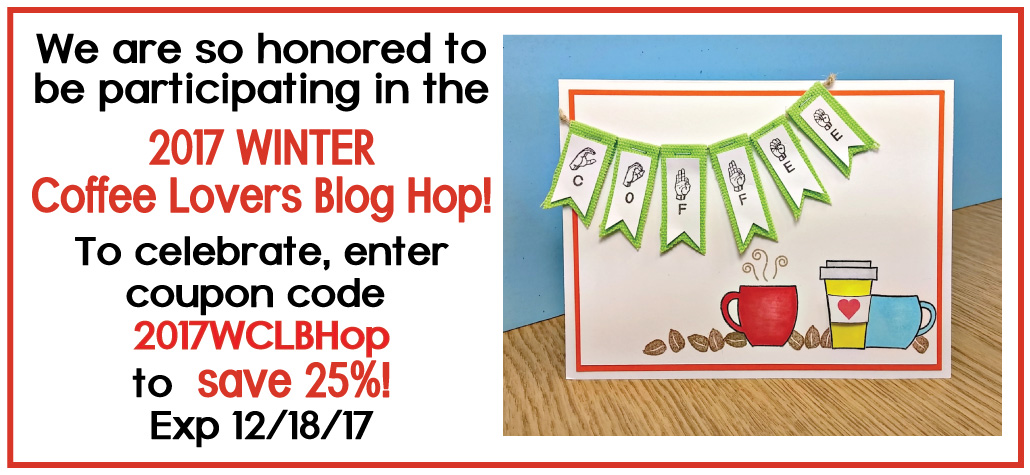
Don’t forget you can save 25% your order with the above coupon code. It expires today, Monday 12/18/17 so be sure to use it today. This is the last sale of the year.

This is the Sentiments for all Occasions Card Project we are going to create….. let’s get creative!

Supplies Needed for the Sentiments for all Occasions Card Project 

A Creative Journey with Melissa Sentiments for All Occasion Stamp Set

Acrylic Stamp Block

Spellbinders Aristocrat Die Cut set

Card Base

Patterned Background Paper

Paper for Deer

Sentiment and emblem paper

Paper for foliage

3-D Foam adhesive

Adhesive

Brown Ink

Spellbinders Tool or needle

Here are the dies that are in the die cut set. They aren’t super large but are perfect for any card, scrapbook or creation.

To begin your Sentiments for all Occasions Card Project, take out your cream colored paper along with the dies shown. Run your through the die cut machine forward and backward to ensure cut.

Separate the die from the die cut and set them both aside.

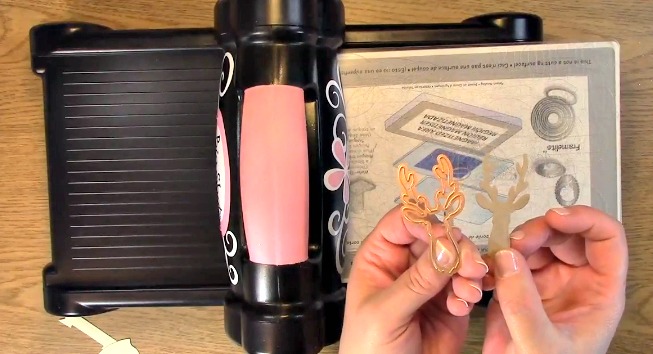
Take out the deer and the craft paper. Run your die through the die cut machine both ways ensuring the proper cut.

Separate the die cut from the die. This is what it will look like. Set both aside.

Take out the foliage die. This is a close up of what it looks like.

Run your die through the die cut machine both ways ensuring the proper cut.

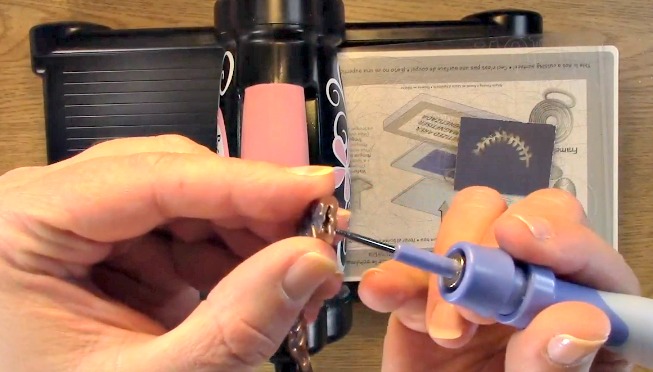
Notice the holes in the back of the die? These will allow you to poke through the intricate dies that you may have trouble getting the paper out of.

Take out your Spellbinders Tool or needle.

Carefully remove your die cut from the die.

Take out your A Creative Journey with Melissa Sentiments for All Occasion Stamp Set.

Notice how a few of my stamps are stained. This was caused by me using a staining ink and also I sometimes don’t clean my stamps right away. Even with this coloring on the stamps, this will not hurt the integrity of the image at all.

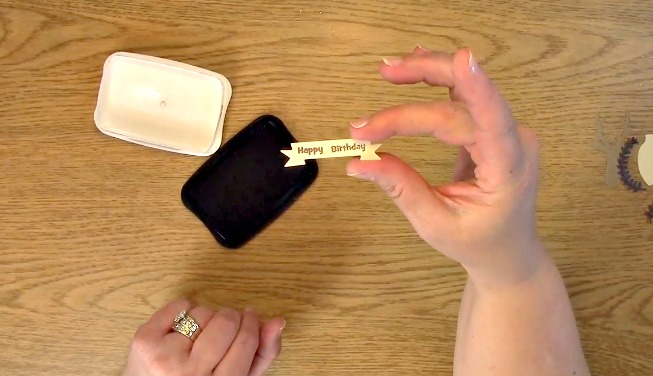
Apply the sentiment to your stamp block. Ink your sentiment on your paper.

This is a close up of the stamped sentiment.

Take out your card base and your decorative paper. Add adhesive to the back of your patterned paper for your Sentiments for all Occasions Card Project.

Apply the patterned paper to your card base.

Add adhesive to the decorative piece and apply to card base.

Apply adhesive to both die cuts of foliage.

Place the foliage to the card base.

Apply 3-D foam adhesive to the sentiment and apply to the card base.

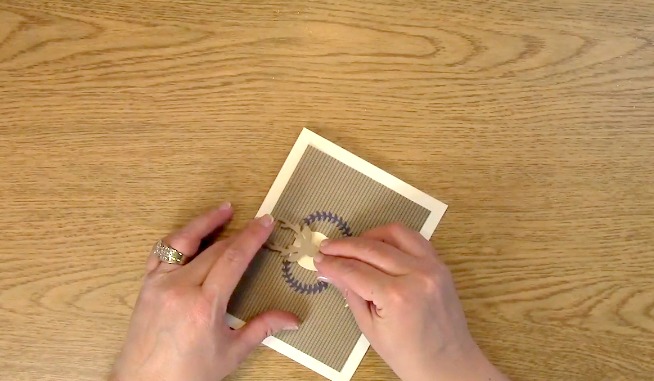
Place your 3-D foam adhesive on the back of your deer die cut. Apply to your card base.

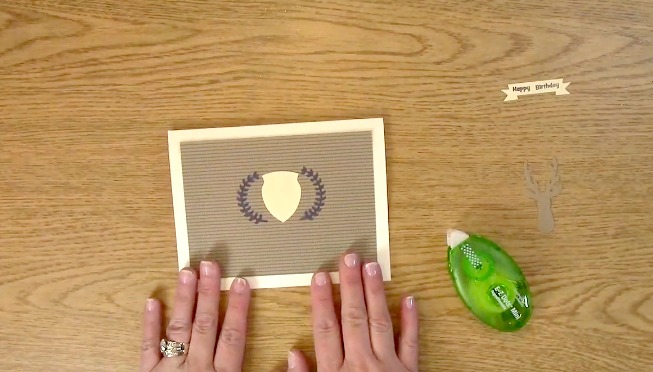
Here are the cards done both vertically and horizontally. Your Sentiments for all Occasions Card Project is complete!

For this weeks giveaways we are giving away the A Creative Journey with Melissa Sentiments for All Occasion Stamp Set

and the Spellbinders Aristocrat Die Cut set. These will be announced next week.

 To qualify to win, you must be BOTH:

A public follower on YouTube, subscribe to our mailing list/blog posts and you may also comment on this blog post for an additional entry to win! Winners will be announced next week on our Mondays with Melissa blog post!

BE SURE TO check to see if you are a winner EVERY WEEK. If you do not contact me within two weeks of the announcement of winning, you will forfeit your prize. Thank you for your understanding.

Subscribe to BOTH with MATCHING NAMES to be eligible. If I am unable to match you with your subscription to both the email list and the YouTube Channel, you will miss your chance to win a prize. If I can’t decipher if you are a matching subscriber (if your profile doesn’t show publicly who you subscribe to) and I can’t confirm you have subscribed to both, you will not be eligible.
Now we have a BUNCH of giveaways to announce from last week and the 2017 Coffee Lovers Blog Hop! YAHOO!!

Now for last weeks GIVEAWAY, we are giving away the above A Creative Journey with Melissa Snowflake Beauty Stamp Set.

The winner is Creations with Kathryn.

For the 2017 Winter Coffee Lovers Blog Hop Winners we were giving away two stamp sets.

The first stamp set is the A Creative Journey with Melissa Coffee, Tea and Wine – OH MY! Stamp Set  and the winner is Tracy Zahm

 A Creative Journey with Melissa You’re Snow Wonderful Stamp Set and the winner is Julie Prince.

Winners, please send me your contact information via contact page on our website, which post you are a winner from and I will get your prize out to you! Thank you so much for being a YouTube follower and subscribing to our mailing list/blog posts!

Thank you for joining us for the Sentiments for all Occasions Card. I hope I have inspired you to create thinking outside of the box!

Have a wonderful week and thank you for going on A Creative Journey with Melissa.


Quick and Easy! Coffee Cup Embossed Recycled Packaging Gift Card Holder

Quick and Easy! Coffee Cup Embossed Recycled Packaging Gift Card Holder is what we have for you today. I love to reuse packaging for my crafts. This is a tutorial on how to do just that!

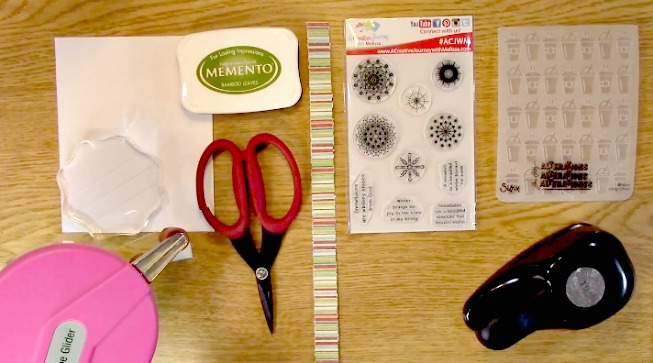
Supplies Needed for the Quick and Easy! Coffee Cup Embossed Recycled Packaging Gift Card Holder Project

A Creative Journey with Melissa Snowflake Beauty Stamp Set

Acrylic Stamp Block

1.25″ Circle Punch

Sizzix Die # 660281 Box and Card Die

Sizzix or manual die cut machine

Scissors

Paper to stamp image on

Green Ink

.75″ x 12″ strip of patterned paper

Tim Holtz Coffee Cup Embossing Folder

Red Tape – Strong adhesive for the packaging

Adhesive for adhering paper to the box

IF YOU ARE HERE FOR THE 2017 WINTER COFFEE LOVERS BLOG HOP PLEASE CLICK HERE. You are of course welcome to check this post out too and enter to win the prize on this post as well! If you aren’t.. Be sure to check it out as you can see lots of coffee project inspiration as well as win a number of prizes from some great sponsors!

To begin the Quick and Easy! Coffee Cup Embossed Recycled Packaging Gift Card Holder project, Take out your paper to stamp on, your acrylic block and your A Creative Journey with Melissa Snowflake Beauty Stamp Set.

Adhere your stamp to your acrylic block. Take out your green ink.

Stamp your snowflake onto your paper. I made a few extra so I can have them on hand in case I need to create an extra card.

Punch your snowflake images out with your circle punch.

This is a die inside it’s clear plastic packaging. When I get dies like this, I take them out of their packaging and cut the parts of the packaging that could be used in a die cut machine at a later time and set them aside. You would be amazed at how many times I have used them on my projects.

If you haven’t heard of this before, search in the box above or click on the menu for the icon and search for packaging and you will  find a few tutorials for some other ideas.

Here is a piece from a longer die that I have kept. This is what we are going to use to die cut our Quick and Easy! Coffee Cup Embossed Recycled Packaging Gift Card Holder Project. Sometimes you may have some blemishes on the packaging. You can solve that issue by embossing it!

Take out your manual die cut machine, two clear platforms and your die. Place a clear platform down on the base of the die cut machine. You will then place your die, clear recycled sheet of packaging and then your second clear platform. Using the handle, run your packaging through the die cut machine.

This is what it will look like once you have done that.

Take out your coffee cup embossing folder, regular platform, two clear platforms and your die cut machine. You can emboss just one side of your box like shown or you can do the entire box by folding your clear sheet in half and placing it in the folder.

This is what it looks like once it has been embossed!

Fold your box where all of the creases are from the die cut.

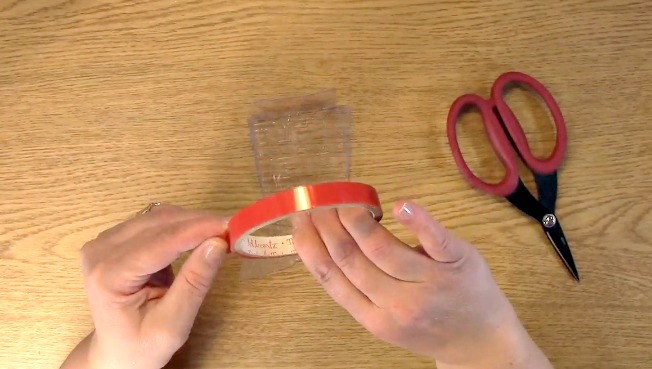
Take out your red tape or other strong adhesive.

Cut two pieces and adhere the two pieces of adhesive to the side of the box.

Remove the red protective piece revealing the adhesive.

Press firmly on the side of the box to the adhesive side ensuring its adhesion creating the box. You may lightly see some of the adhesive. If you do not care for that look, you can place paper on the outside of the box to cover it if you think it is too obvious. I personally thought it looked fine.

This is the die cut and embossed box before it has been put together completely and decorated.

Take out your strip of paper.

Using the gift card holder, measure how large of a piece you will need to wrap it around so it overlaps a little bit.

Trim excess paper off of your creation.

Apply adhesive to the back of the decorative paper.

Wrap your paper around the box ensuring the paper has adhered to the gift card holder.

Take out your stamped image, 3-D foam piece and box. Remove the adhesive back to the foam piece.

Place the foam piece on the back of the stamped image. Place the stamped image on the Quick and Easy! Coffee Cup Embossed Recycled Packaging Gift Card Holder Project.

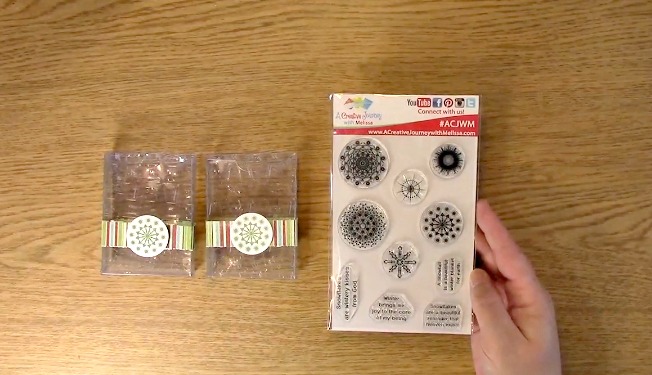
Your Quick and Easy! Coffee Cup Embossed Recycled Packaging Gift Card Holder Project is complete!

For this weeks giveaway, we are giving away the above A Creative Journey with Melissa Snowflake Beauty Stamp Set.

 To qualify to win, you must be BOTH:

A public follower on YouTube, subscribe to our mailing list/blog posts and you may also comment on this blog post for an additional entry to win! Winners will be announced next week on our Mondays with Melissa blog post!

BE SURE TO check to see if you are a winner EVERY WEEK. If you do not contact me within two weeks of the announcement of winning, you will forfeit your prize. Thank you for your understanding.

Subscribe to BOTH with MATCHING NAMES to be eligible. If I am unable to match you with your subscription to both the email list and the YouTube Channel, you will miss your chance to win a prize. If I can’t decipher if you are a matching subscriber (if your profile doesn’t show publicly who you subscribe to) and I can’t confirm you have subscribed to both, you will not be eligible.

Now for last weeks GIVEAWAY we are giving away the A Creative Journey with Melissa Coffee, Tea and Wine – Oh My! Stamp Set.

Jaratzed. you are the winner! Please send me your contact information via contact page on our website, which post you are a winner from and I will get your prize out to you! Thank you so much for being a YouTube follower and subscribing to our mailing list/blog posts!

Thank you for joining us for the Quick and Easy! Coffee Cup Embossed Recycled Packaging Gift Card Holder Project. I hope I have inspired you to create something that can be a tradition and keepsake for years to come! We will be announcing the winners from the 2017 Winter Coffee Lovers Bloghop as well as this weeks giveaway next Monday. BE SURE TO CHECK BACK!

Have a wonderful week and thank you for going on A Creative Journey with Melissa.


Create Patterned Paper using Stamps

Create Patterned Paper using Stamps is what we have for you today. How many of you have stamps that you love but don’t often think about what other things you could use them for? Yes! Me too! What better time than the present than to make some patterned paper?!Before we get started with the Create Patterned Paper using Stamps Project, I wanted to let you know we are participating in an awesome blog hop beginning this Friday! It is the 2017 Winter Coffee Lovers Blog Hop! Be sure to come back and check it out as there are numerous prizes up for grabs not only from me but other sponsors as well. There will be LOTS of inspiration and you can join in on the fun and create to win prizes too!  Now, let’s get started on our creating!

Supplies Needed for the Create Patterned Paper using Stamps Project

A Creative Journey with Melissa Coffee, Tea and Wine – Oh My! Stamp Set

Stamp Block

Paper to stamp on

Paper or protected area for stamping

Ink

Stamp Cleaner

Create Patterned Paper using Stamps is a super easy way to get really cool results by just using the stamps you have in your current supplies! I would suggest you take out scrap paper or a mat to protect your work surface. It gives a better look when you stamp on the edges and not just where the paper is. Looks like a real pattern as they don’t end at the edge of the paper.

Take out your paper, stamp block and your stamp. Place your stamp on the block.

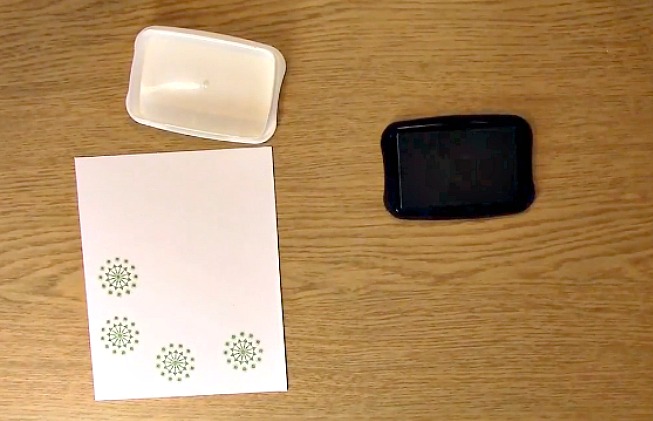
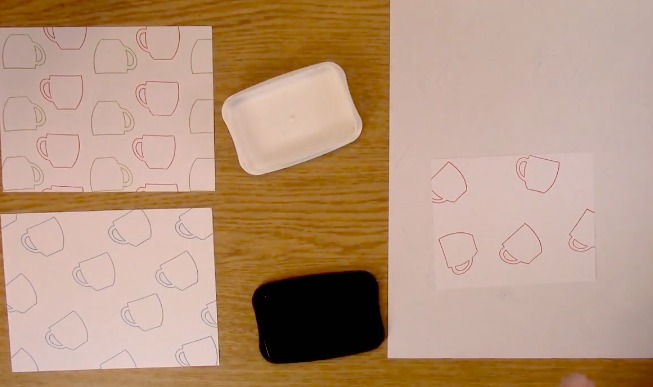
Ink your stamp with the first of two colors. In this case, I used red. Stamp the images in a scattered pattern leaving room for you to stamp the other color as well.

This is what it looks like once the first color has been used.

Clean off your stamp. Ink your stamp with the second color, in this case I used green. Fill in the areas where you don’t have a stamp in a random pattern.

This is the end result. SUPER FAST AND SUPER EASY to Create Patterned Paper using Stamps.

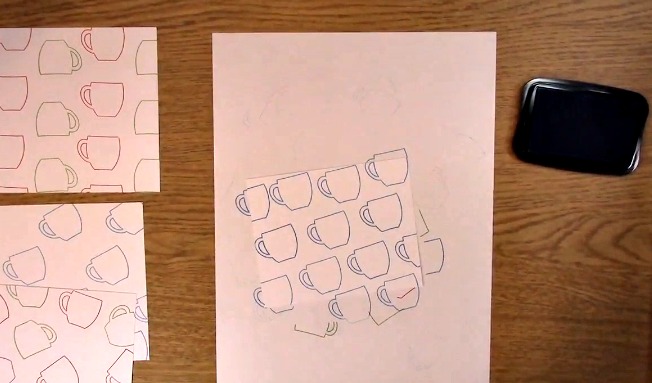
For the second one, I only used one color  which was blue. I created a more of a specific pattern repeated. Either way you like to create will be fine and you can choose one, two or even three colors for your background. Have fun with it!

It’s not exactly perfect but much more specifically patterned than the first example.

Here is the second finished example of the Create Patterned Paper using Stamps.

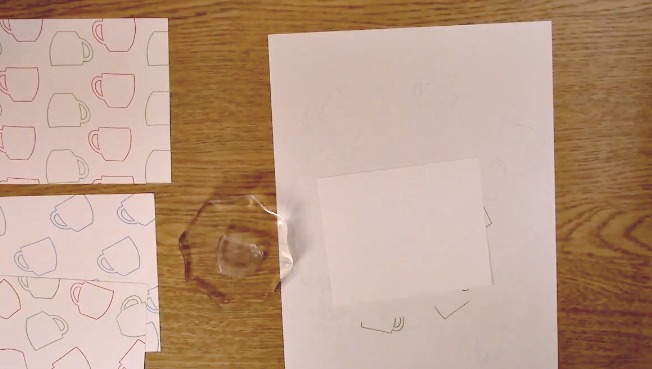
Here are the finished background papers I created. What colors and themes will you create?

For this weeks giveaway, we are giving away the above A Creative Journey with Melissa Coffee, Tea and Wine – Oh My! Stamp Set.

 To qualify to win, you must be BOTH:

A public follower on YouTube, subscribe to our mailing list/blog posts and you may also comment on this blog post for an additional entry to win! Winners will be announced next week on our Mondays with Melissa blog post!

BE SURE TO check to see if you are a winner EVERY WEEK. If you do not contact me within two weeks of the announcement of winning, you will forfeit your prize. Thank you for your understanding.

Subscribe to BOTH with MATCHING NAMES to be eligible. If I am unable to match you with your subscription to both the email list and the YouTube Channel, you will miss your chance to win a prize. If I can’t decipher if you are a matching subscriber (if your profile doesn’t show publicly who you subscribe to) and I can’t confirm you have subscribed to both, you will not be eligible.

Now for last weeks GIVEAWAY we are giving away the A Creative Journey with Melissa Fall and Winter Holiday Sentiments Stamp Set. 

Frances A. you are the winner! Please send me your contact information via contact page on our website, which post you are a winner from and I will get your prize out to you! Thank you so much for being a YouTube follower and subscribing to our mailing list/blog posts!

Thank you for joining us for the Create Patterned Paper using Stamps Project. I hope I have inspired you to create something that can be a tradition and keepsake for years to come! Please be sure to share what you come up with!

Have a wonderful week and thank you for going on A Creative Journey with Melissa.


Seasons Greetings Rudolph Card

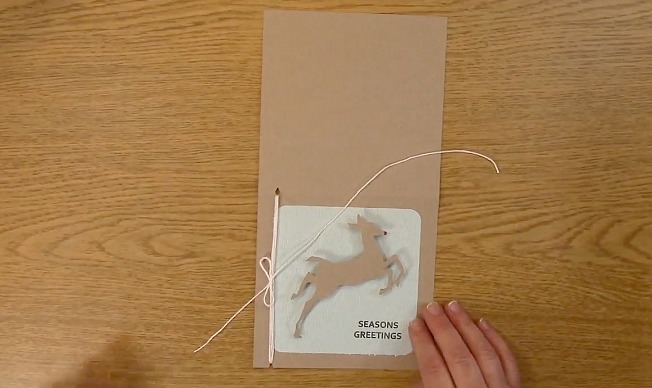
Seasons Greetings Rudolph Card Project is what we have for you today. This card is perfect for anyone that you want to share some holiday cheer with. We are having an awesome sale on our website too! Be sure to check it out as it is the best sale of the year and it ends soon!

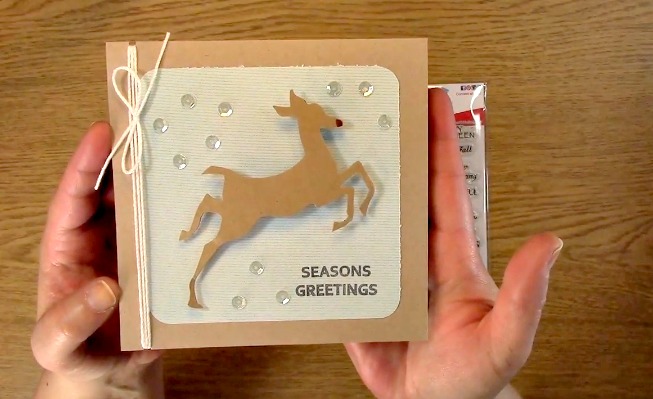
Now that we got the shopping out of the way… Are you ready to get crafty? Let’s get rollin! This is the adorable project we are creating – Seasons Greetings Rudolph Card Project!

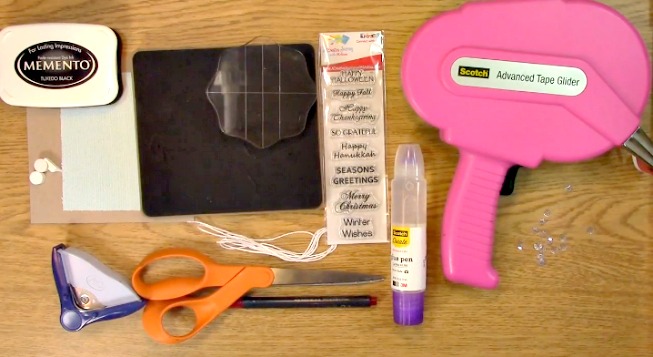
Supplies Needed for the Seasons Greetings Rudolph Card Project

A Creative Journey with Melissa Fall and Winter Holiday Sentiments Stamp Set

Acrylic Stamp Block

Card Base (5.5″ square)

Patterned Paper for Card Mat (4.5″ square)

Memento Ink

Corner Rounder

Tim Holtz Reindeer Flight Die

Iridescent Sequins

3-D Foam  Adhesive circles

Clear Liquid Adhesive

Tape Runner (ATG)

Sizzix Die Cut Machine and Platforms

Red Spica glitter pen

White Twine

Scissors

Beginning with the Patterned Card Mat Paper and corner rounder, round the corners of all four sides of your paper.

Take out your A Creative Journey with Melissa Fall and Winter Holiday Sentiments Stamp Set Acrylic Stamp Block  and Memento Ink.

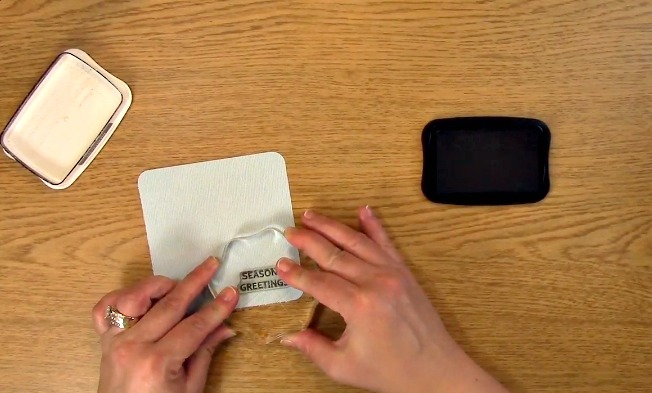
Peel off your Seasons Greetings Stamp and adhere to your acrylic stamp block.

Ink your stamp and stamp your sentiment on your patterned mat paper.


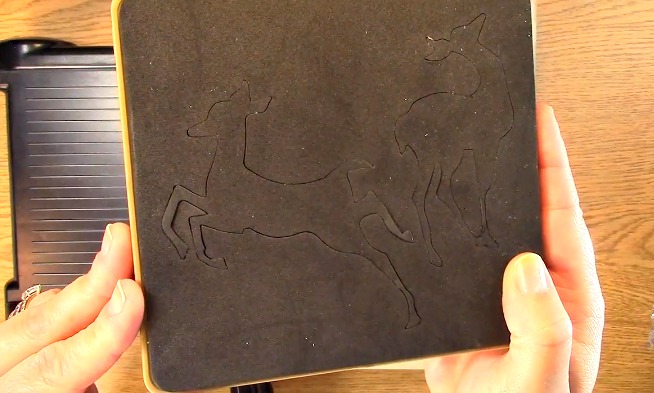
Take out your Tim Holtz Reindeer Flight Die.

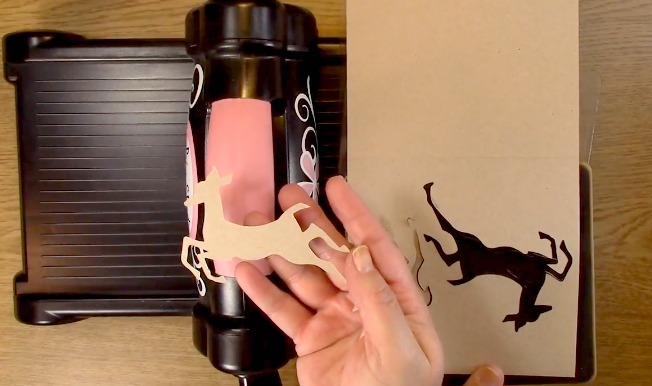
You will also need your Paper to die cut your reindeer as well as a Die Cut Machine and Die cut platforms. Place your paper on top of the die cut area on your die.

Using a clear platform, place one under your die and one on top of the paper you are cutting. Run the die cut “sandwich” through your die cut machine.

This is what the deer die cut will look like once cut for your Seasons Greetings Rudolph Card Project.

Take out your Red Spica glitter pen and color the end of the reindeer nose.

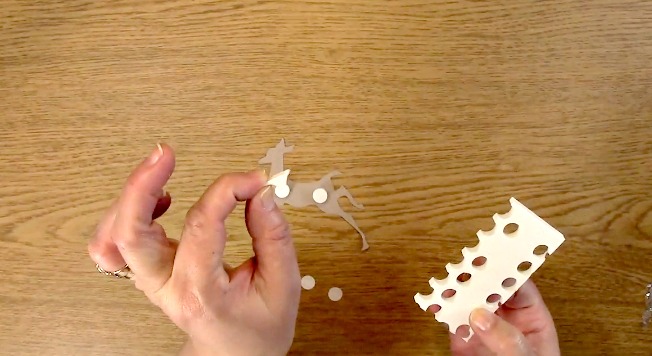
Take out your 3-D foam circles and place them on the back of the reindeer.

*Creative Tip: When you are finished using the foam circles, be sure to use the rest of the material as well. It works great for any area and you can cut it to any size or shape you need from what is left!

This is a perfect example of using the excess for a perfect shape of the head for the reindeer!

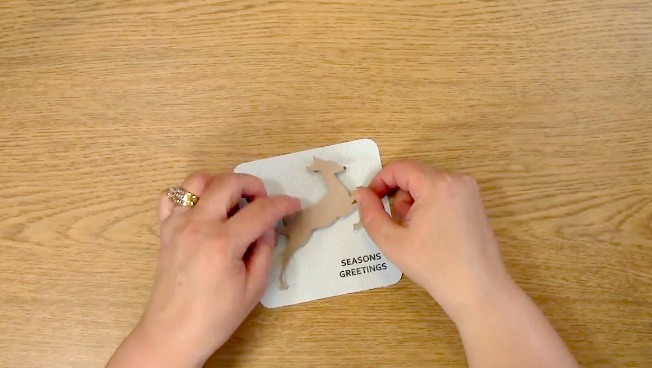
Remove the paper from the 3-D foam and place your reindeer on your stamped patterned card mat.


Place adhesive on your card front.

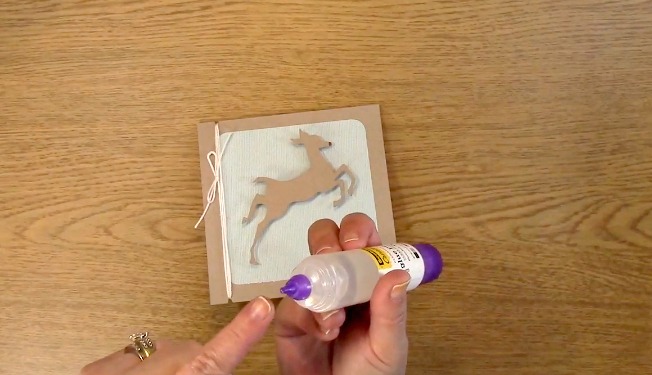
Place your reindeer card mat on top of the card front. Your Seasons Greetings Rudolph Card Project is coming along nicely.

Cut a notch out of the top of the card and on the bottom only the front panel. You are doing this for the white twine.

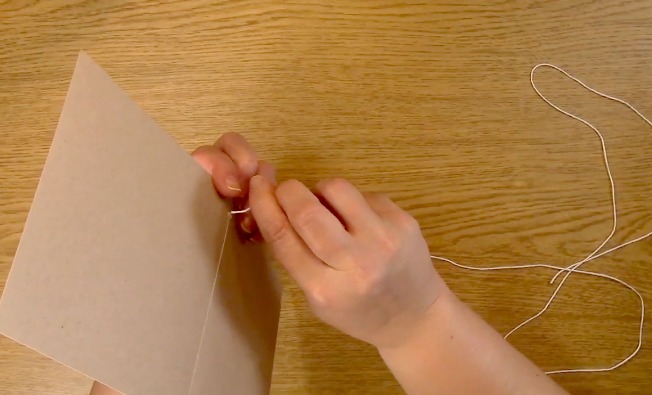
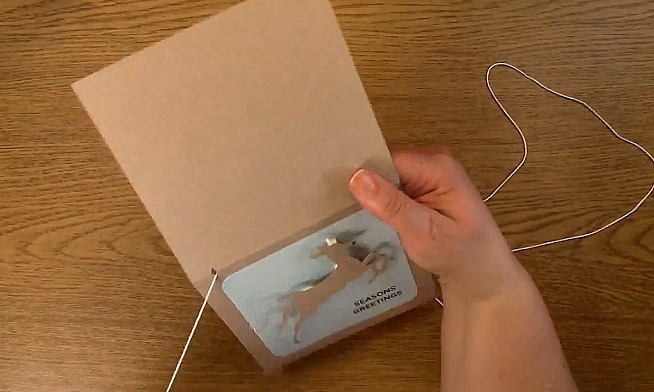
Push your twine from the back of the card through to the front and repeat twice.

Tie your twine in a bow as shown and cut off the excess twine with your scissors.

*Creative Tip: Rather than retie your bow, if you gently bend your paper you can adjust where your bow is by moving your twine. Once you have it where you want it, gently release the bend and you are ready to go!

Using liquid adhesive with sequins, you will want a precise applicator tip. This liquid glue is perfect for the sequin application.

Place a small dot of liquid adhesive on each sequin and place on the card front.

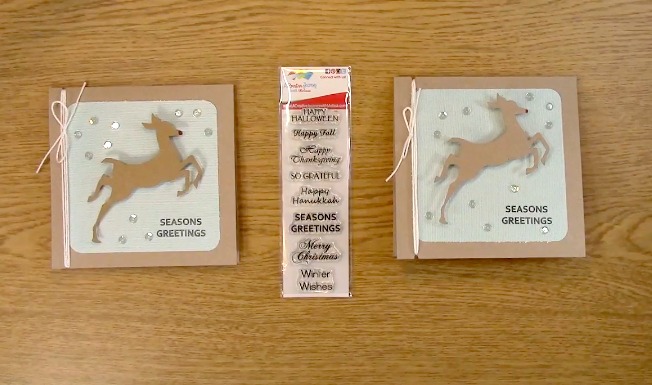
Here you can see on the left there is a more specific pattern for the Seasons Greetings Rudolph Card Project while the right card has a more scattered set of sequins on the card front.

For this weeks giveaway, we have the A Creative Journey with Melissa Fall and Winter Holiday Sentiments Stamp Set.

To qualify to win, you must be BOTH:

A public follower on YouTube, subscribe to our mailing list/blog posts and you may also comment on this blog post for an additional entry to win! Winners will be announced next week on our Mondays with Melissa blog post!

BE SURE TO check to see if you are a winner EVERY WEEK. If you do not contact me within two weeks of the announcement of winning, you will forfeit your prize. Thank you for your understanding.

Subscribe to BOTH with MATCHING NAMES to be eligible. If I am unable to match you with your subscription to both the email list and the YouTube Channel, you will miss your chance to win a prize. If I can’t decipher if you are a matching subscriber (if your profile doesn’t show publicly who you subscribe to) and I can’t confirm you have subscribed to both, you will not be eligible.

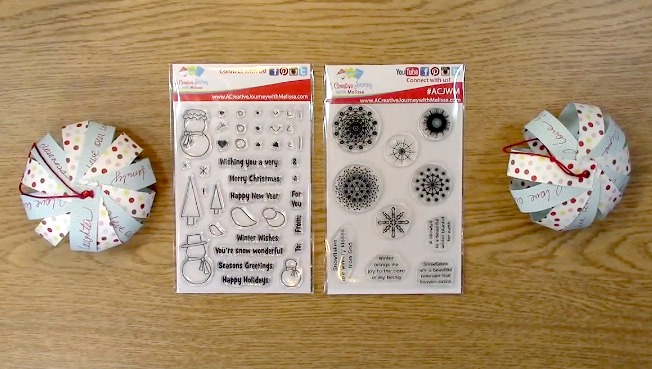
Now for last weeks GIVEAWAY we are giving away TWO STAMP SETS which means TWO WINNERS! We are giving away the A Creative Journey with Melissa You’re Snow Wonderful Stamp Set and the A Creative Journey with Melissa Snowflake Beauty Stamp Set.

The winners are Fit Kitty for the A Creative Journey with Melissa You’re Snow Wonderful Stamp Set

and Melissa Lopez wins the A Creative Journey with Melissa Snowflake Beauty Stamp Set.

Winners,  please send me your contact information via contact page on our website, which post you are a winner from and I will get your prize out to you! Thank you so much for being a YouTube follower and subscribing to our mailing list/blog posts!

Thank you for joining us for the Seasons Greetings Rudolph Card Project . I hope I have inspired you to create something that can be a tradition and keepsake for years to come! Please be sure to share what you come up with!

Have a wonderful week and thank you for going on A Creative Journey with Melissa.