Tag Archive for: Mondays with Melissa

Make your own Action Spring Wobble for your Creations

Make your own Action Spring Wobble for your Creations is what we have for you today. Who doesn’t like a little movement with their creations? I know I sure do so what better way to do so and save money by making some yourself?! Let’s get CREATIVE!

Supplies Needed to Make your own Action Spring Wobble for your Creations

Wire Cutter (or scissors work great too)

26-28 gauge wire (very thin)

Screw driver or something wire can be wrapped around

Adhesive

Scotch Tape

2 pieces of Paper to Attach Spring

Embellishment

Base for Embellishment

 Here is a close up of what we will be making. It works with just about everything and you can adjust the size of the spring action wobble by adjusting the size of the spring.

I used the above wire to Make your own Action Spring Wobble for your Creations. It is very thin. I used 26-28 gauge wire and it works perfectly!

 Take out the screw driver or the item you are wrapping your wire around.

Using the wire and leaving a little tail of it, start to wrap the wire around the screw driver.

 I wrapped it about four times.

Push the wire down so it is more condensed. Wrap 4-5 more times. Condense again.

Trim the wire leaving a 1/4 of an inch for later attachment.

 Here is a close up of the wire spring you will use for the Make your own Action Spring Wobble for your Creations before I pull it off of the screw driver.

 This is what the wire spring will look like once it is pulled off of the screwdriver.

Take a small piece of tape and place it on TOP of one end of the wire.

This is what it will look like once you have placed the tape on it.

Place the tape with the wire sticky side down on the paper.

Here is a close up of what it looks like.

Place tape on the other side of the wire as shown.

Squeeze both sides together to make sure they are stuck. Pull it apart to the width of the desired spring action wobble.

Trim the edges of the paper so that your spring action wobble will fit on your element.

This is the side view and what it will look like when you make your own Action Spring Wobble for your Creations!

This is a top view of what the element looks like. It will fit perfectly on the coffee cup from the A Creative Journey with Melissa Coffee is my Liquid Therapy Stamp Set. Let’s add it to our embellishment!

Add adhesive to the back of the coffee cup. Make sure you have enough to cover the spring action wobble.

Place the spring action wobble down on the coffee cup.

Add adhesive to the decorative paper base where you want to place your spring action wobble and place your embellishment on your base paper.


YOU ARE DONE!

You know how to Make your own Action Spring Wobble for your Creations and can make them for all of your creations!!!

Now, for the GIVEAWAY!

This week for our Giveaway, we are giving away the A Creative Journey with Melissa Coffee is my Liquid Therapy Stamp Set.

To qualify to win, you must be BOTH:

A public follower on YouTube, subscribe to our mailing list/blog posts and you may also comment on this blog post for an additional entry to win!

If you do not contact me within two weeks of the announcement of winning, you will forfeit your prize. Thank you for your understanding.

NOTE: Be sure you are subscribed with matching names. If I am unable to match you with your subscription to both the email list and the YouTube Channel, you will miss your chance to win a prize. If I can’t decipher if you are a matching subscriber (if your profile doesn’t show publicly who you subscribe to) and I can’t confirm you have subscribed to both, I won’t be able to enter you in for the prize. **DO NOT COMMENT WITH YOUR ENTIRE EMAIL ADDY. Only give me the first 6 NOT INCLUDING YOUR HOST. Just enough for me to match your name will work perfectly.

 For last weeks giveaway of the A Creative Journey with Melissa Spinner Greetings Stamp Set

 Sandy F. is the winner!

Sandy F., please send me your contact information via contact page on our website, which post you are a winner from and I will get your certificate prize out to you! Thank you so much for being a YouTube follower and subscribing to our mailing list/blog posts!

We hope you enjoyed our Shaker Card Embellishment Using Packaging Project! Have a wonderful week and thank you for going on A Creative Journey with Melissa.  

Shaker Card Embellishment Using Packaging

Shaker Card Embellishment Using Packaging is what we have for you today.

Who doesn’t like to save money?

Shaker cards have been around for quite some time and seem to be coming back so I thought you would like to see how to create one using packaging you may already have to save some money!

Supplies Needed

A Creative Journey with Melissa Spinner Greetings Stamp Set

Stamp Block

Re Use Acrylic Packaging from your Dies or purchased items or use an Acrylic Sheet

Manual Die Cut Machine & appropriate platforms

Dies

Strong Adhesive

Twine

Base Card

Paper to Stamp Sentiment On

Green and Black Ink

Punch

Sequins

Decorative Paper

Foam Tape

Scissors

Paper Trimmer (you can use your scissors too)

This is acrylic packaging from a die for my Sizzix die cut machine. I like to keep it so that I can use it for projects like these.

Using my scissors, I cut the box open making sure I leave the long flat areas intact so I can use them for future projects. Trim off the parts that won’t be usable. Be sure to use sharp scissors as it will help when you are cutting the material.

For the second part of the Shaker Card Embellishment Using Packaging I am only using the Right side of the die. I am using this to create the window for my shaker card. This will save on materials that you won’t be using for this project.

The Die I used the Echo Park Sizzix die as shown above.

First, you will want to pull out your clear platform for your manual die cut machine.

You will then want to place the die you are using on top of that. I put my die face up so I can see where I am putting my material typically but it does help with demonstration purposes as well.

Place your recycled acrylic piece ensuring that it is covering the area in which you want to cut. If it overlaps a little, that is OK. You can trim it after it has been die cut.

This is what it looks like once it has been die cut.

Be sure to trim any edges that aren’t needed.

Now we will be die cutting the frame or front part for the Shaker Card Embellishment Using Packaging. Place your clear platform, your die and then your paper on top of the die.

Take out your paper and place that on top of your die and then your clear platform on top of the paper. Be sure your paper is completely covering the area you want cut.

Run your die cut through the machine using the handle.

Once it has been cut, it will look like this. (This is the back side of the paper)

This is what I made using the inside piece of this die. Two weeks ago I did a thank you card tutorial on my creation HERE.

I overlapped the paper on the die so I need to trim the excess area.

Take out your paper trimmer and trim the excess paper from your frame for your Shaker Card Embellishment Using Packaging Project.

With the frame and the acrylic piece you die cut, you are ready to put together your Shaker Card Embellishment Using Packaging Project.

Here you can see what the window of the  Shaker Card Embellishment Using Packaging Project will look like.

If you don’t like to keep the packaging the way it is, in case it has blemishes or marks on it, you can emboss your acrylic material to make it less noticeable like I have here.

For this creation, I used a star embossing folder because I thought it went along with my theme and decor better.

Take out your clear platform.

NOTE: Don’t worry if your platform has marks on it like mine does above. It is NORMAL. Even if it makes creaking and cracking noises, it is normal. At some point you may need to replace your clear platforms but I have had mine for well over 5 years and haven’t had to yet.

Place your clear platform down on your machine.

On top of your clear platform, place the standard platform down.

Place your clear acrylic material inside your embossing.

Close your embossing folder and place it on top of your standard platform.
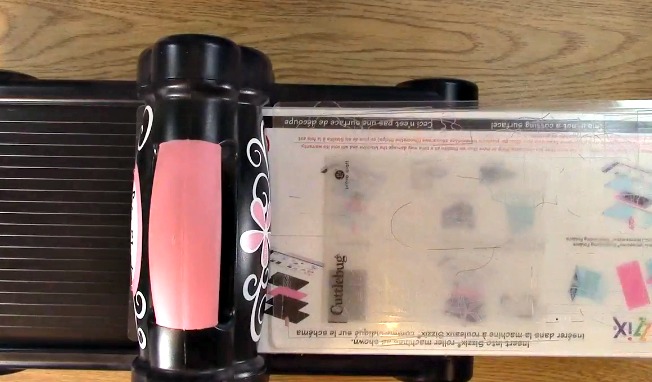
Place your clear platform on top of your embossing folder.

Turn the handle and run your embossing folder “sandwich” through the manual die cut machine.

This is what the acrylic will look like once you have embossed it. One of the easiest and coolest tricks to do!

Take out your sequins and move them around. You want to try to get them separated so that they aren’t stuck together inside your shaker card. This will keep your card flowing when you are shaking it.

Now that you have done your prep work, it is time to create your  Shaker Card Embellishment Using Packaging Project! Take out your frame and your embossed acrylic piece.

Place strong adhesive on the back of your shaker card frame.

To avoid having the acrylic bending and not laying flat, bend it the opposite way it is going to straighten out the piece.

Adhere your acrylic piece to the BACK of your shaker frame.

Press down on all sides of the acrylic so you ensure it is adhered to the paper.

This is what it looks like once you have adhered them together.

Take out your foam tape. You will want it to be approximately 1/4 inch – 1/2 inch tall to ensure there is enough room for the shaking part of the shaker. If your foam tape is not that thick, you can use multiple layers to achieve that. My tape was thinner so I used two layers.

*NOTE* I cut my foam tape in half because I didn’t need that thick of a border around the frame.

Place your foam tape around the edge of the front of your shaker card. Make sure you don’t leave any large gaps otherwise you may loose some of your shaker components.

Once you have placed your tape around the card, you will want to push down hard on your foam tape to ensure its adhesion.

Here you can see a little gap between where the tape meets.. It is not big enough to worry about but to make sure that nothing falls through, use the second layer to cover all of the areas where the tape meets.

Remove the tape backing from the foam tape.

Start placing your second layer of foam tape on top of your first one and cover your gaps.

I ran out of the pre-cut foam tape so I cut some more straight down the middle for future shakers and the rest of this one.

This is what it looks like once I have cut it.

After I have finished placing the second layer of foam tape, push down hard on the foam tape to ensure the second layer sticks to the first and the card front. Set this aside.

Take out your card base, green ink, stamp block and A Creative Journey with Melissa Spinner Greetings Stamp Set. Place your star stamp on your stamp block.

Using the star from the A Creative Journey with Melissa Spinner Greetings Stamp Set, ink and stamp stars on  your card base using green ink.

It seems I made a mistake by placing a little extra ink by this star. I am going to show you how I fixed it!

I could have left the ink on there with the shaker contents no one would have likely noticed but I wanted to show you what I would do.

What a great way to make this a **TIP** I just added another star right on top of the area and you can’t even tell it was there.

To make it look more uniform in my creation, I added another one on the bottom right.

This is what it looked like when the stamping was done.

Using the A Creative Journey with Melissa Spinner Greetings Stamp Set, take off your sentiment from the stamp sheet. I chose Celebrating Your Graduation. Place the words on your work surface the way you would want to read them.

Once you have them aligned and in order, take your stamp block and press down on your stamps.

Now if you are picky like me, you will fiddle around with it a bit just to make sure it is JUST RIGHT!

Now, YOU ARE READY TO STAMP YOUR SENTIMENT!

Ink your sentiment and stamp it on your paper.

I usually like to make a few extra in case I would need them for a future card emergency. LOL

Take out your punch and punch out your sentiment for your Shaker Card Embellishment Using Packaging Project.

Using twine, wrap around your punched out tag. I wrapped it around my tag three times.

You can tie a bow or a knot. I chose to tie it in a knot.

Trim off the excess twine from your project.

Place foam tape on the tag. You only need one layer for this. Set this aside.

Take out your card base and your card from for your Shaker Card Embellishment Using Packaging Project.

Bring out your sequins ensuring that they are not stuck together. Even after I did it previously, I still found a few that wanted to stick together. Once you have done that, place all of your sequins in the middle of your card. You want to make sure you don’t put it where the card adhesive could come in contact with it.

THAT WOULD BE A MESS!

Remove the tape backing from the card front.

Turn the card front so that you can see the decor with the foam tape facing down. Carefully line up your card front to the card base.

Push down on all of the edges a few times ensuring the adhesion to your card base.

This is what your Shaker Card Embellishment Using Packaging Project. looks like so far!

Double check which way your card is facing. This way you can be sure you are putting on the sentiment in the correct direction of your creation.


Remove the foam tape backing from your sentiment. Adhere your sentiment tag to your card.

As you can see, I decided to switch it  up a bit and show you how the card would look if I put the sentiment horizontally. Just switching the cards direction changed it up a little bit and gave it a different look. I LIKE IT!


This is what the window looks like without embossing and it really depends on what type of look you want for your creation.

Here are three different looks for your Shaker Card Embellishment Using Packaging Project!

Now, for the GIVEAWAY!

This week for our Giveaway, we are giving away the A Creative Journey with Melissa Spinner Greetings Stamp Set

To qualify to win, you must be BOTH:

A follower on YouTube, subscribe to our mailing list/blog posts and you may also comment on this blog post for an additional entry to win!

You must contact me within two weeks of the announcement of winning. You will unfortunately, forfeit your prize and it will be placed back in the giveaway stash for a future giveaway if you do not. Thank you for your understanding.

NOTE: Be sure you are not subscribed with two different names. If I am unable to match you with your subscription to both the blog and the YouTube Channel, you will miss your chance to win a prize. If I can’t decipher if you are a matching subscriber (if your profile doesn’t show publicly who you subscribe to) and I can’t confirm you have subscribed to both, I won’t be able to enter you in for the prize. **DO NOT COMMENT WITH YOUR ENTIRE EMAIL ADDY. Only give me the first 6 NOT INCLUDING YOUR HOST. Just enough for me to match your name will work perfectly.

For last weeks giveaway of the

the Birthday Wishes A Creative Journey with Melissa Stamp Set!

Cindy B is the winner!

Cindy B, please send me your contact information via contact page on our website, which post you are a winner from and I will get your certificate prize out to you! Thank you so much for being a YouTube follower and subscribing to our mailing list/blog posts!

We hope you enjoyed our Shaker Card Embellishment Using Packaging Project! Have a wonderful week and thank you for going on A Creative Journey with Melissa.  


Scrapbook Expo Shaker Card Kits

Scrapbook Expo Shaker Card Kits is what we have for you today.

This is not a tutorial but a product review we are sharing.

Shaker cards and embellishments have been around for years but this is a new way to create a shaker embellishment or card that will save you some time! I really enjoyed the Queen & Company products I saw in their booth at the Scrapbook Expo and I can’t wait to show them to you!

For the first Scrapbook Expo Shaker Card Kits we have the Shaped Shaker Kit for Birthdays from Queen and Company. I really thought it was cool that it not only included the versatile die but the pre-cut foam for the shakers you will create!

What an added treat to get a nice page to keep in a binder so you can keep all of your kit items in place. LOVE IT!

Here is a close up of what is included in the kit as well as the amazing possibilities!

Scrapbook Expo Shaker Card Kits from Queen and Company come with their own page! You can keep them in a binder so all of your kit needs are at your fingertips!


Here is a ruler next to the package of dies so you can see how tall the dies are that come with this set.

This will help you see how wide the dies are with the ruler measurements.

Here are the dies and the foam piece that will be used for a shaker card. I love how the kit came with the pre-cut shapes of foam for your shaker creation from the Scrapbook Expo Shaker Card Kits.

This is the Shaped Shaker Kit Say Cheese. It’s adorable and perfect for those creations that you want to add a little color, dimension or a photo in a creation too! Isn’t the view master reel die cut adorable? Yes I had to look it up to figure out the name of it! LOL

 Here is a close up of what is included in the Say Cheese kit. It also comes with a page for a book that holds all of the kit items as the previous one did.

One of the main reasons why I bought this kit was because of this adorable mini Polaroid die cut! SO CUTE!

When I saw this larger Polaroid die cut that is an A2 size, it was a MUST. I had to have it to go with the Say Cheese kit. I can’t wait to create with it!

Now, for the GIVEAWAY!

This week for our Giveaway, we are giving away the Birthday Wishes A Creative Journey with Melissa Stamp Set!

To qualify to win, you must be BOTH:

A follower on YouTube, subscribe to our mailing list/blog posts and you may also comment on this blog post for an additional entry to win!

You must contact me within two weeks of the announcement of winning. You will unfortunately, forfeit your prize and it will be placed back in the giveaway stash for a future giveaway if you do not. Thank you for your understanding.

NOTE: Be sure you are not subscribed with two different names. If I am unable to match you with your subscription to both the blog and the YouTube Channel, you will miss your chance to win a prize. If I can’t decipher if you are a matching subscriber (if your profile doesn’t show publicly who you subscribe to) and I can’t confirm you have subscribed to both, I won’t be able to enter you in for the prize. **DO NOT COMMENT WITH YOUR ENTIRE EMAIL ADDY. Only give me the first 6 NOT INCLUDING YOUR HOST. Just enough for me to match your name will work perfectly.

For last weeks giveaway of the

the Sentiments for All Occasions A Creative Journey with Melissa Stamp Set:

 Kay M is the winner!

Kay M, please send me your contact information via contact page on our website, which post you are a winner from and I will get your certificate prize out to you! Thank you so much for being a YouTube follower and subscribing to our mailing list/blog posts!

We hope you enjoyed our Scrapbook Expo Shaker Card Kits product review! Have a wonderful week and thank you for going on A Creative Journey with Melissa.  

Birthday Gift Thank You Cards

Birthday Gift Thank you Cards is what we have for you today. My son (MY BABY!) Austin just had his 17th birthday. My how time flies! He was fortunate enough to get some birthday gifts so you know that what means… Thank you notes!

I have always taught my kids if someone is kind enough to send you a gift, you can at least thank them with a card or a call.. or even both!

Well, today I have Birthday Gift Thank you Cards that are not only easy to make, they are super duper cute too! Are you ready to get CREATIVE? Let’s get started!

Supplies Needed for the Birthday Gift Thank You Cards

A Creative Journey with Melissa Sentiments for all Occasions Stamp Set

Stamp Block

Ink

1 1/4″ square punch

1 3/8″ square punch

Adhesive

3-D Foam Dots or Squares

Card Base

Paper to Stamp Sentiment On

Decorative Paper

Solid Color Paper for Mat for Sentiment

Solid Color Paper for Card Base

Scissors

Embossing Folder

Manual Die Cut Machine (Sizzix)

Twine

*Corner Rounder Optional

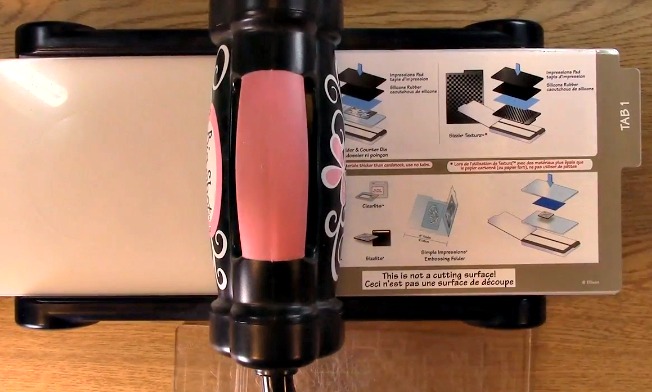
First you will need your manual die cut machine. I am using my Sizzix machine. I have the main platform on tab 1.

Take out your embossing folder.

Add your solid color paper to the inside of your embossing folder.

Close the embossing folder.


Place your clear platform on top of the tab 1 on the main platform. Place your embossing folder on top of the clear platform.

Take your second clear platform and place it on top of the embossing folder.

Using the handle, turn it so the embossing folder is run through the die cut machine.

Take out your embossing folder from under the clear platform.

This is what your paper will look  like once it has been embossed. Cool, right?

The sample Birthday Gift Thank You Cards that I have done opens horizontally which is the most common type of card from my experience.

For this Birthday Gift Thank You Cards tutorial I am going to do the same card only with the card opening up vertically like shown above.

Using the adhesive, put adhesive on the back of the solid colored embossed mat.

Adhere the paper to the card base.

Apply adhesive to the back of the decorative paper.

NOTE: I had a scrap left over that happened to have the corners rounded. If you like the look, be sure you round your corners as well.

Apply decorative paper to the top of the solid colored paper as shown above.

Here are my very loved and USED stamps.

Later in this post I will show you how I used the stained stamps and how the stain doesn’t effect the integrity of the stamp or image. You can use your stamps over and over again even if they are stained. I use memento ink and sometimes forget to clean them.

I do not, however, recommend STAZON ink for our photopolymer stamps. It is not recommended for clear stamps as it can over time effect the integrity of the stamp as can the cleaner to keep it from staining.

I have pulled out the Thanks for being so generous stamps off of my stamp sheet. I have found an easy way to place my stamps so that it is almost fool proof! If you didn’t see my video last week showing you how, check it out here! I also do it below in this tutorial but not as detailed.

Place your stamp block on top of your sentiment and then lift up.

Here is a close up shot. You are ready to ink!

Ink your sentiment.

Stamp your sentiment on your paper.

Here is a close up shot of the stamped sentiment.

I have been asked if the stamps will work if they have stains on them. People have told me they don’t like it which is understandable and others thought they would mess up the image.

I wanted to show you how I will stamp with the stamps that have stains on them. This way you can see for yourself how the sentiment comes out.

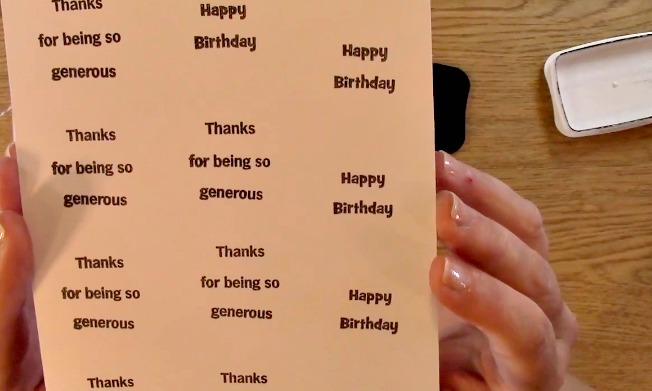
I took off the Happy Birthday Sentiments from my stamp sheet. As you can see they are clearly stained.

Place your stamp block on top of the sentiment pushing down.

Here is a close up so you can the stained. You are ready to ink your stamp!

Apply ink to your sentiment.

Stamp your sentiment.

Here is a close up shot of both the unstained (on the left) and the stained stamps (on the right) As you can see, there is no difference in the image or the integrity of the stamp. YAHOO!  So mystery solved LOL!

Now to continue the Birthday Gift Thank You Cards tutorial, take out your 1 1/4″ square punch and punch out your sentiment.

Take out your 1 3/8″ square punch and punch out your solid color mat for your sentiment.


Adhere your sentiment to your punched out mat.

Place the 3-D foam dots on the back of the matted sentiment.

Place your sentiment on the front of your card.

Take out your circle punch (I believe it is 1/8″) and punch a circle on the left top of the card as shown.

NOTE: Card is upside down when punching so it shows on the right side bottom.

 This is what it will look like once you have punched the hole at the top.

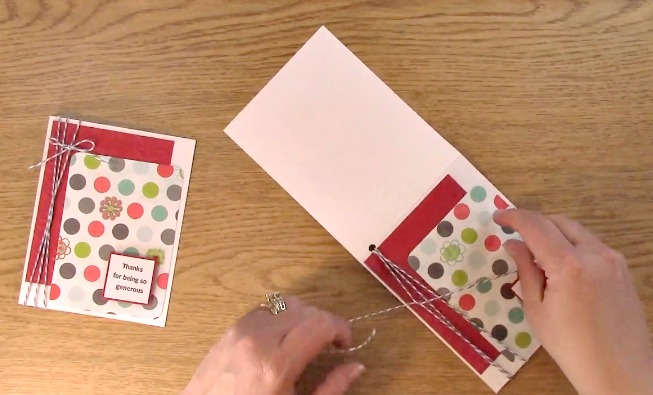
Take out your twine. Going up through the middle of the card, push your twine up leaving some to tie at the end. Then you will wrap the twine around the card and go up through the card again. You will repeat this twice.

I found that if I held the extra twine on the back of the card, it didn’t get in the way of me trying to pull the other twine through the middle of the card.

Once you have wrapped twine around twice, you will pull it around to the front and then cut off any excess twine.

You will then cross the two ends together as shown.

Make a bow making sure it is tight.

Trim off any excess twine.

I really didn’t like where the bow was at so I wanted to move it up.

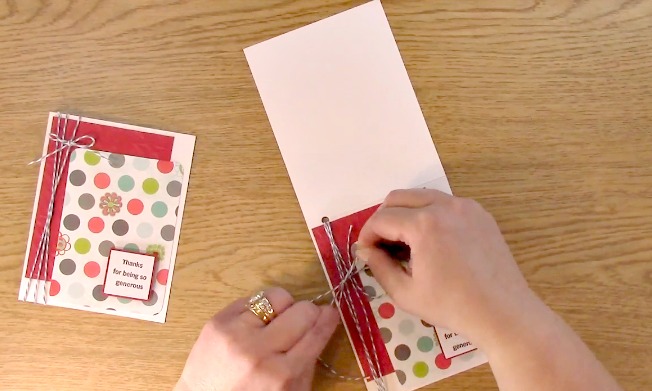
Here is a simple trick to do this. Gently bend your card. This will allow you more room to move your twine to adjust it.

Gently using your finger, move the twine where you want it to be. YOU GOT IT!

Now you can see the card on the left opens horizontally.

The card on the right opens vertically.

You did it!

Now, for the GIVEAWAY!

This week for our Giveaway, we are giving away the Sentiments for All Occasions A Creative Journey with Melissa Stamp Set again by popular request!

To qualify to win, you must be BOTH:

A follower on YouTube, subscribe to our mailing list/blog posts and you may also comment on this blog post for an additional entry to win!

If you do not contact me within two weeks of the announcement of winning, you will unfortunately, forfeit your prize and it will be placed back in the giveaway stash for a future giveaway. Thank you for your understanding.

NOTE: Be sure you are not subscribed with two different names. If I am unable to match you with your subscription to both the blog and the YouTube Channel, you will miss your chance to win a prize. If I can’t decipher if you are a matching subscriber (if your profile doesn’t show publicly who you subscribe to) and I can’t confirm you have subscribed to both, I won’t be able to enter you in for the prize. **DO NOT COMMENT WITH YOUR ENTIRE EMAIL ADDY. Only give me the first 6 NOT INCLUDING YOUR HOST. Just enough for me to match your name will work perfectly.  Your understanding is appreciated.

For last weeks giveaway of the

the Sentiments for All Occasions A Creative Journey with Melissa Stamp Set:

 Vanessa B is the winner!

Vanessa B, please send me your contact information via contact page on our website, which post you are a winner from and I will get your certificate prize out to you! Thank you so much for being a YouTube follower and subscribing to our mailing list/blog posts!

We hope you enjoyed our Birthday Gift Thank You Cards Tutorial! Have a wonderful week and thank you for going on A Creative Journey with Melissa.  

SUPER EASY Stamp Straight Tips

SUPER EASY Stamp Straight Tips is what we have for you today. I don’t know if you have a problem with stamping straight on your projects but I sure do. I love stamping with our clear stamps but even with a grid and being able to see where they are going doesn’t mean I can always line it up properly. Maybe it is a little OCD on my part but it can be daunting if you are trying to get something really straight by looking at it upside down. Well, I have a few tips for you.. Hopefully, these will help you as they have  helped me AND encourage you to get your craft on! Are you READY? Let’s get Creative!

What you will need

Sentiments for All Occasions A Creative Journey with Melissa Stamp Set

Paper

Ink

Stamp Block

My stamps are stained. This will NOT effect the integrity of the stamps or the image that is stamped. They are just well loved with pigment ink.

Solvent ink is NOT recommended for clear stamps on a continual basis as they will degrade the stamps over time. Pigment ink is fine however some of them can stain the stamps as shown above.

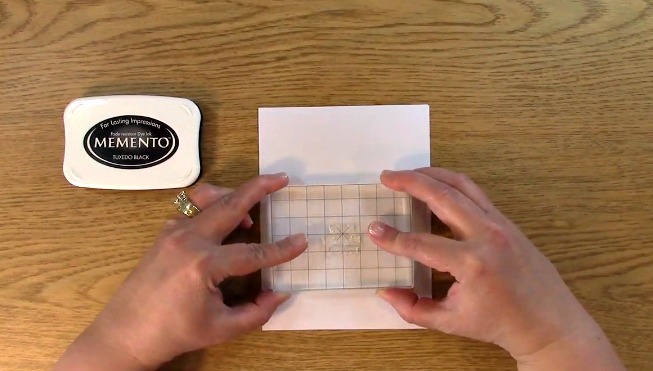
For SUPER EASY Stamp Straight Tips, you will want to place your stamps as if they are already stamped. Normally you would place them backwards but for this tip, you will place them readable as seen above.

Using whatever stamps you want to use on your project, arrange them on a piece of paper or even grid paper if you wish.

Using the grid on the blocks work very well but sometimes it’s hard to line up when the words are upside down.

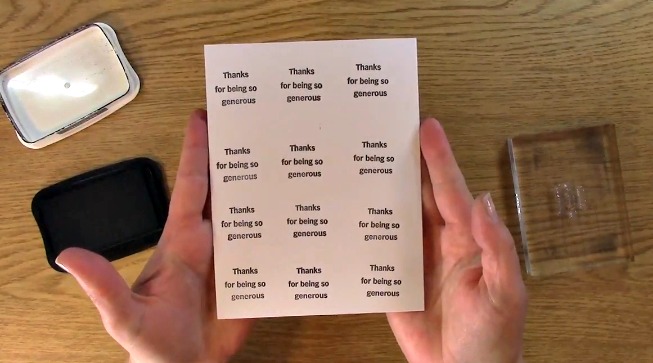
I think I have the sentiment pretty close.

Here is a close up. The words thanks and generous need a little arrangement. Once you have straightened it out to the way you want it, you are set!

For the SUPER EASY Stamp Straight Tips, take your clear stamp block and place it on top of the arranged stamps.

This is what it looks like. I think I turned my hand a little when I picked it up so I corrected the generous stamp and we were set!

Ink your sentiment.

Stamp your sentiment on your paper.

I typically will stamp a few extra so I can have them on hand when I am creating. You can never have too many thank you sentiments on hand, right?

Now, for the GIVEAWAY!

This week for our Giveaway, we are giving away the Sentiments for All Occasions A Creative Journey with Melissa Stamp Set.

To qualify to win, you must be BOTH:

A follower on YouTube, subscribe to our mailing list/blog posts and you may also comment on this blog post for an additional entry to win!

If you do not contact me within two weeks of the announcement of winning, you will unfortunately, forfeit your prize and it will be placed back in the giveaway stash for a future giveaway. Thank you for your understanding.

NOTE: Be sure you are not subscribed with two different names. If I am unable to match you with your subscription to both the blog and the YouTube Channel, you will miss your chance to win a prize. If I can’t decipher if you are a matching subscriber (if your profile doesn’t show publicly who you subscribe to) and I can’t confirm you have subscribed to both, I won’t be able to enter you in for the prize. **DO NOT COMMENT WITH YOUR ENTIRE EMAIL ADDY. Only give me the first 6 NOT INCLUDING YOUR HOST. Just enough for me to match your name will work perfectly.  Your understanding is appreciated.


For last weeks giveaway of the Posh Carpe Diem Planner set.

Jiji J is the winner!

Jiji J, please send me your contact information via contact page on our website, which post you are a winner from and I will get your certificate prize out to you! Thank you so much for being a YouTube follower and subscribing to our mailing list/blog posts!

We hope you enjoyed our SUPER EASY Stamp Straight Tips! Have a wonderful week and thank you for going on A Creative Journey with Melissa.  

Autism Awareness Ribbon Interactive Card

Autism Awareness Ribbon Interactive Card is what we have for you today. This is a really cute way to add a little bit of movement on a card for Autism Awareness Month. This card technique can be used over and over again to create all different occasion cards. Are you ready? Let’s get started!

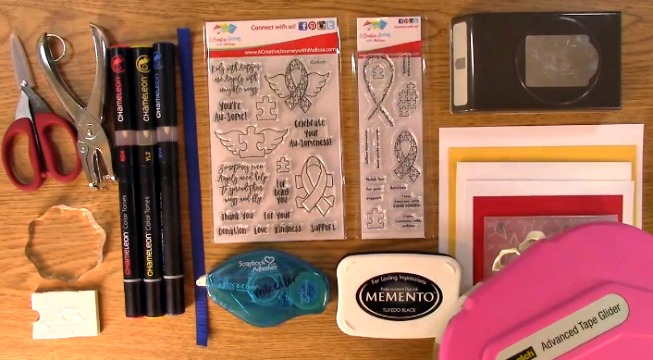
Supplies Needed

A Creative Journey with Melissa Awareness Ribbon Set #6 – Angels with Autism Stamp Set

A Creative Journey with Melissa Awareness Ribbon Set #4 – Autism Awareness

Scissors

Hole Punch

Stamp Block

3-D Foam Dots

Chameleon Pens

Adhesive (I also used my ATG Gun)

Black Ink

Punch

Ribbon

Card Base

Paper to Stamp on

Phrase paper Mat

Paper to mount sentiments on

Back Mat of the red paper for ribbon flow

Embossing Folder

Manual Die Cut Machine

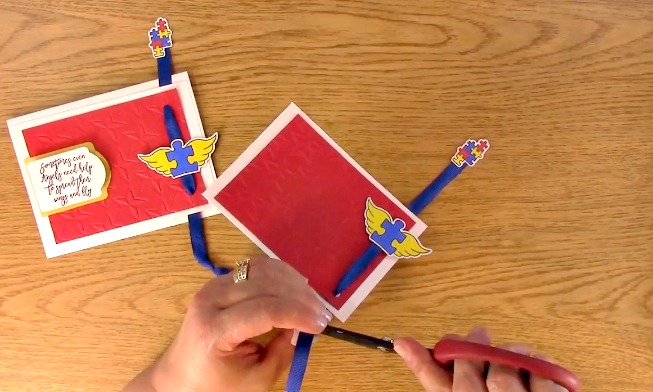
This is the creation we are making today. The Autism Awareness Ribbon Interactive Card is movable by pulling the ribbon up and down.

You can grab it from one end at a time and pull so that you can see the “Autism Angel” flying.

Take out your manual die cut machine, platforms, paper and embossing folder.

Place your paper inside the embossing folder.

Sandwich your embossing folder in between the two clear platforms and on top of the sizzix main platform.

Turn the handle and run through the embossing folder through the die cut machine.

This is a close up of what it will look like once it has been run through. I love the texture on this!

For the next step in creating your Autism Awareness Ribbon Interactive Card, take out your A Creative Journey with Melissa Awareness Ribbon Set #6 – Angels with Autism Stamp Set, stamp block, ink and paper to stamp on. Place the puzzle piece with wings on your block.

Ink your stamp image and stamp it on the paper.

Take out your A Creative Journey with Melissa Awareness Ribbon Set #4 – Autism Awareness. Take off the connected puzzle pieces image and place them on your stamp block.

Ink and stamp the image on your paper.

Take out your BV4 Chameleon Pen.

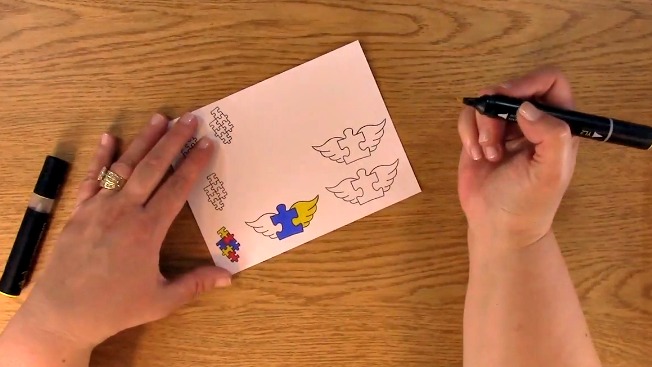
You will color the puzzle piece on the puzzle piece with the wings image blue. Color the puzzle pieces on the connected puzzle pieces blue.

Take out your RD Chameleon Pen.

Using your RD4 Chameleon Pen, color the puzzle pieces on the connected puzzle pieces red.

Take out the YL2 Chameleon Pen. Color the angel wings yellow.

Color the remaining puzzle pieces with the YL2 Chameleon Pen.

Here is a close up of the finished coloring.

I used my Brother Scan and Cut 2 to cut out my images. If you do not have one or another electronic die cut machine that you can cut your images out with, fussy cut around your image and make a matching set for a duplicate piece.

Take out your embossed red piece of paper and punch one hole on either side or the right side of your paper as shown set aside.

I used approximately 10″ of ribbon for an A2 card. I did end up cutting some off but better to be safe than sorry.

Using my ATG gun, I applied adhesive to the two puzzle piece collections – front piece and back piece.

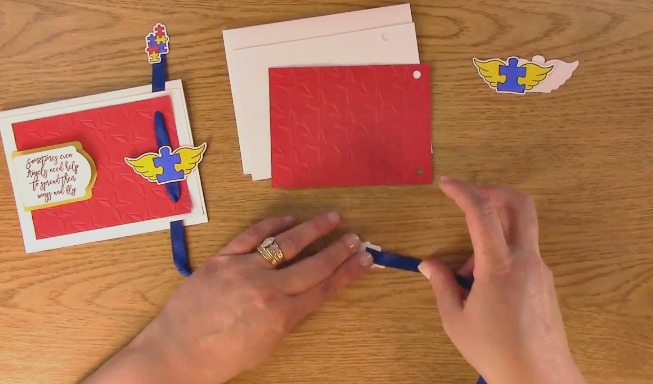
Place the back piece underneath the ribbon so the ribbon is showing on top of the cut out paper.

Now, you will put the puzzle piece collection colored image on top of the ribbon to make a “sandwich” of the two pieces of paper and the ribbon in the middle.

This is a close up of what it will look like once it is done.

**HELPFUL TIP**

Be sure when you are hole punching your bottom white paper that you don’t punch the hole too far off toward the middle or the ribbon will not pull correctly and you will have to re punch it with a new piece. Lesson Learned… LOL!

Punch holes in your white paper that will be used as a mat for the red embossed paper.

Carefully add adhesive to the red pieces of paper. DO NOT PRESS FIRMLY OR IT WILL STICK AND YOU WILL HAVE TO START OVER.

Take your ribbon that has the puzzle pieces attached to it. Starting at the top hole at the back of the white paper, feed your ribbon through the back and through the red embossed piece of paper.

Pull your ribbon through so it is on the outside of the red paper then to through the red paper.

Take the ribbon and continue it through to the bottom hole down on the white paper and push through.

Line up the paper ensuring the adhesive is not on the ribbon and the ribbon  moves freely.


Adhere the red paper to the white paper taking extra caution for the sides of the red paper and it’s adhesion.

Take out your puzzle piece with wings and back piece.

**TIP**

I cut off the head part of the back pieces of the stamped image. This will allow the puzzle pieces with wings to move all the way to the top. Be sure whatever image you use, it doesn’t interfere with where you are going to be putting your ribbon.

Apply adhesive on the back of the colored image and the front of the copy. Place your image under the ribbon at the bottom. This will give you an approximate idea how it will look. Once you are comfortable with it, adhere it to the back side of the blue ribbon as shown above.

Adhere the front of the image making a sandwich of the two images with the blue ribbon in the middle.

Pull the ribbon up and down ensuring that it flows properly.

**THIS IS OPTIONAL** Apply adhesive to the back of the colored puzzle pieces and the front of the copy. Adhere the front of the puzzle pieces to the back of the blue ribbon as shown. Above you can see both ways I made it.

Apply the colored puzzle pieces to the front making a sandwich with the blue ribbon in the middle.

If you would like to have the ribbon end sandwiched between the two papers, trim the ribbon so it does not continue through the image. Make sure you pull it all the way up before cutting to ensure plenty of ribbon for the Autism Awareness Ribbon Interactive Card creation.

This is what it will look like once it is done.

Take out the phrase from the A Creative Journey with Melissa Awareness Ribbon Set #6 – Angels with Autism Stamp Set.

Place it on your stamp block and ink it.

Stamp your phrase on the paper.

Using your choice of punch, punch out the phrase.

Mat the punched out phrase on a pieces of paper. Cut around it so it shows a little bit larger punched shape for a mat of the phrase. Take out your 3-D foam dots and adhere to the back of the phrase.

Apply your phrase to your mat paper.

Apply adhesive to the card front and apply your matted sentiment on the card front.

 Check to be sure your ribbon moves freely on your Autism Awareness Ribbon Interactive Card creation.

You are finished creating your Autism Awareness Ribbon Interactive Card.

Now, for the GIVEAWAY!

This week for our Giveaway, we are giving away the American Craft Creative Zen markers from last weeks haul!

To qualify to win, you must be BOTH:

A follower on YouTube, subscribe to our mailing list/blog posts and you may also comment on this blog post for an additional entry to win!

If you do not contact me within two weeks of the announcement of winning, you will unfortunately, forfeit your prize and it will be placed back in the giveaway stash for a future giveaway. Thank you for your understanding.

NOTE: Be sure you are not subscribed with two different names. If I am unable to match you with your subscription to both the blog and the YouTube Channel, you will miss your chance to win a prize. If I can’t decipher if you are a matching subscriber (if your profile doesn’t show publicly who you subscribe to) and I can’t confirm you have subscribed to both, I won’t be able to enter you in for the prize. **DO NOT COMMENT WITH YOUR ENTIRE EMAIL ADDY. Only give me the first 6 NOT INCLUDING YOUR HOST. Just enough for me to match your name will work perfectly.  Your understanding is appreciated.


For last weeks giveaway of the Elizabeth Craft die set

Jean Truchan is the winner!

Jean Truchan, please send me your contact information via contact page on our website, which post you are a winner from and I will get your certificate prize out to you! Thank you so much for being a YouTube follower and subscribing to our mailing list/blog posts!

We hope you enjoyed our Autism Awareness Ribbon Interactive Card tutorial! Have a wonderful week and thank you for going on A Creative Journey with Melissa.  

Creative Goodies Haul

Creative Goodies Haul is what we have for you today. I went to the Scrapbook Expo in Anaheim last weekend and I had a great time with Marie from our Creative Crew. We do not have a tutorial this week but we do have a great review of some awesome products we saw at the expo and want to share! Of course we have our weekly giveaway too! Remember Autism Awareness month his this month. If you haven’t checked out our creations or our stamps for Autism Awareness, Please go to our shop!

Now… let’s check out the Creative Goodies Haul!

Here is an adorable bright collection from Fancy Pants. I love the color palette especially for spring. Perfect for any spring holiday, birthday or celebration!

Here is a close up of the Fancy Pants paper from the Creative Goodies Haul.

I love how it comes with a bunch of different patterns that all coordinate. Keeps the design element easy and perfect!

Here is the tag set from Fancy Pants. A perfect addition to the Creative Goodies Haul! These tags and embellishments are perfect for any planner, project life page, traditional scrapbook page, smash book, card and well everything!

The close up of the tag set shows you the huge variety in this pack! Between the color palette and the design, I just love it!

Do you remember PUFFY STICKERS?

I remember I used to save my allowance so I could purchase them from the teachers store. I LOVED THEM! In our Creative Goodies Haul, we have the new version which is still puffy but less bulky. ADORABLE aren’t they!?

For this part of our Creative Goodies Haul, We have the Easter paper from Simple Stories. I love the adorable images as well as the patterned paper on the backside. You can really utilize this for any creation you need to make for the spring or Easter.

How lovely is this patterned paper? The colors scream SPRING and are perfect for a card or a background for a creation!

LOOK AT THESE STICKERS!

The stickers are not only coordinating with the papers and embellishments but they are so sturdy! No flimsy paper here. These stickers are made with card stock sure to make for a great embellishment in any of your creations.

This collection is from Paper House. I love the feathers. They are so sweet and elegant. Delicate even. I also really like how you can use the patterns for individual items as well as a complete background page. How fun is this? This is one page showing both sides.

These papers are perfect for celebrating family.

 This is one page showing both sides as I have two of each paper. So many things you can do and I love how it has dark blue as a primary color. Perfect for me with two boys.

Mother’s Day coming up and what a better way to celebrate but with this beautiful paper. I love the color palette as it works perfectly for Moms with their little kings.

This coordinating card stock sticker sheet has so many elements!

You can use these elements for a layout and still have plenty left over!

Have you ever used acetate layovers? How cool is this bird acetate? I love it and how you can use it for so many things!

This COLORFUL collection is from Bella Blvd.

I love how their design looks like true watercolor and really combines some beautiful art elements.

The tag set in this collection is extensive and useful for numerous creations. Perfect addition to our Creative Goodies Haul

The handwriting elements to the tags and embellishments look as if you wrote them yourself.

PERFECT for your planners!

This beautiful paper collection goes wonderfully and is a perfect addition to the collection. the variety and the colors! WONDERFUL!

Look how beautiful the gold letters are on the card stock sticker sheet. Between the embellishments and letters, you will have plenty for numerous creations!

These American Crafts Jewel tone markers are cool! I can’t wait to try them!

What a perfect way to use your coloring abilities by coloring a card for a loved one. THAT is a great way to say THANK YOU!

This die set is from Maya Road. I love the sentiments and the images. You can really use this die set over and over again for thinking of you, love you, sympathy, anniversary, friendship and the list goes on and on!

Now, for the GIVEAWAY!

This week for our Giveaway, we are giving away the Elizabeth Craft!! This die set makes edges for your creation so that you can use them as a frame! How cool is this?? The picture on the right is the actual dies that come with the set. Great way to build a frame!

To qualify to win, you must be BOTH:

A follower on YouTube, subscribe to our mailing list/blog posts and you may also comment on this blog post for an additional entry to win!

If you do not contact me within two weeks of winning, you will unfortunately, forfeit your prize. Thank you for your understanding.

NOTE: Be sure you are not subscribed with two different names. If I am unable to match you with your subscription to both the blog and the YouTube Channel, you will miss your chance to win a prize. If I can’t decipher if you are a matching subscriber (if your profile doesn’t show publicly who you subscribe to) and I can’t confirm you have subscribed to both, I won’t be able to enter you in for the prize. **DO NOT COMMENT WITH YOUR ENTIRE EMAIL ADDY. Only give me the first 6 NOT INCLUDING YOUR HOST. Just enough for me to match your name will work perfectly.  Your understanding is appreciated.


For last weeks giveaway of the $15.00 gift certificate for our store….

SUE D is the winner!

SUE D, please send me your contact information via contact page on our website, which post you are a winner from and I will get your certificate prize out to you! Thank you so much for being a YouTube follower and subscribing to our mailing list/blog posts!

We hope you enjoyed our Creative Goodies Haul! Have a wonderful week and thank you for going on A Creative Journey with Melissa.  

2017 Sale A Bration with Brandie Party Part Two

2017 Sale A Bration with Brandie Party HAUL Part Two is what we have for you today. I am so excited to show you the second half of my awesome haul from my Stampin Up Party!

If you didn’t get a chance to see Part One, Check it out HERE.

I am so excited to show you my 2017 Sale A Bration with Brandie Party Part Two. The dies I received and the extras I received are awesome! I can’t wait to show you how I am going to use them in future blog posts and videos so be sure to subscribe so you can check the project out in the future too!! Are you ready? ME TOO!

For my 2017 Sale A Bration with Brandie Party Part Two,

I am going to show you the three framelit die sets that I purchased. I am so excited about these that I had to be sure you knew about them too. As you probably know, I have my own stamp line however, that doesn’t mean I can’t appreciate awesome products that would work perfectly WITH my stamps, right? Well, when I saw these die sets, that is exactly what I had in mind.

This is from the Framelits Sliding Star Die set. Here you can create cards with moving elements. The bottom die is used to have an item floating on a card giving you a cool 3-d moving effect. I will be creating items using this die so be sure to subscribe for future video and blog posts!

The top die is a circle which is prefect to have something floating around in a circle while you have an item in the middle. The circle die cuts not only the area where you would have something floating, you would also be able to cut the circle that would be inside the floating area.

This is the Project Life Cards and Labels Framelits die set.

I love how it will not only cut your 4 x 6 items for Project Life but it will also cut your 2 x 3 cards as well!

This awesome set is the Thinlits Project Life Paper Clips Die set. Not only can you create 4 x 4 and 2 x 2 items using the larger dies, you can also create the adorable clips with the clip dies.

Here is a close of up the clips so you can see how large they are in relation to ones hand. SUPER CUTE RIGHT?

Here are all of the dies I showcased for my 2017 Sale A Bration with Brandie Party Part Two. I hope you will be sure to stay tuned to see what I create with my new dies!

Here is the complete list of items I showcased in my 2017 Sale A Bration with Brandie Party Part Two and a few extras I didn’t in case you want to check them out too!

Free Gifts

133719 Paper Glimmer Gold

135314 Paper Glimmer Silver

135315 Paper Glimmer Dazzling Diamonds

143831 Glimmer paper Assortment Pack

Project Life

141666 Project Life Card Collection Good Vibes

138454 Project Life Card Collection Moments Like These

135707 Framelits Project Life Cards and Labels

138284 Thinlits Project Life Paper Clips

141820 Big Shot Framelits Sliding Star

Coordinating Cardstock for Project Life Kits

100867 Night of Navy 8.5 x 11″

121044 Basic Gray 8.5 x 11″

138336 Tip Top Taupe8.5 x 11″

138334 Watermelon Wonder 8.5 x 11″

141415 Emerald Envy 8.5 x 11″

138340 In Color Collection 2015-2017 12  x 12″

Accessories

102394 Stampin Mist

101022 Stampin Mist Refill

If you have any questions about the items I have described in my 2017 Sale A Bration with Brandie Party Part Two, would like to order or any other questions, please go to Brandie’s Website HERE and I KNOW she will take very good care of you!

This week for our Giveaway, we are giving away the Stampin Up Glitter Paper Pack shown in the video above. These stamp sets will work wonderfully with any of the products that have been shown in my 2017 Sale A Bration with Brandie Party !

To qualify to win, you must be BOTH:

A follower on YouTube, subscribe to our mailing list/blog posts and you may also comment on this blog post for an additional entry to win! If you do not contact me within two weeks of winning, you will unfortunately, forfeit your prize. Thank you for your understanding.

NOTE: Be sure you are not subscribed with two different names. If I am unable to match you with your subscription to both the blog and the YouTube Channel, you will miss your chance to win a prize. If I can’t decipher if you are a matching subscriber (if your profile doesn’t show publicly who you subscribe to) and I can’t confirm you have subscribed to both, I won’t be able to enter you in for the prize. **DO NOT COMMENT WITH YOUR ENTIRE EMAIL ADDY. Only give me the first 6 NOT INCLUDING YOUR HOST. Just enough for me to match your name will work perfectly.  Your understanding is appreciated.

Now for last weeks WINNER!!

The WINNER IS  Jessica Marshall!!

Jessica, please send me your contact information via contact page on our website and I will get your prize out to you! If for some reason, you don’t get a response within 48 hours, please contact me. I have had e-mail issues in the past and would hate to have this happen again and not realize you have tried to contact me. Thank you so much for being a YouTube follower and subscribing to our mailing list/blog posts!

We hope you enjoyed our 2017 Sale A Bration with Brandie Party Part Two. Be sure to contact Brandie on her website if you would like to have your own! You can even have an online party too!

Have a wonderful week and thank you for going on A Creative Journey with Melissa.


SUPER EASY Card combining stamps with Punch Art Fun

SUPER EASY CARD combining stamps with Punch Art Fun is what we have for you today. Would you like to make a SUPER EASY CARD? Do you have a HEART PUNCH OR DIE? Then YOU ARE IN LUCK! Maybe even FOUR LEAF CLOVER LUCK? Yes, we are going to create a really cute and simple St. Patrick’s Day card. Are you ready for some creativity? Let’s get started!

Supplies Needed for the SUPER EASY CARD

A Creative Journey with Melissa’s Spring and Summer Holiday Celebrations Stamp Set

Stamp Block

Card Base

Patterned Mat for card

Paper to stamp sentiment on

Scissors

Foam Squares

Twine

Paper to punch out hearts

Heart Punch

Ticket punch

Adhesive

Rhinestones

Ink

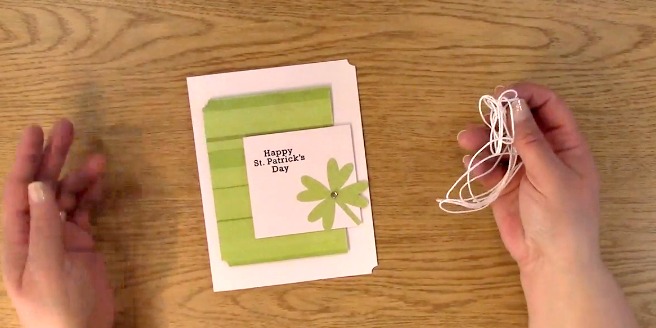
This is the SUPER EASY CARD creation we are going to make today.

This is the perfect card to bring to a corned beef and cabbage St. Patrick’s Day celebration! Wouldn’t this be perfect to bring along with a nice bottle of wine? YES!!

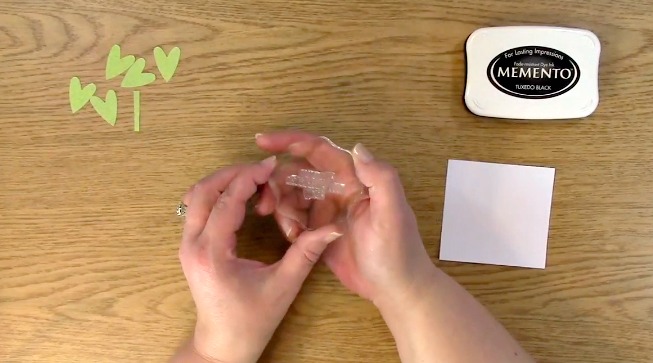
First, you will want to take out your heart punch as well as your paper.

Using your punch with the shape side facing you, punch out your shapes from your paper.

Cut out a stem for your four leafed clover from your paper.

Take out your A Creative Journey with Melissa’s Spring and Summer Holiday Celebrations Stamp Set, ink, Stamp Block and paper to stamp your sentiment on.

Peel off your Happy St. Patrick’s Day sentiment off of your stamp set sheet and place it on your stamp block.

Ink your Happy St. Patrick’s Day sentiment.

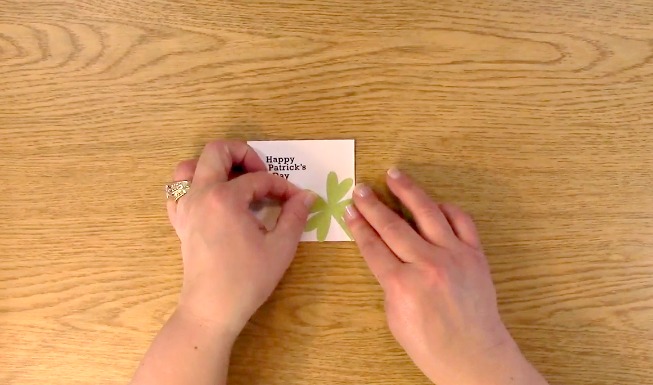
Stamp your sentiment on your paper in the left upper corner. This will allow you plenty of space for your four leafed clover.

Take out your adhesive and four leafed clover pieces. Place adhesive on the stem of your four leafed clover.

Put adhesive on the hearts for your four leafed clover.

Place the pieces of your four leafed clover on your sentiment paper.

This is what the four leafed clover looks like close up once the pieces have been put together.

Take out your rhinestone and place one in the middle of your four leafed clover.

Take out the ticket punch and punch the left side of your paper.

Using your ticket punch, punch your base card on the left side of the card.

Be sure to punch both the front of the card as well as the back of the card. When it is closed together it will be punched through on the right side of the card.

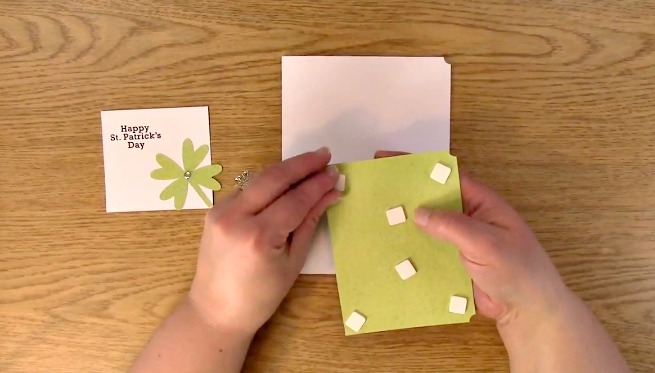
Place foam squares on the back of the mat for the card base and remove the protective paper.

Adhere your decorative paper on your card base for your SUPER EASY CARD.

Place your foam squares on your sentiment paper and remove the protective paper backing.

Put your sentiment paper with your four leafed clover on your card base of your SUPER EASY CARD.


Take out your white twine and wrap your twine around your SUPER EASY CARD. I wrapped it around the card three times.

Tie a bow with your twine and cut any excess twine off.

Here are the completed creations of your SUPER EASY CARD!

This week for our Giveaway, we are giving away the A Creative Journey with Melissa’s Spring and Summer Holiday Celebrations Stamp Set shown in the video above which will work wonderfully with your SUPER EASY Card combining stamps with Punch Art Fun!

To qualify to win, you must be BOTH:

A follower on YouTube, subscribe to our mailing list/blog posts and you may also comment on this blog post for an additional entry to win! If you do not contact me within two weeks of winning, you will unfortunately, forfeit your prize. Thank you for your understanding.

NOTE: Be sure you are not subscribed with two different names. If I am unable to match you with your subscription to both the blog and the YouTube Channel, you will miss your chance to win a prize. If I can’t decipher if you are a matching subscriber (if your profile doesn’t show publicly who you subscribe to) and I can’t confirm you have subscribed to both, I won’t be able to enter you in for the prize. **DO NOT COMMENT WITH YOUR ENTIRE EMAIL ADDY. Only give me the first 6 NOT INCLUDING YOUR HOST. Just enough for me to match your name will work perfectly.  Your understanding is appreciated.

Now for last weeks WINNER!!

The WINNER IS Terri Burson !!

Terri, please send me your contact information via contact page on our website and I will get your prize out to you! If for some reason, you don’t get a response within 48 hours, please contact me. I have had e-mail issues in the past and would hate to have this happen again and not realize you have tried to contact me. Thank you so much for being a YouTube follower and subscribing to our mailing list/blog posts!

We hope you enjoyed our SUPER EASY Card combining stamps with Punch Art Fun tutorial.

Have a wonderful week and thank you for going on A Creative Journey with Melissa.


SUPER EASY Craft Project – Planner Pom Pom Clip

SUPER EASY Craft Project – Planner Pom Pom Clip is what we have for you today. You can use this clip not only for your planner but also as a book mark, scrapbook marker, gift for a friend and so much more! I was reintroduced to the Pom Pom when I went to a crop hosted by my friends Esther and Leticia. I remember making them when I was younger and LOVED THEM! Leticia is on our Creative Crew and I along with Brandie and Rhoda on our Creative Crew were thrilled to support such an AWESOME crop. Esther did the demonstration of the Planner Pom Pom Clip.

If you are in the Los Angeles, California and are interested in going to one of their crops, send me a message and I will get you in contact with them!

Now, do you want to make your own? Let’s get started!

Supplies Needed

Twine or Yarn

Scissors

Paper Clips

Cut off a 4-6 inch piece of twine or yarn and set aside. You will use this to tie your Planner Pom Pom Clip.

Hold out your two fingers. Holding them apart approximately a quarter to a half of an inch apart. Starting at the bottom of your fingers as shown, wrap your yard around your fingers.

Wrap around your fingers with the yarn.

I wrapped the yarn twenty five times around my fingers.

If you want the Planner Pom Pom Clip to be more full, you would want to add more times wrapped with your yarn.

Cut off the yarn on the bottom once you have finished wrapping it to your desired thickness.

Take out the yarn piece you set aside. You will want to push the yarn piece in between your fingers as shown above where it is wrapped with the yarn.

Once you have pushed the yarn through, pull the yarn half way through so that there is yarn on both sides.

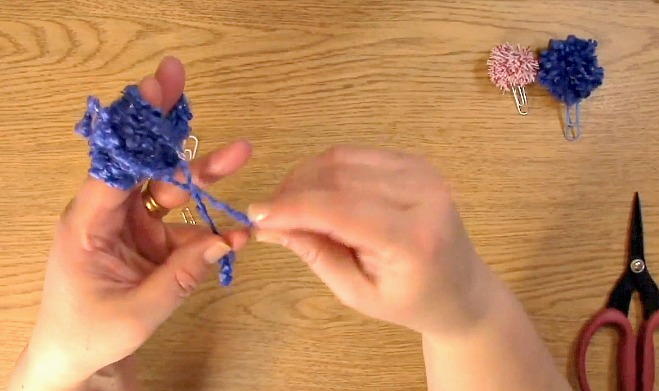
You will then take the ends of the pushed through yarn and tie them.

Remove the yarn from your fingers.

Pull the yarn tightly ensuring the yarn is in place securely.

You will then want to tie it again making a knot.

Once this is complete, take out your paper clip. Bend out your paper clip a little so you have a little bit of room between the outside edge and the inside.

Insert your paper clip either through the knot in the pom pom or behind it.

I chose to place the paper clip behind the knot. I feel like it is more secure this way.

Once it is securely attached, slide the paper clip around a full 360 degrees around the paper clip so that the paper clip is facing the correct way.

This is what the Planner Pom Pom Clip should look like once the paper clip is fully in place.

Now it’s time to trim your Planner Pom Pom Clip! It’s just like giving your clip a hair cut. Trim it to your liking whether it be short, long, even or uneven, it’s all up to you!

Here is my completed Planner Pom Pom Clip!

Here are the three Planner Pom Pom Clip creations I made! Aren’t they adorable? The possibilities are endless!

Again, a huge thank you to Esther and Leticia for inspiring my creativity today!

This week for our Giveaway, we are giving away the A Creative Journey with Melissa A Date to Remember Stamp Set shown in the video above which will work GREAT with your planner and NEW Planner Pom Pom Clip.

To qualify to win, you must be BOTH:

A follower on YouTube, subscribe to our mailing list/blog posts and you may also comment on this blog post for an additional entry to win! If you do not contact me within two weeks of winning, you will unfortunately, forfeit your prize. Thank you for your understanding.

NOTE: Be sure you are not subscribed with two different names. If I am unable to match you with your subscription to both the blog and the YouTube Channel, you will miss your chance to win a prize. If I can’t decipher if you are a matching subscriber (if your profile doesn’t show publicly who you subscribe to) and I can’t confirm you have subscribed to both, I won’t be able to enter you in for the prize. **DO NOT COMMENT WITH YOUR ENTIRE EMAIL ADDY. Only give me the first 6 NOT INCLUDING YOUR HOST. Just enough for me to match your name will work perfectly.  Your understanding is appreciated.

Now for last weeks WINNER!!

The WINNER IS Karen Ladd !!

Karen, please send me your contact information via contact page on our website and I will get your prize out to you! Thank you so much for being a YouTube follower and subscribing to our mailing list/blog posts!

We hope you enjoyed our Project Life Pocket Page Scrapbooking product overview. Have a wonderful week and thank you for going on A Creative Journey with Melissa.