Tag Archive for: Pocket Page Scrapbooking

2017 Sale A Bration with Brandie Party

2017 Sale A Bration with Brandie Party by Stampin Up is what we have for you today !! Yes! You read it right!

My awesome friend and previous Creative Crew member has moved on to a new adventure which is being a Stampin Up Demonstrator!

I am so excited for her and of course want to support my friends with their passion. I wanted to share with you what I got at my 2017 Sale A Bration with Brandie Party ! As you probably know, I have my own stamp line so I don’t typically use other stamps as I prefer to use my own. Did you know that Stampin Up has a number of amazing products besides stamps? YES THEY DO!

Between the Project Life kits, dies, paper, stamp cleaner and so much more….OMG!

I have so much to show you from my 2017 Sale A Bration with Brandie Party, I have to do it in two videos! Be sure to come back next week for the second half too! Are you ready? Here we go!

In years past I typically would do a large party at my house with four make n takes along with food and fun all day long. I really miss those days.

It usually would last from around 10-6:30.. Yes it was an awesomely fun all day event. This year it is just not in the cards for us so I was able to do a much smaller version and just purchased what I had saved up for. After my order, I ended up getting the benefits for my 2017 Sale A Bration with Brandie Party ! Any of the items you see in my video are available for purchase through Brandie. The 2017 Sale A Bration ends I believe March 31st.

Any questions or orders, please go to Brandie’s Website HERE and I KNOW she will take very good care of you!

We, A  Creative Journey with Melissa, do have a number of stamp sets that work perfectly with Project Life, scrapbooking, Pocket Page Scrapbooking, Card Marking, etc. Specifically for this video, the stamps below would work great with the products reviewed.


Everyday Alphabet Lower Case and Numbers      Everyday Alphabet Upper Case and Emoticon

Design Elements Stamp Set       

Design Elements                                        Photo Booth Fun


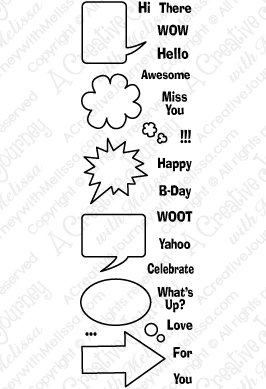
Speech Bubbles Mini                                            Speech Bubbles Large

            Sign Language Numbers - American Sign Language Stamp Set

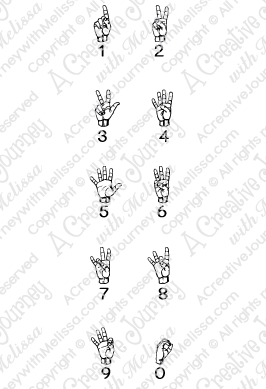
Sign Language Alphabet                                    Sign Language Numbers 

So let’s get started… 2017 Sale A Bration with Brandie Party starts with the Stampin Up project life card kits come in the cutest little box! I love it!

You can reuse it as well as bring it along on a crop and have all of your cards in a protected perfect fitting place!

As you can see here, it has a different spaces to hold your project life cards as well as a place for a journaling pen.

You know how I feel about journaling so YOU HAVE to do it!

This awesome project life kit is called

Moments like these.

I love the color palette as it is perfect for not only masculine but feminine creations.

There are so many journaling prompts to pick from something is bound to inspire you to share your story!

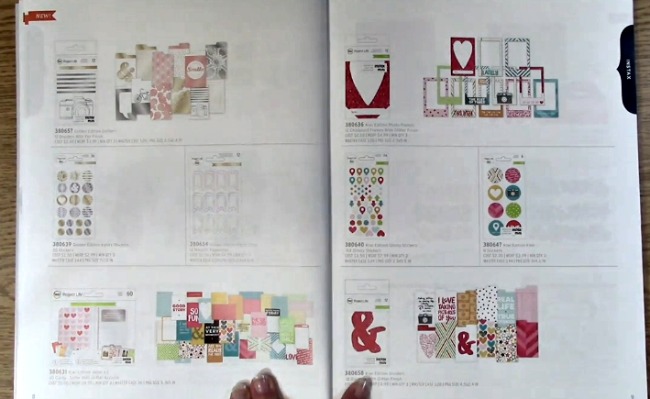
The cards here are 2 x 3″ in size and really great for your Project Life album as well as using any extra for a greeting card to send a little hello to a loved one.

Here are the 4 x 4″ cards which are also included in the kit.

I love the variety of words as well as designs so that you really have a great variety to pick from for any occasion.

Here with the 4 x 6″ cards, you can use these as a photo mat, design element, or a page title! Look at the designs and the rich watermelon color to add a beautiful pop to your page!

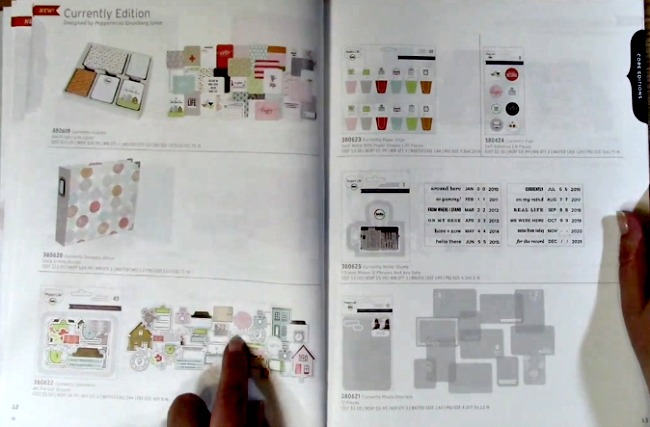
Now, the second Project Life Kit I purchased for my 2017 Sale A Bration with Brandie Party is the

Good Vibes Project life kit.

I love the rich dark colors and Good Vibes is exactly what it gives me as I look at it!

This kit also comes in it’s own little box holding the 2 x 3″, 3 x 4″ and 4 x 6″ cards.

Its so compact and convenient which makes it perfect to bring along while you are waiting to pick up kids, waiting for an appointment or watching your favorite show. The possibilities are endless!

Here are some of the 4 x 6″ Project Life cards that come in the kit. I love how the titles can really be used as a journaling prompt.

As you can see here, the 2 x 3″ cards from this kit is full of words of inspiration.

Wouldn’t this card be perfect for a quote to be used along with the Speech Bubbles Mini and Speech Bubbles Large A Creative Journey with Melissa Stamp sets? We thought so too!

Here are some of the 4 x 4″ Project Life Cards. I could really see some great stories to be told on those!

Now we have to talk about necessity for our 2017 Sale A Bration with Brandie Party too.. Customers and friends have asked me how I clean my Clear Photo Polymer stamps.

I use the Stampin Up Scrub pad and Stampin Mist. In addition, I have the Stampin up mist refill just in case I get low!

I love how it works and how it doesn’t dry out my stamps like some cleaners do.

The Stampin Scrub is something that I have owned for years and years. I own two of them. I use them so often, I have one in each of the areas I craft in because it is my GO TO item in my crafting tool box!

One of the best things about the Stampin Scrub

is it is durable and washable! I love it! You can remove the scrub pads and wash them!

There are a number of products out there to clean your stamps whether it be for rubber or clear photo polymer. I have been using Stampin Up products on all of my stamps for YEARS.

Here are some of the products I love from Stampin Up. I was fortunate enough to get enough so that I am going to make another video for you for next week! Be sure to check out next weeks too! You are not going to want to miss it!

This week for our Giveaway, we are giving away the A Creative Journey with Melissa Everyday Alphabet Lower Case and Numbers and Everyday Alphabet Upper Case and Emoticon Stamp Sets shown in the video above. These stamp sets will work wonderfully with any of the products that have been shown in my 2017 Sale A Bration with Brandie Party !

To qualify to win, you must be BOTH:

A follower on YouTube, subscribe to our mailing list/blog posts and you may also comment on this blog post for an additional entry to win! If you do not contact me within two weeks of winning, you will unfortunately, forfeit your prize. Thank you for your understanding.

NOTE: Be sure you are not subscribed with two different names. If I am unable to match you with your subscription to both the blog and the YouTube Channel, you will miss your chance to win a prize. If I can’t decipher if you are a matching subscriber (if your profile doesn’t show publicly who you subscribe to) and I can’t confirm you have subscribed to both, I won’t be able to enter you in for the prize. **DO NOT COMMENT WITH YOUR ENTIRE EMAIL ADDY. Only give me the first 6 NOT INCLUDING YOUR HOST. Just enough for me to match your name will work perfectly.  Your understanding is appreciated.

Now for last weeks WINNER!!

The WINNER IS  Jean Bullock!!

Jean, please send me your contact information via contact page on our website and I will get your prize out to you! If for some reason, you don’t get a response within 48 hours, please contact me. I have had e-mail issues in the past and would hate to have this happen again and not realize you have tried to contact me. Thank you so much for being a YouTube follower and subscribing to our mailing list/blog posts!

We hope you enjoyed our 2017 Sale A Bration with Brandie Party. Be sure to contact Brandie on her website if you would like to have your own! You can even have an online party too!

Have a wonderful week and thank you for going on A Creative Journey with Melissa.


Creating Journal Blocks to tell the Story

Creating Journal Blocks to tell the Story is what we have for you today. This project is something you can do in mass quantity, keep on hand and decorate on an as needed basis. There are so many ways to utilize Journal Blocks to tell a story. They are perfect for trips, special occasions, experiences or just for “A Day in the Life of” to document your day! I am so excited to show this to you so let’s get started!

Supplies Needed

 Stamp Block

A Date to Remember A Creative Journey with Melissa Stamp Set

That’s the Ticket A Creative Journey with Melissa Stamp Set

Card Stock

Ink

Corner Rounder

First, when Creating Journal Blocks, you will want to take out your paper squares and use the corner rounder on the paper.

Next, take out your stamp block, ink, paper and the A Date to Remember A Creative Journey with Melissa Stamp Set.

Place the dotted circle on your stamp block, ink your stamp and stamp on your paper.

This is what it will look like after stamping your dotted circle on your journal block.

Remember, when you are Creating Journal Blocks you can use whatever color ink or paper you want. Use what will coordinate best for your project. You can use Journal Blocks for a scrapbook, specific holiday or theme, event and vacation.

Take out your FEB stamp and place it on the stamp block.

Using your choice of ink color to match your project, ink your FEB stamp.

Pick out the correct date for your Journal Block, place your stamp on your acrylic stamp block and ink your stamp.

Here is a close up after stamping the month, dotted circle and date.

When Creating Journal Blocks, you can be as sophisticated or as simple as you wish.

As a design choice, I have decided to add the year to my journaling block. Take out the 20 stamp and the 17 stamp. First, place your 20 stamp on your block, ink and stamp on your paper.

Second, take your 17 (for 2017) on your stamp block, ink and stamp on your paper , lining it up to make sure it flows with the recently stamped 20.

Here is a close up of the result Creating Journal Blocks.

I love how the month and year are on the side and the date is straight. I thought it was something different to do.

We have now finished Creating Journal Blocks on the front side of our paper. Now, flip them over and we will start the journaling prompt on the back.

Take out That’s the Ticket A Creative Journey with Melissa Stamp Set and peel off the frame of your choice.

The stamps in both of these sets can be used as exact straight creations or gently move them around to create your own. The stamps that have an outline image can be made into other shapes and I love how the frame can be perfect or you can manipulate it by changing it’s shape so it looks like it is hand drawn.

Be creative!

Place your stamp on the block and ink it thoroughly.

Stamp your image onto the paper.

TIP:Be sure when Creating Journal Blocks, you double check that the paper is facing the correct way so it matches regardless of which side you are looking at because  you don’t want one based horizontally and one vertically.

Pick out your favorite prompt for your journaling block. You can replicate the journaling prompt for all of your journaling blocks or you can do different ones for every day.

I chose different journaling prompts but for this one I chose MY FUTURE and since we are getting ready to look at colleges for my youngest son, it worked! Time FLIES BY!

To change the look of the outline frame stamps, we manipulated it so this normally square stamp is now placed on the block as an oval.

This is what it looked like once it was stamped. I thought it looks a little like the Batman logo LOL You can also use these on doodling pages!

Here are the finished creations for Creating Journal Blocks to tell the Story.

ACJwMThat’s the Ticket Stamp Set

ACJwM A Date to Remember Stamp Set

This week for our Giveaway, we are giving away the A Date to Remember A Creative Journey with Melissa Stamp Set and That’s the Ticket A Creative Journey with Melissa Stamp Set  used in the video above.

To qualify to win, you must be BOTH:

A follower on YouTube, subscribe to our mailing list/blog posts and you may also comment on this blog post for an additional entry to win! If you do not contact me within two weeks of winning, you will unfortunately, forfeit your prize. Thank you for your understanding.

NOTE: Be sure you are not subscribed with two different names and I am unable to match you with your subscription to both the blog and the YouTube Channel, you will miss your chance to win a prize. If I can’t decipher if you are a matching subscriber, if your profile doesn’t show publicly who you subscribe to) and I can’t confirm you have subscribed to both, I won’t be able to enter you in for the prize. **DO NOT COMMENT WITH YOUR ENTIRE EMAIL ADDY. Only give me the first 6 NOT INCLUDING YOUR HOST. Just enough for me to match your name will work perfectly.  Thank you for your understanding.

Now for last weeks WINNER!!

The winner of the I Just Love You Stamp Set by ACJwM is Barb Macaskill!

Barb, please send me your contact information via contact page on our website and I will get your prize out to you! Thank you so much for being a YouTube follower and subscribing to our mailing list/blog posts!

We hope you enjoyed our Creating Journal Blocks to tell the Story tutorial. Have a wonderful week and thank you for going on A Creative Journey with Melissa.

CHA 2016 Project Life New Product Review with Giveaway

It’s a CHA 2016 Project Life New Product Review with Giveaway!! Today we are going to do a new product review of Becky Higgins amazing new 2016 Winter catalog I received at the CHA Show! First I want to announce the WINNER of last weeks giveaway. It is Eileen Fields! She will be receiving an awesome Mod Podge gift pack courtesy of Cathie and Steve and Plaid. Eileen please contact me with your mailing info and I will get your prize out to you this week! YAHOO!!!! Thank you for participating!

Now, onto this weeks fun and GIVEAWAY! I will be giving you a first hand look at the new 2016 Winter catalog as well as a wonderful prize ONE OF A KIND Becky Higgins Autograph prize that is up for grabs that any Scrapbooker, Creative, Memory Keeper and of course Project Lifer, would be THRILLED to have! This is her signing one right here! A keepsake to truly treasure!

Project life Winter Catalog 2016 j

Sooooooo I went to the CHA (Craft and Hobby Association) Show last weekend and it was a blast! Be sure to stay tuned as I have a number of prizes up for grabs that I received there from some great vendors. One person that I adore and is just as sweet as you would expect her to be is Becky Higgins AKA the Project Life creator. She is so sweet and I asked her if she would be as so kind to give me an autograph for one of her fans and she graciously obliged. The CHA 2016 Project Life New Product Review with Giveaway is a wonderful keepsake for your very own Project Life book!

In order to qualify to win you need to:

Subscribe to my YouTube Channel

Subscribe to my blog on Blog Lovin’

Comment on this post if you are a Traditional Scrapbooker, Card Maker, Project Lifer, Love Planners, Smash Booker, all of the above or whatever your favorite form of memory keeping is and why.

For additional chances to win, follow me on Instagram. If you do so, please be sure to let me know in your comment here on the blog so I can be sure to count it in the comments when answering the question. I will be double checking so please be honest or you will be disqualified. Unfortunately, dishonesty has happened before. Due to shipping prices this offer is only open to United State Residents. We appreciate your understanding. Winner will be announced 1/25 on my blog so be sure to check back!

Now for the fun stuff!

As I said before, Becky is UNBELIEVABLY gracious. I went to CHA with a few of the Creative Crew members as well as my hubby and oldest son. Christian is 18 so fortunately, he was able to attend this year! Christian was a great sport and he was my “poser” for pictures. Don’t you think this picture is great? I love how it turned out!

Project life Winter Catalog 2016 i

If you haven’t heard of Project Life it is a simplistic way to do scrapbooking by having pre printed cards and layouts that are easy to follow and do. You can embellish as much or as little as you want! Here are a few pictures of my favorite sets although I LOVE THEM ALL, I had to pick just a few.

Project life Winter Catalog 2016 a

I love bold colors and I love this line. The bold colors, sayings and cute designs really will be useful for me in my creations. Most of all I like versatile designs. I have two boys but don’t want all masculine products either so a versatile set that can be used for multiple things is what I look for and THESE ARE AWESOME! I am really excited! For the names of the collections, check out my video for more details!

Project life Winter Catalog 2016

I LOVE the doodle edition and the all seasons edition.. AGAIN THE COLORS ARE FABULOUS! Really versatile and adorable! Did you ever think to use your extra cards to create a greeting card or use it for a cover page of your Project Life book? Words that are important to you? Just a thought.. The possibilities are REALLY ENDLESS!

Project life Winter Catalog 2016 f

With the above set there are some really cute coffee items as well as home doodles… its just all around so cute!! LOVE IT!

Project life Winter Catalog 2016 c

However above all else, I think my favorite is the Explore Edition. This would be great for my boys between dirt bike riding, going camping, etc. The colors are perfect for that as are the embellishments. TOO DARNED CUTE! I see an increase in spending with the economy… UH-OH!

You may also want to check out our stamp sets. Our alphabet stamp sets as well as our Sign Language Alphabet stamp sets are great for any Project Life, Journal, Pocket Page Scrapbooking, Planner or anything you creative and crafty you come up with!

Here is a close up of the autographed card you will be getting if you are the winner. So excited to share the CHA 2016 Project Life New Product Review with Giveaway with you!

Project life Winter Catalog 2016 h

Be sure to follow the directions of the giveaway and come back next Monday to check out if you are the lucky winner!

Thank you so much for going on A Creative Journey with Melissa. Be sure to follow the instructions on this blog post in order to win a one of a kind autograph from Becky Higgins! Thank you for participating in the CHA 2016 Project Life New Product Review with Giveaway!

melissa-written-signature

CHA 2016 Going on A Creative Journey with Melissa Part #2

I am baaaaaaaaccccckkkkk from CHA 2016!!!  I have returned from CHA 2016 and am overwhelmed, thrilled and exhausted! I have a lot to show you and will be showing it to you over the next few weeks as well as having GIVEAWAYS TOO!! Today’s focus is on We R Memory Keepers products. I do not have any affiliation with them, I just love their products and own a number of them. I am thinking about carrying them, what do you think? Would you like me to carry them and if so, what would you like to see? Comment on this post and answer this question and you will be entered to win one of the CHA prizes I have. I have a number of them thanks to the generosity of some of the manufacturers like items from  Tim Holtz, Simple Stories, Cathie and Steve with Plaid Industries, Sizzix to name a few. I will be picking a winner at random on Sunday January 17th and will announce the winner on Monday January 18th as well as what they have won and will have one of my sons pick the winner. This is a tradition I started when I started blogging and have continued it throughout the years. After all, they are the A and the C of the ACJwM! The above video is a sneak peek at that alphabet punch board by We R Memory Keepers. It’s really cool and I think it would be great for teachers that do bulletin boards. I thought you would like to see it as it is not even on the market yet. How cool is that? If you want to learn more about CHA and read my first post, please go here. Now, onto the products. I loved this display it was clean, colorful and most of all filled with fun items to play with! They were wonderful and the gentleman was more than happy to do an impromptu demo video for little ole me! I was and am VERY THANKFUL!

We R Memory Makers CHA 2016

These above are shadow boxes, cork boards, chalk boards, peg boards, wire hanger and picture frames. They all look so wonderful and when I saw them I thought HMMMMM…. PAINT!

IMAG1029
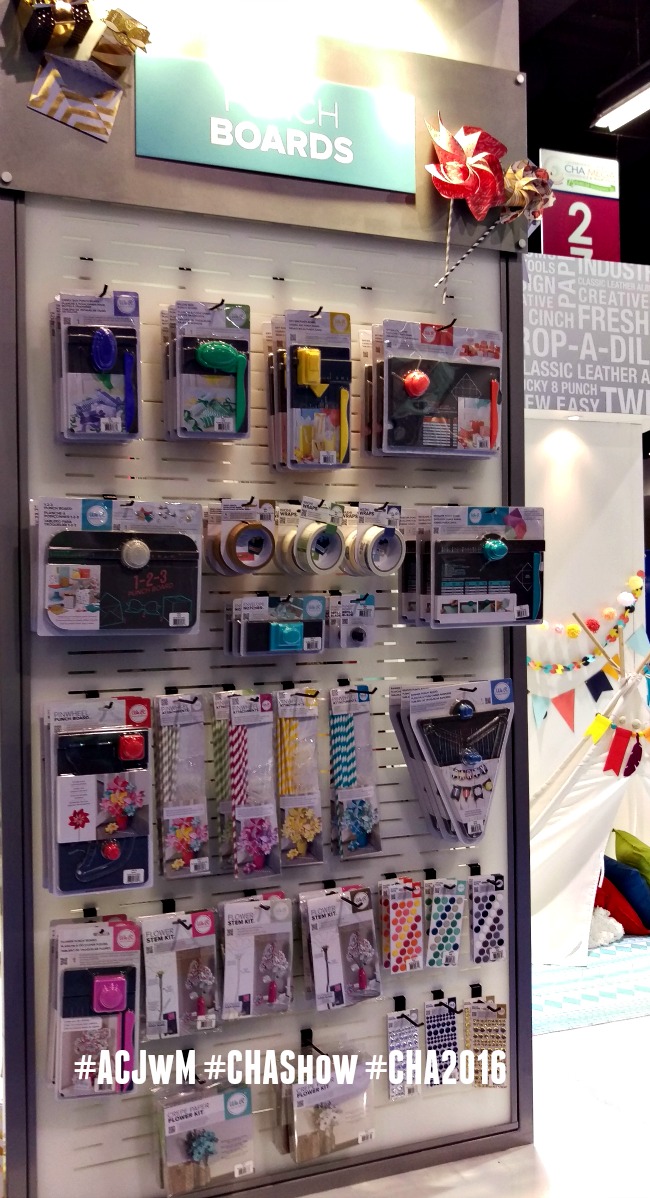
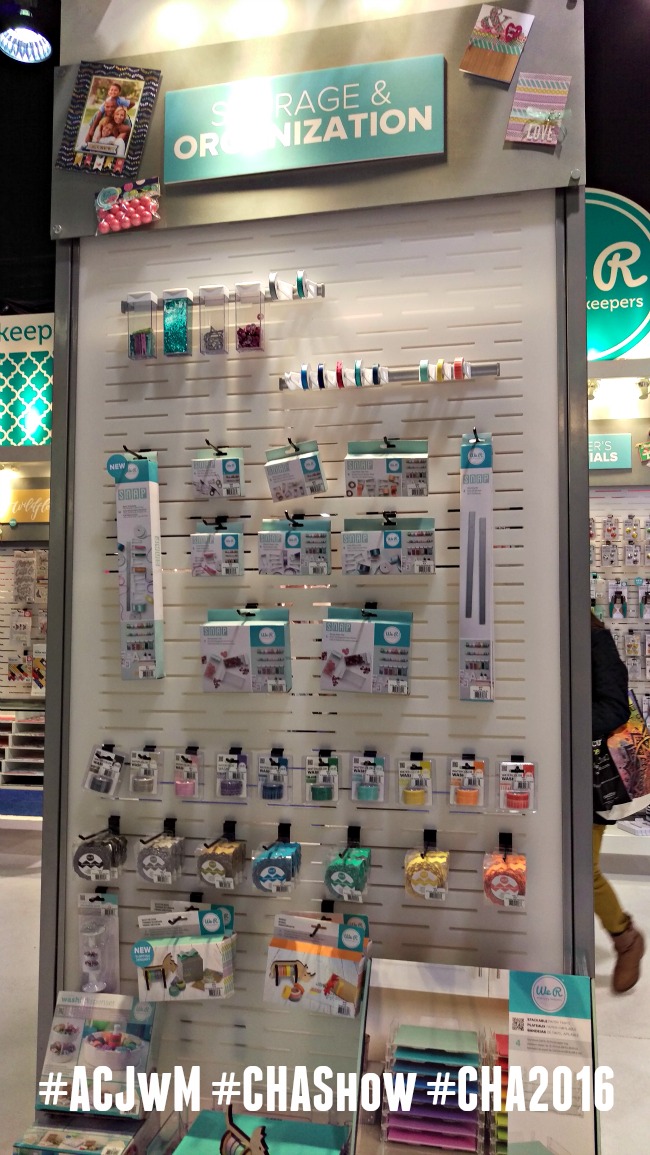
The above includes washi tape, washi dispenser, paper and more! It also includes a type of rail system PERFECT for organization. Especially the farthest left one that has different size holders for different sized ribbon and WASHI!! YES WASHI!!We R Memory Keepers CHA 2016 2

Here is a CLOSER VIEW of the rail system. It’s pretty cool!

IMAG1032

The above has various punches and decor for party decor making!  They are all so useful! This display is also including  punches to make the alphabet punch board that is featured in the above video 🙂

IMAG1031

Here are some awesome flower kits, various punch boards as well as embellishments PERFECT for a PARTY!!!

IMAG1030

And of course for all of you Project Life Lovers… We have a similiar type of item that would work great with Project Life which is Albums Made Easy. We also have the FUSE that allows you to make your own sized pockets along with a bunch more fun stuff for Pocket Page Scrapbooking!

I hope you enjoyed this tutorial as well as the products included in the review of the We R Memory Keepers booth at CHA 2016! Thank you so much for stopping by and going on A Creative Journey with Melissa.

melissa-written-signature

Planner Clips, Hair Clips, Book Marks, OH MY!

Planner Clips, Hair Clips, Book Marks, OH MY! This is EXACTLY what I thought when I was creating these clips and I have since come up with more ideas as well! Would you like to learn how to create a clip that can be used for multiple purposes? In this video, I will show you how to easily make these clips that have a number of uses. You can make Planner Clips, Project Life Clips, Hair Clips, Pocket Letter Clips, Book Marks, Money Clips, OH MY! The possibilities are ENDLESS!

Whether you prefer to learn by the video above or the pictorial below, we have you covered so let’s get started!

Here are the items you will need to create this project:

Hair Clips

Grosgrain Ribbon ( 1/4″ thick which is what I used)

Beacon Fabri-Tac Glue

Sharp Scissors

Embellishments
Supplies

You will want to use your ribbon to measure exactly how much you will need to cover the inside top, top and back area of the clip. This should be done each time you use a different sized or brand clip, as they can vary. It is the same exact way you would create your clip with adhesive.

Collage for Measuring

Now, for the project! Take your measured ribbon and run a line of adhesive on one side of the ribbon (not the patterned side) leaving a small area on each end empty for overage.Apply adhesive to the back side of the ribbon

To assemble, you will start with the inside top of the clip. You will have the pattern of your ribbon facing down (as you have just placed your glue facing up.)

close up of adhesive
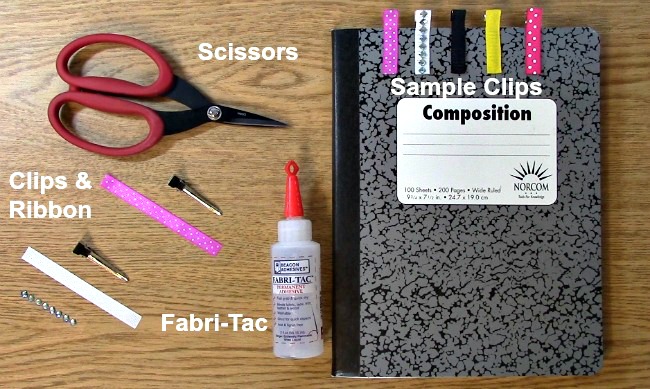
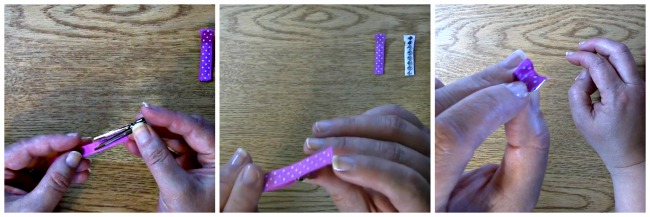
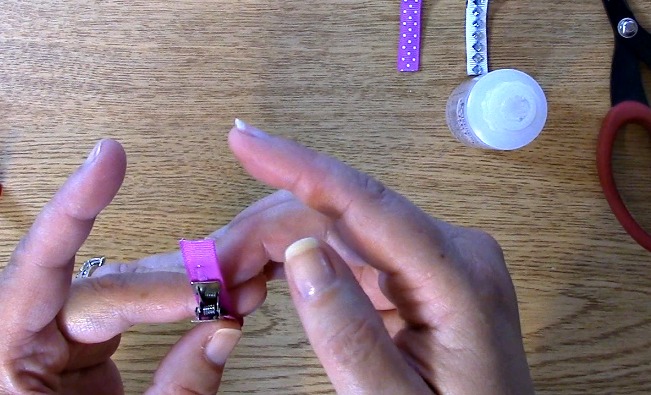
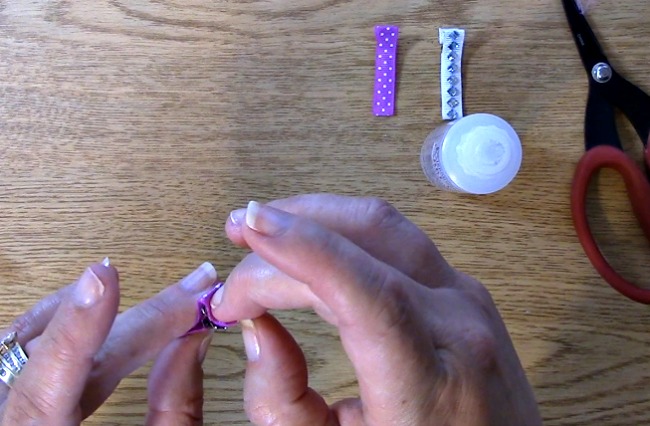
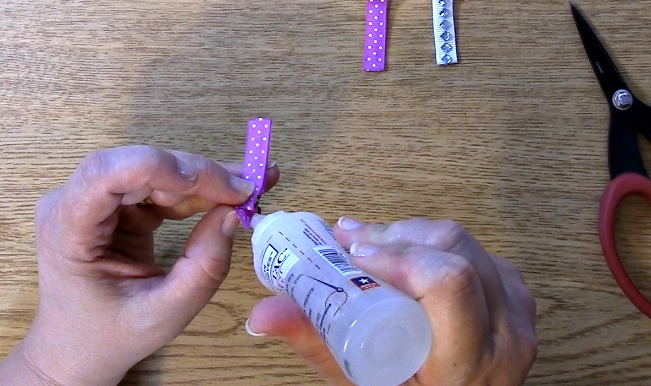
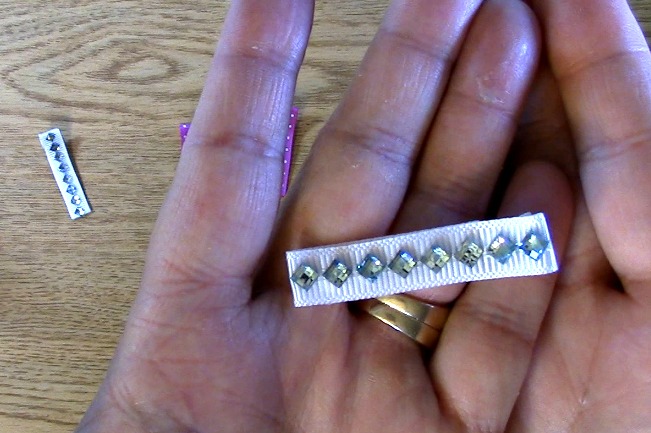
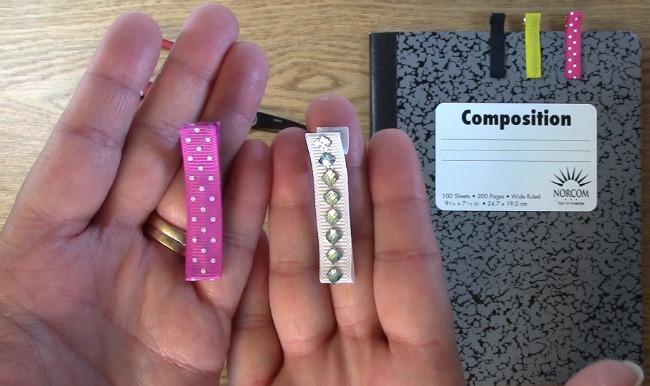
Place the ribbon on the inside of the clip so that the glue is facing up and will adhere to the top part of the inside of the clip.

place ribbon on the inside of the clip glue facing up

 Wrap the ribbon around so that you cover the top of the clip.

One the inside of the clip and the top of the clip are done, you now have to cover the back side of the clip

Take the remaining part of the ribbon and wrap it around the back to hide the spring area.

adhere the ribbon to the back of the clip

Add adhesive sparingly as needed in areas where necessary.

add adhesive sparingly where needed

Adjust your ribbon so that they line up and are centered.

Look over the ribbon and adjust so that it is even and centered

Take your project one step further! Add embellishments like rhinestones, flowers, more ribbon and whatever you choose!

Add embellishments

You are done!

clip close up

We hope that you enjoyed our project today. We would love to hear what type of uses YOU come up with for this adorable project.

Thank you for joining us and for going on A Creative Journey with Melissa.

melissa-written-signature