Shaker Card Embellishment Using Packaging
Shaker Card Embellishment Using Packaging is what we have for you today.
Who doesn’t like to save money?
Shaker cards have been around for quite some time and seem to be coming back so I thought you would like to see how to create one using packaging you may already have to save some money!

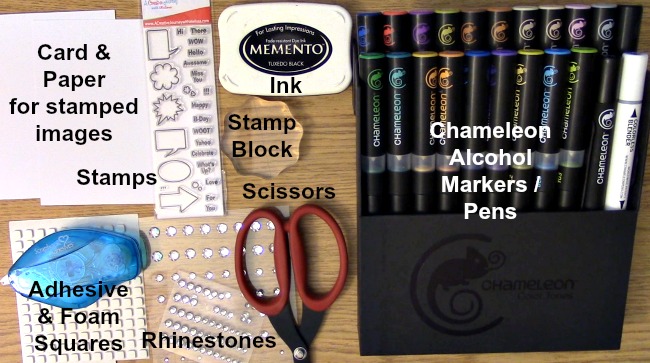
Supplies Needed
A Creative Journey with Melissa Spinner Greetings Stamp Set
Re Use Acrylic Packaging from your Dies or purchased items or use an Acrylic Sheet
Manual Die Cut Machine & appropriate platforms
Dies
Strong Adhesive
Twine
Base Card
Paper to Stamp Sentiment On
Green and Black Ink
Punch
Sequins
Decorative Paper
Foam Tape
Scissors
Paper Trimmer (you can use your scissors too)

This is acrylic packaging from a die for my Sizzix die cut machine. I like to keep it so that I can use it for projects like these.

Using my scissors, I cut the box open making sure I leave the long flat areas intact so I can use them for future projects. Trim off the parts that won’t be usable. Be sure to use sharp scissors as it will help when you are cutting the material.

For the second part of the Shaker Card Embellishment Using Packaging I am only using the Right side of the die. I am using this to create the window for my shaker card. This will save on materials that you won’t be using for this project.

The Die I used the Echo Park Sizzix die as shown above.

First, you will want to pull out your clear platform for your manual die cut machine.

You will then want to place the die you are using on top of that. I put my die face up so I can see where I am putting my material typically but it does help with demonstration purposes as well.

Place your recycled acrylic piece ensuring that it is covering the area in which you want to cut. If it overlaps a little, that is OK. You can trim it after it has been die cut.

This is what it looks like once it has been die cut.

Be sure to trim any edges that aren’t needed.

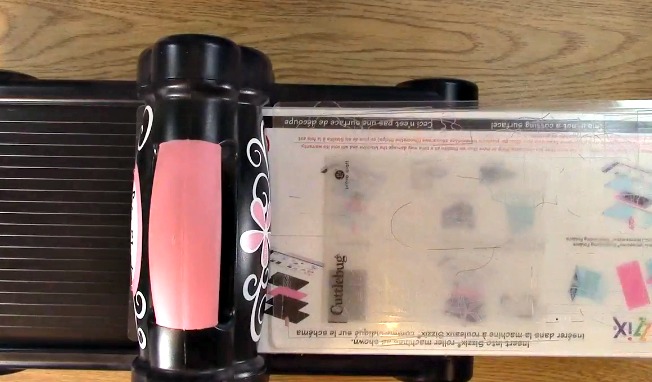
Now we will be die cutting the frame or front part for the Shaker Card Embellishment Using Packaging. Place your clear platform, your die and then your paper on top of the die.

Take out your paper and place that on top of your die and then your clear platform on top of the paper. Be sure your paper is completely covering the area you want cut.

Run your die cut through the machine using the handle.

Once it has been cut, it will look like this. (This is the back side of the paper)

This is what I made using the inside piece of this die. Two weeks ago I did a thank you card tutorial on my creation HERE.

I overlapped the paper on the die so I need to trim the excess area.

Take out your paper trimmer and trim the excess paper from your frame for your Shaker Card Embellishment Using Packaging Project.

With the frame and the acrylic piece you die cut, you are ready to put together your Shaker Card Embellishment Using Packaging Project.

Here you can see what the window of the Shaker Card Embellishment Using Packaging Project will look like.
 If you don’t like to keep the packaging the way it is, in case it has blemishes or marks on it, you can emboss your acrylic material to make it less noticeable like I have here.

For this creation, I used a star embossing folder because I thought it went along with my theme and decor better.

Take out your clear platform.
NOTE: Don’t worry if your platform has marks on it like mine does above. It is NORMAL. Even if it makes creaking and cracking noises, it is normal. At some point you may need to replace your clear platforms but I have had mine for well over 5 years and haven’t had to yet.

Place your clear platform down on your machine.

On top of your clear platform, place the standard platform down.

Place your clear acrylic material inside your embossing.

Close your embossing folder and place it on top of your standard platform.
Place your clear platform on top of your embossing folder.

Turn the handle and run your embossing folder “sandwich” through the manual die cut machine.

This is what the acrylic will look like once you have embossed it. One of the easiest and coolest tricks to do!

Take out your sequins and move them around. You want to try to get them separated so that they aren’t stuck together inside your shaker card. This will keep your card flowing when you are shaking it.

Now that you have done your prep work, it is time to create your Shaker Card Embellishment Using Packaging Project! Take out your frame and your embossed acrylic piece.

Place strong adhesive on the back of your shaker card frame.

To avoid having the acrylic bending and not laying flat, bend it the opposite way it is going to straighten out the piece.

Adhere your acrylic piece to the BACK of your shaker frame.

Press down on all sides of the acrylic so you ensure it is adhered to the paper.

This is what it looks like once you have adhered them together.

Take out your foam tape. You will want it to be approximately 1/4 inch – 1/2 inch tall to ensure there is enough room for the shaking part of the shaker. If your foam tape is not that thick, you can use multiple layers to achieve that. My tape was thinner so I used two layers.
*NOTE* I cut my foam tape in half because I didn’t need that thick of a border around the frame.

Place your foam tape around the edge of the front of your shaker card. Make sure you don’t leave any large gaps otherwise you may loose some of your shaker components.

Once you have placed your tape around the card, you will want to push down hard on your foam tape to ensure its adhesion.

Here you can see a little gap between where the tape meets.. It is not big enough to worry about but to make sure that nothing falls through, use the second layer to cover all of the areas where the tape meets.

Remove the tape backing from the foam tape.

Start placing your second layer of foam tape on top of your first one and cover your gaps.

I ran out of the pre-cut foam tape so I cut some more straight down the middle for future shakers and the rest of this one.

This is what it looks like once I have cut it.

After I have finished placing the second layer of foam tape, push down hard on the foam tape to ensure the second layer sticks to the first and the card front. Set this aside.

Take out your card base, green ink, stamp block and A Creative Journey with Melissa Spinner Greetings Stamp Set. Place your star stamp on your stamp block.

Using the star from the A Creative Journey with Melissa Spinner Greetings Stamp Set, ink and stamp stars on your card base using green ink.

It seems I made a mistake by placing a little extra ink by this star. I am going to show you how I fixed it!

I could have left the ink on there with the shaker contents no one would have likely noticed but I wanted to show you what I would do.
What a great way to make this a **TIP** I just added another star right on top of the area and you can’t even tell it was there.

To make it look more uniform in my creation, I added another one on the bottom right.

This is what it looked like when the stamping was done.

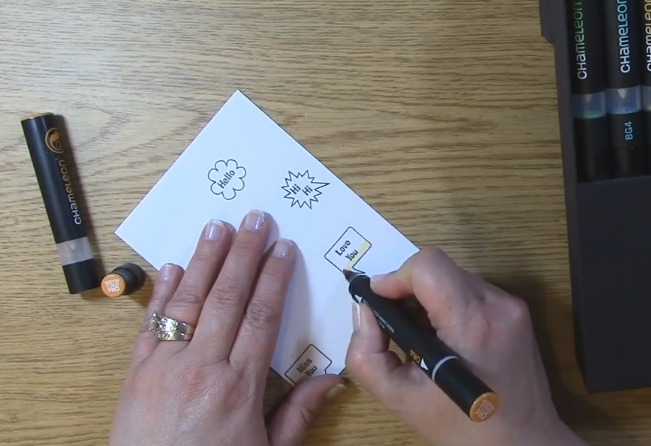
Using the A Creative Journey with Melissa Spinner Greetings Stamp Set, take off your sentiment from the stamp sheet. I chose Celebrating Your Graduation. Place the words on your work surface the way you would want to read them.

Once you have them aligned and in order, take your stamp block and press down on your stamps.

Now if you are picky like me, you will fiddle around with it a bit just to make sure it is JUST RIGHT!

Now, YOU ARE READY TO STAMP YOUR SENTIMENT!

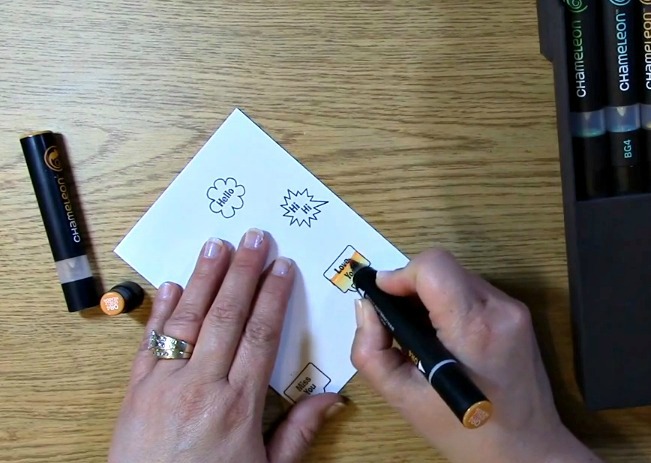
Ink your sentiment and stamp it on your paper.

I usually like to make a few extra in case I would need them for a future card emergency. LOL

Take out your punch and punch out your sentiment for your Shaker Card Embellishment Using Packaging Project.

Using twine, wrap around your punched out tag. I wrapped it around my tag three times.

You can tie a bow or a knot. I chose to tie it in a knot.

Trim off the excess twine from your project.

Place foam tape on the tag. You only need one layer for this. Set this aside.

Take out your card base and your card from for your Shaker Card Embellishment Using Packaging Project.

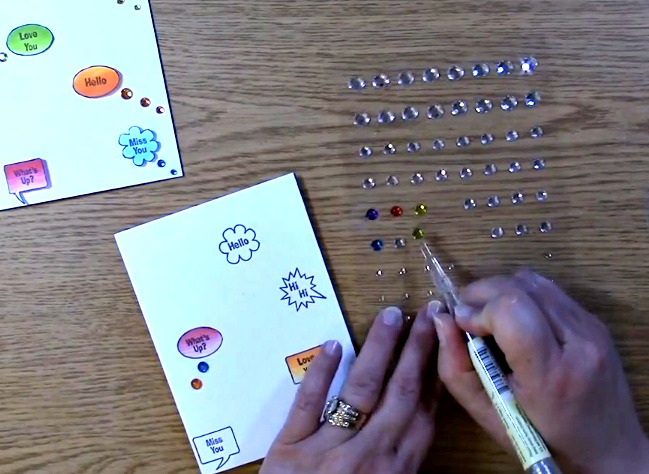
Bring out your sequins ensuring that they are not stuck together. Even after I did it previously, I still found a few that wanted to stick together. Once you have done that, place all of your sequins in the middle of your card. You want to make sure you don’t put it where the card adhesive could come in contact with it.
THAT WOULD BE A MESS!

Remove the tape backing from the card front.

Turn the card front so that you can see the decor with the foam tape facing down. Carefully line up your card front to the card base.

Push down on all of the edges a few times ensuring the adhesion to your card base.

This is what your Shaker Card Embellishment Using Packaging Project. looks like so far!

Double check which way your card is facing. This way you can be sure you are putting on the sentiment in the correct direction of your creation.

Remove the foam tape backing from your sentiment. Adhere your sentiment tag to your card.

As you can see, I decided to switch it up a bit and show you how the card would look if I put the sentiment horizontally. Just switching the cards direction changed it up a little bit and gave it a different look. I LIKE IT!

This is what the window looks like without embossing and it really depends on what type of look you want for your creation.

Here are three different looks for your Shaker Card Embellishment Using Packaging Project!

Now, for the GIVEAWAY!
This week for our Giveaway, we are giving away the A Creative Journey with Melissa Spinner Greetings Stamp Set
To qualify to win, you must be BOTH:
A follower on YouTube, subscribe to our mailing list/blog posts and you may also comment on this blog post for an additional entry to win!
You must contact me within two weeks of the announcement of winning. You will unfortunately, forfeit your prize and it will be placed back in the giveaway stash for a future giveaway if you do not. Thank you for your understanding.
NOTE: Be sure you are not subscribed with two different names. If I am unable to match you with your subscription to both the blog and the YouTube Channel, you will miss your chance to win a prize. If I can’t decipher if you are a matching subscriber (if your profile doesn’t show publicly who you subscribe to) and I can’t confirm you have subscribed to both, I won’t be able to enter you in for the prize. **DO NOT COMMENT WITH YOUR ENTIRE EMAIL ADDY. Only give me the first 6 NOT INCLUDING YOUR HOST. Just enough for me to match your name will work perfectly.

For last weeks giveaway of the
the Birthday Wishes A Creative Journey with Melissa Stamp Set!
Cindy B is the winner!
Cindy B, please send me your contact information via contact page on our website, which post you are a winner from and I will get your certificate prize out to you! Thank you so much for being a YouTube follower and subscribing to our mailing list/blog posts!
We hope you enjoyed our Shaker Card Embellishment Using Packaging Project! Have a wonderful week and thank you for going on A Creative Journey with Melissa. 


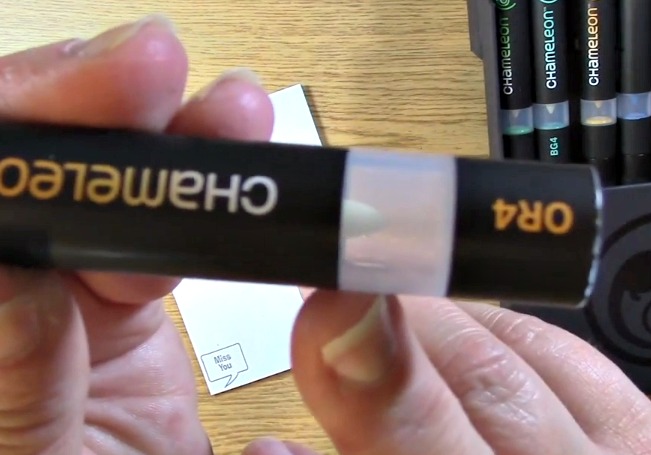
 Once you have taken off the cap off your marker tip preference, place your tip so that the mixing chamber is touching your colored tip. Make sure that your colored tip (nib) pointed toward the sky and the mixing chamber tip (nib) is pointed toward the floor. The pen will be upright and the below picture is what your marker / pen will look like when it is in front of you.