Tag Archive for: sign language

Kid Friendly Crafts – Valentine Treat Holders

Kid Friendly Crafts – Valentine Treat Holders is what we have for you today. I was very fortunate and grateful for being a room parent for both of my kids. Actually, my husband and I were BOTH room parents. I couldn’t have done it without him. When it was a holiday, I loved creating something for my children’s classmates. I tried to create something that would also work with what the teachers were doing in the classroom. These treat holders will do just that!

Supplies Needed for the Kid Friendly Crafts – Valentine Treat Holders Project

A Creative Journey with Melissa I Just Love You stamp set

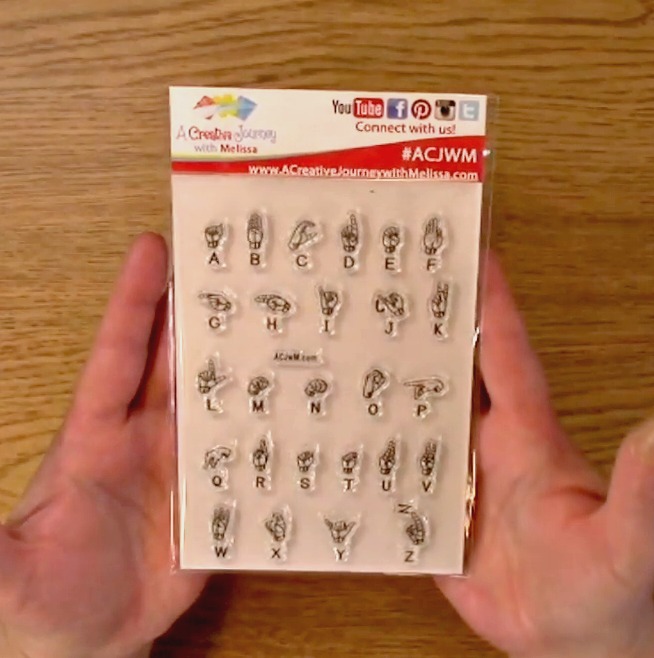
A Creative Journey with Melissa Sign Language Alphabet stamp set

Acrylic Block

Stapler

Adhesive

Marker

Candy of your choice

Red Ink

Paper for treat holder

Paper to stamp on

This is the Kid Friendly Crafts – Valentine Treat Holders Project that we are going to create! It is perfect for you to create yourself or make it a family project! Simple for little ones to help with too!

To begin the Kid Friendly Crafts – Valentine Treat Holders Project, take out your paper to stamp on, sign language stamps, red ink pad and stamp block. Place your stamps on your stamp block.

Ink your sign language alphabet stamps and stamp them on your paper. Clean and remove your stamps, placing them back on their sheet.

Place your love stamp from your I Just Love You stamp set onto your stamp block. Add ink to your sentiment and stamp your word onto your paper. Clean and remove your stamps, placing them back on their sheet.

Take out your heart stamps as shown above from your I Just Love You stamp set. Ink your stamps and stamp your image on the upper right hand corner of your paper. Repeat for the bottom left corner by moving the vertical hearts above the horizontal hearts as shown. Clean and remove your stamps, placing them back on their sheet.

This is what your Kid Friendly Crafts – Valentine Treat Holders Project looks like once you have stamped your images and sentiments on your paper.

Have your child write their classmates name and sign their name on the tag. I would suggest they use pencil in case they make a mistake. For older kids, using a pen may be preferred.

Take out your treat holder paper. You can choose to fold the paper more or less depending on how much of the treat you want exposed. For the example, I chose to fold it more so less of the treat would show. With this creation, I am going to fold it a little bit less so more of the treat would show.

For this demonstration, I decided to use adhesive to adhere the sides of the treat holder. Place adhesive on either side of the flap. Do not to all three sides or else you won’t have an opening for the treat.

In my example, I used staples. Either way works great. If you have little ones, they may be more excited to use the stapler.

The first time I stamped the word TO with my sign language alphabet stamps, I didn’t press all of the way and I got half of the image. What does one do when that happens? TURN OVER THE PAPER!! In this case, we will be placing adhesive on the back of this paper so we can adhere it to the treat holder.

Place your Kid Friendly Crafts – Valentine Treat Holders Project label on the front of the treat holder.

I chose to use Fun Dip for our treat filler. You can use any treat really however be sure to ask the teacher if any of the students have any allergies. We want to be sure that the treats are all inclusive.

You did it! You created your Kid Friendly Crafts – Valentine Treat Holders Project! How fun was that?! Now for this weeks giveaway, we are giving away two stamp sets.

The first is the A Creative Journey with Melissa Sign Language Alphabet stamp set and

the second is A Creative Journey with Melissa I Just Love You stamp set.

For our giveaways from last week, a store credit so you can pick out your favorite item in our store! Please be sure that you  send me a message letting me know which post you won on and your contact info and I can get your prize out to you!

The winner is Jessica M!

Winner, please send me an message HERE and I will get your prize out to you!

For all of our giveaways including this one, in order for you to qualify for an entry to win, you would need to be a follower on YouTube, subscribe to our mailing list/blog posts (found on our blog page) and you may also comment on this blog post for an additional entry to win! When you subscribe, you will receive an e-mail on Mondays with our latest blog post. BE SURE TO READ IT to check to see if you are a winner EVERY WEEK. If you do not contact me within two weeks of the announcement of winning, you will forfeit your prize. NO EXCEPTIONS. Thank you for your understanding.

NOTE: If you are subscribed with two different names and I am unable to match you with your subscription to the blog and the YouTube Channel, you will be ineligible to win as I can’t decipher if you are a matching subscriber to both. Thank you for your understanding.

We hope you will subscribe to our YouTube Channel, Blog/Newsletter updates and check out our website!

As always, we appreciate your visit and we hope you enjoyed going on A Creative Journey with Melissa. Have a wonderful holiday!

melissa-written-signature

Sign Language Stamps

Did you know we have Sign Language Stamps? Sign Language has been part of my life before I was here on earth. My paternal Grandparents were deaf and my brother is. I want to show you how versatile sign language stamps are and how you can use them in any creation! No tutorial today but an overview of our Sign Language Stamps!

These creation may look familiar to you. I picked out my three favorite creations I used sign language stamps with.

This creation is of my Uncle Herb. Here is a close up of the sign language alphabet stamp set in use.

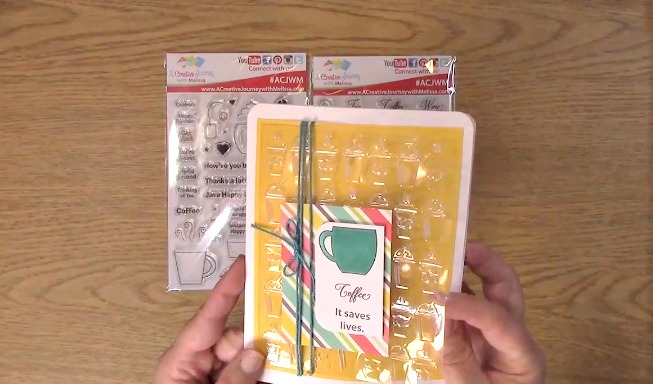
This coffee card was made with our coffee and sign language stamp sets. I really love how they work together.

This is a great example of a card that works perfectly using sign language stamps during a difficult time. Perfect for a sympathy card.

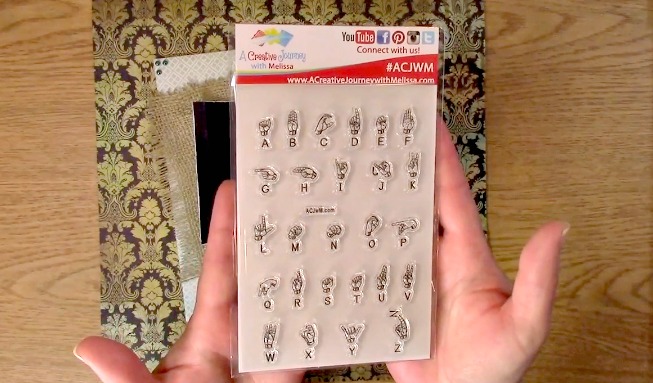
Our sign language alphabet stamp set that works for any creation.

We also have our sign language alphabet number stamp set. This set works great for calendars, planners and scrapbook pages too!

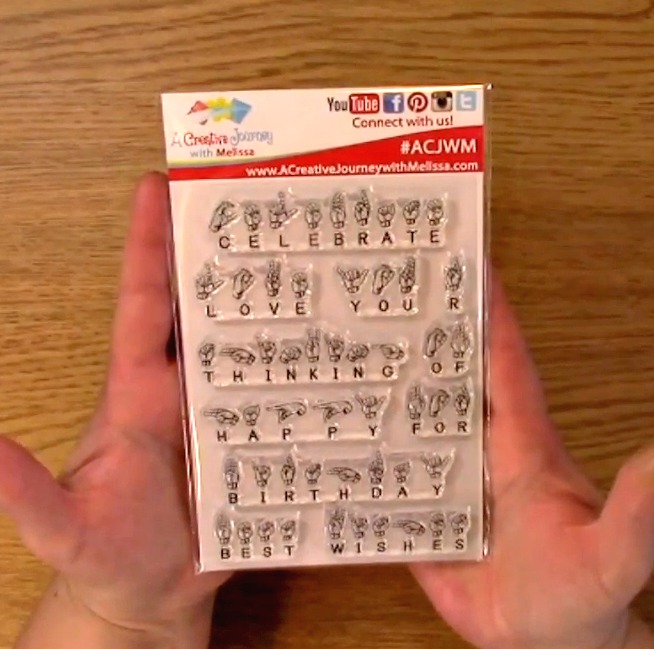
One of our other two sign language stamp sets is Sign Language Sentiments. This set works perfectly for a scrapbook page layout as well as cards, journals, etc.

Our sign language sentiments 2 works great with its counterpart sign language sentiments or with the alphabet and number stamps as well!

For this weeks giveaway, you get to pick whichever sign language stamp set you want or another stamp set! YOU GET TO PICK!

For our giveaways from a few weeks ago, we are giving away all four of these prizes! Three dies and a stamp set! Please be sure that you  send me a message letting me know which post you won on and your contact info and I can get your prize out to you!

The winners are Laura D.,  Dana M., Lisa M and BrendaLea!

Winners, please send me an message HERE and I will get your prize out to you!

For all of our giveaways including this one, in order for you to qualify for an entry to win, you would need to be a follower on YouTube, subscribe to our mailing list/blog posts (found on our blog page) and you may also comment on this blog post for an additional entry to win! When you subscribe, you will receive an e-mail on Mondays with our latest blog post. BE SURE TO READ IT to check to see if you are a winner EVERY WEEK. If you do not contact me within two weeks of the announcement of winning, you will forfeit your prize. NO EXCEPTIONS. Thank you for your understanding.

NOTE: If you are subscribed with two different names and I am unable to match you with your subscription to the blog and the YouTube Channel, you will be ineligible to win as I can’t decipher if you are a matching subscriber to both. Thank you for your understanding.

We hope you will subscribe to our YouTube Channel, Blog/Newsletter updates and check out our website!

As always, we appreciate your visit and we hope you enjoyed going on A Creative Journey with Melissa. Have a wonderful holiday!

melissa-written-signature


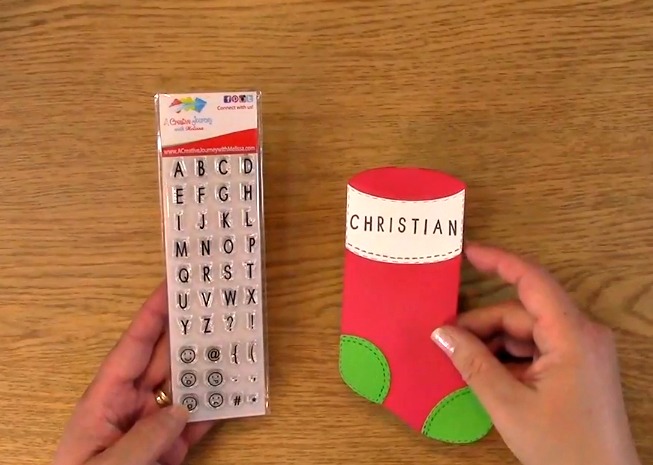
Holiday Stocking Card Using Sign Language Stamps

Holiday Stocking Card Using Sign Language Stamps is what we have for you today. I am always looking for multiple uses for the dies that I have. We invest a lot of money in our crafting tools and I like to think of multiple ways to use them. That is what we are going to do today! Are you ready? Let’s get started!

Here is the creation we are going to make! It is perfect for gift cards for the holidays!

Supplies Needed for the Holiday Stocking Card Using Sign Language Stamps Project

A Creative Journey with Melissa Sign Language Alphabet stamp set

Acrylic Block

Scissors

Black Ink

Paper for Card

Paper for embellishments for stocking

Stocking Die

Glue dot for gift card

Trim for stocking

Adhesive

Here is a close up of the stocking die I used.

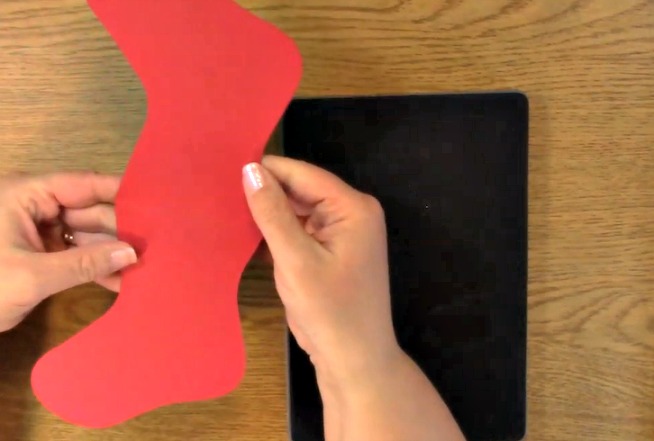
Take out your stocking die, paper, platforms and manual die cut machine. Place your paper on top of the die where you need the white pieces cut. Place your die on top of the clear platform and then place the clear platform on top of the die so it is sandwiched between the two clear platforms.

Here are the pieces that the die cut out for me for the Holiday Stocking Card Using Sign Language Stamps Project.

Take your colored 6″ x 12″ piece of paper out.

Fold your colored paper in half.

Be sure the fold line is BELOW the top of the stocking. This is how you will make it a card!

Using the same sandwich as you did for the embellishment pieces for the stocking, run your die with the folded part BELOW the line where the die will cut. Run your die cut through your machine.

You did it! This is how you create the stocking card for your Holiday Stocking Card Using Sign Language Stamps Project!

This is a close up of the die. I placed my fold approximately 1/4 inch below the cut line for the stocking. Above is the picture is an exaggeration of how much space it was. I just wanted to be sure you were clear which line you were to be sure you placed the fold under for your creation.

Take out your ink and the top of your stocking. Peel off the appropriate letters from your A Creative Journey with Melissa sign language stamp set.

Place the first letter on the block.

Ink your stamp

Stamp your letter on the top of the stocking. Repeat to spell out the word you wish to have.

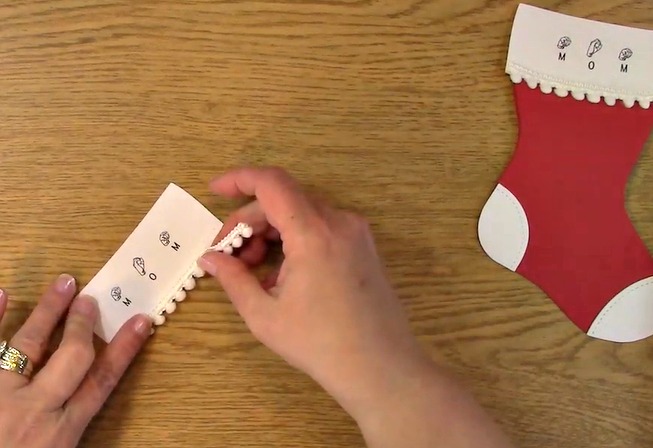
Take out your trim. Place adhesive on the bottom edge of the stocking top. Adhere the trim to the stocking top. Trim off any excess.

Here on the left I put the letters rounded so they followed the trim. On the right I did them straight. Which do you like better?

Place adhesive on the back of the stocking heel and toe pieces. Adhere them to the front of your stocking card.

Take out your stocking top with the trim.

Adhere the stocking top to the front of the stocking card.

You did it! You completed your Holiday Stocking Card Using Sign Language Stamps Project!


First I want to announce the two winners from the Fall/Winter Coffee Lovers Blog Hop $15 store credit.

The winners are:

Cynthia C. and Lucy E.

For last weeks $15.00 store credit prize, the winner is Sydney G.

For this weeks prize, we will be giving away a $15.00 store credit! That way you can decide exactly what you want!

For all of our giveaways including this one, in order for you to qualify for an entry to win, you would need to be a follower on YouTube, subscribe to our mailing list/blog posts (found on our blog page) and you may also comment on this blog post for an additional entry to win! When you subscribe, you will receive an e-mail on Mondays with our latest blog post. BE SURE TO READ IT to check to see if you are a winner EVERY WEEK. If you do not contact me within two weeks of the announcement of winning, you will forfeit your prize. NO EXCEPTIONS. Thank you for your understanding.

NOTE: If you are subscribed with two different names and I am unable to match you with your subscription to the blog and the YouTube Channel, you will be ineligible to win as I can’t decipher if you are a matching subscriber to both. Thank you for your understanding.

We hope you will subscribe to our YouTube Channel, Blog/Newsletter updates and check out our website!

As always, we appreciate your visit and we hope you enjoyed going on A Creative Journey with Melissa.

melissa-written-signature

Holiday Handmade Treat Holders

Holiday Handmade Treat Holders is what we have for you today. During this time of year it seems that there is a never ending need for gifts between teachers, friends, family, etc. This creation is super easy to make and is a great way to show someone you care without breaking your bank!

Supplies Needed for the Holiday Handmade Treat Holders Project

A Creative Journey with Melissa Sign Language Alphabet stamp set

Acrylic Block

3-D Foam adhesive

Black Ink

Circle Punch and Label Punch

Adhesive

Stampin Up Top Note Die (Unfortunately, I believe it is retired but to be sure go to Brandie’s Stampin’ Up website and send her a message!)

Trimmer

Card Stock for Treat Holder

Coordinating Card Stock for circle mat

White card stock to stamp sentiment

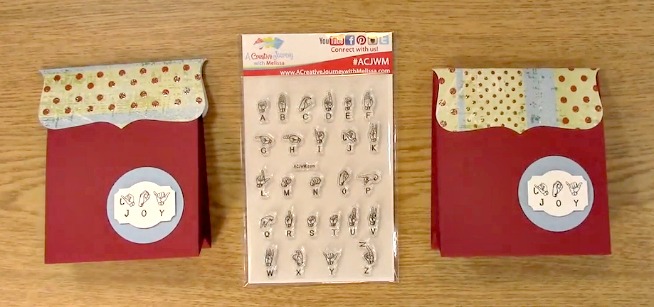
This is the Holiday Handmade Treat Holders Project. I really love the color palette and how the sign language stamps convey the perfect message for the holidays!

This is the side profile of the Holiday Handmade Treat Holders Project. You can put whatever item you wish for this and just adjust the size of the treat holder to fit your needs.

To begin your Holiday Handmade Treat Holders Project, take out your Top Note Die or the die of your choice.


Take your decorative paper and place it on the top of your die. Make sure that you have covered the area to be cut by your paper.

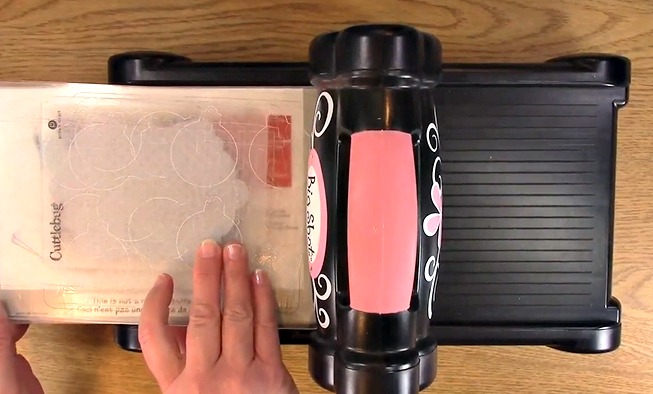
Place your clear platform, your die, your paper and then your other clear platform on your manual die cut machine. Run your die through your machine.

This is what it looks like once it has been cut.

Take out your trimmer and use the scoring blade and score your die cut in the middle. You can also fold this in half if you wish instead of using your trimmer.

This is what it looks like once it has been folded on the score line.

We are going to now score your paper for your treat bag. There will need to be three score lines where you will fold.

Did you know that most trimmers of ANY brand have a hidden arm underneath that allow you to expand your trimming size?

Here you will see the bottom of my Stampin’ Up! Trimmer. It also holds accessories as well! If you didn’t know this-check yours out!

I used a 12″ piece of paper. I scored the paper at 5″, 6″ and 7″.

This is what it looked like once I folded on the score line. It makes a “M” for Melissa! LOL

I used hot chocolate packs in my Holiday Handmade Treat Holders Project. You can place a small amount of adhesive if you wish it to be placed in a specific place or

you can place your item inside a bag and adhere it that way as well.

Take out your coordinating paper and punch your circle.

Using your punch label punch your sentiment paper.

Take out your A Creative Journey with Melissa Sign Language Alphabet stamp set, acrylic block and ink.

Place your first letter on the acrylic block and ink it.

Stamp your letter on the punched out label.

I chose to stamp the last letter on the label. That way I can get the middle letter centered between the two letters so they don’t look lopsided.

This is what the finished stamped letters looked like.

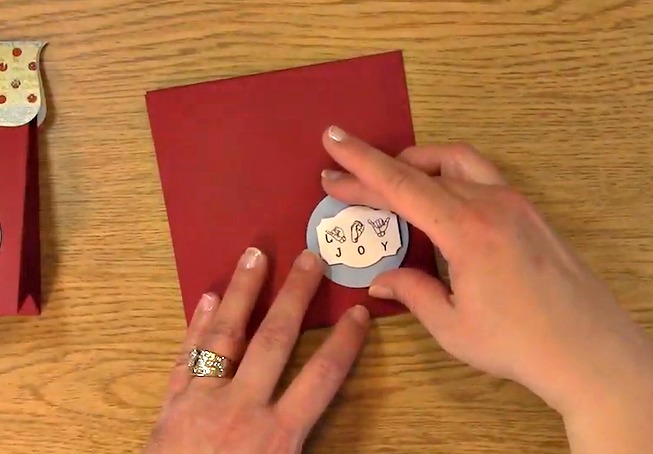
Using your 3-D adhesive, apply it to the back of your sentiment. Place it on the punched out circle as shown.

Apply adhesive to the back of your circle. Adhere your circle to the front of the Holiday Handmade Treat Holders Project.

When I cut this piece of card stock, it was a little wider than I wanted it to be for my project. 

I used the label die to approximate the size that I wanted to cut the treat holder down to.

Using my trimmer, I trimmed off approximately 1/2 inch off of the side of the treat holder project.

This looks much better and will be more cohesive for the project.

Apply adhesive to the inside of the die for the top of your creation. Be sure you apply adhesive to both sides.


Press firmly on both sides of the cut out die so the adhesive adheres to the Holiday Handmade Treat Holders Project.

I chose to use hot chocolate packets but you could really use anything. Here I used a packaged tea bag.

When placed inside the fold, it really won’t go anywhere. In the video I even shook it and it was staying put without adhesive!

Here are the completed Holiday Handmade Treat Holders Projects!


We are also participating in an awesome blog hop so if you would like to check it out please go here 2018 Fall Winter Coffee Lovers Blog Hop,

For this weeks prize, we will be giving away a $15.00 store credit! That way you can decide exactly what you want!

For all of our giveaways including this one, in order for you to qualify for an entry to win, you would need to be a follower on YouTube, subscribe to our mailing list/blog posts (found on our blog page) and you may also comment on this blog post for an additional entry to win! When you subscribe, you will receive an e-mail on Mondays with our latest blog post. BE SURE TO READ IT to check to see if you are a winner EVERY WEEK. If you do not contact me within two weeks of the announcement of winning, you will forfeit your prize. NO EXCEPTIONS. Thank you for your understanding.

NOTE: If you are subscribed with two different names and I am unable to match you with your subscription to the blog and the YouTube Channel, you will be ineligible to win as I can’t decipher if you are a matching subscriber to both. Thank you for your understanding.

For our blog winners for the blog hop , they will be announced on our blog post on Monday December 10, 2018. This is open to everyone, not only the US! 

Don’t forget to use the coupon code CoffeeLover2018 to save 25% on your purchase!

We hope you will subscribe to our YouTube Channel, Blog/Newsletter updates and check out our website!

As always, we appreciate your visit and we hope you enjoyed going on A Creative Journey with Melissa.

melissa-written-signature


2018 Fall Winter Coffee Lovers Blog Hop

Welcome to the 2018 Fall Winter Coffee Lovers Blog Hop! Whether your prefer hot chocolate, coffee, tea, or even a blended drink (which is what I ALWAYS prefer) and of course CREATIVE AWESOMENESS; you are going to really enjoy the 2018 Fall Winter Coffee Lovers Blog Hop!

There are a number of companies participating  in the 2018 Fall Winter Coffee Lovers Blog Hop and we are really honored and excited to be one of the SUPER SPONSORS & FLASH PRIZE SPONSOR for this amazing blog hop! We also have our own giveaways also right here on our blog! Be sure to read the WHOLE POST for the details!

To start at the beginning of the 2018 Fall Winter Coffee Lovers Blog Hop please click HERE.

The 2018 Fall Winter Coffee Lovers Blog Hop runs Friday, November 30 starting at 6:00 AM Pacific Time thru Friday, December, 1st. This allows you PLENTY of time to participate by hopping, creating or BOTH!

Winners for the entire hop will be posted on the blog Sunday, December 9th HERE.

If you aren’t familiar with the Coffee Loving Papercrafters Group and would like to learn more, be sure to join their Facebook Group HERE to ensure you get the latest info on all of their blog hops! The group is SUPER fun with awesome creativity and inspiration throughout the year and of course.. GREAT SEASONAL HOPS with WONDERFUL COFFEE inspiration! We would hate for you to miss out on the inspiration and possibilities!!

Now, onto the projects we have for you today! The theme is Coffee, Tea, and Cocoa with a Winter and Fall theme! 


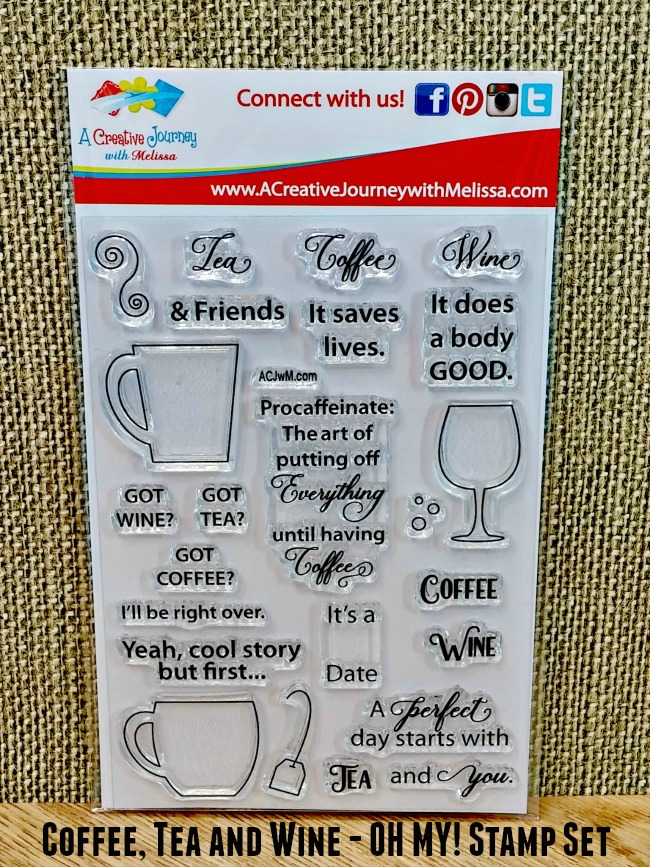
I used the A Creative Journey with Melissa Coffee, Tea and Wine – OH MY! , A Creative Journey with Melissa Coffee is my Liquid Therapy stamp set and the A Creative Journey with Melissa Sign Language Alphabet stamp sets on my projects.

My style is Cute, Clean and SIMPLE. I like to create things that look cute but I LOVE spending time with my family. I try to create things that can be done expeditiously and often times in mass quantities. The easier, the better!

When I created these projects, I had small gifts in mind for teachers, friends, neighbors or anyone that you would like to show them you care by giving them a handmade gift but also fits in my budget.

This cute little gift holder works perfect for Tea, Coffee, Hot Chocolate or any little gift you would like to dress up. I used our A Creative Journey with Melissa Sign Language Alphabet tp create the letters for this creation. I love how adding sign language to a creation really brings me joy! My brother and both of my paternal grandparents are/were deaf. Such a BEAUTIFUL LANGUAGE!

Do you want to see how this is made? Be sure to come back on Monday for my #MondayswithMelissa and you will see how I made this creation step by step. Not only will you have a video to refer to, you will have step by step instructions with pictures. Whichever way you prefer to learn, we have you covered! Be sure to subscribe to our YouTube Channel, Blog/Newsletter  so you don’t miss it!

Here is the surprise! You have a little packet of Hot Chocolate inside! You could add your homemade popcorn, chocolates, tea or anything else that you would like! SO CUTE!

This adorable creation has a surprise as well! I used the cup and tea bag label from the A Creative Journey with Melissa Coffee, Tea and Wine – OH MY! stamp set.  I used the heart for the tea bag label from the A Creative Journey with Melissa Coffee is my Liquid Therapy stamp set.

I used the ribbon as a pulley. This pulls the tea bag out for use! Cute, simple and fast, right?! Just the way I like my crafts and I hope you do too!

For our giveaway for this hop on our blog we will be giving away two $15.00 store credits for two winners! That way you can decide exactly what you want!

For all of our giveaways including this one, in order for you to qualify for an entry to win, you would need to be a follower on YouTube, subscribe to our mailing list/blog posts (found on our blog page) and you may also comment on this blog post for an additional entry to win! When you subscribe, you will receive an e-mail on Mondays with our latest blog post. BE SURE TO READ IT to check to see if you are a winner EVERY WEEK. If you do not contact me within two weeks of the announcement of winning, you will forfeit your prize. NO EXCEPTIONS. Thank you for your understanding.

NOTE: If you are subscribed with two different names and I am unable to match you with your subscription to the blog and the YouTube Channel, you will be ineligible to win as I can’t decipher if you are a matching subscriber to both. Thank you for your understanding.

For our blog winners for this blog hop will be announced on our blog post on Monday December 10, 2018. This is open to everyone, not only the US! 

Don’t forget to use the coupon code CoffeeLover2018 to save 25% on your purchase!

We hope you will subscribe to our YouTube Channel, Blog/Newsletter updates and check out our website!

Happy Hopping and we hope you enjoyed going on A Creative Journey with Melissa.

melissa-written-signature

Sign Language Sentiments 2 Sympathy Card

Sign Language Sentiments 2 Sympathy Card is what we have for you today. I have created more sympathy cards in the past two months that I care to for a life time. Sadly, one of my crafty friends husband’s passed away. I knew I was going to create a card for her and her family so I decided I would share how I did it. Creating sympathy cards are always difficult so I figured the more ideas we have the better, hoping we won’t have to create one any time soon if at all.

Supplies Needed for the Sign Language Sentiments 2 Sympathy Card Project

A Creative Journey with Melissa Sign Language Sentiments 2 Stamp Set

Acrylic Stamping Block

Black Ink

Card Base

Paper to stamp sentiment on

gray mat for sentiment

black mat for sentiment

Gray paper for Label die

Embossing folder for label die cut

3-D foam adhesive

Adhesive

Pearls

Decorative circle with pearls

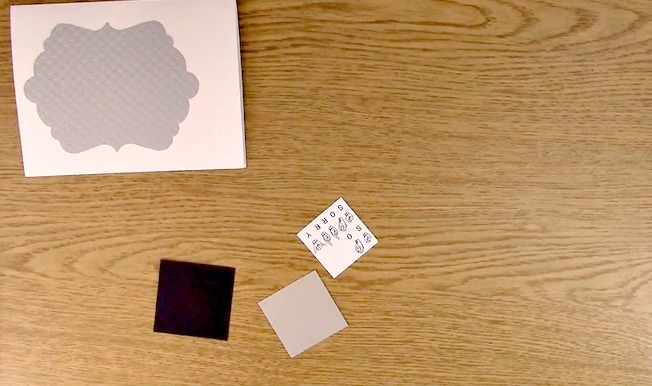
For your Sign Language Sentiments 2 Sympathy Card Project you will first want to take out your die, paper, die cut machine and platforms. Place your clear platform, die, paper then the other clear platform on your die cut machine. Run your die through the die cut machine.

Die cut your label from the gray paper. Here is the die cut label.

Take out your embossing folder and place your die cut label inside.

Emboss your label die cut for your Sign Language Sentiments 2 Sympathy Card Project.

This is what your label will look like once it has been embossed. I LOVE THE TEXTURE!

Take out your card base. Using your adhesive, place adhesive on the back of the label and adhere to your card base.

A Creative Journey with Melissa Sign Language Sentiments 2 Stamp Set and your Acrylic Stamping Block. Place the words So Sorry on your block.

Ink your sentiment for your Sign Language Sentiments 2 Sympathy Card Project.

Stamp your sentiment on your paper.

Using your square punch, punch out your sentiment.

Here are the squares you will be layering for your sentiment.

Apply adhesive to the back of the sentiment and gray squares. Layer them in order of size 1.75″, 2″ and 2.25″ as shown.

Take out your card base, quicker poker picker upper and your pearls. Place one large and two small pearls on the left side of your label.

*Side Note: I love this tool and I actually have a few of them! This is the Quik Kutz Quicker Picker Upper. It is a must have for all tool boxes!

Apply six foam rectangles to the back of the sentiment squares.

Peel off the side of the sentiment where the pearls will go. Place your pearl embellishments on. 

Add two foam rectangles to the other side of the square as shown to make up for the additional height from the pearl stem.

Apply additional adhesive on top of the pearl stems and foam rectangles to ensure proper adhesion.

Take off the backing of the foam rectangles on the two additional ones and apply to the card front.

You have completed your sympathy card.

For this weeks giveaway we are giving away the A Creative Journey with Melissa Sign Language Sentiments 2 Stamp Set !! Winners announced next week so be sure to check back!

To qualify to win, you must be BOTH:

A public follower on YouTube, subscribe to our mailing list/blog posts and you may also comment on this blog post for an additional entry to win! Winners will be announced next week on our Mondays with Melissa blog post!

BE SURE TO check to see if you are a winner EVERY WEEK. If you do not contact me within two weeks of the your name being picked, you will forfeit your prize. Thank you for your understanding.

Subscribe to BOTH with MATCHING NAMES to be eligible. If I am unable to match you with your subscription to both the email list and the YouTube Channel, you will miss your chance to win a prize. If I can’t decipher if you are a matching subscriber (if your profile doesn’t show publicly who you subscribe to) and I can’t confirm you have subscribed to both, you will not be eligible.

For last weeks giveaway we are giving away the A Creative Journey with Melissa Sentiments For All Occasions Stamp Set!!

 The winner is  Cyndi E!

Winner, please send me your contact information via contact page on our website, which post you are a winner from and I will get your prize out to you! Thank you so much for being a YouTube follower and subscribing to our mailing list/blog posts!

Thank you for joining us for the Sign Language Sentiments 2 Sympathy Card Project. I hope you take this time to enjoy your loved ones and spend time with them. You never know how long you have. CHECK BACK TO SEE IF YOU ARE A WINNER!

Have a wonderful week and thank you for going on A Creative Journey with Melissa.

Six Giveaways Chase My Blues Away

Six Giveaways Chase My Blues Away is what we have today. No tutorial today just giveaways… Sounds good right? You know when you get kind of in a funk and on top of it have a lot of stuff going on? It can get overwhelming, right? Yes! For me too! What better way for me to cheer myself up than cheer up someone else?! You got it!

We have 6 giveaways today! Be sure you check back to claim your prize otherwise it will go back into the prize bin for another giveaway.

Some of the prizes for the Six Giveaways Chase My Blues Away are prizes that haven’t been claimed. I have giveaways every week so be sure to check back next week to see if you are a winner!

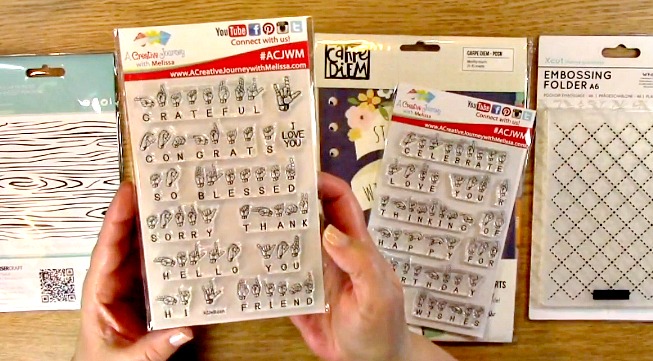
Our first giveaway is the A Creative Journey with Melissa Sign Language Sentiments 2 Stamp Set.

For my second giveaway for the Six Giveaways Chase My Blues Away is the A Creative Journey with Melissa Sign Language Sentiments Stamp Set

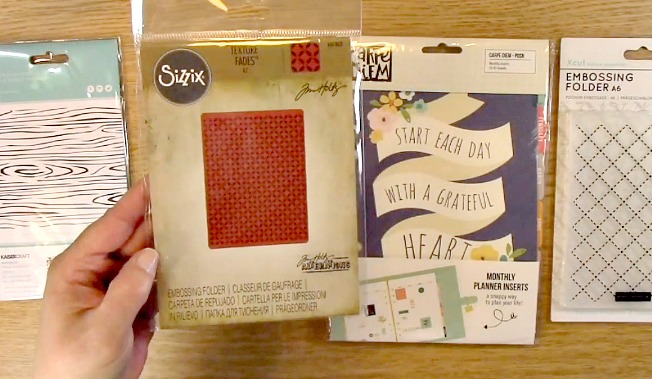
The third giveaway for the Six Giveaways Chase My Blues Away is this awesome textured embossing folder by Tim Holtz. Definitely one of my go to embossing folders!

This giveaway is for the planners. You are going to LOVE this set! It is not only filled with goodies, it is quite lovely too!

This awesome embossing folder is so much fun to work with! You can ink, stain, paint, sand and water color the paper before or after giving your paper an awesome and beautiful look! You can even use it plain with paper and it looks very elegant.


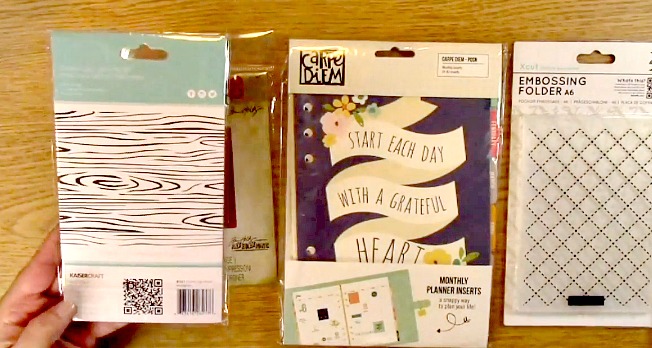
The sixth and last giveaway for the Six Giveaways Chase My Blues Away is this lovely wood grain embossing folder. This folder would work great for a masculine background, behind a bird image, an outdoor scene and really just about anything! Seriously the possibilities are endless!

 Now for this weeks GIVEAWAY we are giving away all of the AWESOME products above. There will be SIX WINNERS!

To qualify to win, you must be BOTH:

A public follower on YouTube, subscribe to our mailing list/blog posts and you may also comment on this blog post for an additional entry to win! Winners will be announced next week on our Mondays with Melissa blog post!

If you do not contact me within two weeks of the announcement of winning, you will forfeit your prize. Thank you for your understanding.

Subscribe to BOTH with MATCHING NAMES to be eligible. If I am unable to match you with your subscription to both the email list and the YouTube Channel, you will miss your chance to win a prize. If I can’t decipher if you are a matching subscriber (if your profile doesn’t show publicly who you subscribe to) and I can’t confirm you have subscribed to both, I won’t be able to enter you in for the prize. **DO NOT COMMENT WITH YOUR ENTIRE EMAIL ADDY. Only give me the first 6 NOT INCLUDING YOUR HOST. Just enough for me to match your name will work perfectly.

Now for last weeks GIVEAWAY we are giving away the amazingly versatile A Creative Journey with Melissa Outside and In Stamp Set!

The winner is Lisa Maxner!

Lisa,  please send me your contact information via contact page on our website, which post you are a winner from and I will get your prize out to you! Thank you so much for being a YouTube follower and subscribing to our mailing list/blog posts!

Thank you for joining us for the Six Giveaways Chase My Blues Away. I already am cheered up and am thrilled there will be six winners next week! I hope I cheered you up too!

Have a wonderful week and thank you for going on A Creative Journey with Melissa.

How Cancer Inspired A Creative Journey with Melissa

How Cancer Inspired A Creative Journey with Melissa is the story we have today. We do have a giveaway but no tutorials. I have had a few people ask me why and how I got started doing stamps and thought others may want to know too so I decided to share this with all of you. Just about everyone has had to deal with Cancer in way or another whether it be oneself, a loved one, a friend a friend of a friend, etc. There really isn’t anything that is inspiring about it however Cancer Inspired A Creative Journey with Melissa.

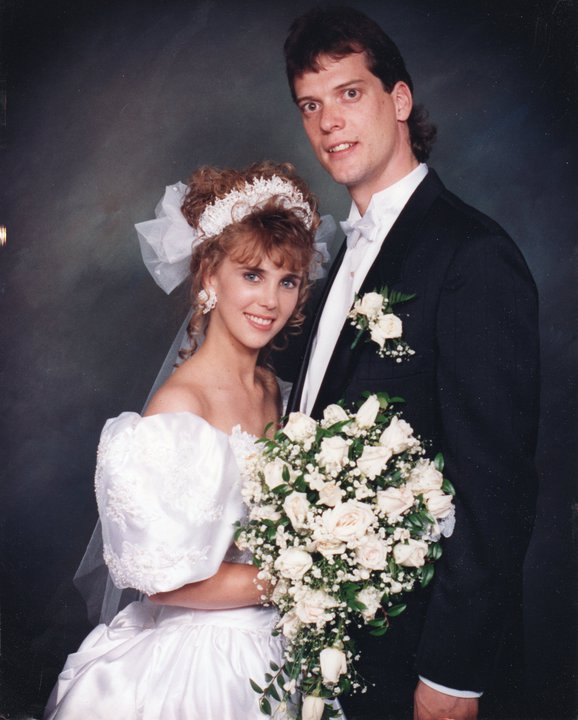
First, I should give you a little background on me. I grew up in Chicago and met my husband on a blind date in Chicago. We were introduced by my co-worker and Jon’s childhood friend that were dating. When we got married on June 18, 1994, I moved from Chicago to the St. Louis area where my hubby was from and living. We then ended up moving to California for my hubby’s work so that is how we landed here in LA.

Now.. back to Cancer Inspired A Creative Journey with Melissa … and YES THIS IS REALLY HOW I TALK LOL More than likely it is my ADHD (Seriously, I am diagnosed and on meds and SOMETIMES they help. LOL) ANYHOW, my Uncle Herb AKA UH lived in San Diego, CA since before I was born. Even though he lived quite a ways away, UH would always come out for large events like my prom (pictured above is my Dad on the left and UH on the right. Yes that is me in the middle) wedding, graduation, etc. He visited me when I was pregnant and after I had my kids too.

UH didn’t have children of his own but he was quite the cool Uncle. Once we moved to California, we grew closer in proximity and our relationship grew as well. My kids really admired him and had a great bond with him too.

I am VERY blessed to have a number of amazing people in my life that support me. Of course “My Boys” are my top three (my hubby and my two sons) and had a lot to do with the actual name of the business. Their first names are Austin, Christian and Jon, and with that A Creative Journey with Melissa was born in February 2011.

I was also fortunate to have the support of a number of others as well. I am ever so grateful for the support, love and encouragement. For a long time I had wanted to start my own stamp line but was too scared of failure, putting myself out there and really causing a financial burden on my family. I was not going to take a loan, (I never did either) or use money that I didn’t have on hand so I decided to scrap the idea. (A little paper crafting humor! LOL)

Unfortunately, in August of 2012 UH was diagnosed with cancer. Needless to say we were heart broken and it wasn’t looking very good.

UH had a wonderful group of friends and support system. I would also come out to visit and stay with him for a few days or even a few weeks when he was having a procedure or when he needed me.

One day while I was sitting with UH chatting after he had been recently been going though chemo in passing I said, “Someday, I am going to start my own stamp line…” and UH said, “If not now, when?”

Well, needless to say that lit a fire under me.  Can’t really argue with someone that has stage 4 cancer throughout his body including his brain. He really encouraged me to be the best I can be and supported me regardless. The questions of if I am going to fail and being scared turned into CAN I REALLY DO THIS? With the support of “My Boys” and of course UH and numerous others, the adventure began. I had been creating handmade items for a few years as a business but wanted to expand it to stamps.

UH and Cancer Inspired A Creative Journey with Melissa started with my first two set of stamps that I released. Specifically the second one. After he completed radiation, he was given a radiation diploma. He and I both thought it was cool how they tried to make a negative into a positive and with that the concept of Awareness Ribbon Stamp Sets were born. Awareness Ribbon #1 and Awareness Ribbon #2 were my first two stamp sets released and have since added Awareness Ribbon Stamp Set #3 – Ready for a Fight. UH lived in San Diego as I said and we live in LA. We would visit a few times a year but when he was diagnosed with Cancer, it was at least monthly if not weekly as time went on. My first stamp release was September 18, 2013. UH enjoyed watching me package my stamps and sending them out to my first set of customers! I was so excited and UH was too!

Sadly, the next day UH passed. I really think he waited to see the release and the success of the first day.

I have been inspired by numerous people in my Creative Journey in addition to UH.

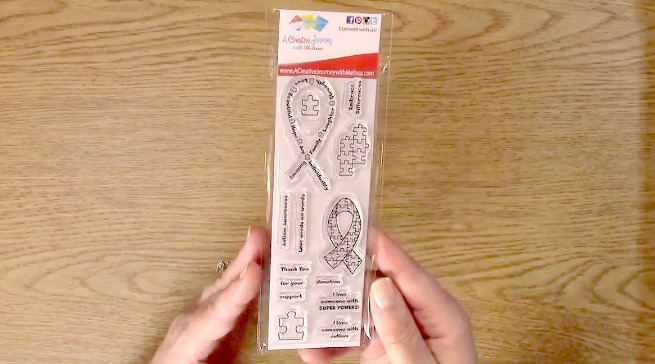
Two friends of mine that have inspired me are Julie Gonzalez and Cristal (Pinky) Hobbs. They are amazing Moms that I have met. They are amazing, strong, intelligent women and they also have sons that have Autism. Julie’s son was diagnosed with Autism and she was participating in an Autism walk to raise awareness. This inspired me to create the above stamp set Awareness Ribbon Set #4 – Autism Awareness. A portion of this set supports the walk that Julie does every year in honor of her son Anthony.

I was inspired to create these two stamp sets Awareness Ribbon Set #5 – See Autism with your Heart and Awareness Ribbon Set #6 – Angels with Autism to raise awareness by Pinky. A portion of Angels with Autism is donated to a wonderful school program near and dear to Pinky’s heart. What amazing women they both are! I feel very blessed.


These cards were created using them!

Sign Language was spoken fluently in our home as my brother is deaf. My Dad and UH were brothers and both of their parents were deaf. It truly is a beautiful language and I thought what better way to inspire people to learn sign language then create stamps showcasing its beauty! I used the Sign Language Alphabet Stamp Set to create the above sentiment “Remember” for the scrapbook page I made with UH’s picture above.

We also have Sign Language Sentiments and Sign Language Sentiments 2

as well as Sign Language Alphabet Numbers and a closer pic of the Sign Language Alphabet stamp set.

We also have some amazing alphabet stamp sets that work perfectly with planners, cards, scrapbooks, project life and just about everything!

I love to create clean and simple cards and what I use are the Spring and Summer Holiday Celebrations and our Fall and Winter Holiday Sentiments stamp sets. Awesome for those creations needing a holiday sentiment.

Who doesn’t love coffee? I know I sure do and these stamp sets are perfect for your creations! We have the Coffee is my Liquid Therapy and the Coffee, Tea and Wine – OH MY! Stamp sets. They are so much fun to create with!
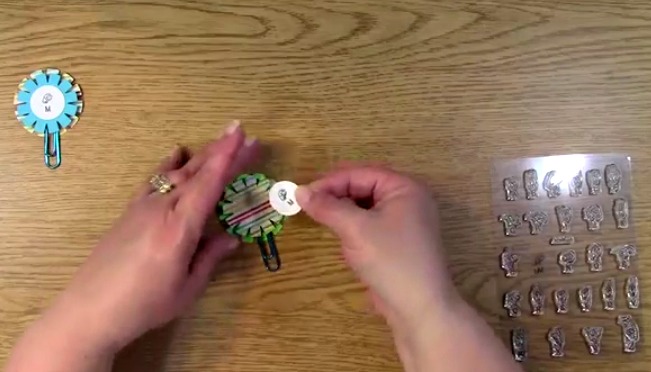
Here are close ups of two creations I made with them. I used recycled packaging for the left one and a penny for the slider on the right one! Be sure to check out my blog or YouTube channel to see how they were made!

Now for this weeks GIVEAWAY! We are giving away a $25.00 store credit to our store!!

I have had a number of people say how much they love these stamp sets for organizing, their planners, lists and just about everything else under the moon so I thought this would be the perfect prize for this week. You can pick out what YOU want!
To qualify to win, you must be BOTH:

A public follower on YouTube, subscribe to our mailing list/blog posts and you may also comment on this blog post for an additional entry to win! Winners will be announced next week on our Mondays with Melissa blog post!

If you do not contact me within two weeks of the announcement of winning, you will forfeit your prize. Thank you for your understanding.

NOTE: You must be subscribed to BOTH with MATCHING NAMES. If I am unable to match you with your subscription to both the email list and the YouTube Channel, you will miss your chance to win a prize. If I can’t decipher if you are a matching subscriber (if your profile doesn’t show publicly who you subscribe to) and I can’t confirm you have subscribed to both, I won’t be able to enter you in for the prize. **DO NOT COMMENT WITH YOUR ENTIRE EMAIL ADDY. Only give me the first 6 NOT INCLUDING YOUR HOST. Just enough for me to match your name will work perfectly.

 Here’s the GIVEAWAY from last weeks post which is

 the A Creative Journey with Melissa Everyday Alphabet Upper Case and Emoticon stamp set  and the winner is Andrea G!

We are also giving away the A Creative Journey with Melissa Awareness Ribbon #3 – Ready for a Fight Stamp Set  and the winner is Melissa M!

Andrea & Melissa,  please send me your contact information via contact page on our website, which post you are a winner from and I will get your prize out to you! Thank you so much for being a YouTube follower and subscribing to our mailing list/blog posts!

 We hope you enjoyed our How Cancer Inspired A Creative Journey with Melissa post and we hope you are inspired to do something you may not have the courage for. In the words of UH…. if not now, WHEN?

Have a wonderful week and thank you for going on A Creative Journey with Melissa.


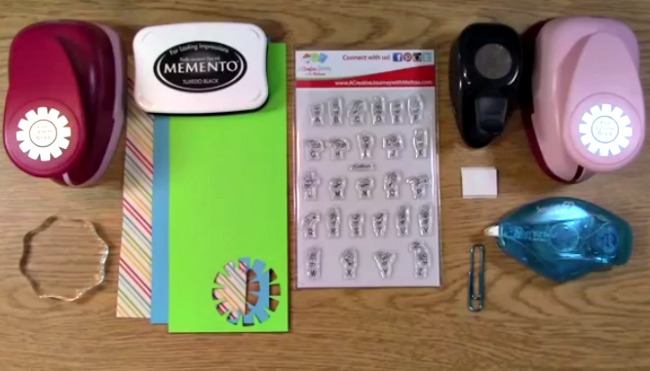
Craft personalized Sign Language planner, journal, midori clips, etc.

Craft personalized Sign Language planner, journal, midori clips, etc. is what we have for you today. There are so many ways and reasons you would make these clips that I can’t wait to see what you come up with. This is a CAS (clean and simple) design for you to use as inspiration or “clip-lift” (copy the idea) for your own creation.

Craft your own personalized Sign Language clips

Supplies Needed to Craft your own personalized Sign Language clips 

Sign Language Alphabet Stamp Set

Stamp Block

Ink

Foam Rectangles/Squares for 3-D look

Scrap Patterned Paper

Scrap Colored Paper

Punches

Ink

Adhesive

Paper for Stamping on

Paper Clips

Craft your own personalized Sign Language clips b

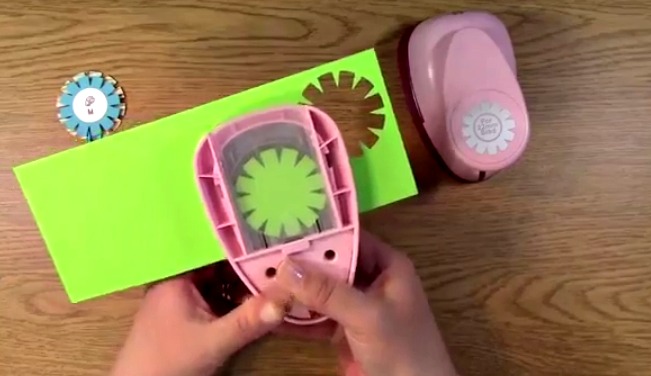
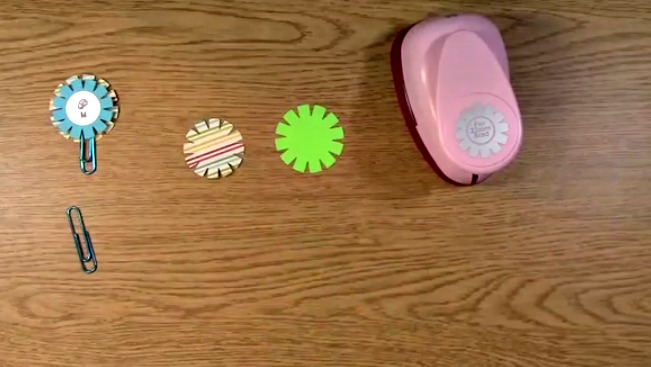
Take out your patterned and colored paper. Punch out your shapes.

Craft your own personalized Sign Language clips c

Be sure one is larger than the other so that they will layer nicely.

Craft your own personalized Sign Language clips d

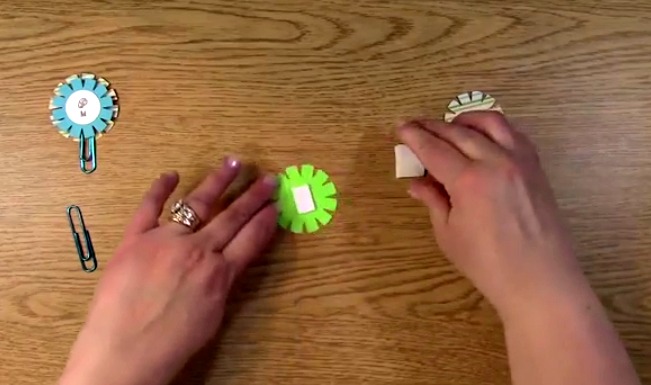
Apply 3-D Foam adhesive to the bottom punched out layer.

Craft your own personalized Sign Language clips e

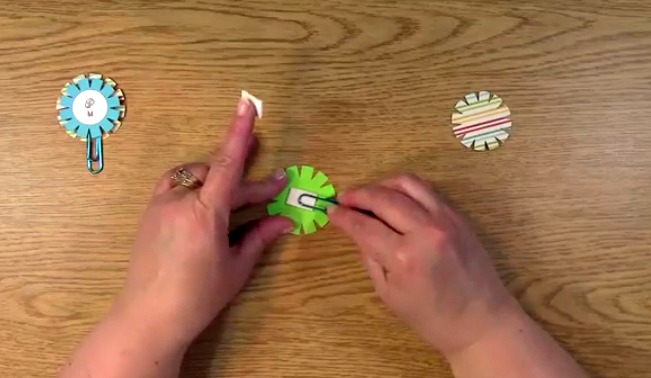
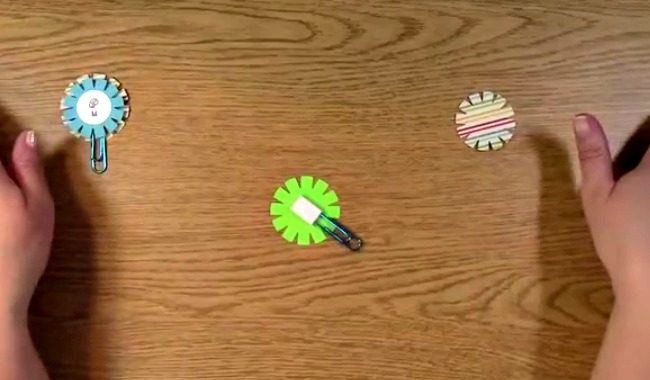
Add the paper clip to the top of the foam adhesive allowing most of it to hang off of your creation enabling use for planners, bookmarks, midori’s, etc.

Craft your own personalized Sign Language clips f

Add your second 3-D foam adhesive rectangle to the top of the paper clip.

Craft your own personalized Sign Language clips g

Apply the smaller punched out shape to the top of the foam rectangle.

Craft your own personalized Sign Language clips i

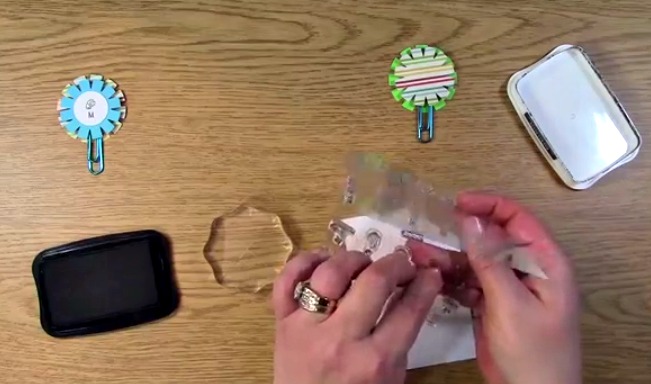
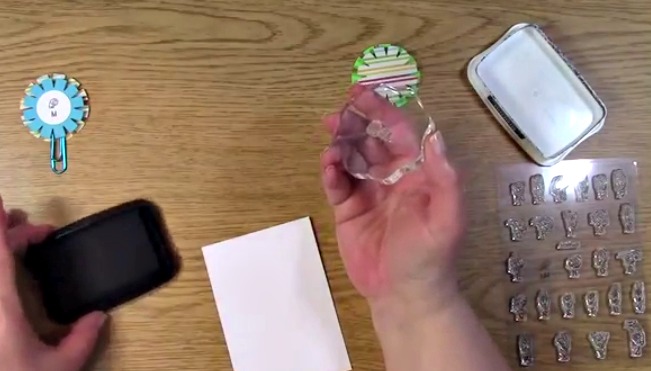
Take out your stamp block, Sign Language Alphabet Stamp Set, Ink and paper to stamp on. Peel off the Sign Language Alphabet letter of your choice.

Craft your own personalized Sign Language clips j

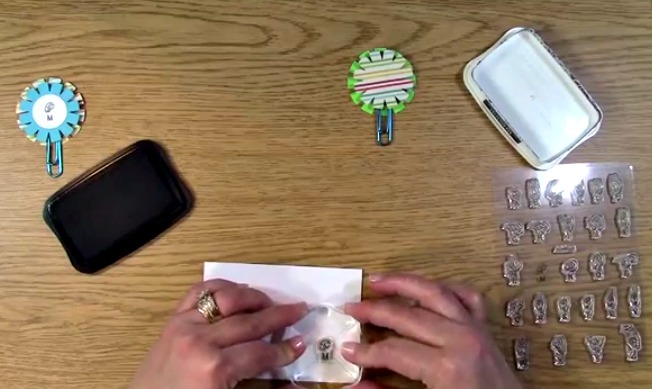
Place your stamp on the block.

Craft your own personalized Sign Language clips k

Ink your stamp.

Craft your own personalized Sign Language clips l

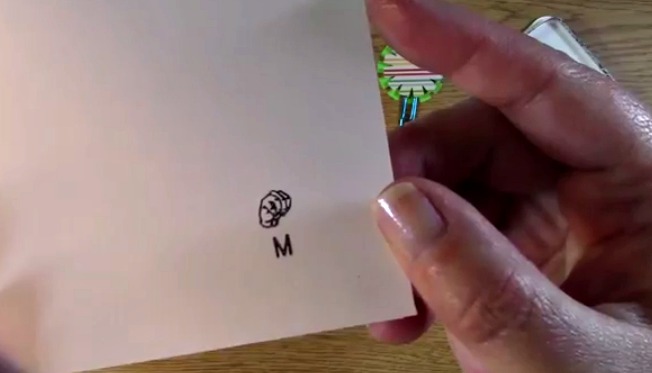
To Craft personalized Sign Language planner, journal, midori clips, etc. you will now need to stamp your letter on your paper.

Craft your own personalized Sign Language clips m

Here is a close-up of the stamped image.

Craft your own personalized Sign Language clips n

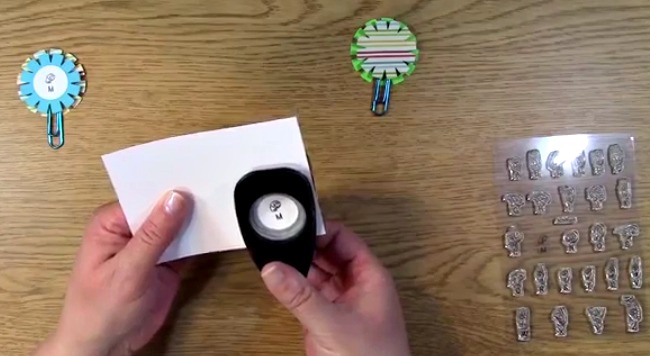
Using your chosen punch, punch out the stamped letter.

Craft your own personalized Sign Language clips o

Apply adhesive to the back of the stamped letter.

Craft your own personalized Sign Language clips p

Apply the stamped image to the top of the punched out shape.

Craft your own personalized Sign Language clips r

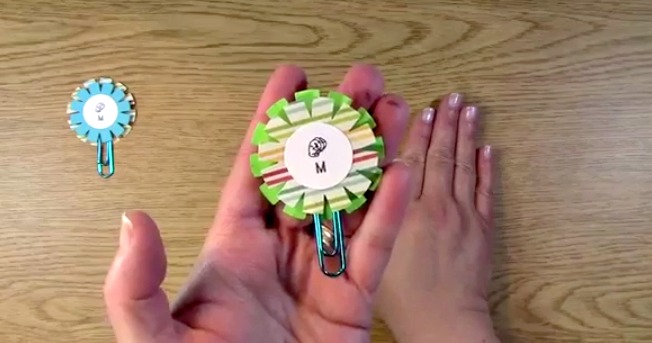
Here is your finished clip! You now know how to Craft personalized Sign Language planner, journal, midori clips, etc.!

Craft your own personalized Sign Language clips s

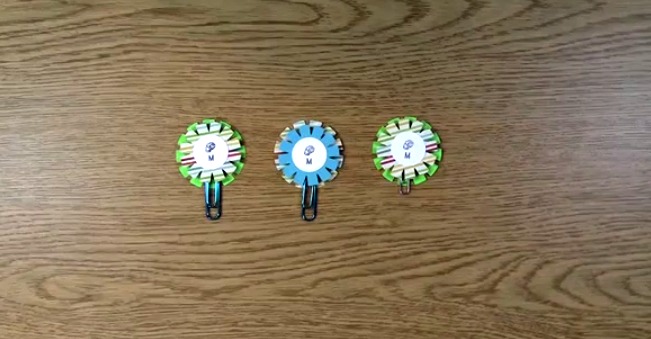
Here are a few clips that I made showing you the different look whether you have a solid color by the alphabet letter or patterned as well as a smaller clip is used for the middle creation.

Thank you so much for joining us today. We hope we have inspired you to create your own clips and we would love to hear what you have created! Please be sure to share it with us. Thank you for going on A Creative Journey with Melissa.

melissa-written-signature

Sign Language Sentiments 2 stamp set I Love You Card

The Sign Language Sentiments 2 stamp set is so versatile. It works perfectly for this Valentine’s Day I created for my husband. In this video, I will show you how I used the Sign Language Sentiment stamp set 2 how I created this card step by step. Whether you like to learn by video (above) or pictorial (below) we have you covered! This is something you can refer back to again and again! Enough “talking” let’s get started!

Sign Language Sentiments 2 stamp set I Love You Card

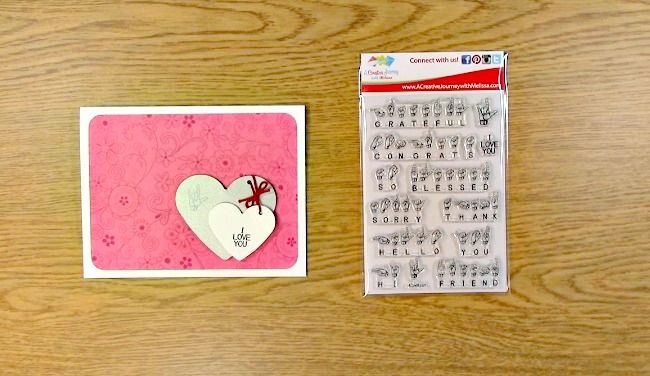
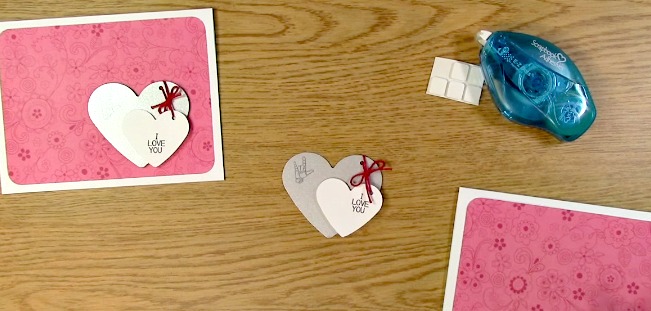
This is the card we are creating with the Sign Language Sentiments 2 stamp set.

Here are the supplies you will need :

Card Base

Patterned Paper

Paper for Hearts

Paper Punches

Memento Black Ink

Stamp Block

Red Twine

Corner Rounder

Scissors

Adhesive

Foam Squares

Sign Language Sentiments 2 stamp set I Love You Card b

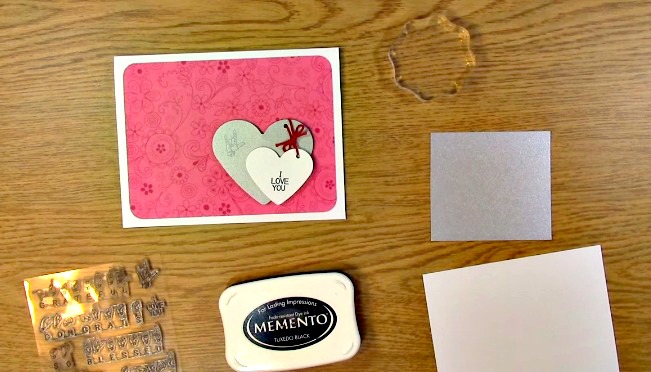
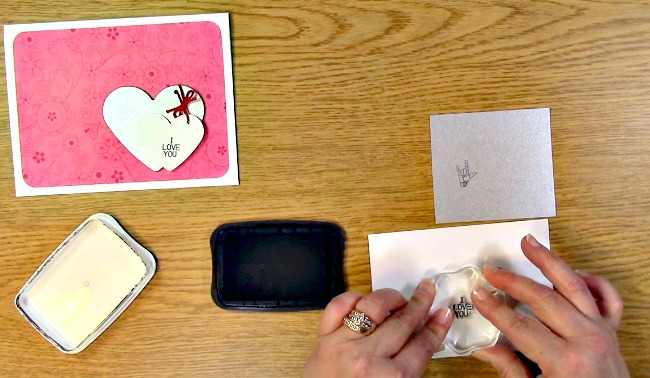
Take out your Sign Language Sentiments 2 stamp set, Paper to stamp on, ink, and stamp block.

Sign Language Sentiments 2 stamp set I Love You Card c

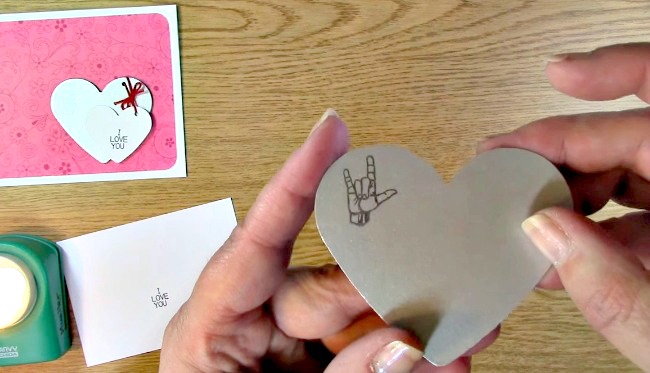
Stamp your sentiments on your paper.

Sign Language Sentiments 2 stamp set I Love You Card e

Sign Language Sentiments 2 stamp set I Love You Card d

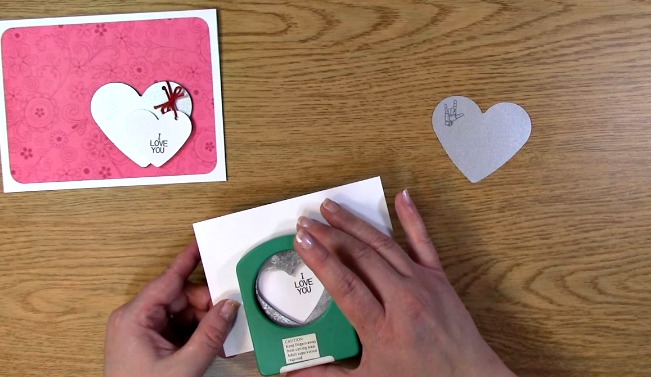
Take out your punches and punch your sentiments.

Sign Language Sentiments 2 stamp set I Love You Card f

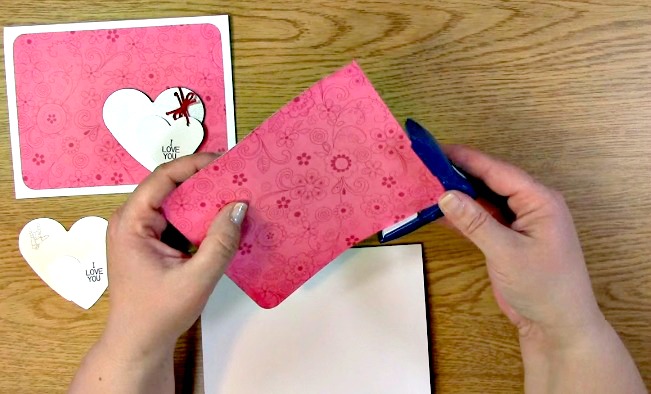
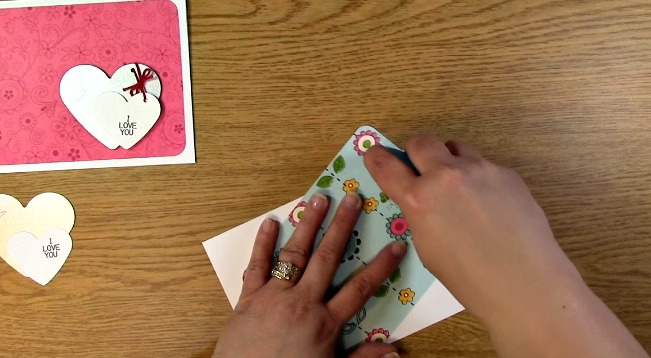
Take our your decorative paper. Using your corner rounder punch, punch the corners on all four sides.

Sign Language Sentiments 2 stamp set I Love You Card g

Add adhesive to the back of your decorative paper.

Sign Language Sentiments 2 stamp set I Love You Card h

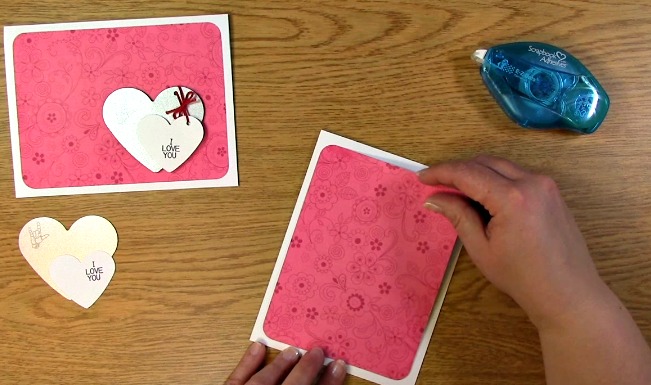
Adhere paper to your card base.

Sign Language Sentiments 2 stamp set I Love You Card i

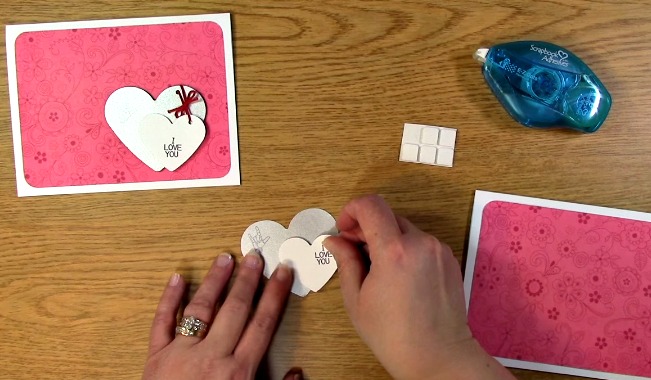
Add a foam square to the back of the smaller heart and adhere to the larger heart.

Sign Language Sentiments 2 stamp set I Love You Card j

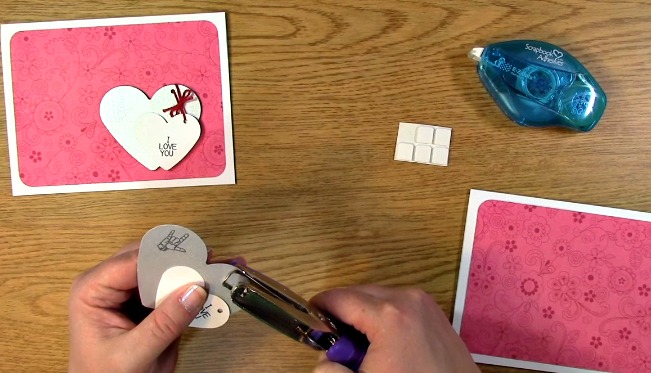
Using your 1/8″ punch, punch a whole on both of the hearts where you would like to have a bow placed.

Sign Language Sentiments 2 stamp set I Love You Card k

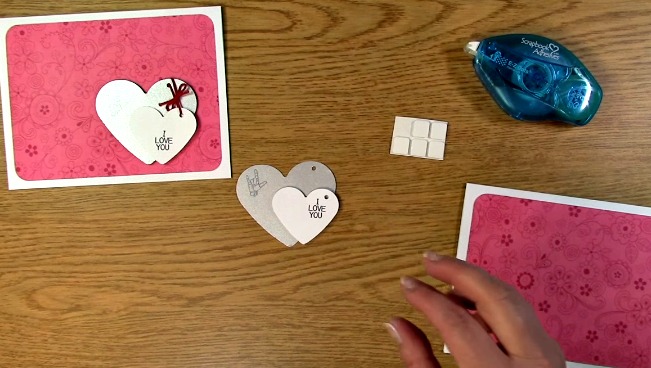
This is what it looks like before you add the twine.

Sign Language Sentiments 2 stamp set I Love You Card l

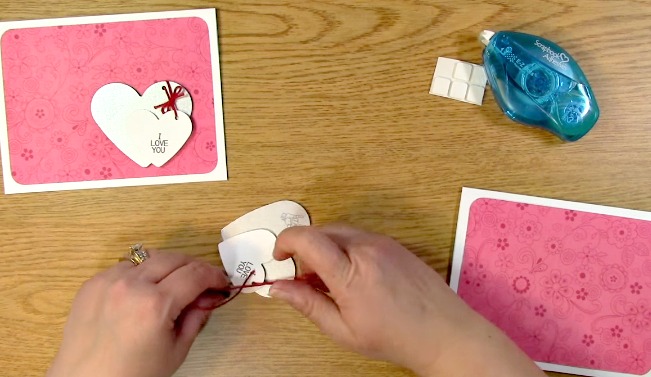
Thread your twine from the bottom through the top and tie a bow.

Sign Language Sentiments 2 stamp set I Love You Card m

This is what it will look like once it is tied.

Sign Language Sentiments 2 stamp set I Love You Card n

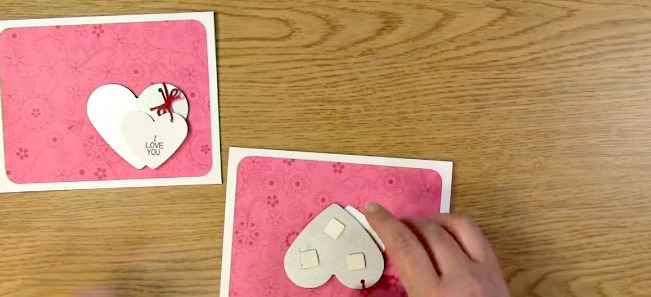
Add your foam squares to to the back of the larger heart.

Sign Language Sentiments 2 stamp set I Love You Card o

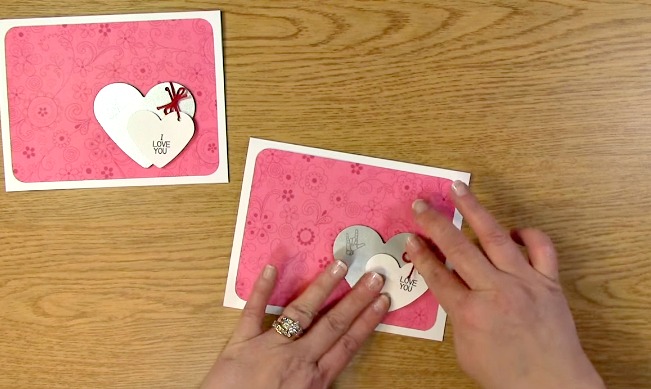
Adhere the heart to the card base.

Sign Language Sentiments 2 stamp set I Love You Card Master wm

Here is the completed card using Sign Language Sentiments 2!

Although this is simple to make, I think the twine along with the offset hearts really make the creation sweet and heartfelt. Who wouldn’t love this card. Yes, my husband SURE DID! We hope you enjoyed this creation and enjoyed going on A Creative Journey with Melissa.

melissa-written-signature