Tag Archive for: Speech Bubbles Mini

Summer Coffee Loving Card Makers Blog Hop

Summer Coffee Lovers Blog HopWelcome! If you happened to come here by chance, you are in LUCK! We are taking part in the wonderful Summer Coffee Lovers Blog Hop (#summerclh) showcasing our love for what you ask? COFFEE!!  Who doesn’t LOVE that? We are really honored and excited to be one of the SUPER SPONSORS for this amazing blog hop with this awesome group.

To start at the beginning of the Summer Coffee Lovers Blog Hop please click HERE. The Summer Coffee Lovers Blog Hop runs from June 5th at 6:00 AM Pacific Time until June 12th 11:59 PM Pacific Time. Winners announced on June 14th!

If you would like to check out the main Coffee Lovers Blog CLICK HERE.

If you aren’t familiar with the Coffee Loving Papercrafters Group and would like to learn more, be sure to join their Facebook Group HERE to ensure you get the latest info on all of their blog hops! The group is SUPER fun with awesome creativity, inspiration and of course.. GREAT HOPS with SUPER DUPER PRIZES! We would hate for you to miss out!

Now onto some CREATIVE Fun stuff from Raven!

Hey beautiful crafters! Creative Crew member Raven Baca here for A Creative Journey with Melissa. How are you doing on this beautiful summer day? Well if you are in the United States, it’s summer. Abroad you are in the middle of winter. How cool is that?

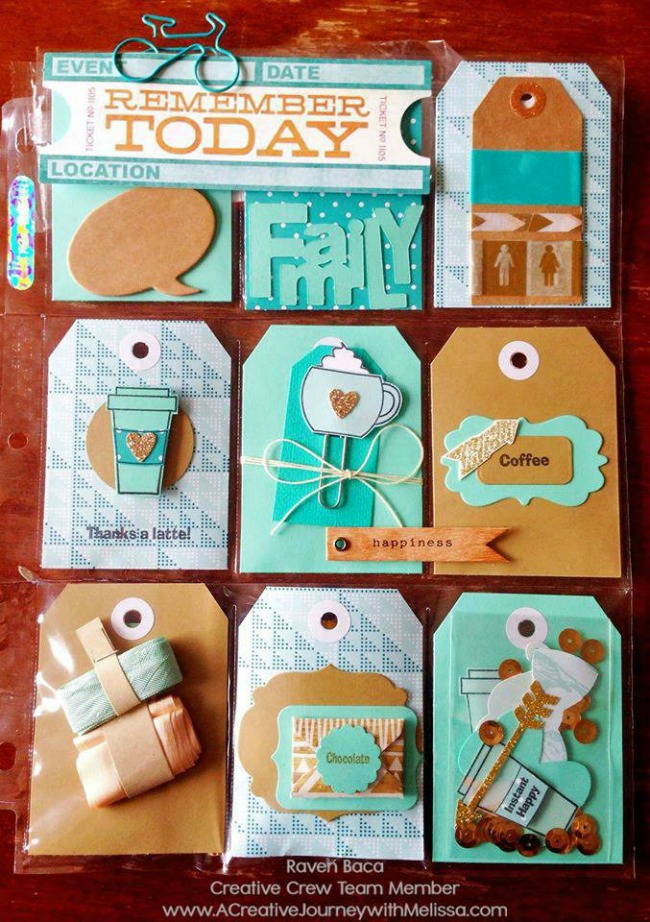
Today I have a little something to share with you that will keep you warm. It’s a Pocket Letter. If you don’t know what a pocket letter is, it is a way for people to exchange letters like pen pals in a page protector format with nine pockets that easily fits into a standard binder for you to keep. You include a personal note, some fun creative goodies as well as some of your pen-pals favorite things. In this case – COFFEE of course! I have really thrown my creativity into pocket letters and I JUST LOVE IT! I love being creative and I also LOVE Pen-Paling so Pocket Letters are the best of both worlds! It’s just fabulous and I hope I will inspire you to be creative by the project I am highlighting today.

For today’s post I made a coffee themed pocket letter for one of my dear friends. I asked her if she liked coffee. We were great friends in High School and she has since moved out of state so unfortunately, we don’t get to spend much time together. Her response to me was,”only with my oxygen.” Kinda love that so I’m using that as my new saying lol.

This was her little gift and I’m sharing with you all for inspiration. I hope you love it and you find some ideas that inspire you to pay it forward!

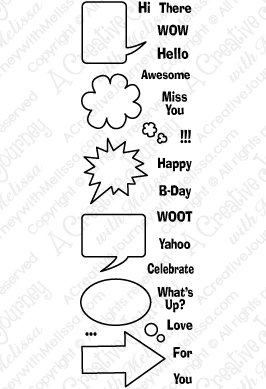
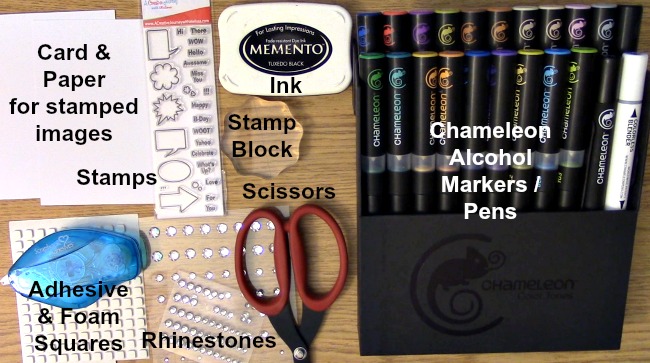
For the pocket letter creation the stamps I used were from the Coffee is My Liquid Therapy Stamp Set.

Pocket Letter

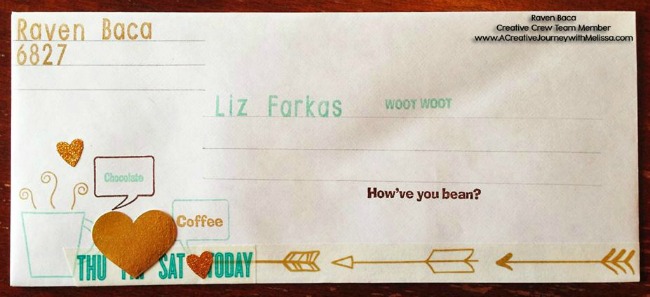
This was her envelope that I just had to decorate using the same color scheme and stamp set. I LOVE that large coffee mug. Isn’t it just the cutest thing? I also decided to use a few more stamp sets that I love from A Creative Journey with Melissa and I love how they all worked together!

For the Pocket Letter Envelope, the stamps I used were

Coffee is My Liquid Therapy

Everyday Alphabet Upper Case and Emoticon Stamp Set

Everyday Alphabet Lower Case and Numbers Stamp Set

Speech Bubbles Mini Stamp Set

raven envelope

Feel inspired? Be sure to get your creative juices flowing and create something that is summer coffee themed. You could link up to enter for some amazing prizes using the inlinkz link on the Coffee Lovers Blog that can be found HERE! If you post on social media be sure to use the hashtag #summerclh for all of your creations as well!

Here on our blog we are giving away the Coffee is my Liquid Therapy stamp set in addition to all of the other prizes that are being given away! All you need to do is post your answer to this question on our blog: What is your favorite type of coffee? If your comment doesn’t show up right away, don’t worry. All comments are held for review.

Thanks for joining us and I hope you enjoyed my creation today. Be sure to hop along to all of the other amazing creatives for inspiration and the opportunity to win great prizes along the way!

SAVE MONEY on embellishments! Coloring with Chameleon Pens Tutorial

Do you want to SAVE MONEY on embellishments! Coloring with Chameleon Pens Tutorial Good Afternoon! Thank you for joining us for Mondays with Melissa. Today I am going to be showing you how to SAVE MONEY on embellishments by coloring them with Chameleon Pens. There are so many different things you can do and it is really amazing how great the rhinestones look once you have colored them. It is one of the EASIEST techniques with the fastest gratification! LOVE IT! I have also created a card using the Speech Bubbles Mini Set using the Chameleon Pens. It really came out cute! If you like to learn by video, check out the video above, if you prefer a pictorial, check out the pics below and let me know what you think! Thanks for joining us and let’s get started!

First I want to show you a card I created using the Chameleon Pens. The Chameleon pens / markers are alcohol based markers. They have numerous uses two of which I am going to share with you today.

Here is the list of supplies you would need to recreate this card:

Speech Bubbles Mini Stamp Set

Chameleon Markers Complete Set

Memento Ink

Stamp Block

Adhesive

Foam Squares

Scissors

Card base

Paper to stamp sentiment & image on

Pick your speech bubble from the Speech Bubble Mini Stamp Set, adhere to the stamp block,

ink the stamp and stamp your image on your paper.

Adhere Sentiment to the stamp block, ink and stamp sentiment inside the speech bubble. Repeat stamping on paper per your personal design choice until satisfied with the number of designs to be placed for your card.

Take out your Chameleon markers. You can use either the brush tip or the bullet tip (like a felt tip) to color your images. Below is showing the brush tip which is what I will be using to color the image.

This is the tip for the mixing chamber (blending solution.) I have used it with red before as you can see there is a tint of red/pink on it. This will not change the nib or effect of the blending solution mixture and it’s effectiveness at all.

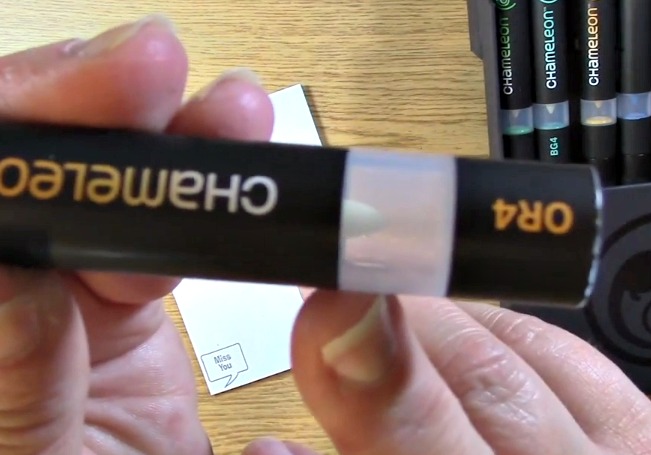
Once you have taken off the cap off your marker tip preference, place your tip so that the mixing chamber is touching your colored tip. Make sure that your colored tip (nib) pointed toward the sky and the mixing chamber tip (nib) is pointed toward the floor. The pen will be upright and the below picture is what your marker / pen will look like when it is in front of you.

This is an above view of what your marker should look like when you have the mixing chamber-straight up and down.

Keep your pen upright so the blending solution can transfer to the colored nib. The amount of time you would like to keep it like this varies depending on how light you want the color to be to start with. The darker the color marker, the longer it will take to saturate the color with solution to make it almost opaque. I have kept it on for as short as 3 seconds for a very light difference to 10-15 seconds for a drastic color change. For the below creation, I kept it on for at least 12 seconds. As you can see, it is almost translucent as I begin to color.

As I continue to color, you can see where the blending solution is being used with the color. The blending solution is used and the color then starts to come through more as the blending solution is no longer saturating the nib.

Here is a close up of the variance of color from the bottom where I started to the top where the color was most saturated

and no longer had blending solution and the pigment is coming through.

This is the mixing chamber with a nib that hasn’t been used yet. As you can see, there isn’t any pigment/color on it at all. This will change with use as shown with the red mixing chamber in a previous picture and will not effect the mixing chamber and effectiveness.

This is what the mixing chamber looks like with both nibs (tips) touching to transfer the blending solution to the colored marker. This picture is just for visual purposes. When using the chamber the marker should be upright for it to be effective.

After using the mixing chamber for approximately 6-8 seconds, I started coloring below.

Screenshot 2015-04-13 17.32.49

Once you have colored your speech bubbles after stamping the image and sentiment, cut out the speech bubbles. Adhere them with either adhesive or a foam square for dimension to your card. Set aside. Take out your rhinestones and Chameleon pens.

Pick a marker color that you want to color your rhinestones. Color the top of the rhinestone to your liking.

*NOTE* Unless you want a translucent color on your rhinestone, do not use the blending solution

or else the color may not be strong enough for it to be obvious.

This is the rhinestone fully colored with the marker.

Here I have colored more of them in for demonstration purposes. The possibilities are ENDLESS!

Here is a close up shot of the colored rhinestones. LOOKS AWESOME DOESN’T IT?!

I use my QuickStick from Quickutz to take them off of the sheet of rhinestones and place them on my card. Many other companies have a tool similar to this and they work well also.

This is a close up of what the rhinestones and colored speech bubbles I created in the video for example purposes.

This is the finished card I created for an example of this technique.

Speech Bubbles Card

I hope you enjoyed this pictorial and sign up for our blog post updates as well as our mailing list for promotions, coupons and updates! Thanks so much for joining us and we hope you had a great time going on A Creative Journey with Melissa.

signature

What’s New Wednesday – Blog Hop, Releases, Giveaways!

Welcome to What’s New Wednesday!!

Hi There! I am Melissa Mueller, the owner of A Creative Journey with Melissa . Welcome to the monthly NEW PRODUCT RELEASES for A Creative Journey with Melissa. We will be introducing new products EVERY SECOND WEDNESDAY of the month. We are also having a blog hop this month so be sure to follow along for an opportunity to win one of FIVE PRIZES! The best way to ensure you are alerted to our latest and greatest info is to subscribe to our E-mail Updates to get the most up to date info! If you didn’t know, I also have a Mondays with Melissa which is a YouTube series. I have videos every Monday showing some type of design preference and/or a tutorial on how to do something you may not have done before. Sometimes we even have sneak peeks! We would love it if you connected with us and followed along! You can check out the latest video below but be sure to connect with us above at the top right where you can go directly to our social media areas. We would love to connect with you!

Now.. onto some fun! If you came here  by chance, you are in luck! We are having a blog hop with awesome creations as well as giving away five prizes!

Here are the three new stamp releases and I am thrilled to be able to share these new products and some great creations along this hop with you today.

Speech Bubbles Mini

Speech Bubbles Mini stamp set

Speech Bubbles Large

Speech Bubbles - Large Stamp Set

Sign Language Sentiments

Sign Language Sentiments  Stamp Set

I would like to show you this amazing creation done by a friend of mine Raven. I love her style, color choice and well.. I just love her! She is an amazing Mom, supporter of mine and really did an amazing job with the Speech Bubbles Mini Set and I thought you would like to check it out!

Here is my Monday’s with Melissa video if you didn’t catch it before and my card creation using the Sign Language Sentiments stamp set.

I would love it if you would check it out and see what you think!

Below is a list of the Blog Hop Line-Up participants. All you need to do is click on the blog hop participant’s picture (don’t click on me because you saw my post above and my video- you are already here:) ) and then follow the directions on their blog post. You must comment on all blogs and follow all directions to be eligible. If you do so, you will be entered in to win one of five prizes!

Melissa

 Alena

Brandie

Rhoda

Haidee

Giveaways

Speech Bubbles Mini Stamp Set

Speech Bubbles Large Stamp Set

Sign Language Sentiments Stamp Set

TWO $10 gift certificate for Joann’s

Thank you for visiting and please be sure to hop along the blog hop to all of our other amazingly talented Creative Crew Team Members and follow the directions on each blog and become a follower if you aren’t already. If you qualify, you will be entered in the giveaway for one of the FIVE prizes if you do so! Entries for this blog hop will end Friday 4/10/15 at 8 PM Pacific Time. Winners will be announced on Saturday, 4/11/15 on the A Creative Journey with Melissa’s blog HERE . The post with the winner information will not be live (active or available) until Saturday. You must contact Melissa with your shipping information via Facebook PM, comment on her blog or e-mail me within three days of the winning announcement blog post or your prize will be forfeited. At this time, only US Residents are eligible. Thank you for your understanding.

Next up on the blog hop is Alena and I know she has some really cool creations using the Sign Language Sentiments set and more… Check it out HERE

Be sure to check back to see if you are a winner on Saturday. Thanks so much for hopping along with us!

melissa-written-signature