Tag Archive for: video tutorial

Custom Tie Dye Ribbon Tutorial

Custom Tie Dye Ribbon Tutorial is what we have for you today. Do you ever look at a project and think Wow! Those two or three colors would look awesome with this creation but can’t figure out how? PROBLEM SOLVED! I have an inexpensive way for you to create your own Custom Tie Dye Ribbon for your projects that won’t break the bank! Ready? Let’s do this!

Supplies Needed for the Custom Tie Dye Ribbon Project

Alcohol Ink

Isopropyl Alcohol

Paper Clips

Seam Binding

Plastic Baggies or a Jar you don’t mind getting stained

Clothes Pins (yay remmebered!)

Paper towels or I used make up pads

GLOVES if you don’t want to get ink all over your hands because YOU WILL

For this project, I used Chameleon Ink refill colors Y03, V04 and BG4 for the alcohol ink colors.

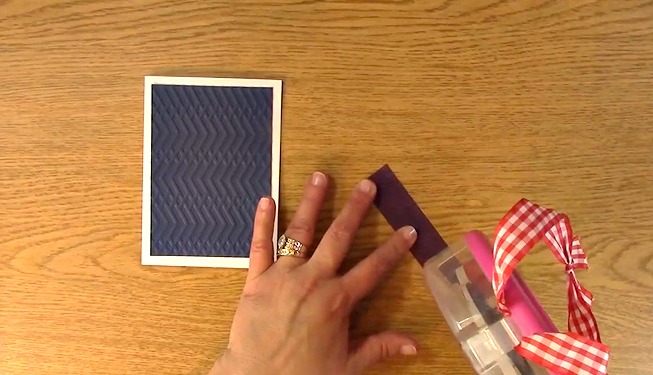
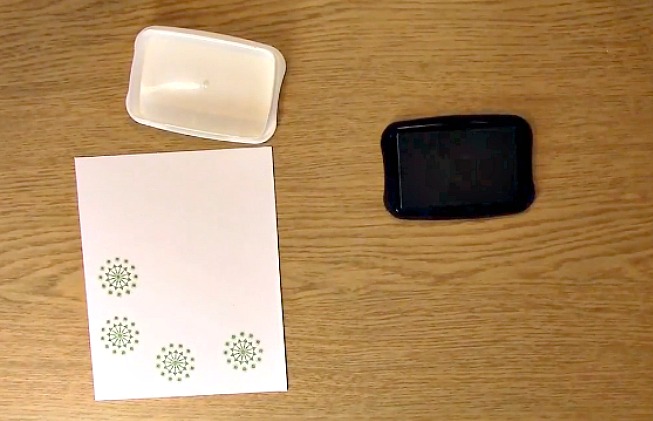
I also used white seam binding.

For the seam binding, there is a small pin in it to hold the ribbon. Take it out but be sure to keep it as it comes in handy for storage!

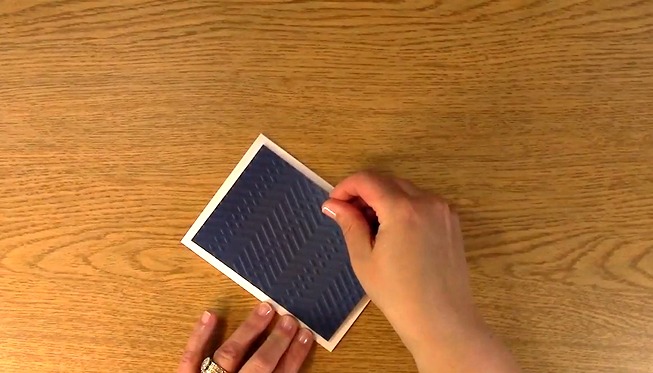
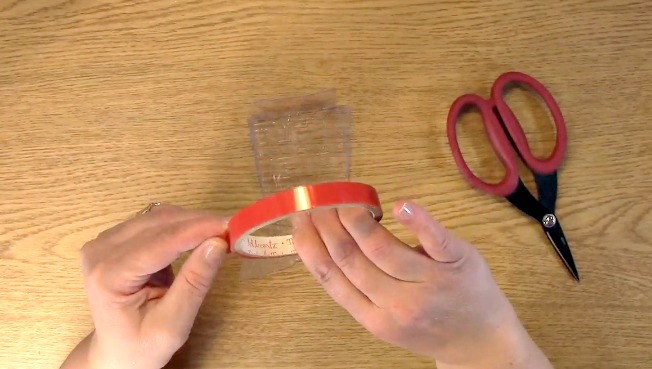
To begin, take the amount of ribbon you need for your project and cut it off of your roll. For this ribbon, I am making it a little bit messy looking on purpose to I am just randomly bunching my seam binding ribbon together as shown.

Twist the seam binding and clip one end of it in the clothespin.

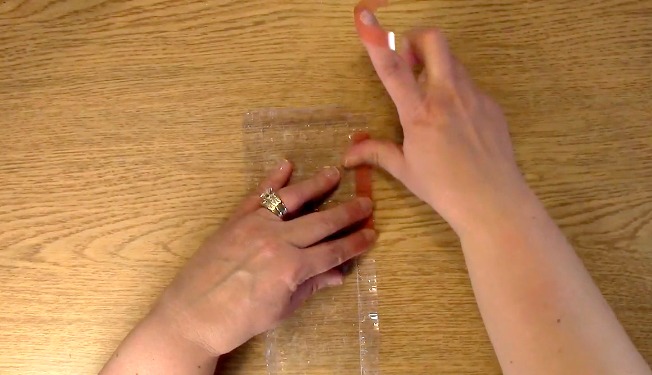
Twist and clip the other end so it looks like the above and set aside.

For the second Custom Tie Dye Ribbon, wrap your ribbon neatly around your hand as shown above.

Take out four paper clips and place them on the ribbon as shown above.

This is the back side of the ribbon. Notice that the paperclips are placed differently to get a different effect.

Using your baggy as an ink catch all, place your ribbon inside the bag. Carefully place a small amount of alcohol ink inside your bag of the first color.

Add the second color to your bag. I put WAYYY too much of the first color in however you will see what I do with the extra in a little bit.

Close your baggy and Smoosh, yes I said SMOOSH, your colors inside the bag. This is what your bag will look like, A MESS! Set your Custom Tie Dye Ribbon aside.

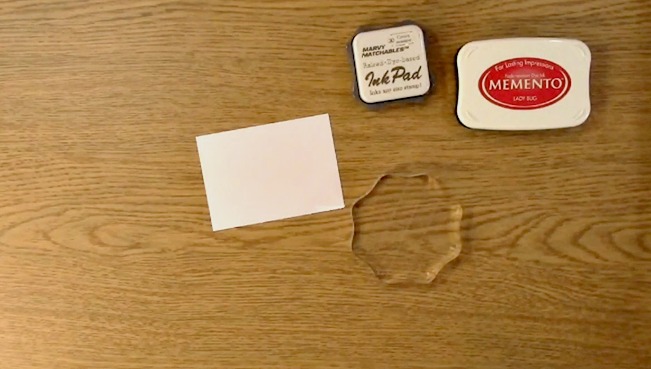
Take out your second baggy and place a few drops of the colors you wish to use inside the baggy.

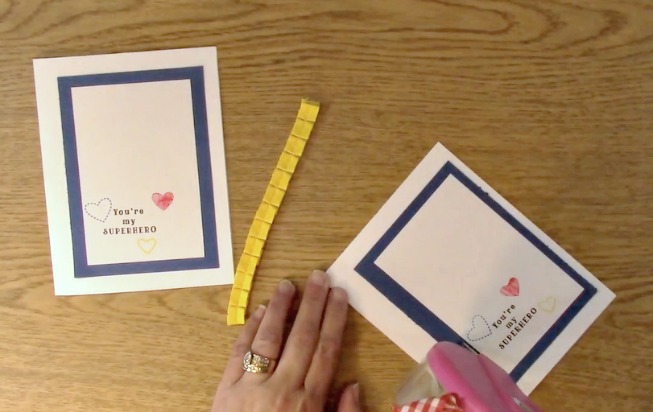
Using your clothes pin seam binding ribbon, strategically place the ink on various parts of the ribbon.

Take out your first inked creation and set aside to dry.

With the extra ink inside the baggy from the first creation, I placed some more seam binding ribbon and smooshed it to see what effect I would get. Set it aside to dry.

Take out the inked ribbon with the clothespins from the bag once they have dried. These are still a little bit wet.

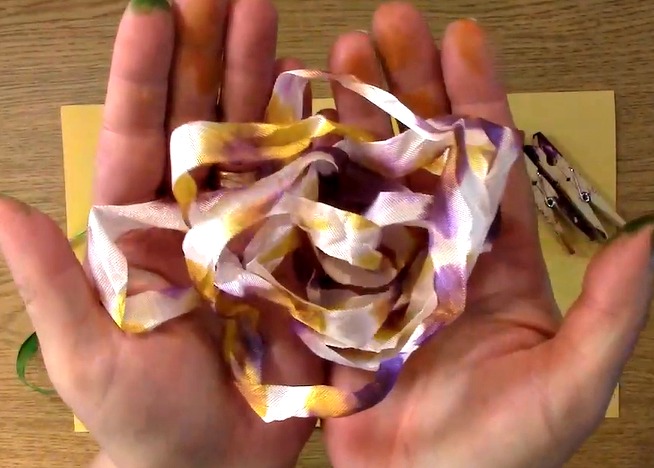
This is what it looks like! I love it! What do you think?

I used WAY TOO MUCH ink for the first ribbon project. LESSON LEARNED however, I do like how it came out so maybe it wasn’t so bad after all!

You will need to carefully take off the paperclips so the ribbon doesn’t snag. ANOTHER lesson I learned…

This is what the ribbon looks like although it is still quite wet as you can see by the look of my fingers.

The results of the ribbon as it is drying.

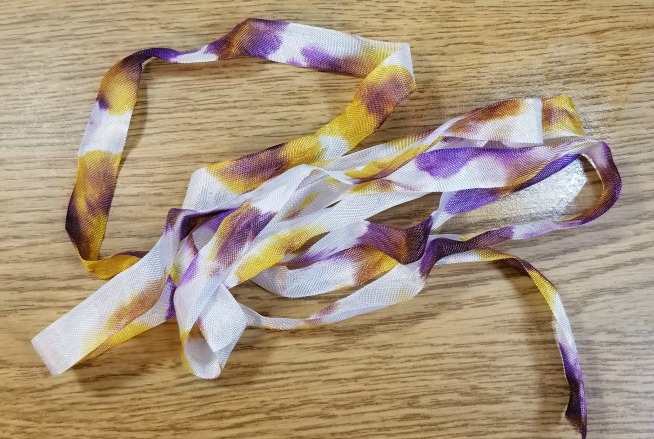
This is what the purple and yellow ribbon looks like once it is completely dry.

When the yellow and blue ribbon is completely dry, this is what it looks like. I am glad you can see more of the blue now and it doesn’t look all green!

This is the extra piece of ribbon I put in the baggy just to see what it looked like. I know I can use this on a future project!

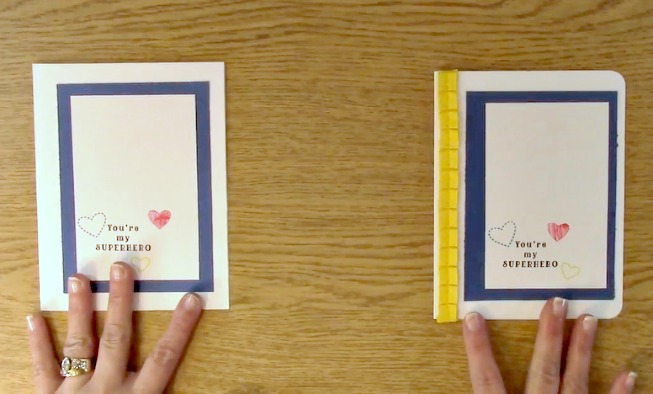
Here are all of them side by side completely dry. Which would you want to try?

For this weeks giveaway, we are giving away $15 credit to our store!

For last weeks giveaway, we are giving away $15 credit to our store!

The winner is Teresa G.

Please be sure that you  send me a message letting me know which post you won on and your contact info and I can send your code for your store credit to you!

Winners, please send me an message HERE and I will get your prize out to you!

For all of our giveaways including this one, in order for you to qualify for an entry to win, you would need to be a follower on YouTube, subscribe to our mailing list/blog posts (found on our blog page) and you may also comment on this blog post for an additional entry to win! When you subscribe, you will receive an e-mail on Mondays with our latest blog post. BE SURE TO READ IT to check to see if you are a winner EVERY WEEK. If you do not contact me within two weeks of the announcement of winning, you will forfeit your prize. NO EXCEPTIONS. Thank you for your understanding.

NOTE: If you are subscribed with two different names and I am unable to match you with your subscription to the blog and the YouTube Channel, you will be ineligible to win as I can’t decipher if you are a matching subscriber to both. Thank you for your understanding.

We hope you will subscribe to our YouTube Channel, Blog/Newsletter updates and check out our website!

As always, we appreciate your visit and we hope you enjoyed going on A Creative Journey with Melissa. 

melissa-written-signature


SAVE MONEY – Dollar Store Embellishment Custom Coloring

SAVE MONEY – Dollar Store Embellishment Custom Coloring is what we have for you today. I bought some pearl embellishments at the dollar store. I am going to show you how to custom color them for any project and save money while doing it!

Supplies Needed for the SAVE MONEY – Dollar Store Embellishment Custom Coloring Project

Alcohol Markers or Pens

Embellishment

Project you are trying to color match

This all started when I was at the dollar store and saw these.

There are 216 self adhesive pearls for ONE DOLLAR!  Now, I am going to show you how to create your own colors for these so you can use them on any of your projects!

Here you can see that there is an adhesive line that the pearls are on. You can cut those however it works best for you.

For the SAVE MONEY – Dollar Store Embellishment Custom Coloring tutorial, I am using OL3 and YG3 chameleon pens to color the pearls for my project.

To begin, take out your OL3 chameleon pen.

Using the brush nib of your chameleon pen for your SAVE MONEY – Dollar Store Embellishment Custom Coloring project, color the embellishment completely so there isn’t any white showing through. I think it’s a pretty good match! What do you think?

Take out your YG3 chameleon pen and color your second pearl.

What a difference in the two colors! I really like them both but the first one matches my project better.

This is what happens when I colored the pearl with the YG3 and then colored on top of that OL3 and this is what it looks like on the right. I really like it!

For this weeks giveaway, we are giving away $15 credit to our store!

For last weeks giveaway, we are giving away $15 credit to our store!

The winner is Mary V.

Please be sure that you  send me a message letting me know which post you won on and your contact info and I can send your code for your store credit to you!

Winners, please send me an message HERE and I will get your prize out to you!

For all of our giveaways including this one, in order for you to qualify for an entry to win, you would need to be a follower on YouTube, subscribe to our mailing list/blog posts (found on our blog page) and you may also comment on this blog post for an additional entry to win! When you subscribe, you will receive an e-mail on Mondays with our latest blog post. BE SURE TO READ IT to check to see if you are a winner EVERY WEEK. If you do not contact me within two weeks of the announcement of winning, you will forfeit your prize. NO EXCEPTIONS. Thank you for your understanding.

NOTE: If you are subscribed with two different names and I am unable to match you with your subscription to the blog and the YouTube Channel, you will be ineligible to win as I can’t decipher if you are a matching subscriber to both. Thank you for your understanding.

We hope you will subscribe to our YouTube Channel, Blog/Newsletter updates and check out our website!

As always, we appreciate your visit and we hope you enjoyed going on A Creative Journey with Melissa. 

melissa-written-signature

Holiday Stocking Card Using Sign Language Stamps

Holiday Stocking Card Using Sign Language Stamps is what we have for you today. I am always looking for multiple uses for the dies that I have. We invest a lot of money in our crafting tools and I like to think of multiple ways to use them. That is what we are going to do today! Are you ready? Let’s get started!

Here is the creation we are going to make! It is perfect for gift cards for the holidays!

Supplies Needed for the Holiday Stocking Card Using Sign Language Stamps Project

A Creative Journey with Melissa Sign Language Alphabet stamp set

Acrylic Block

Scissors

Black Ink

Paper for Card

Paper for embellishments for stocking

Stocking Die

Glue dot for gift card

Trim for stocking

Adhesive

Here is a close up of the stocking die I used.

Take out your stocking die, paper, platforms and manual die cut machine. Place your paper on top of the die where you need the white pieces cut. Place your die on top of the clear platform and then place the clear platform on top of the die so it is sandwiched between the two clear platforms.

Here are the pieces that the die cut out for me for the Holiday Stocking Card Using Sign Language Stamps Project.

Take your colored 6″ x 12″ piece of paper out.

Fold your colored paper in half.

Be sure the fold line is BELOW the top of the stocking. This is how you will make it a card!

Using the same sandwich as you did for the embellishment pieces for the stocking, run your die with the folded part BELOW the line where the die will cut. Run your die cut through your machine.

You did it! This is how you create the stocking card for your Holiday Stocking Card Using Sign Language Stamps Project!

This is a close up of the die. I placed my fold approximately 1/4 inch below the cut line for the stocking. Above is the picture is an exaggeration of how much space it was. I just wanted to be sure you were clear which line you were to be sure you placed the fold under for your creation.

Take out your ink and the top of your stocking. Peel off the appropriate letters from your A Creative Journey with Melissa sign language stamp set.

Place the first letter on the block.

Ink your stamp

Stamp your letter on the top of the stocking. Repeat to spell out the word you wish to have.

Take out your trim. Place adhesive on the bottom edge of the stocking top. Adhere the trim to the stocking top. Trim off any excess.

Here on the left I put the letters rounded so they followed the trim. On the right I did them straight. Which do you like better?

Place adhesive on the back of the stocking heel and toe pieces. Adhere them to the front of your stocking card.

Take out your stocking top with the trim.

Adhere the stocking top to the front of the stocking card.

You did it! You completed your Holiday Stocking Card Using Sign Language Stamps Project!


First I want to announce the two winners from the Fall/Winter Coffee Lovers Blog Hop $15 store credit.

The winners are:

Cynthia C. and Lucy E.

For last weeks $15.00 store credit prize, the winner is Sydney G.

For this weeks prize, we will be giving away a $15.00 store credit! That way you can decide exactly what you want!

For all of our giveaways including this one, in order for you to qualify for an entry to win, you would need to be a follower on YouTube, subscribe to our mailing list/blog posts (found on our blog page) and you may also comment on this blog post for an additional entry to win! When you subscribe, you will receive an e-mail on Mondays with our latest blog post. BE SURE TO READ IT to check to see if you are a winner EVERY WEEK. If you do not contact me within two weeks of the announcement of winning, you will forfeit your prize. NO EXCEPTIONS. Thank you for your understanding.

NOTE: If you are subscribed with two different names and I am unable to match you with your subscription to the blog and the YouTube Channel, you will be ineligible to win as I can’t decipher if you are a matching subscriber to both. Thank you for your understanding.

We hope you will subscribe to our YouTube Channel, Blog/Newsletter updates and check out our website!

As always, we appreciate your visit and we hope you enjoyed going on A Creative Journey with Melissa.

melissa-written-signature

Monochromatic Father’s Day Card

Monochromatic Father’s Day Card is what we have today. I realize Father’s Day was yesterday but you can use this idea for any card you want to create for any occasion! You could use this for a birthday, anniversary, wedding or just about any occasion!

Supplies needed for the Monochromatic Father’s Day Card 

A Creative Journey with Melissa Spring and Summer Holiday Celebrations Stamp Set

Acrylic Block

Ink

Punch

Two pieces of Colored paper – Monochromatic

Paper to stamp sentiment on

Scoring board and scoring tool or bone folder

3-D Foam

For this project, I started with a A2 card which is 8.5″ x 5.5″. This is half of a regular 8.5 x 11″ piece of paper.

Score 2 1/8 ” on each side as shown.

Fold the flaps inward on your Monochromatic Father’s Day Card showing you the gate fold of the card.

Take your 1″ x 8.5″ piece of paper and wrap it around the card with the opening in the front as shown.

Using the sentiment of choice, place it on your acrylic block. Ink your stamp and stamp your sentiment on the paper.

This is what it looks like once it is done. I always do an extra just to be sure I have one available if needed.

Using your punch, face the punching area toward you so you can see what area you are punching.

Squeeze the punch and you will punch out the sentiment for your Monochromatic Father’s Day Card.

Place your 3-D foam on either side of the strap for your card as shown.

Wrap the strap around your card ensuring it is even.

Place your sentiment on the 3-D foam adhesive. This now creates the band for your gate folded card on your Monochromatic Father’s Day Card.

To remove the band,


slide it downward or upward.

Remove the band off of the Monochromatic Father’s Day Card. YOU DID IT! Pretty easy technique for a cool and different look!

For this weeks giveaway we are giving away the A Creative Journey with Melissa Spring and Summer Holiday Celebrations Stamp Set

For all of our giveaways including this one, in order for you to qualify for an entry to win, you would need to be a follower on YouTube, subscribe to our mailing list/blog posts (found on our blog page) and you may also comment on this blog post for an additional entry to win! When you subscribe, you will receive an e-mail on Mondays with our latest blog post. BE SURE TO READ IT to check to see if you are a winner EVERY WEEK. If you do not contact me within two weeks of the announcement of winning,you will forfeit your prize. NO EXCEPTIONS. Thank you for your understanding.

NOTE: If you are subscribed with two different names and I am unable to match you with your subscription to both the blog and the YouTube Channel, unfortunately you will be ineligible to win as I can’t decipher if you are a matching subscriber to both. Thank you for your understanding.

For last weeks giveaway we are giving away a store credit for $15.00 to pick whatever you like that will get you inspired to be CREATIVE!

The winner is Cheryl G !

Winners, please send me an message HERE and I will get your prize out to you!

We hope you will subscribe to our YouTube Channel, Blog/Newsletter updates and check out our website!

Thank you for joining us and we hope you enjoyed going on A Creative Journey with Melissa.

melissa-written-signature


SUPER EASY Father’s Day Card

SUPER EASY Father’s Day Card is what we have for you today! This card is handsome, elegant and SUPER EASY! What could be better! Before we get started, I wanted to remind  you of an awesome Coffee Lovers Blog Hop I am participating in starting Friday. Be sure to check back or even better.. be sure you subscribe to our email and blog posts and you will get an awesome email about it! Now, are you ready to get CREATIVE?! Me too!


Supplies Needed for the SUPER EASY Father’s Day Card Project

A Creative Journey with Melissa Spring and Summer Holiday Celebrations Stamp Set

Acrylic Stamp Block

Card base

Solid color mat

Solid color strip

White paper to stamp sentiment on

Adhesive

Punch

Embossing folder

Manual Die Cut machine

Ink

3-D Foam Rectangles

Take out your paper for the mat on your card, embossing folder and your manual die cut machine. Place your paper in your embossing folder.

Place your embossing folder on your platform.

Put your clear platform on top of your embossing folder.

Run your embossing folder through your manual die cut machine.

Isn’t this texture FABULOUS!

Using your adhesive, apply some to the back of your embossed paper.

Apply your embossed paper to your card base.

Add some adhesive to the strip of paper.

Adhere the strip of paper to your card.

Take out your Ink, stamps and stamping block. Place your stamp on your block and ink your sentiment.

Stamp your sentiment on your paper.

Take out your punch. I figured out my paper was a bit smaller than my punch’s length so sometimes when you use a small piece of paper you don’t have a big enough piece to use in your punch.

HERE IS A GREAT TIP! USE A POST IT NOTE! It will give you just a little more space for you to be able to place your paper inside your punch and it works perfectly!

Punch out your sentiment.

Place your foam rectangles on the back of your sentiment. Remove the paper from the back of the foam adhesive.

Apply your sentiment to your card.

You have completed your SUPER EASY Father’s Day Card!

Now for this weeks giveaways! I am giving away the A Creative Journey with Melissa Spring and Summer Holiday Celebrations Stamp Set !

Be SURE you are a subscriber to our YouTube channel and to our Blog/E-mail list and make sure your names are matching so I can verify you are subscribed to both to enable you to be eligible to win! Winners announced next week so be sure and check back! Winners will be announced next week on our Mondays with Melissa blog post!

BE SURE TO check to see if you are a winner EVERY WEEK. If you do not contact me within two weeks, you forfeit your prize. Thank you for your understanding.

Now for last weeks giveaway! I am giving away a $15.00 store credit to our store and ANOTHER ONE to one of the wonderful people that wished my hubby HAPPY BIRTHDAY!!!!

The winners are is Denise and Kathy !!!

Winners, please send me your contact information via contact page on our website, which post you are a winner from and I will get your prize out to you! Thank you so much for being a YouTube follower and subscribing to our mailing list/blog posts!

Thank you for joining us for the SUPER EASY Father’s Day Card post. CHECK BACK NEXT WEEK TO SEE IF YOU ARE A WINNER!

Have a wonderful week and thank you for going on A Creative Journey with Melissa.

You’re My SUPERHERO Autism Awareness Stamp Set Creation

You’re My SUPERHERO Autism Awareness Stamp Set Creation is what we have for you today. Autism Awareness is imperative to get answers and proper help for those affected. We are creating a a card that can be used to show someone you admire them not just for their bravery in their Autism journey but for any reason!

Supplies needed for the You’re My SUPERHERO Autism Awareness Stamp Set Creation

A Creative Journey with Melissa Awareness Ribbon Set #5 See Autism with your Heart

Stamp Block

Black, Red, Blue and Yellow Ink

Corner Rounder

Adhesive

Paper For Stamping

Blue paper to mat sentiment

Card Base

Scissors

Ribbon (optional)

For your 00You’re My SUPERHERO Autism Awareness Stamp Set Creation, take out your stamping block, A Creative Journey with Melissa Awareness Ribbon Set #5 See Autism with your Heart stamp set, black ink, and your paper to stamp sentiments on.

Peel off the sentiment of your choice and place it on your stamp block. Ink your sentiment.

Stamp your sentiment on your paper for your You’re My SUPERHERO Autism Awareness Stamp Set Creation. Return your stamp to the stamp sheet.

Peel off the heart stamps of your choice. Take out your red, blue and yellow ink.

Place your solid heart stamp on your block. Ink your stamp.

NOTE: When I used this ink, I noticed it did a lot of resisting on the stamp unlike when I use memento ink. I didn’t care for the dotted look so I decided to do something a little different.

Lightly after tapping the ink onto the stamp, swipe the stamp across the ink pad. This is what it will look like on the stamp.

Stamp the solid heart image onto your paper.0

This is what it looks like stamped. I love the texture of the ink on the paper. This occurred just by simply swiping the stamp across the ink pad which looks pretty cool, huh?

Once you have stamped your image, be sure to clean off your stamps. I use Stampin’ Up!’s Stampin’ mist. I love how it cleans without residue. I use this for all of my stamps. My friend Brandie is a Stampin’ Up Demonstrator so if you are interested in some, go to Brandie’s website HERE. They also have an awesome scrubbing pad thingy that I use. Like them so much I have two!

Place your dotted heart on your stamping block. Using the dotted outlined heart from the A Creative Journey with Melissa Awareness Ribbon Set #5 See Autism with your Heart stamp set , ink your stamp with blue ink.

Stamp your heart on your sentiment paper and clean off your stamp.

Place your third heart stamp on your block and ink with your yellow ink.

Stamp your heart image on your sentiment paper as shown. Clean off your stamp and return it to your stamp set sheet.

Take out your blue mat paper.

Using your adhesive, run your adhesive on the back of your sentiment stamped paper.

Adhere your paper to the blue mat paper.

Place adhesive on the back of your blue mat paper and adhere it to your card base.

Be sure to place adhesive to the left of the mat and sentiment paper.

Take your pleated yellow ribbon and adhere the ribbon down the side of the mat and sentiment paper.

This is what it will look like. You would be perfectly fine to leave the card just like this but I decided to take it two steps further.

Take out your corner rounder. I chose to only corner round two of the four corners of my card.

This is what it looks like with the ribbon and corners rounded on the right and without that on the left.

Although I do like the way it looks, I decided to add a few more solid yellow hearts.

I thought it need a little something extra and I think it worked! What do you think?

For this week, we are giving away the A Creative Journey with Melissa Awareness Ribbon Set #5 See Autism with your Heart. Winners announced next week so be sure and check back!

To qualify to win, you must be BOTH:

A public follower on YouTube, subscribe to our mailing list/blog posts and you may also comment on this blog post for an additional entry to win! Winners will be announced next week on our Mondays with Melissa blog post!

BE SURE TO check to see if you are a winner EVERY WEEK. If you do not contact me within two weeks, you forfeit your prize. Thank you for your understanding.

Subscribe to BOTH with MATCHING NAMES to be eligible. If I am unable to match you with your subscription to both the email list and the YouTube Channel, you will miss your chance to win a prize. If I can’t decipher if you are a matching subscriber (if your profile doesn’t show publicly who you subscribe to) and I can’t confirm you have subscribed to both, you will not be eligible. 

For last weeks giveaway we are giving away the A Creative Journey with Melissa Sentiments for All Occasions Stamp set!

 The winner is  Debbie H!

Winner, please send me your contact information via contact page on our website, which post you are a winner from and I will get your prize out to you! Thank you so much for being a YouTube follower and subscribing to our mailing list/blog posts!

Thank you for joining us for the You’re My SUPERHERO Autism Awareness Stamp Set Creation. CHECK BACK NEXT WEEK TO SEE IF YOU ARE A WINNER!

Have a wonderful week and thank you for going on A Creative Journey with Melissa.

Handmade Love Card for ANY COUPLE

Handmade Love Card for ANY COUPLE is what we have for today. Our A Creative Journey with Melissa I Just Love You Stamp Set can cover any configuration of love for your card including Female & Male, Female & Female, Male and Male or any variation you choose to celebrate.

Supplies Needed for the Handmade Love Card for ANY COUPLE Project

A Creative Journey with Melissa I Just Love You stamp set

Acrylic Stamp Block

Red Ink

Gray Ink

White card base

Gray Card Mat

Red Mat for stamped images

Paper to stamp images and sentiment on

White Twine

Scissors

To start, take out your gray ink, white paper and stamp block. Choose the stamp images from your A Creative Journey with Melissa I Just Love You stamp set.

For the Handmade Love Card for ANY COUPLE Project video I chose a female and female for my best friends that have gotten engaged! I am so excited for them! This stamp set is super versatile for any couple!

Ink your female image with the gray ink. Stamp as shown above.

Place ink on your female image again. Stamp next to your other stamped image leaving room for a heart by the hands.

Clean off your stamp and place back on your sheet. Take out your heart image and ink it with red ink. Stamp the heart in between the hands as shown above.

Ink the love sentiment with red ink. Stamp the sentiment on the side of the women images as shown.

This is what it will look like once the stamping has been completed. Place adhesive on the back of the stamped paper.

Adhere your paper to the red mat.

Take out your white card base and your gray mat. Place adhesive on the back of the gray mat and adhere to the card base.

Put adhesive on the back of your red paper and images. Adhere to the gray mat on your card base.

Take out your white twine. Wrap it around your card three times.

Tie a bow with the twine and trim off the excess.

Adjust the twine on  your card as you wish.

This is what the Handmade Love Card for ANY COUPLE Project looks like completed.

Cards are complete!

For this weeks giveaway we are giving away the A Creative Journey with Melissa I Just Love You stamp set. Winners announced next week so be sure to check back!

To qualify to win, you must be BOTH:

A public follower on YouTube, subscribe to our mailing list/blog posts and you may also comment on this blog post for an additional entry to win! Winners will be announced next week on our Mondays with Melissa blog post!

BE SURE TO check to see if you are a winner EVERY WEEK. If you do not contact me within two weeks of the your name being picked, you will forfeit your prize. Thank you for your understanding.

Subscribe to BOTH with MATCHING NAMES to be eligible. If I am unable to match you with your subscription to both the email list and the YouTube Channel, you will miss your chance to win a prize. If I can’t decipher if you are a matching subscriber (if your profile doesn’t show publicly who you subscribe to) and I can’t confirm you have subscribed to both, you will not be eligible.

 For last weeks giveaways we are giving away the

A Creative Journey with Melissa I Just Love You stamp set.

 THE WINNER IS   Marybeth

Marybeth, please send me your contact information via contact page on our website, which post you are a winner from and I will get your prize out to you! Thank you so much for being a YouTube follower and subscribing to our mailing list/blog posts!

Thank you for joining us for the Handmade Love Card for ANY COUPLE Project. I hope I have inspired you to organize yourself even if in just a small way! BE SURE TO CHECK BACK TO SEE IF YOU ARE A WINNER!

Have a wonderful week and thank you for going on A Creative Journey with Melissa.

Quick and Easy! Coffee Cup Embossed Recycled Packaging Gift Card Holder

Quick and Easy! Coffee Cup Embossed Recycled Packaging Gift Card Holder is what we have for you today. I love to reuse packaging for my crafts. This is a tutorial on how to do just that!

Supplies Needed for the Quick and Easy! Coffee Cup Embossed Recycled Packaging Gift Card Holder Project

A Creative Journey with Melissa Snowflake Beauty Stamp Set

Acrylic Stamp Block

1.25″ Circle Punch

Sizzix Die # 660281 Box and Card Die

Sizzix or manual die cut machine

Scissors

Paper to stamp image on

Green Ink

.75″ x 12″ strip of patterned paper

Tim Holtz Coffee Cup Embossing Folder

Red Tape – Strong adhesive for the packaging

Adhesive for adhering paper to the box

IF YOU ARE HERE FOR THE 2017 WINTER COFFEE LOVERS BLOG HOP PLEASE CLICK HERE. You are of course welcome to check this post out too and enter to win the prize on this post as well! If you aren’t.. Be sure to check it out as you can see lots of coffee project inspiration as well as win a number of prizes from some great sponsors!

To begin the Quick and Easy! Coffee Cup Embossed Recycled Packaging Gift Card Holder project, Take out your paper to stamp on, your acrylic block and your A Creative Journey with Melissa Snowflake Beauty Stamp Set.

Adhere your stamp to your acrylic block. Take out your green ink.

Stamp your snowflake onto your paper. I made a few extra so I can have them on hand in case I need to create an extra card.

Punch your snowflake images out with your circle punch.

This is a die inside it’s clear plastic packaging. When I get dies like this, I take them out of their packaging and cut the parts of the packaging that could be used in a die cut machine at a later time and set them aside. You would be amazed at how many times I have used them on my projects.

If you haven’t heard of this before, search in the box above or click on the menu for the icon and search for packaging and you will  find a few tutorials for some other ideas.

Here is a piece from a longer die that I have kept. This is what we are going to use to die cut our Quick and Easy! Coffee Cup Embossed Recycled Packaging Gift Card Holder Project. Sometimes you may have some blemishes on the packaging. You can solve that issue by embossing it!

Take out your manual die cut machine, two clear platforms and your die. Place a clear platform down on the base of the die cut machine. You will then place your die, clear recycled sheet of packaging and then your second clear platform. Using the handle, run your packaging through the die cut machine.

This is what it will look like once you have done that.

Take out your coffee cup embossing folder, regular platform, two clear platforms and your die cut machine. You can emboss just one side of your box like shown or you can do the entire box by folding your clear sheet in half and placing it in the folder.

This is what it looks like once it has been embossed!

Fold your box where all of the creases are from the die cut.

Take out your red tape or other strong adhesive.

Cut two pieces and adhere the two pieces of adhesive to the side of the box.

Remove the red protective piece revealing the adhesive.

Press firmly on the side of the box to the adhesive side ensuring its adhesion creating the box. You may lightly see some of the adhesive. If you do not care for that look, you can place paper on the outside of the box to cover it if you think it is too obvious. I personally thought it looked fine.

This is the die cut and embossed box before it has been put together completely and decorated.

Take out your strip of paper.

Using the gift card holder, measure how large of a piece you will need to wrap it around so it overlaps a little bit.

Trim excess paper off of your creation.

Apply adhesive to the back of the decorative paper.

Wrap your paper around the box ensuring the paper has adhered to the gift card holder.

Take out your stamped image, 3-D foam piece and box. Remove the adhesive back to the foam piece.

Place the foam piece on the back of the stamped image. Place the stamped image on the Quick and Easy! Coffee Cup Embossed Recycled Packaging Gift Card Holder Project.

Your Quick and Easy! Coffee Cup Embossed Recycled Packaging Gift Card Holder Project is complete!

For this weeks giveaway, we are giving away the above A Creative Journey with Melissa Snowflake Beauty Stamp Set.

 To qualify to win, you must be BOTH:

A public follower on YouTube, subscribe to our mailing list/blog posts and you may also comment on this blog post for an additional entry to win! Winners will be announced next week on our Mondays with Melissa blog post!

BE SURE TO check to see if you are a winner EVERY WEEK. If you do not contact me within two weeks of the announcement of winning, you will forfeit your prize. Thank you for your understanding.

Subscribe to BOTH with MATCHING NAMES to be eligible. If I am unable to match you with your subscription to both the email list and the YouTube Channel, you will miss your chance to win a prize. If I can’t decipher if you are a matching subscriber (if your profile doesn’t show publicly who you subscribe to) and I can’t confirm you have subscribed to both, you will not be eligible.

Now for last weeks GIVEAWAY we are giving away the A Creative Journey with Melissa Coffee, Tea and Wine – Oh My! Stamp Set.

Jaratzed. you are the winner! Please send me your contact information via contact page on our website, which post you are a winner from and I will get your prize out to you! Thank you so much for being a YouTube follower and subscribing to our mailing list/blog posts!

Thank you for joining us for the Quick and Easy! Coffee Cup Embossed Recycled Packaging Gift Card Holder Project. I hope I have inspired you to create something that can be a tradition and keepsake for years to come! We will be announcing the winners from the 2017 Winter Coffee Lovers Bloghop as well as this weeks giveaway next Monday. BE SURE TO CHECK BACK!

Have a wonderful week and thank you for going on A Creative Journey with Melissa.


Create Patterned Paper using Stamps

Create Patterned Paper using Stamps is what we have for you today. How many of you have stamps that you love but don’t often think about what other things you could use them for? Yes! Me too! What better time than the present than to make some patterned paper?!
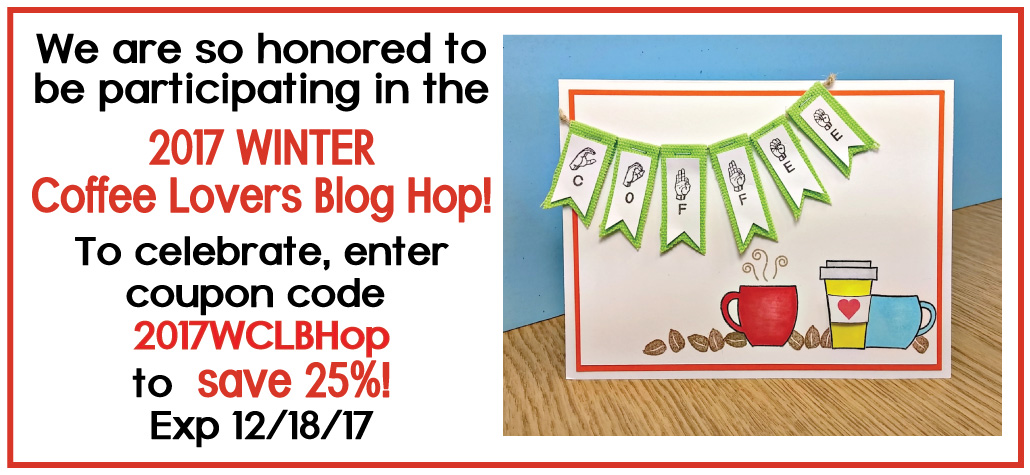
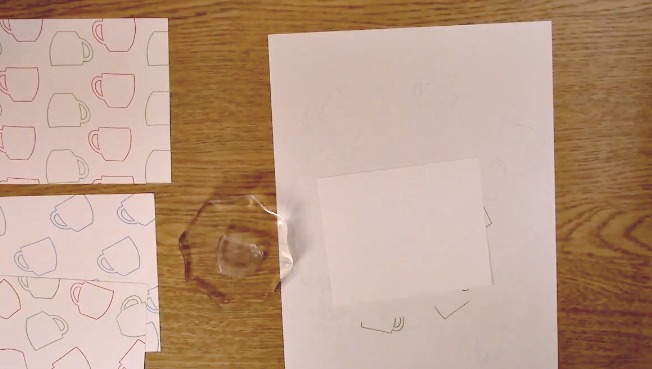
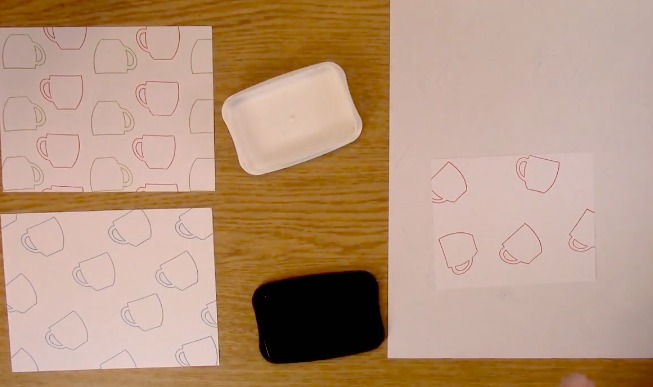
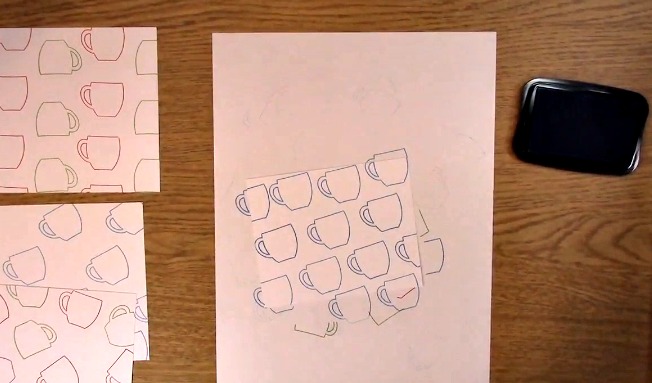
Before we get started with the Create Patterned Paper using Stamps Project, I wanted to let you know we are participating in an awesome blog hop beginning this Friday! It is the 2017 Winter Coffee Lovers Blog Hop! Be sure to come back and check it out as there are numerous prizes up for grabs not only from me but other sponsors as well. There will be LOTS of inspiration and you can join in on the fun and create to win prizes too!  Now, let’s get started on our creating!

Supplies Needed for the Create Patterned Paper using Stamps Project

A Creative Journey with Melissa Coffee, Tea and Wine – Oh My! Stamp Set

Stamp Block

Paper to stamp on

Paper or protected area for stamping

Ink

Stamp Cleaner

Create Patterned Paper using Stamps is a super easy way to get really cool results by just using the stamps you have in your current supplies! I would suggest you take out scrap paper or a mat to protect your work surface. It gives a better look when you stamp on the edges and not just where the paper is. Looks like a real pattern as they don’t end at the edge of the paper.

Take out your paper, stamp block and your stamp. Place your stamp on the block.

Ink your stamp with the first of two colors. In this case, I used red. Stamp the images in a scattered pattern leaving room for you to stamp the other color as well.

This is what it looks like once the first color has been used.

Clean off your stamp. Ink your stamp with the second color, in this case I used green. Fill in the areas where you don’t have a stamp in a random pattern.

This is the end result. SUPER FAST AND SUPER EASY to Create Patterned Paper using Stamps.

For the second one, I only used one color  which was blue. I created a more of a specific pattern repeated. Either way you like to create will be fine and you can choose one, two or even three colors for your background. Have fun with it!

It’s not exactly perfect but much more specifically patterned than the first example.

Here is the second finished example of the Create Patterned Paper using Stamps.

Here are the finished background papers I created. What colors and themes will you create?

For this weeks giveaway, we are giving away the above A Creative Journey with Melissa Coffee, Tea and Wine – Oh My! Stamp Set.

 To qualify to win, you must be BOTH:

A public follower on YouTube, subscribe to our mailing list/blog posts and you may also comment on this blog post for an additional entry to win! Winners will be announced next week on our Mondays with Melissa blog post!

BE SURE TO check to see if you are a winner EVERY WEEK. If you do not contact me within two weeks of the announcement of winning, you will forfeit your prize. Thank you for your understanding.

Subscribe to BOTH with MATCHING NAMES to be eligible. If I am unable to match you with your subscription to both the email list and the YouTube Channel, you will miss your chance to win a prize. If I can’t decipher if you are a matching subscriber (if your profile doesn’t show publicly who you subscribe to) and I can’t confirm you have subscribed to both, you will not be eligible.

Now for last weeks GIVEAWAY we are giving away the A Creative Journey with Melissa Fall and Winter Holiday Sentiments Stamp Set. 

Frances A. you are the winner! Please send me your contact information via contact page on our website, which post you are a winner from and I will get your prize out to you! Thank you so much for being a YouTube follower and subscribing to our mailing list/blog posts!

Thank you for joining us for the Create Patterned Paper using Stamps Project. I hope I have inspired you to create something that can be a tradition and keepsake for years to come! Please be sure to share what you come up with!

Have a wonderful week and thank you for going on A Creative Journey with Melissa.


Stampin Up Trim Your Stocking Outside of the Box

Stampin Up Trim Your Stocking Outside of the Box is what we have for you today. We have a die that we figured out how to use it for something outside of the box..

I made what you would expect, a Christmas stocking, with the die set. As you can see, this die is a nice size. It is approximately 6″ in length.

After making the Christmas stocking, I then thought why not think outside of the box? We created A Breast Cancer Awareness Gift Card and thought you would want to check it out too! Breast Cancer Awareness Month is October and what better way than to bring awareness to Breast Cancer than to put together a gift card holder for a loved one that is battling this horrible disease?

Supplies Needed for the Stampin Up Trim Your Stocking Outside of the Box Project

A Creative Journey with Melissa Awareness Ribbon #3 – Ready for a Fight Stamp Set

Trim Your Stocking Thinlits Dies by Stampin’ Up!

Acrylic Block for stamping

Adhesive

Black Memento Ink

Pink Ink

White card stock

Pink Paper (I used suede paper)

Place the awareness ribbon stamps on your stamp block. Ink your stamp block with pink ink and stamp on your white paper using a varying pattern.

This is how I made my own background paper for this creation.

Take out your manual die cut machine, base platform and clear platform.

Get your stocking die out from the set.

Place your awareness ribbon background paper down on your clear platform. Put your die on top of that cutting side down. Place your second clear platform on top of the die.

Run your die through the machine and set the die cut piece aside. Set the stocking die and the leftover paper aside as well.

Take out your plain white paper and place pillow box die on top of it. Place your clear platform on top of the die. Run your pillow box die through the die cut machine.

This is what your cut pieces from your dies will look like.

Using the A Creative Journey with Melissa Awareness Ribbon #3 – Ready for a Fight Stamp Set, take out the sentiment of your choice. I chose I love you for the sentiment.

Ink and stamp your sentiment on your pink paper.

Using the stocking trim dies, cut your stocking top, toes and heal parts from your pink paper. Center your sentiment in the top of the stocking die.

Here are the cut out pieces for the stocking. Set these pieces aside.

Take out your pillow box die cut. Fold in the tab at the bottom of the die. This tab will hold in your gift card once it is placed inside.

Fold in the two sides toward the center of the die. This is where you will be gluing it to the stocking.

Here it shows what it will look like once you have finished folding the pillow box for the Stampin Up Trim Your Stocking Outside of the Box Project.

Apply adhesive to the tab as well as the two sides you folded in.

Line up the sides to the back of the stocking die. The stocking die and the pillow box die will not line up at the bottom.

Here is a side view of what it will look like once you have lined up the sides and them are compressing the two sides together.

Be sure to push down on all areas that were glued to ensure its adhesion.

This is the gift card holder once it is glued.

Place adhesive on the back of the three pink pieces for your stocking.

Notice the embossed curved line here? You will use this as a guide.

Line up the top of the stocking with the sentiment to the embossed curved line.

Place the larger die cut piece on the toe of the stocking.

Put the smaller remaining piece on the heal part of the stocking as shown.

They are complete! Isn’t it amazing what you can do if you just think outside of the box? If you are interested in any of the die sets or the paper trimmer from Stampin’ Up, check out Brandie’s Website Here and you can order your own!

 Now for this weeks GIVEAWAY! We are giving away the A Creative Journey with Melissa Everyday Alphabet Upper Case and Emoticon stamp set

and the A Creative Journey with Melissa Awareness Ribbon #3 – Ready for a Fight Stamp Set

I have had a number of people say how much they love these stamp sets for organizing, their planners, lists and just about everything else under the moon so I thought this would be the perfect prize for this week. TWO winners – one for each set!

To qualify to win, you must be BOTH:

A public follower on YouTube, subscribe to our mailing list/blog posts and you may also comment on this blog post for an additional entry to win! Winners will be announced next week on our Mondays with Melissa blog post!

If you do not contact me within two weeks of the announcement of winning, you will forfeit your prize. Thank you for your understanding.

NOTE: You must be subscribed to BOTH with MATCHING NAMES. If I am unable to match you with your subscription to both the email list and the YouTube Channel, you will miss your chance to win a prize. If I can’t decipher if you are a matching subscriber (if your profile doesn’t show publicly who you subscribe to) and I can’t confirm you have subscribed to both, I won’t be able to enter you in for the prize. **DO NOT COMMENT WITH YOUR ENTIRE EMAIL ADDY. Only give me the first 6 NOT INCLUDING YOUR HOST. Just enough for me to match your name will work perfectly.

Here’s the GIVEAWAY from last weeks post which is the A Creative Journey with Melissa Everyday Alphabet Upper Case and Emoticon stamp set and the A Creative Journey with Melissa Everyday Alphabet Lower Case and Numbers Stamp Set.

The winner is Verna A. AGAIN!

Verna,  please send me your contact information via contact page on our website, which post you are a winner from and I will get your prize out to you! Thank you so much for being a YouTube follower and subscribing to our mailing list/blog posts!

 We hope you enjoyed our Stampin Up Trim Your Stocking Outside of the Box post!

Have a wonderful week and thank you for going on A Creative Journey with Melissa.