COOL STAMPING TOOL REVIEW – MISTI

COOL STAMPING TOOL REVIEW – MISTI is what we have for you today. I am so excited to show you this tool! I think there are a million ways to use this tool for your creations and here I have one way to use it. If you didn’t know, MISTI stands for Most Incredible Stamping Tool Invented. It is made by www.mysweetpetunia.com. If you are someone that likes to stamp multiple items, two or more stepped stamping projects, or to use multiple stamps on one creation.. THIS TOOL IS FOR YOU! We have a few pics below to show you how the MISTI works but I would recommend that you watch the video in order to see it in action!

COOL STAMPING TOOL REVIEW - MISTIa

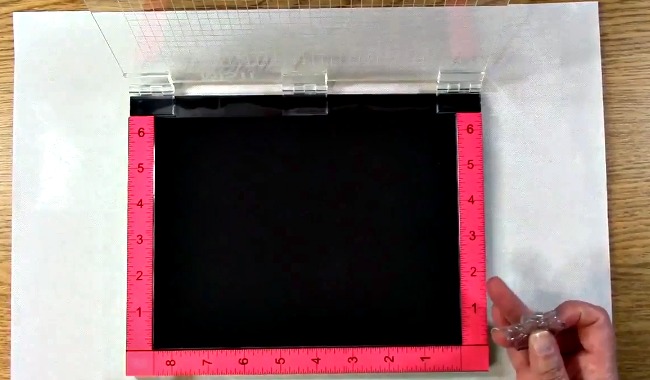
This is the MISTI. There are a few different sizes so be sure to check out their website to see which one would best suit your needs.

COOL STAMPING TOOL REVIEW - MISTI c

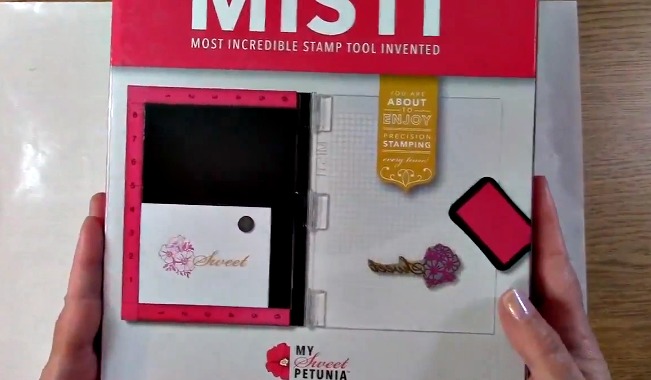
Here is the front of the box that it came in.

COOL STAMPING TOOL REVIEW - MISTI b

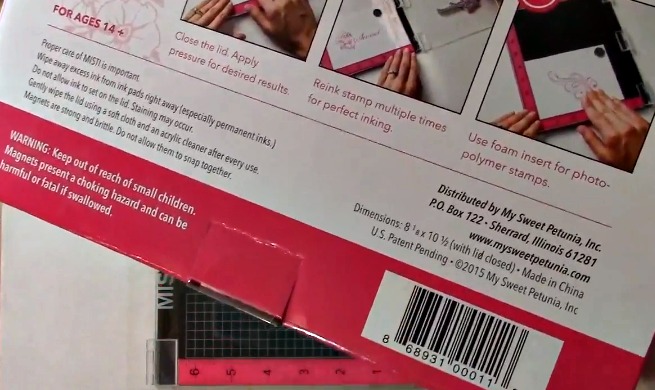
The one I have used in the demo is 8 1/8″ x 10 1/2″. The box also has directions on the outside of the box as a guide for use.

COOL STAMPING TOOL REVIEW - MISTI d

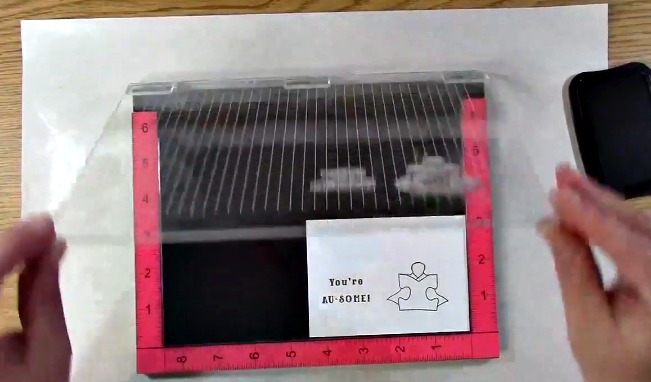
As you can see, the MISTI comes with very clear markings so that you can use specific measurements to align your project just right.

COOL STAMPING TOOL REVIEW - MISTI e

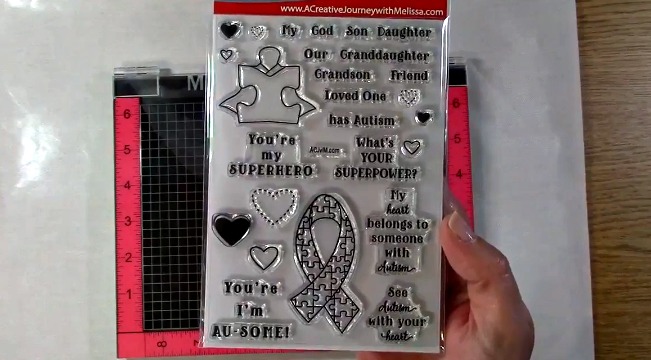
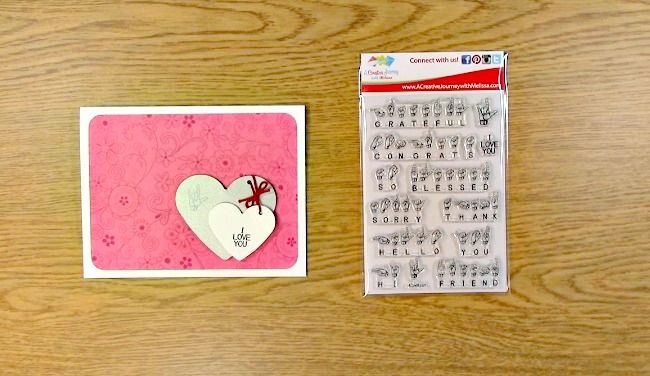
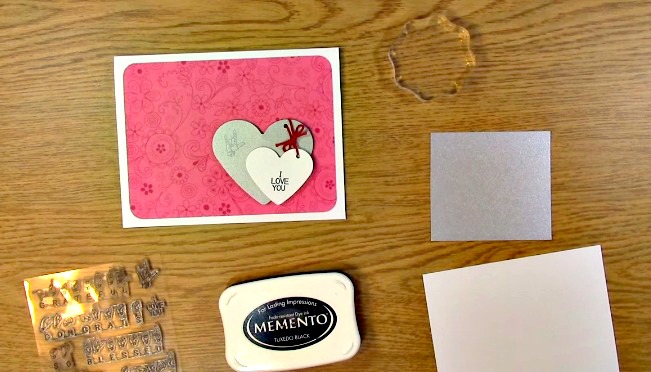
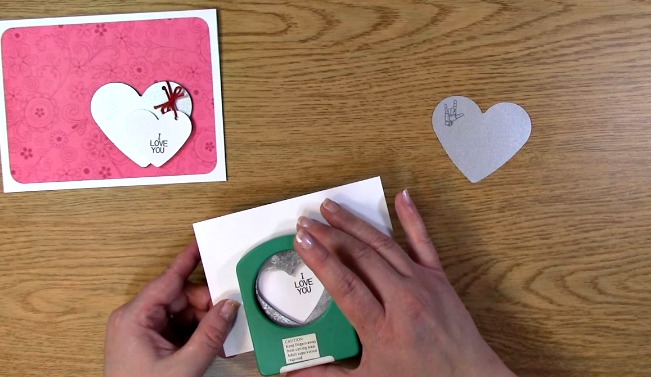
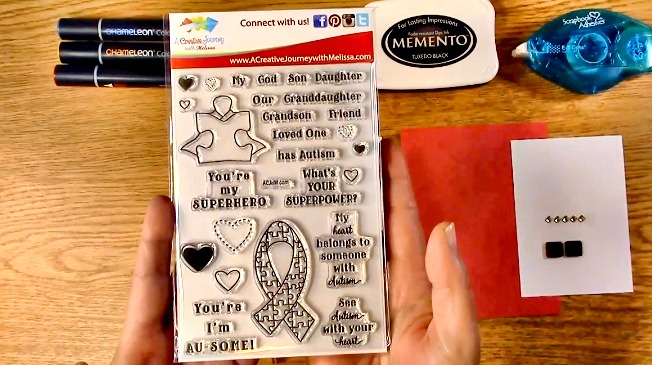
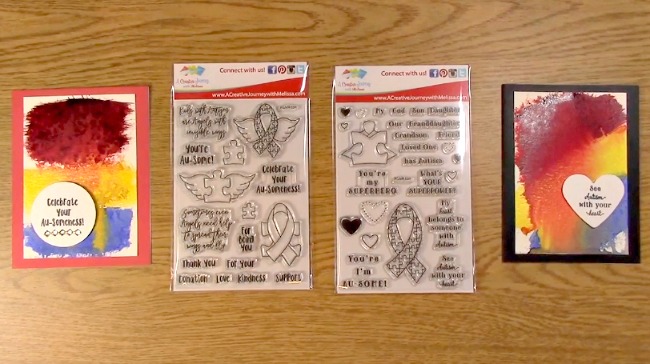
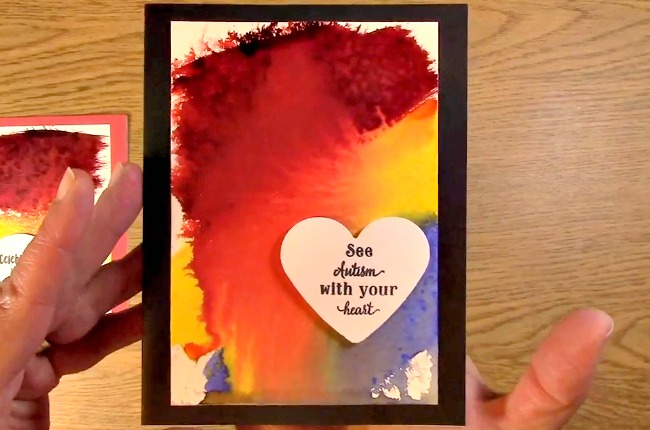
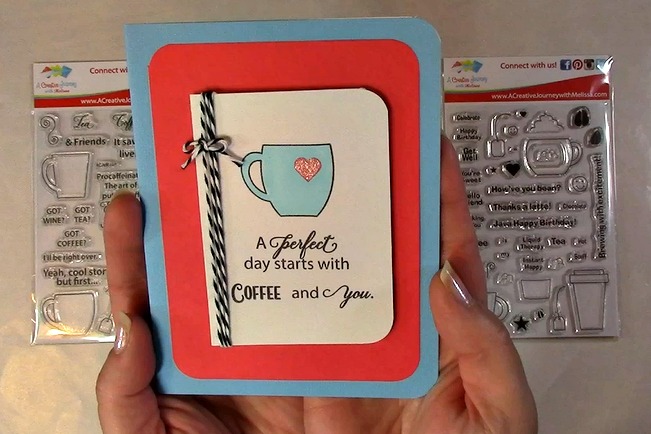
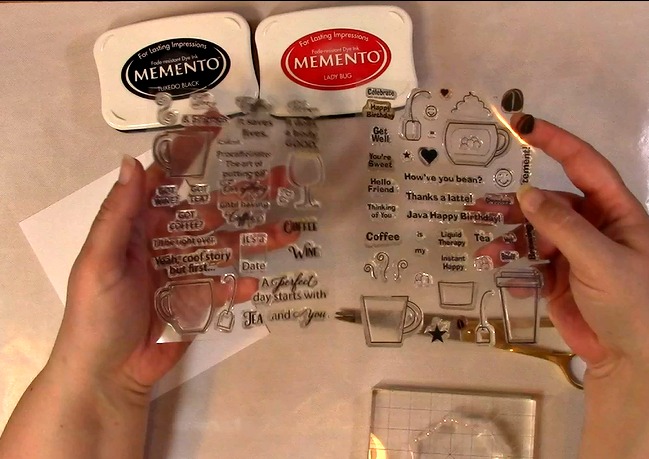
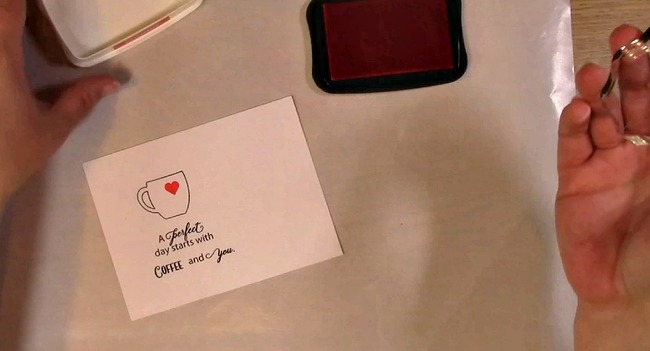
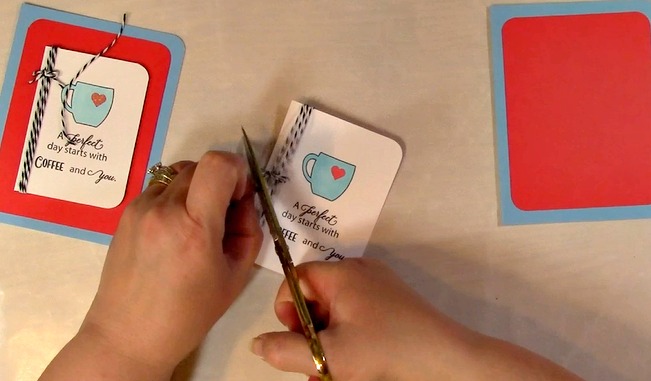
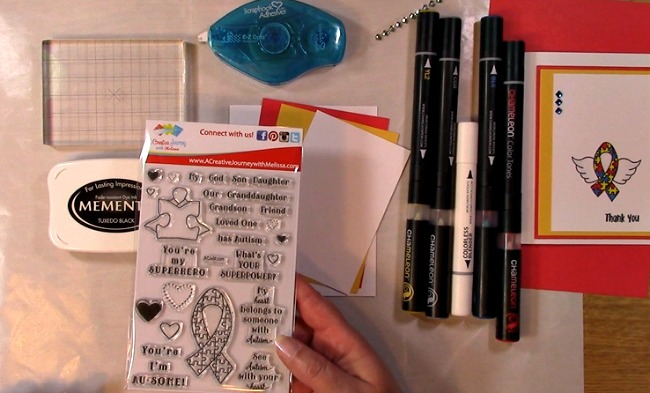
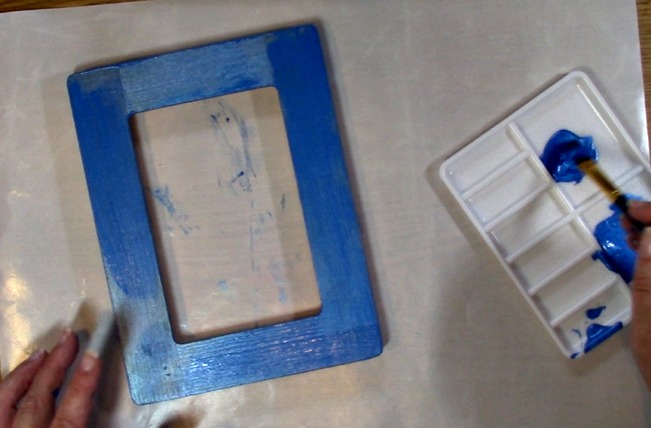
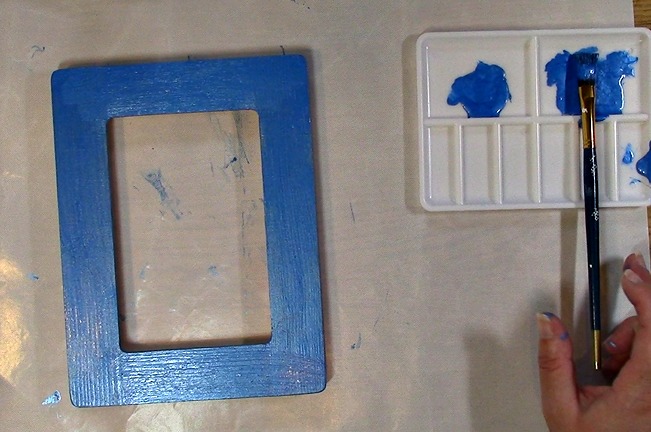
For this demo, I am using the Awareness Ribbon Set #5 – See Autism with your Heart Stamp Set.

COOL STAMPING TOOL REVIEW - MISTI f

To use this with photo polymer stamps, be sure the black foam insert (as shown) is at the base of the MISTI. This ensures proper pressure for the perfect stamped image.  Take out your stamps and place them on the foam for placement.

COOL STAMPING TOOL REVIEW - MISTI g

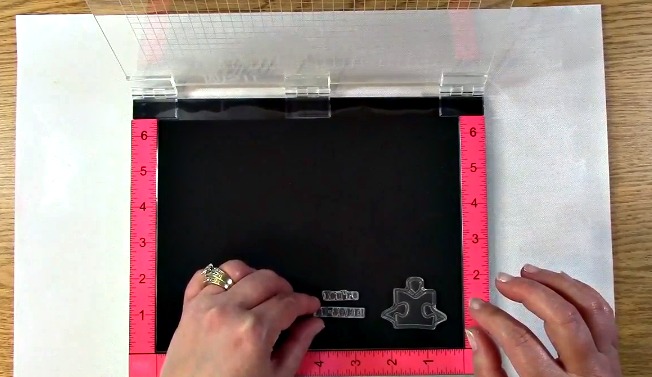
Arrange your stamps so that they look how you want them to on your creation.

COOL STAMPING TOOL REVIEW - MISTI i

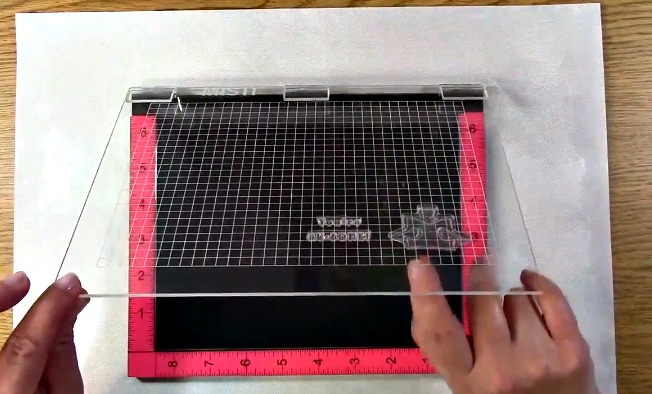
Press down so that the acrylic back sticks to the photo polymer stamp.

COOL STAMPING TOOL REVIEW - MISTI j

This is how it looks once it has stuck.

COOL STAMPING TOOL REVIEW - MISTI k

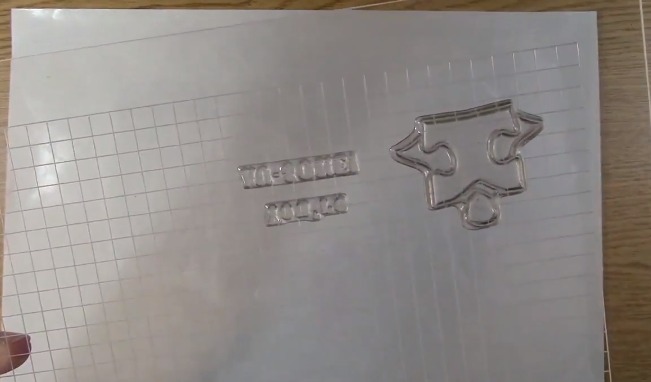
Here is a close up of the back of the acrylic.

COOL STAMPING TOOL REVIEW - MISTI l

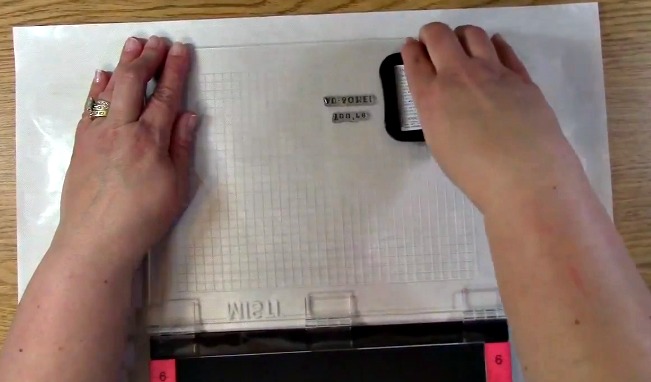
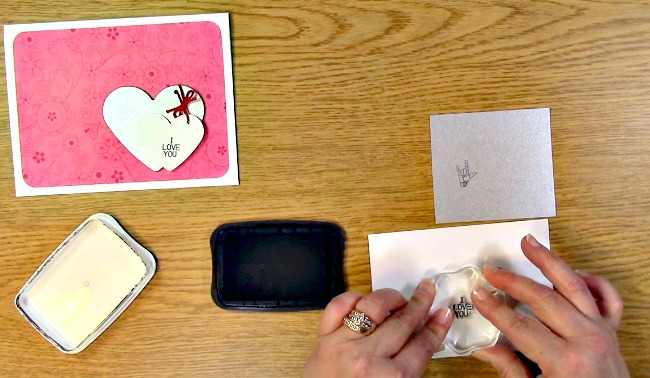
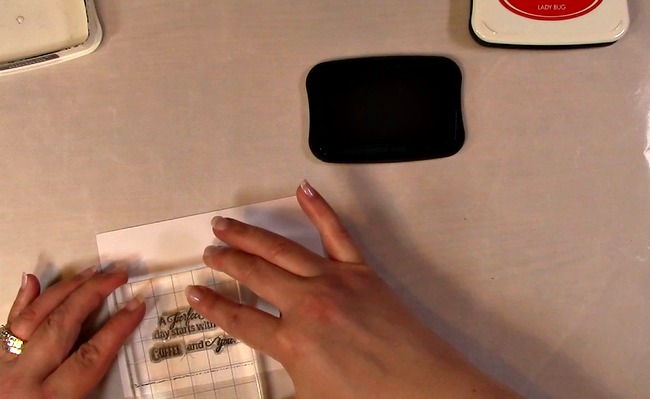
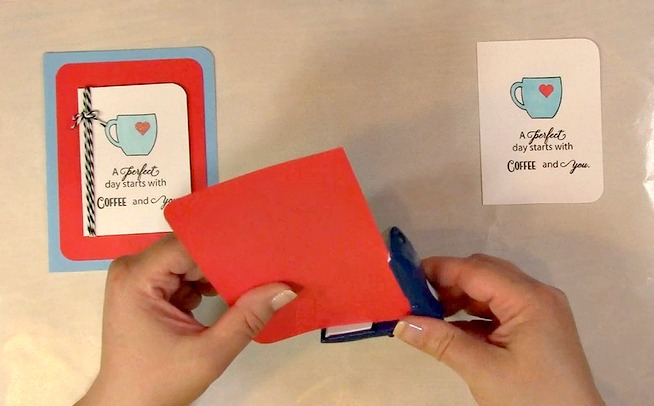
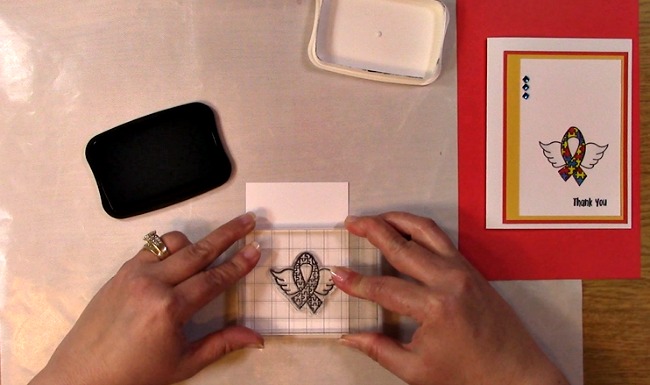
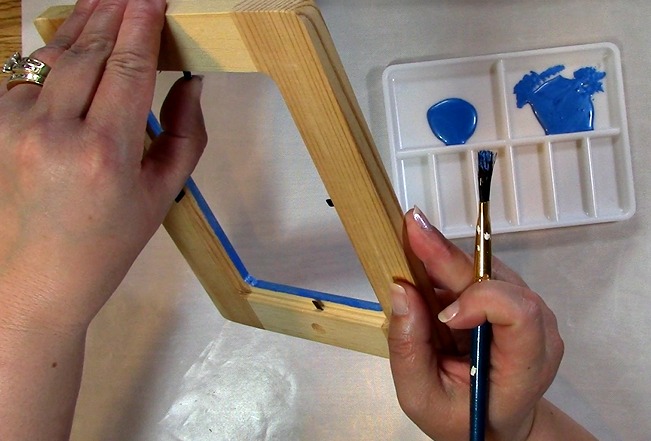
Ink your stamps and place your paper down on the foam pad at the base of the MISTI.

COOL STAMPING TOOL REVIEW - MISTI m

Once inked, close the acrylic sheet.

COOL STAMPING TOOL REVIEW - MISTI n
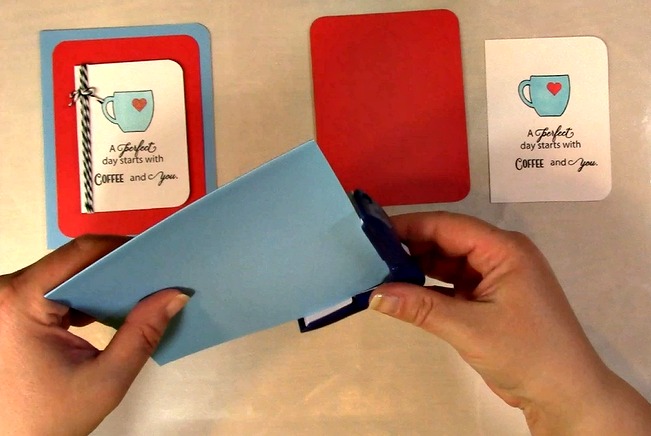
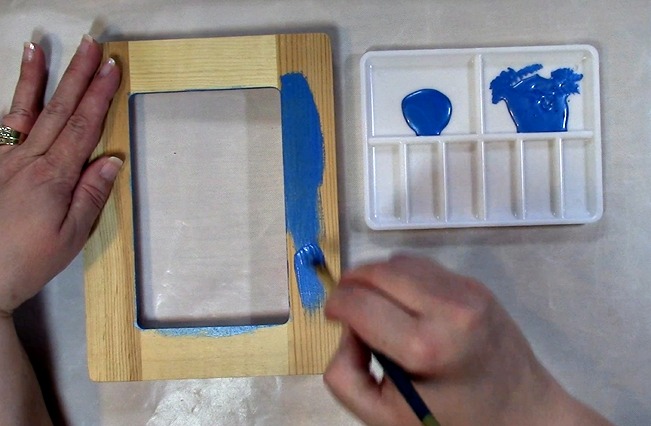
Press down on the acrylic so it stamps your image(s) on the paper completely.

COOL STAMPING TOOL REVIEW - MISTI o

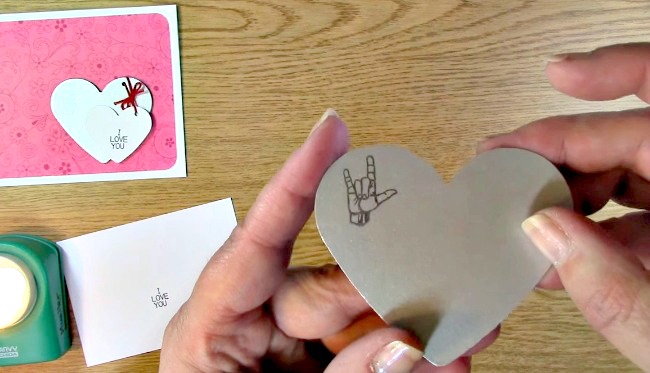
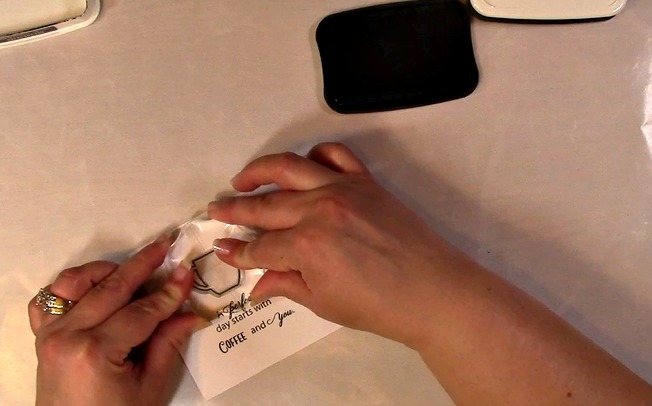
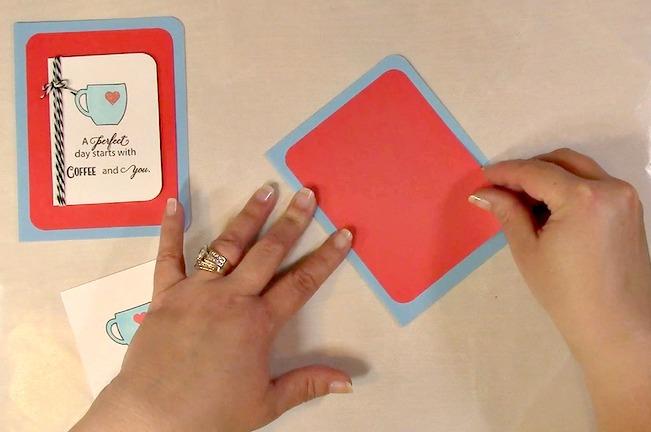
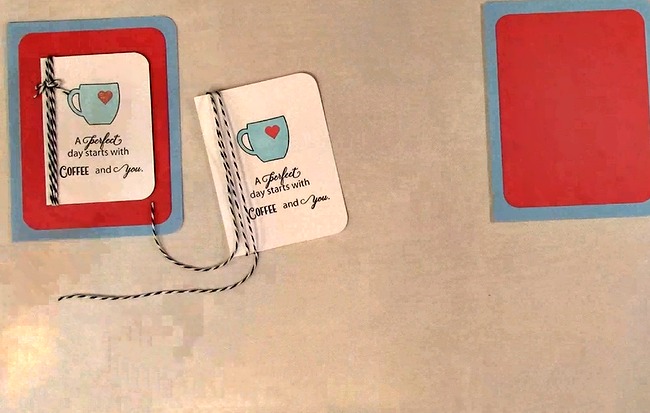
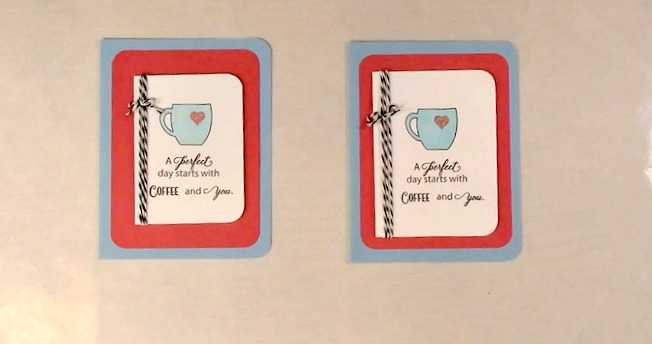
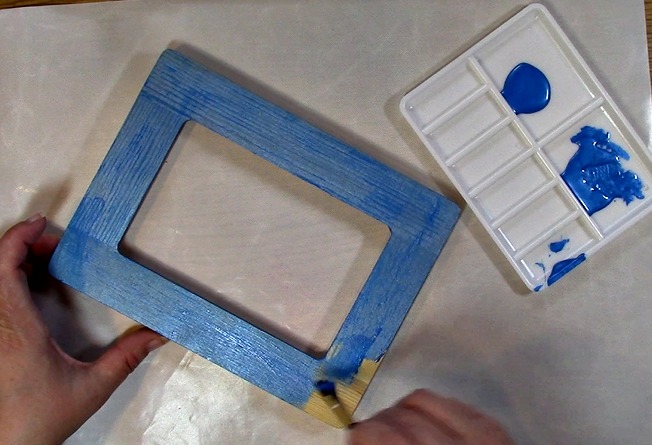
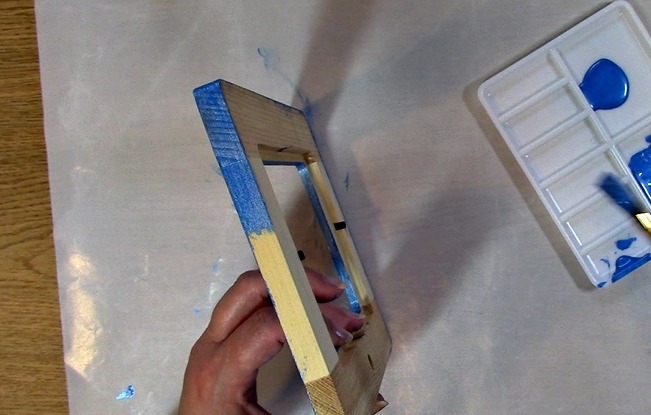
Your stamped image is complete! Now you can stamp this one more time or hundreds and get the same exact effect! Be sure to ink properly and you are set to create away!

Thank you for joining us today! We hope you enjoyed our product tutorial and going on A Creative Journey with Melissa.

melissa-written-signature

Autism Superhero Card including Customized Rhinestones

Autism Superhero Card including Customized Rhinestones is what we have for you today. April is Autism Awareness Month. I was inspired to create a card honoring those that are the true Superheroes of Autism. Anyone that has Autism, loves someone with Autism, Teaches someone with Autism, etc.. They are Superheroes. In addition to that, I am going to show you how to customize your Rhinestones by coloring them. It is so super easy, you will be coloring them for all of your projects!

Autism Superhero Card including Customized Rhinestones a

Supplies Needed

Awareness Ribbon Set #5 – See Autism with your Heart

Chameleon Pens – BL6 YO3 RD4

Stamping Block

Ink

Scissors

Adhesive

Foam Squares

Card Base

Paper to Stamp Sentiment and Image

Autism Superhero Card including Customized Rhinestones b

We are using the Awareness Ribbon Set #5 – See Autism with your Heart Stamp Set to create the Autism Superhero Card including Customized Rhinestones.

Autism Superhero Card including Customized Rhinestones e

Take out your white paper for your sentiment, ink, stamps and stamp block. Adhere the stamp to the stamp block. Ink the stamp and stamp your sentiment onto your paper. Clean your stamp.

Autism Superhero Card including Customized Rhinestones f

Take off your sentiment and return it to its stamp sheet. Take off the image from the stamp sheet and place it on the stamp block.  Using your ink, ink your stamp and then stamp your image on your paper.

Autism Superhero Card including Customized Rhinestones g

Cut a triangle out from the right side of paper with the stamped sentiment as shown above.

Autism Superhero Card including Customized Rhinestones h

Using your BL6 Chameleon Pen, color the inside of the puzzle piece. Replace your cap once you are finished coloring.

Autism Superhero Card including Customized Rhinestones i

Take out your RD4 Chameleon Pen and color the cape on your image. Replace your cap once you are finished coloring.

Autism Superhero Card including Customized Rhinestones l

Take out your Y03 Chameleon Marker or whatever color would work best with your creation.

Autism Superhero Card including Customized Rhinestones m

Take out your rhinestones and color them. There is no preparation necessary. Alcohol markers such as the Chameleon Markers will color non porous surfaces such as acrylic, glass, metal, plastic and more. They also work on porous items such as wood, paper, felt, and so much more!

Autism Superhero Card including Customized Rhinestones n

This is a close up shot of the rhinestones once they were colored. They started out clear. You don’t need to wait for them to dry as they dry fairly quickly.

Autism Superhero Card including Customized Rhinestones o
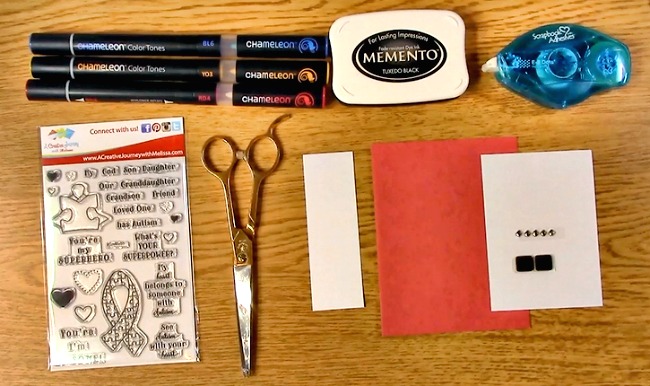
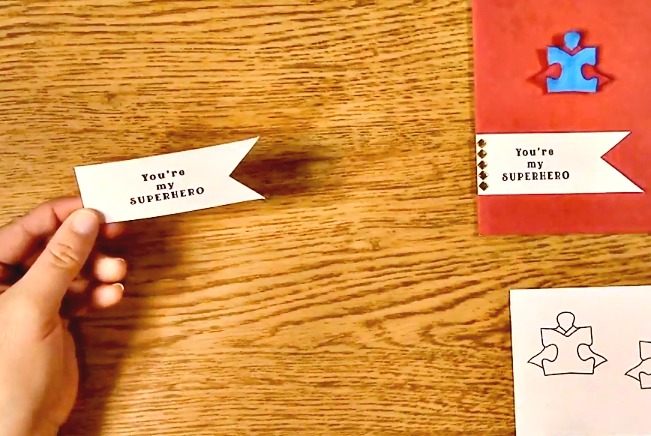
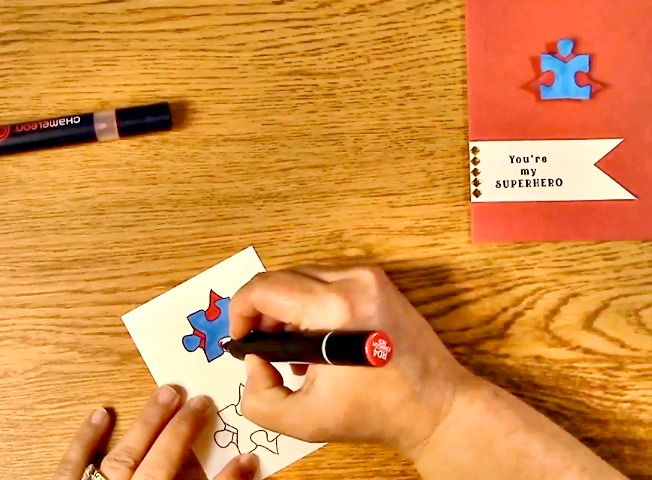
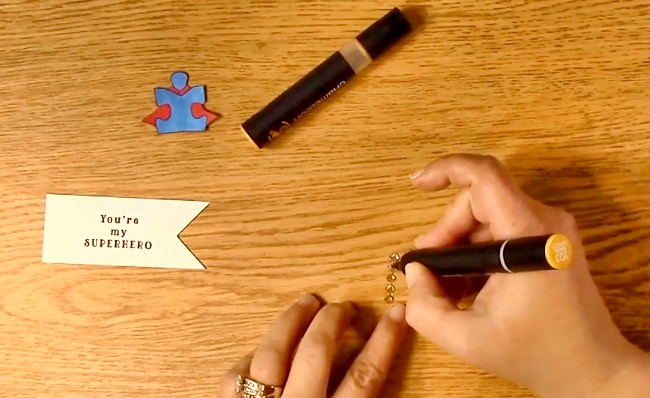
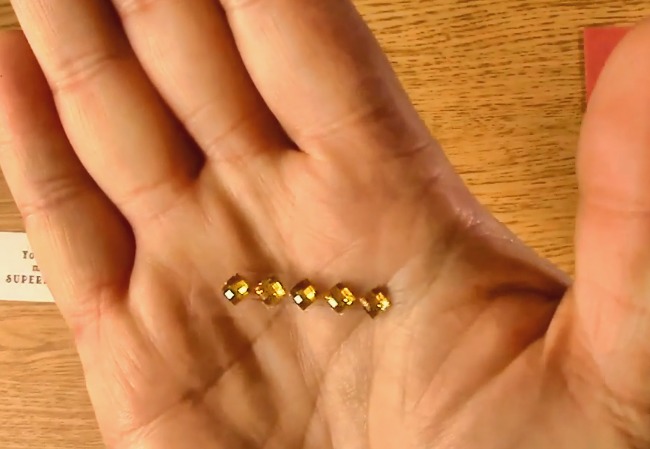
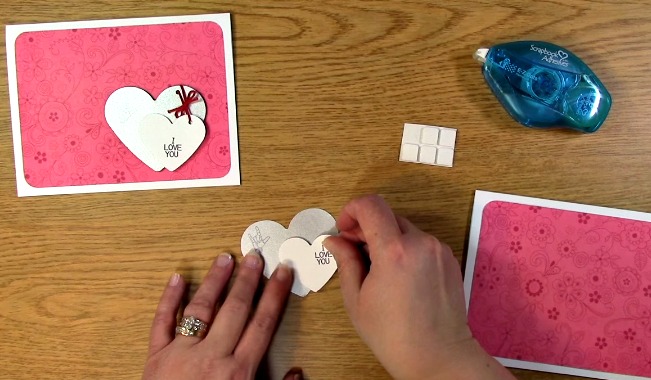
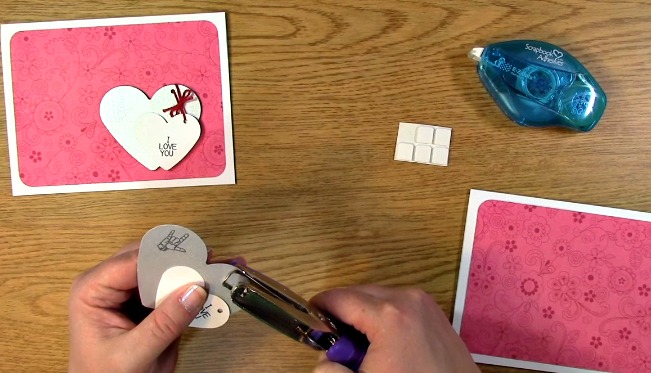
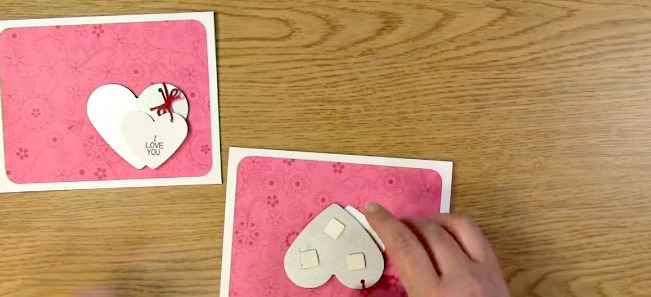
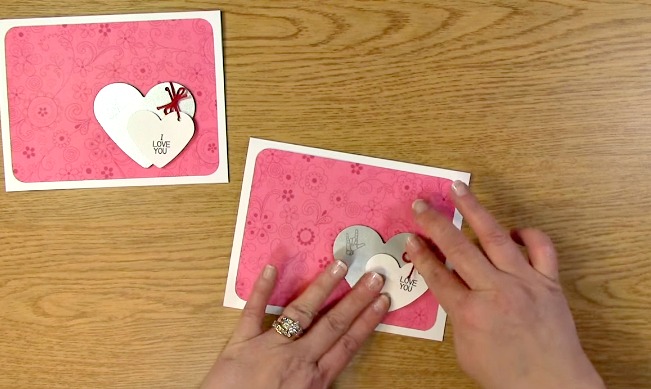
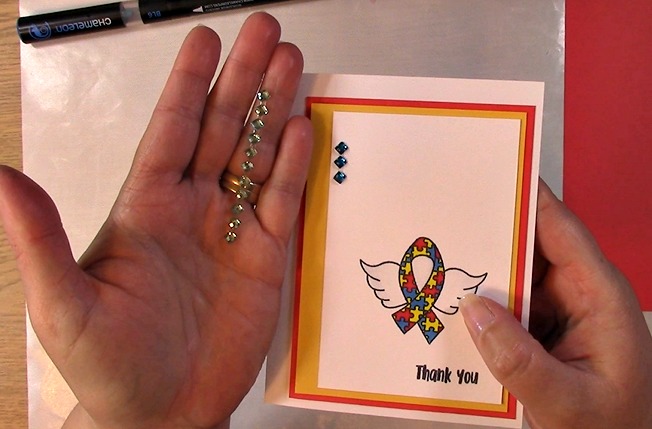
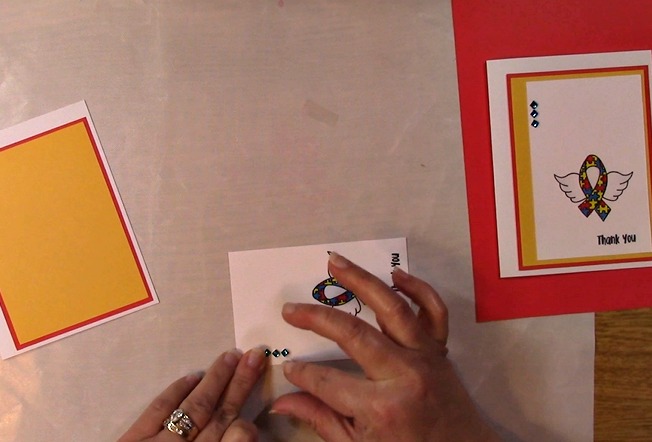
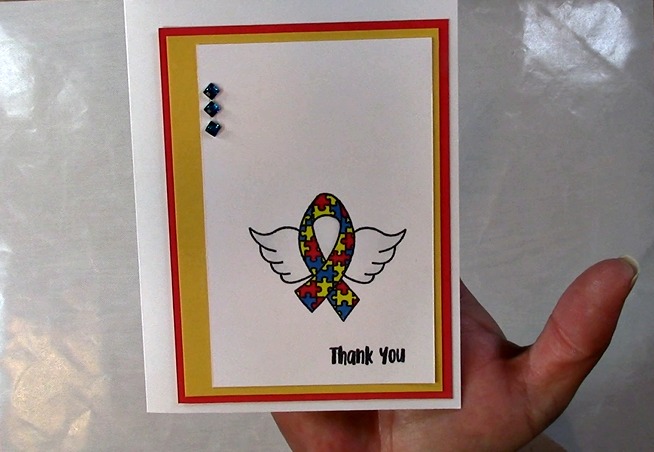
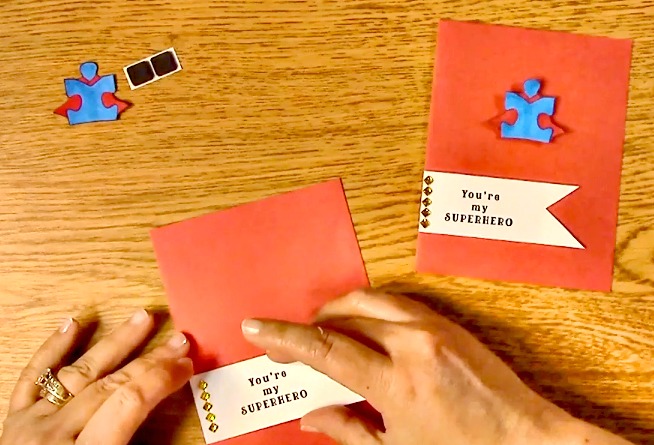
Adhere your rhinestones on your sentiment as shown. Apply adhesive to the back of the sentiment and adhere to your card base.

Autism Superhero Card including Customized Rhinestones r

Place your foam square on the back of your image. Place on your card base.

Autism Superhero Card including Customized Rhinestones c

Your Autism Superhero Card including Customized Rhinestones project is complete! Thank you for joining us today and we hope you enjoyed going on A Creative Journey with Melissa.

melissa-written-signature

Autism Awareness Month plus Twinkling H20 Tutorial

Autism Awareness Month plus Twinkling H20 Tutorial is what we have for you today. Did you know that according to the 2015 National Health Interview Survey 1 in every 45 kids ages 3-17 are diagnosed with ASD – Autism Spectrum Disorder? Yes, the stats are staggering.

Autism Awareness Month plus Twinkling H20 Tutorial

We have created stamp sets that we donate a portion of them to various causes that support Autism research, programs for people with Autism and programs that support families effected by Autism. I have two wonderful friends that inspire me every day in their journey with Autism. Julie and Pinky (Cristal) are amazing women and I just love their strength, courage, perseverance and overwhelming love for their kids and support for Autism. They have inspired me to create two cards using our two newest stamp sets. They are Awareness Ribbon Set #5 – See Autism with your Heart and Awareness Ribbon Set #6 – Angels with Autism.

Autism Awareness Month plus Twinkling H20 Tutorial e

Supplies Needed

Awareness Ribbon Set #5 – See Autism with your Heart

Awareness Ribbon Set #6 – Angels with Autism

Twinkling H20’s: Sunburst, Rich Cobalt, and Poppy

Paint Brushes

Water filled sprayer

Water Color Paper

Paper Towel

 Protected work surface

 Autism Awareness Month plus Twinkling H20 Tutorial d
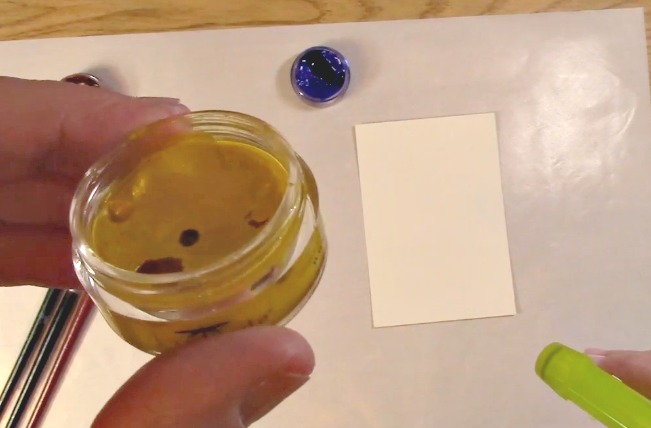
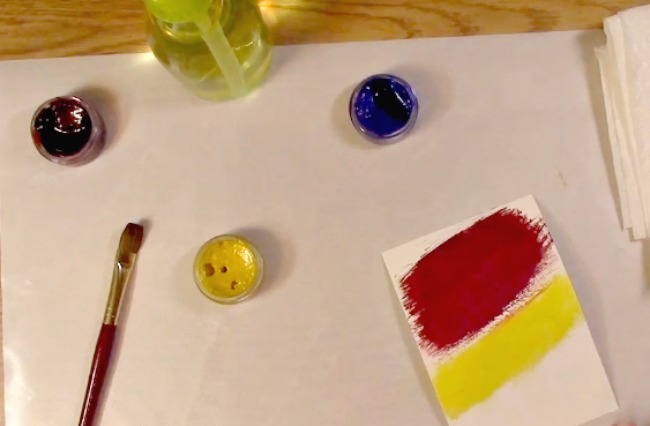
When I received some of the Twinkling H20’s, they were broken up in their jar. The GREAT news is that this doesn’t effect their amazing color, effectiveness or how amazingly long they last! The bad news is that there was a very limited amount of these as they are no longer available by the manufacturer so I only have six of these sets available. The great news.. THEY ARE ON SALE to celebrate Autism Awareness!

Autism Awareness Month plus Twinkling H20 Tutorial f

Using your water sprayer, spray some water into the Twinkling H20 jar. I had already used these for the cards shown so it had been well over the 10-15 minute time frame recommended for you to wait for the water to activate the water colors.

Autism Awareness Month plus Twinkling H20 Tutorial h

This is a close up of the beautiful and rich color they contain. I love the sparkle and the color is FABULOUS!

Autism Awareness Month plus Twinkling H20 Tutorial i

Once you have added the water and waited a bit, you can either use a paint brush, palette or even a cleanable work surface mat to place your twinkling h20’s. I chose a paint brush to apply my water color to my paper.

Autism Awareness Month plus Twinkling H20 Tutorial j

Here is the Poppy…

Autism Awareness Month plus Twinkling H20 Tutorial k

Here is when the Sunburst color was added…

Autism Awareness Month plus Twinkling H20 Tutorial l
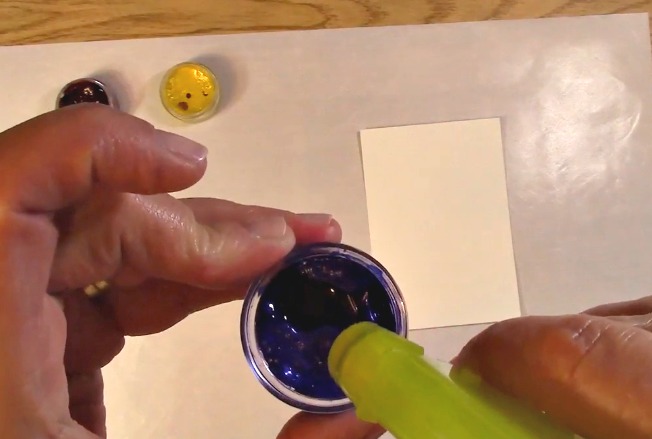
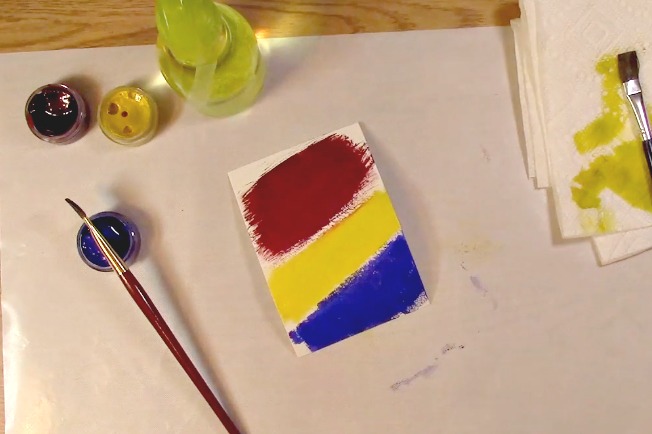
And now the Rich Cobalt has been added.

Autism Awareness Month plus Twinkling H20 Tutorial n

I love the shimmer and sheen that you get when using this product! It’s AWESOME!

Autism Awareness Month plus Twinkling H20 Tutorial o

Take out your sprayer and spray a few times onto your painted paper.

Autism Awareness Month plus Twinkling H20 Tutorial p

If you like the look, set it aside. If you would like to add more water like I did, spray again.

Autism Awareness Month plus Twinkling H20 Tutorial q

I also tilted my paper to different areas where I wanted the water to flow to.

Autism Awareness Month plus Twinkling H20 Tutorial r

This is what the result was. I really love it!

Autism Awareness Month plus Twinkling H20 Tutorial t

Now you are once again going to take a pre-painted paper and water bottle.

Autism Awareness Month plus Twinkling H20 Tutorial u

Using the spray bottle a bit further away from the paper 6-8 inches or so, spray your paper. You are trying to get a very light mist to hit your paper. This will give you the look of a light spritz of lighter color on your paper where the water has landed.

Autism Awareness Month plus Twinkling H20 Tutorial w

Here is a close-up of the spritz of water placed on the paper. You have completed the techniques!

Autism Awareness Month plus Twinkling H20 Tutorial a
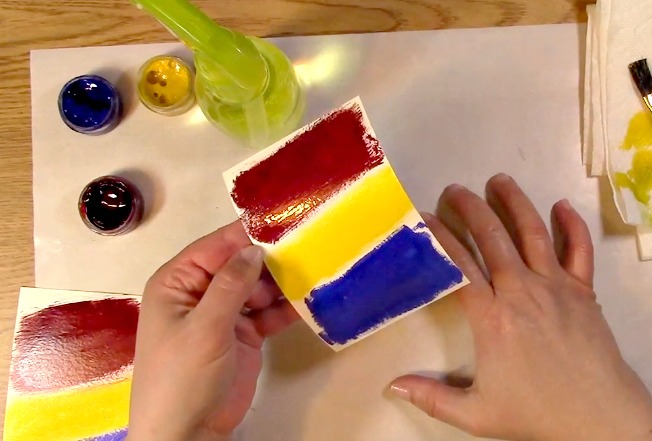
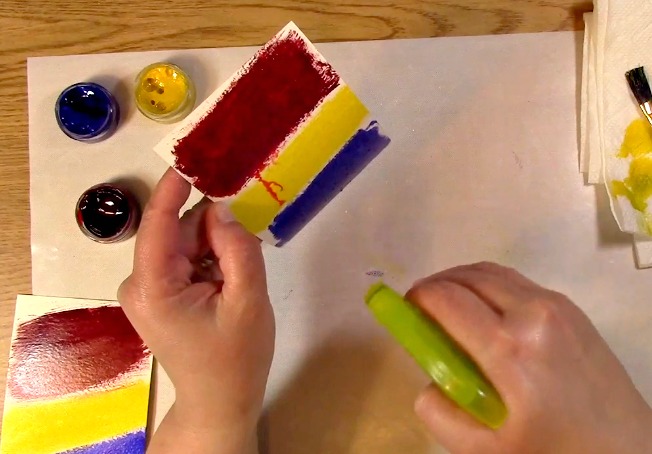
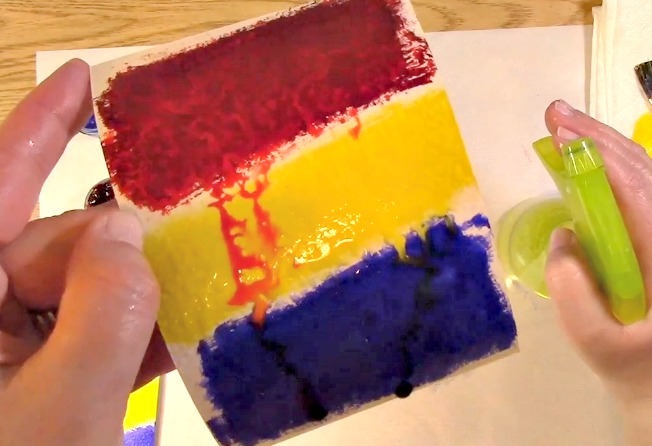
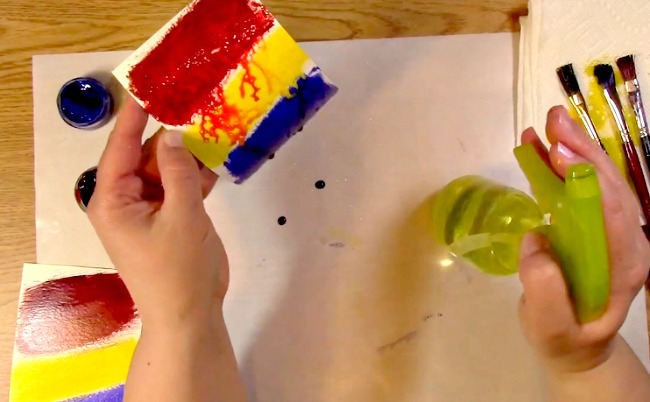
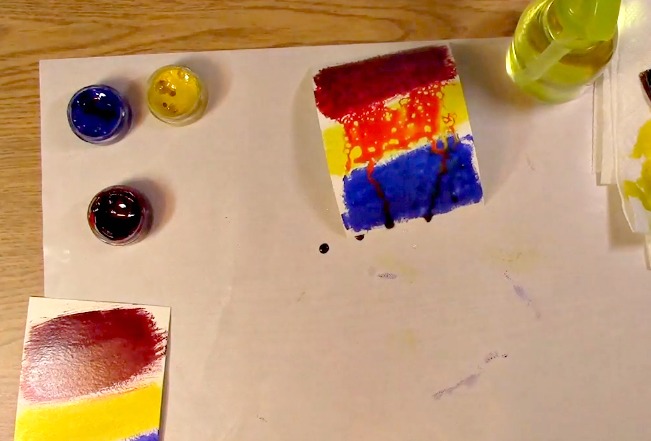
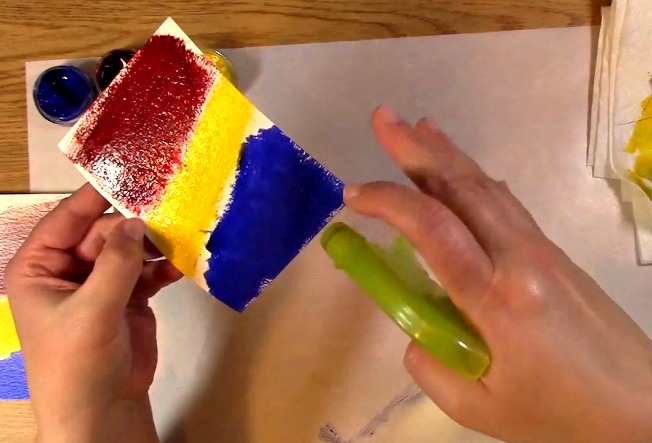
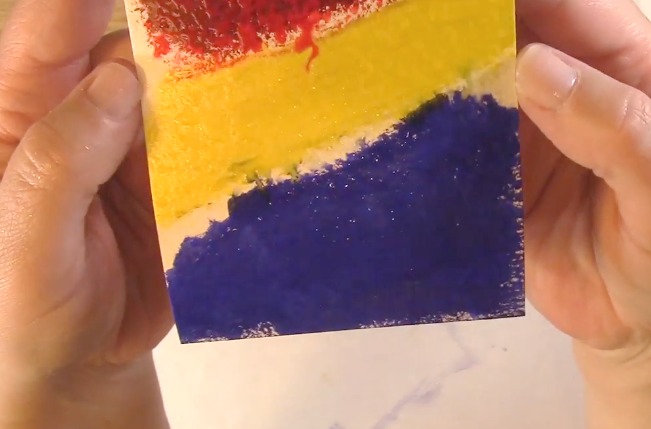
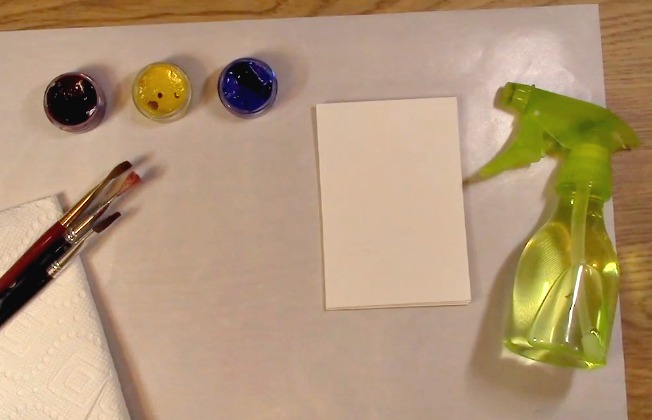
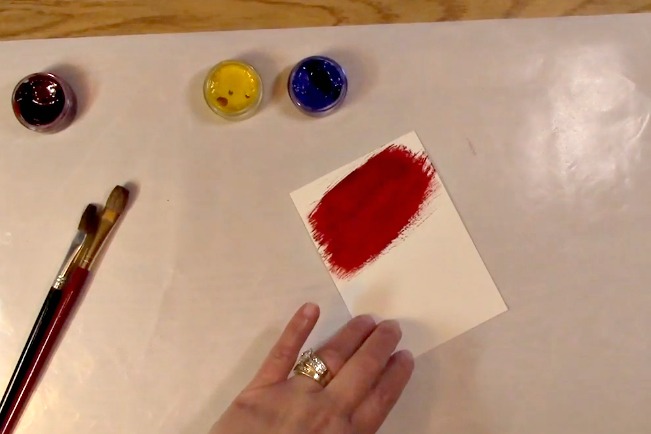
If you wish to have the paper look like this creation below, you will want to concentrate the water and move it up, down, left and right. This will give you the different looks of the feathering out of color. I then used a paper towel to pat dry.

Autism Awareness Month plus Twinkling H20 Tutorial b

For this creation, I sprayed three times and allowed the colors to drip into one another. I then allowed the paper to dry and it left the textured look from the water spray.

I hope you enjoyed our tutorial and projects today. We really appreciate you stopping by and hope that you enjoyed going on A Creative Journey with Melissa.

melissa-written-signature

Creating Grass Technique with Chameleon Pens plus Winners

Creating Grass Technique with Chameleon Pens plus Winners is what we have for you today. It is such a simple technique that you may want to use it for borders, shading and who knows what else! We do not have a pictorial for this technique this time as it is too difficult to get the technique across in pictures. We hope you enjoy the Creating Grass Technique with Chameleon Pens video above and we would love to hear if there are any techniques, ideas or questions you have about your Chameleon Pens. If you haven’t subscribed to our YouTube Channel, be sure to do so! We have all different techniques, tutorials, etc that you won’t want to miss out on! We have a great deal going on with our Chameleon Pens in our store. They are on sale with US priority shipping included!

Now, for our 2016 Spring Coffee Lovers Hop WINNERS! For our blog, we have the following winner for the $25.00 Gift Certificates for our store :

Denise Bryantsays:

I love dies that coordinate with stamps! I don’t have an electronic cutter of any type, so dies are my preference!

Congrats Denise! Please contact me with your e-mail address so that I can issue your $25.00 credit! Once again, thank you for your input and for hopping along with us!

Now for the 2016 Spring Coffee Lovers Hop WINNERS!! There are a BUNCH of winners so please go HERE and check to see if you have won any of the amazing prizes! We had so many people participate! A HUGE THANK YOU TO Amy & Chaitali for all of their hard work in front of and behind the scenes for this great hop!  AWESOME WORK LADIES!

melissa-written-signature

A PERFECT Coffee Card to celebrate the 2016 Spring Coffee Lovers Hop

A PERFECT Coffee Card to celebrate the 2016 Spring Coffee Lovers Hop is what we have for you today. I am so honored and excited to be participating in this amazing week long hop! There are so many amazing sponsors and prizes! We are honored that we are one of the flash prize and SUPER SPONSORS! If you want more information about the hop and the details, be sure to go here so that you can start at the beginning with ALL of the info! You can even create something YOURSELF and win prizes for that as well! Be sure to check it out… It doesn’t end until FRIDAY so you have PLENTY OF TIME!!  Now, onto my creation

A PERFECT Coffee Card to celebrate the 2016 Spring Coffee Lovers Hop c

Supplies Needed

Coffee is my Liquid Therapy Stamp Set

Coffee, Tea and Wine – OH MY! Stamp Set

Stamping Block

Chameleon Pens

Black and Red Memento Ink

Card Base

Red mat for sentiment

Adhesive

3-D adhesive

Black and white twine

Corner Rounder

Scissors

A PERFECT Coffee Card to celebrate the 2016 Spring Coffee Lovers Hop a

A PERFECT Coffee Card to celebrate the 2016 Spring Coffee Lovers Hop is what we are creating today. Although it may not be a typical SPRING card. I LOVE bright colors and to me, it is a PERFECT color match for MY SPRING!

A PERFECT Coffee Card to celebrate the 2016 Spring Coffee Lovers Hop d

First, you will want to get your stamp sets out, ink, stamp blocks and paper.

A PERFECT Coffee Card to celebrate the 2016 Spring Coffee Lovers Hop e

Attach your stamp sentiments to the block, ink and stamp your sentiments on your paper.

A PERFECT Coffee Card to celebrate the 2016 Spring Coffee Lovers Hop f

Remove your sentiment stamps. Attach your coffee cup stamp. Ink your stamp and stamp your coffee cup above your sentiment.

A PERFECT Coffee Card to celebrate the 2016 Spring Coffee Lovers Hop g

Remove your coffee cup stamp and place your heart stamp from the Coffee is my Liquid Therapy stamp set on your block. Ink with your red ink and stamp on your coffee cup.

A PERFECT Coffee Card to celebrate the 2016 Spring Coffee Lovers Hop h

Take out  your BL3 Chameleon Pen.

A PERFECT Coffee Card to celebrate the 2016 Spring Coffee Lovers Hop i

Color your coffee cup image.

A PERFECT Coffee Card to celebrate the 2016 Spring Coffee Lovers Hop j

Use your corner rounder on the right side of your sentiment paper.

A PERFECT Coffee Card to celebrate the 2016 Spring Coffee Lovers Hop l

Take out your red paper and use the corner rounder on all four sides.

A PERFECT Coffee Card to celebrate the 2016 Spring Coffee Lovers Hop m

Take out your card base and use the corner rounder only on the right side of the card.

A PERFECT Coffee Card to celebrate the 2016 Spring Coffee Lovers Hop n

Adhere the red paper to the blue card base.

A PERFECT Coffee Card to celebrate the 2016 Spring Coffee Lovers Hop o

Take out your twine and wrap your twine around your sentiment paper three times.

A PERFECT Coffee Card to celebrate the 2016 Spring Coffee Lovers Hop p

Tie a bow with your twine and trim the excess.

A PERFECT Coffee Card to celebrate the 2016 Spring Coffee Lovers Hop q

Place six foam squares on the back of your sentiment. Remove the backing of the foam squares.

A PERFECT Coffee Card to celebrate the 2016 Spring Coffee Lovers Hop s

Adhere your sentiment paper to your card base.

A PERFECT Coffee Card to celebrate the 2016 Spring Coffee Lovers Hop t

Here are the completed projects! Thank you so much for joining us for A PERFECT Coffee Card to celebrate the 2016 Spring Coffee Lovers Hop. We hope you check out the 2016 Spring Coffee Lovers Hop and enjoyed going on A Creative Journey with Melissa.

melissa-written-signature

Awareness Ribbon #6 – Angels with Autism Stamp Release SNEAK PEEK and MORE


Awareness Ribbon #6 – Angels with Autism Stamp Release SNEAK PEEK and MORE is what we have today for you! We have one sneak peek but there are TWO more stamp sets coming out! Be sure to check out our blog and website on Wednesday, March 16, 2016 to see all what we have that is NEW! We are going to have directions for our Instagram Hop so you can hop along and win one of three prizes! For now though, we have this awesome creation to show you using our to be released Angels with Autism Stamp Set and Chameleon Pens! As an added bonus, I will show you how to color your own embellishments so that they match your project! Are you ready? Let’s get started!

Awareness Ribbon #6 - Autism Angel Stamp Release SNEAK PEEK and MORE e

Awareness Ribbon #6 – Angels with Autism Stamp Set (TO BE RELEASED 3-16-16)

Stamp Block

Chameleon Pens

Ink

Card Base

Two Mats for Stamped Image

Paper for Stamped Image

Adhesive

Scissors

Awareness Ribbon #6 - Autism Angel Stamp Release SNEAK PEEK and MORE f

Take out your Paper, Ink and Awareness Ribbon #6 – Angels with Autism Stamp Set out. Stamp the image on your paper. Set aside.

Awareness Ribbon #6 - Autism Angel Stamp Release SNEAK PEEK and MORE g

Take out your colored papers for matting. Adhere the yellow mat to the red mat.

Awareness Ribbon #6 - Autism Angel Stamp Release SNEAK PEEK and MORE h

Adhere the mat to the card base. Set aside.

Awareness Ribbon #6 - Autism Angel Stamp Release SNEAK PEEK and MORE i

Take out your Chameleon Pens and your stamped image. You will need your CB (Colorless Blender), BL6, RD4, YL2, and CG8. Take out your CG8 pen. Take off the bullet nib cap off. Using the blending cartridge, place the bullet nib in the blending cartridge holding it upright so the blending solution cartridge is on the top. Hold upright for 10-12 seconds. Awareness Ribbon #6 - Autism Angel Stamp Release SNEAK PEEK and MORE ia

Color the angel wings with your CG8 from the puzzle piece out to the end on both sides.

Awareness Ribbon #6 - Autism Angel Stamp Release SNEAK PEEK and MORE j

Color various pieces of the puzzle on the image with your YL2   pen.

Awareness Ribbon #6 - Autism Angel Stamp Release SNEAK PEEK and MORE k

Color various pieces of the puzzle on the image with your RD4 Pen.

Awareness Ribbon #6 - Autism Angel Stamp Release SNEAK PEEK and MORE m

Color various pieces of the puzzle on the image with your BL6  Pen. If you feel at this point any of the colors need to be a bit lighter, you can use a light coloring of the colorless blender to smooth out any areas as well as lighten the colors on your project.

Awareness Ribbon #6 - Autism Angel Stamp Release SNEAK PEEK and MORE o

Take out your rhinestones. The rhinestones are a light blue but we need them a darker blue so we are going to color our embellishment so that it matches our project.

Awareness Ribbon #6 - Autism Angel Stamp Release SNEAK PEEK and MORE p

Using the B  Pen, color the rhinestones creating a deeper blue color.

Awareness Ribbon #6 - Autism Angel Stamp Release SNEAK PEEK and MORE q

Cut apart the rhinestones only taking the ones you wish to use. Apply to the card front.

Awareness Ribbon #6 - Autism Angel Stamp Release SNEAK PEEK and MORE r

Apply adhesive to the back of the stamped image paper. Adhere the stamped image to the card base.

Awareness Ribbon #6 - Autism Angel Stamp Release SNEAK PEEK and MORE b

Your project is complete! Thank you for joining us for the Awareness Ribbon #6 – Angels with Autism Stamp Release SNEAK PEEK and MORE!

Be sure to check back for info on here on our blog for our Instagram hop on Wednesday as well as the blog hop for the 2016 Spring Coffee Lovers Blog Hop that runs Friday, March 18 – Friday, March 25! There are a number of sponsors and WE are one of them! There are a BUNCH of great prizes up for grabs! Be sure to check it all out! You won’t want to miss it!

Thank you for joining us today and we hope you enjoyed going on A Creative Journey with Melissa.

melissa-written-signature

Painting an Unfinished Frame Adding Texture with Bubble Wrap

Painting an Unfinished Frame Adding Texture with Bubble Wrap is what we will be doing today. This is so simple to do and inexpensive, it almost doesn’t even seem fair that it looks so great! I love to create projects that are awesome for the eyes and soft on the wallet. This will definitely make you happy! There are so many different possibilities with this project and I can’t wait to see what you come up with!

Painting an Unfinished Frame Adding Texture with Bubble Wrap b

Here are the supplies you will need for the Painting an Unfinished Frame Adding Texture with Bubble Wrap project:

Unfinished Photo Frame (I purchased mine at Michael’s for $1!)

Folk Art Paint

Paint Brush

Bubble Wrap

Palette, Plate or Place to Place your Paint

Protected Area to Paint on or Washable Surface

Painting an Unfinished Frame Adding Texture with Bubble Wrap c

Take your paint, paint tray, brush and frame out. Add your paint to your paint tray.

Painting an Unfinished Frame Adding Texture with Bubble Wrap d

Paint the inside ledge of the frame that is NOT where the photo will be going. NOTE: I do not paint the back side of the frame. My reason is because if you are to place it up against a wall or hang it on a wall, you can leave paint residue depending on where you live and the moisture in your area. If you want a finished look, you can trace out a piece of paper and adhere or spray a fixative to avoid this issue.

Painting an Unfinished Frame Adding Texture with Bubble Wrap e

Be sure to paint the entire inside ledge as shown.

Painting an Unfinished Frame Adding Texture with Bubble Wrap f

Pull the metal piece that keeps the photos in. This will keep a little barrier between the frame and the work surface as it sticks out further than the frame.

Painting an Unfinished Frame Adding Texture with Bubble Wrap g

Paint the first coat on thefront of the frame.Painting an Unfinished Frame Adding Texture with Bubble Wrap h

This is what it looks like once the first coat is completed.

Painting an Unfinished Frame Adding Texture with Bubble Wrap i

Paint the outside edge of the frame.

Painting an Unfinished Frame Adding Texture with Bubble Wrap j

Paint the front of the frame for it’s second coat.Painting an Unfinished Frame Adding Texture with Bubble Wrap k

This is what it looks like once the second coat of paint has been applied.

Painting an Unfinished Frame Adding Texture with Bubble Wrap l

For the Painting an Unfinished Frame Adding Texture with Bubble Wrap, take out the bubble wrap. Place it on the front of the frame where it was just painted. Be sure it is still wet to allow the bubble wrap texture to show after it’s placement and removal.

Painting an Unfinished Frame Adding Texture with Bubble Wrap m

Press down firmly on the bubble wrap to ensure the design transfer and the paint lifts onto the bubble wrap.

Painting an Unfinished Frame Adding Texture with Bubble Wrap n

Carefully remove the bubble wrap.

Painting an Unfinished Frame Adding Texture with Bubble Wrap o

This is what it looks like once the bubble wrap has been removed.

Painting an Unfinished Frame Adding Texture with Bubble Wrap p

Here is a closer look to what the design is that the bubble wrap left upon removal.

Your Painting an Unfinished Frame Adding Texture with Bubble Wrap project is COMPLETE! This was super fast, inexpensive and CUTE! Thank you for joining us for this tutorial today and we hope you enjoyed going on A Creative Journey with Melissa.

melissa-written-signature

Concrete Crafts with Linda Swingle

Concrete Crafts with Linda Swingle is what we are showing you today. YES! I know! Sounds like fun right? Well it is. My awesome son Christian did the interview with Linda at the CHA Show 2016. I can’t tell you how excited I am to show you the AMAZING talent of my friend Linda. To see more of here concrete crafts, go to her personal facebook page and check out her amazing creations! She is going to be featured in a magazine in the spring. I will update this post once it has been published but here you are getting your very own sneak peek!

Supplies for Creating with Concrete

Makers Mix Concrete

Water for mixing

Mixing Bowl

Measuring cup

Covered work area

Sturdy surface to work on

Tint Powders for coloring the concrete

Mixing utencils (spatula or scraper)

Molds of your favorite shape or design

Acrylic paint

Paint Brushes

Water to rinse paint brushes

Below is a pictorial of what Linda did with the demonstration for us at CHA. For more details, check out the video above.

First, add water to your concrete ensuring it is mixed thoroughly.

Concrete Crafts with Linda Swingle

Using vegetable oil, prepare the inside of the molds to allow for it’s release upon drying.

Concrete Crafts with Linda Swingle b

Add your concrete to your mold.

Concrete Crafts with Linda Swingle c

Want to add some color to your concrete? Add the tinting powder, mix and pour it into the prepared mold. It’s just that easy!

Concrete Crafts with Linda Swingle f

If you would like to paint your creation, I would suggest you allow it to dry overnight if it is a very thick item if it is smaller like the molds shown, 1-2 hours should work well but use your best judgement as it varies with the amount of concrete/water ratio and how long dry time is.

 Here are some of the other amazing creations Linda has made using concrete.

Concrete Crafts with Linda Swingle g

Concrete Crafts with Linda Swingle h

Concrete Crafts with Linda Swingle i

Thank you so much for joining us today! We hope you enjoyed Linda’s amazing creativity and of course thank you so much for going on A Creative Journey with Melissa.

melissa-written-signature

Refilling Your Chameleon Pens Mixing Chamber with Colorless Blender Solution

Refilling Your Chameleon Pens Mixing Chamber with Colorless Blender Solution is what we are doing today. I don’t know about you but I LOVE MY CHAMELEON PENS!! I love how they are compact, refillable. and basically as I call them- A FOREVER PEN! I love to play with different color palettes and create different dimension with them as well. If you haven’t tried them yet, be sure to visit your Local Scrapbook Store or your Local Stamp Store (LSS) to see if they have them in so that you can see them in person! They are so much fun to play with… You won’t want to miss out!

Whether you like a video tutorial or a pictorial, we have you covered! Let’s get started with the tutorial!

Refilling Your Chameleon Pens Mixing Chamber with Colorless Blender Solution Supplies

Supplies You Will Need:

Your CB (Colorless Blender) Ink Refill Kit

*Included in each Ink Refill Kit: Ink, Syringe, and the Refill Tool (needle)

Chameleon Tweezers

Chameleon Pens

Protected Surface or something to protect your work surface

Refilling Your Chameleon Pens Mixing Chamber with Colorless Blender Solution a

Open your Ink Refill Kit and take out your Syringe, needle/applicator and ink/solution.

Refilling Your Chameleon Pens Mixing Chamber with Colorless Blender Solution d
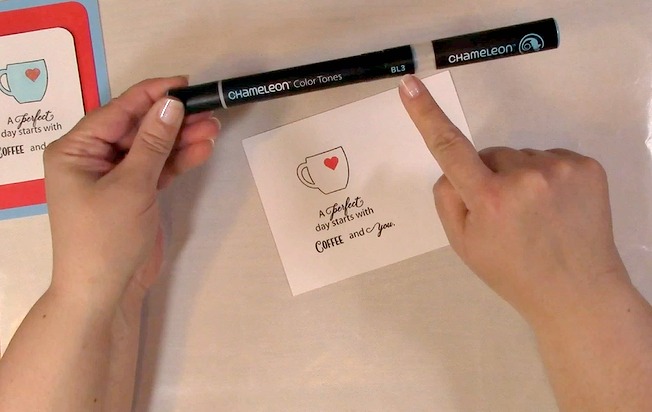
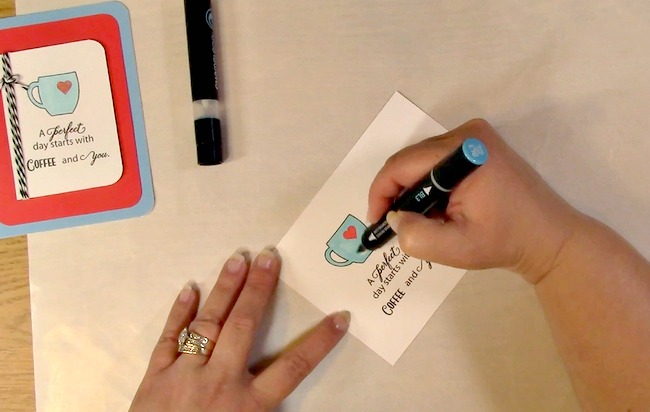
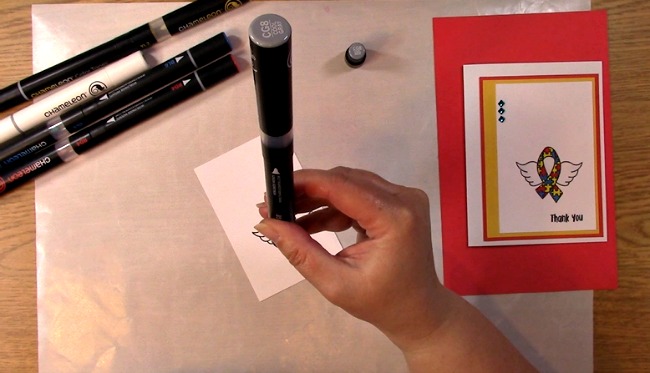
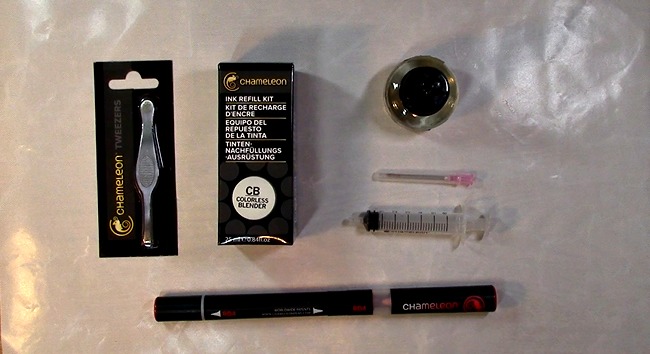
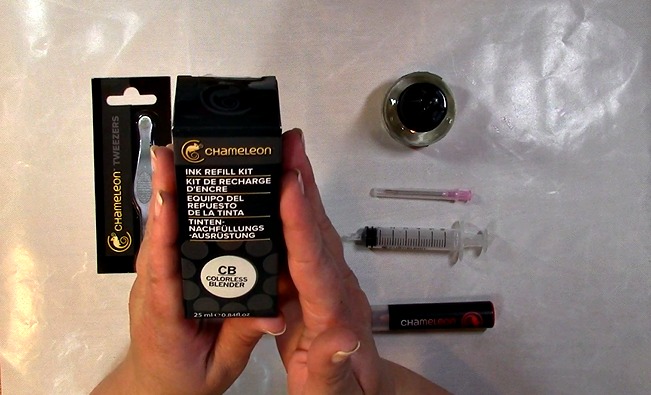
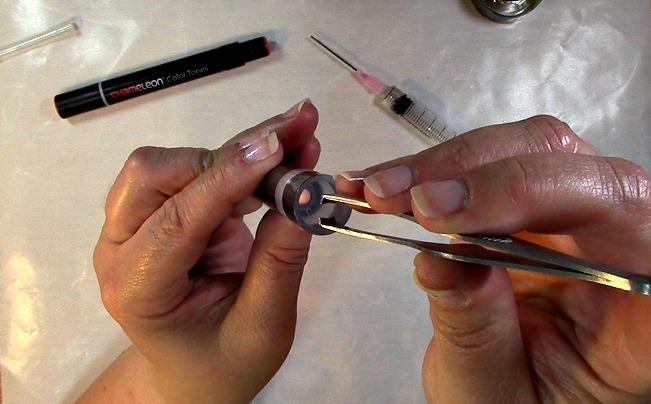
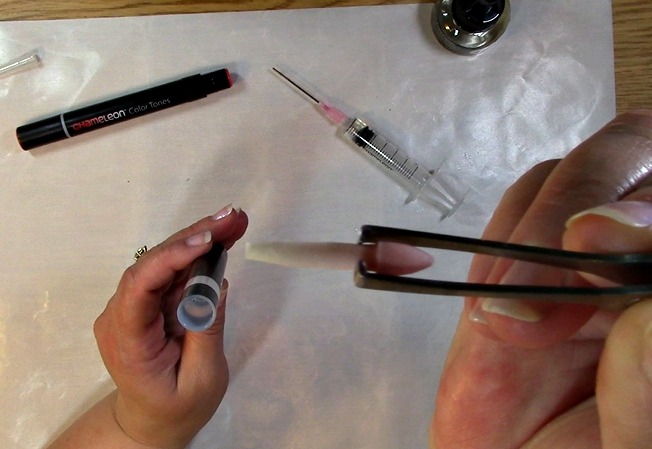
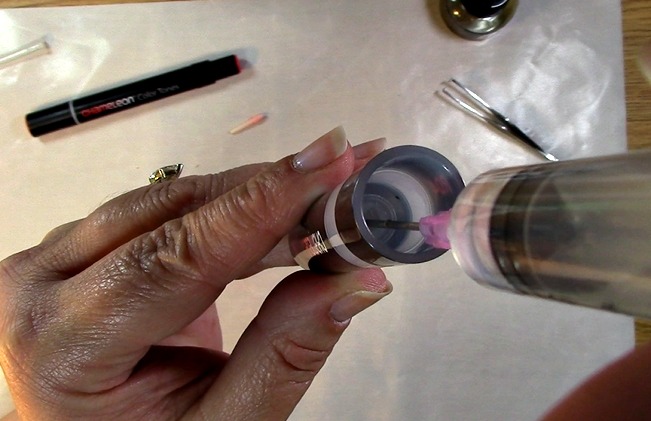
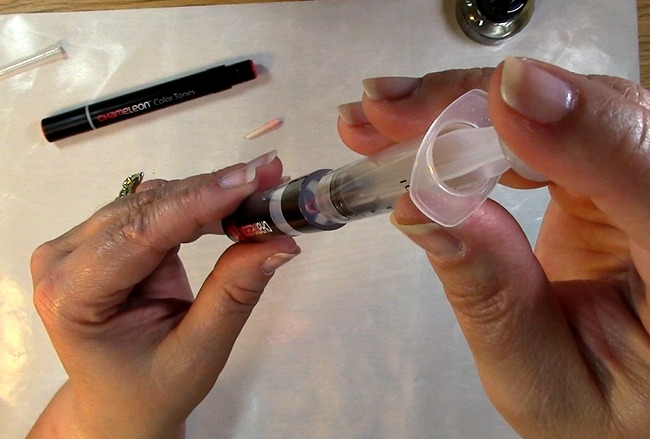
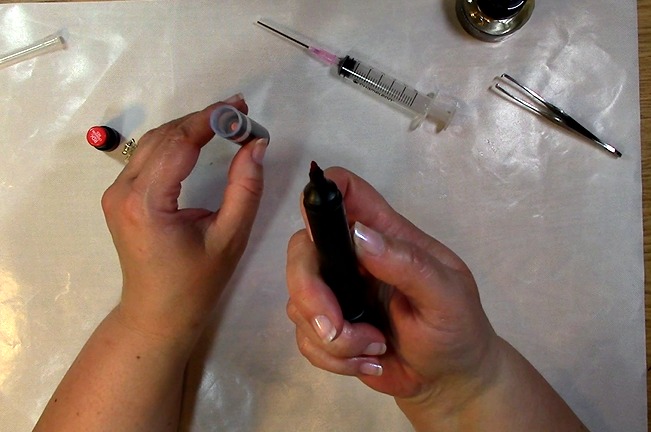
Open your pens mixing chamber. Set the colored ink side of the pen aside leaving you with the mixing chamber and nib. Set aside the mixing chamber while you prepare your syringe with the colorless blender.

Refilling Your Chameleon Pens Mixing Chamber with Colorless Blender Solution e
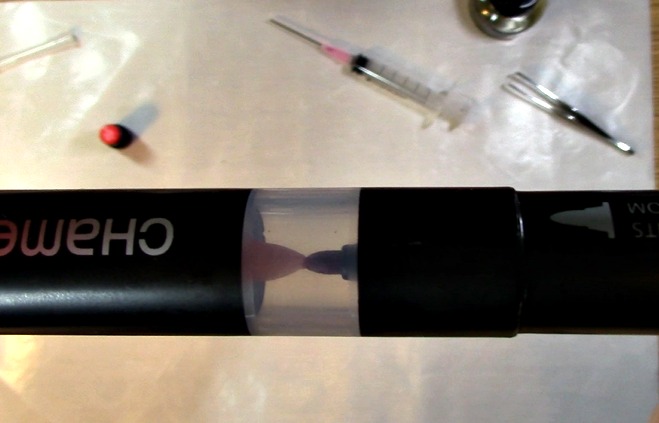
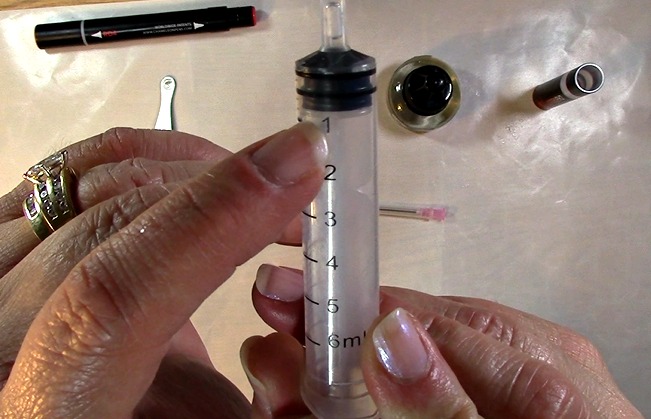
You do not want to overfill your pens. Only fill your pens one milliliter at a time. This would be at the “1” mark on your syringe.
Refilling Your Chameleon Pens Mixing Chamber with Colorless Blender Solution g
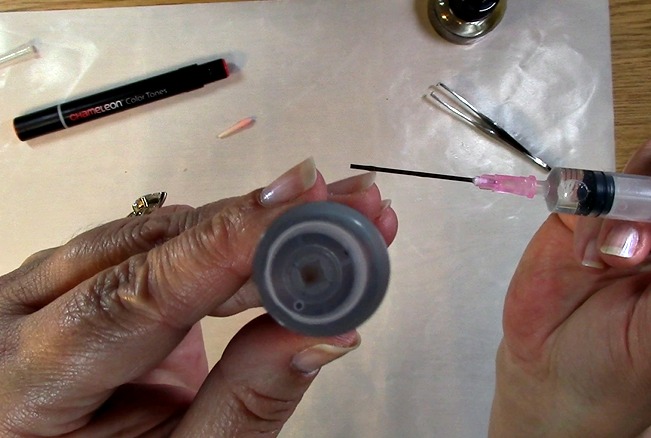
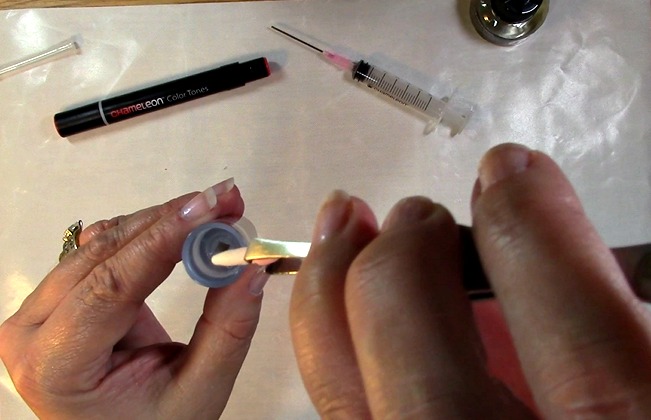
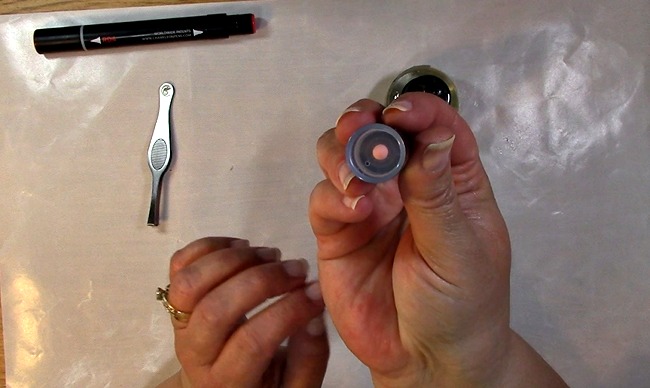
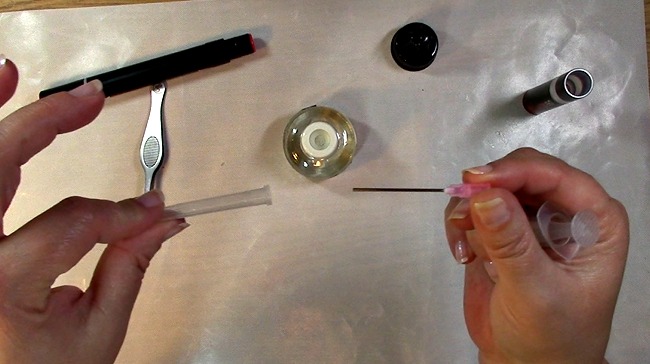
Take out your Colorless Blender Solution. Open it and set the cap aside. Take out your ink applicator/needle. Take off the protective cap. Set the cap aside.

Refilling Your Chameleon Pens Mixing Chamber with Colorless Blender Solution h

Place the applicator/needle on the syringe.

Refilling Your Chameleon Pens Mixing Chamber with Colorless Blender Solution i
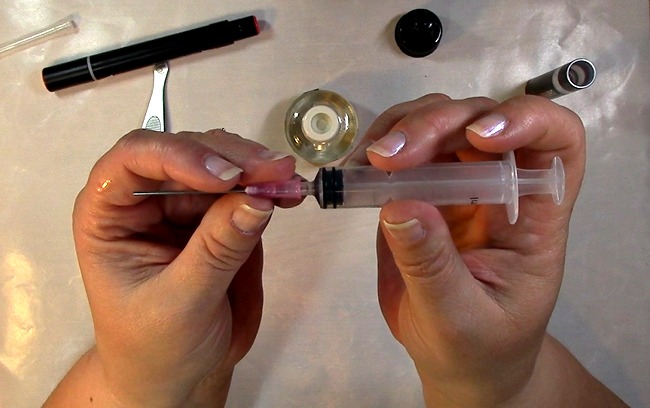
Ensuring that the syringe is pushed all of the way to the bottom so all liquid and air is gone, place your syringe in the colorless blending solution bottle. Pull back on the syringe plunger until the bottom of the black tip of the plunger is at the “1” mark for one milliliter.

Refilling Your Chameleon Pens Mixing Chamber with Colorless Blender Solution j

Here is a close up picture.

Refilling Your Chameleon Pens Mixing Chamber with Colorless Blender Solution k

Take out your Chameleon Tweezers. Using your Chameleon Tweezers, carefully pull out your Blending Chamber nib.

Refilling Your Chameleon Pens Mixing Chamber with Colorless Blender Solution l

Once you take the nib out, set it aside on a clean, protected surface.

Refilling Your Chameleon Pens Mixing Chamber with Colorless Blender Solution m

When Refilling Your Chameleon Pens Mixing Chamber with Colorless Blender Solution; Here is a close up of the Blending Chamber. The square inside is where you will place the applicator/needle.

Refilling Your Chameleon Pens Mixing Chamber with Colorless Blender Solution n

Once you put your applicator/needle inside the chamber you will feel a little bit of resistance. This is NORMAL. Push the needle/applicator a little bit further to ensure the solution is being place inside the chamber.

Refilling Your Chameleon Pens Mixing Chamber with Colorless Blender Solution o

Push the plunger all of the way down transferring the blender solution into the blending chamber. Remove the syringe.

Refilling Your Chameleon Pens Mixing Chamber with Colorless Blender Solution q

Pick up your nib and return your nib back to the blending chamber with your Chameleon Tweezers making sure it is completely seated in the mixing chamber.

Refilling Your Chameleon Pens Mixing Chamber with Colorless Blender Solution r

To verify the nib is properly secured in the mixing chamber, take off one cap off of your ink side of your pen.

Refilling Your Chameleon Pens Mixing Chamber with Colorless Blender Solution s

Place the mixing chamber on the nib as you would if you were to color, ensuring that the two nibs “kiss” allowing the transfer of blender solution.

YOU DID IT! You have officially added your Colorless Blender Solution to your Chameleon Pen!

We hope you enjoyed today’s tutorial and appreciate you spending time with us! We hope you will share your Chameleon Pen projects with us and we hope you enjoyed going on A Creative Journey with Melissa.

melissa-written-signature

Sign Language Sentiments 2 stamp set I Love You Card

The Sign Language Sentiments 2 stamp set is so versatile. It works perfectly for this Valentine’s Day I created for my husband. In this video, I will show you how I used the Sign Language Sentiment stamp set 2 how I created this card step by step. Whether you like to learn by video (above) or pictorial (below) we have you covered! This is something you can refer back to again and again! Enough “talking” let’s get started!

Sign Language Sentiments 2 stamp set I Love You Card

This is the card we are creating with the Sign Language Sentiments 2 stamp set.

Here are the supplies you will need :

Card Base

Patterned Paper

Paper for Hearts

Paper Punches

Memento Black Ink

Stamp Block

Red Twine

Corner Rounder

Scissors

Adhesive

Foam Squares

Sign Language Sentiments 2 stamp set I Love You Card b

Take out your Sign Language Sentiments 2 stamp set, Paper to stamp on, ink, and stamp block.

Sign Language Sentiments 2 stamp set I Love You Card c

Stamp your sentiments on your paper.

Sign Language Sentiments 2 stamp set I Love You Card e

Sign Language Sentiments 2 stamp set I Love You Card d

Take out your punches and punch your sentiments.

Sign Language Sentiments 2 stamp set I Love You Card f

Take our your decorative paper. Using your corner rounder punch, punch the corners on all four sides.

Sign Language Sentiments 2 stamp set I Love You Card g

Add adhesive to the back of your decorative paper.

Sign Language Sentiments 2 stamp set I Love You Card h

Adhere paper to your card base.

Sign Language Sentiments 2 stamp set I Love You Card i

Add a foam square to the back of the smaller heart and adhere to the larger heart.

Sign Language Sentiments 2 stamp set I Love You Card j

Using your 1/8″ punch, punch a whole on both of the hearts where you would like to have a bow placed.

Sign Language Sentiments 2 stamp set I Love You Card k

This is what it looks like before you add the twine.

Sign Language Sentiments 2 stamp set I Love You Card l

Thread your twine from the bottom through the top and tie a bow.

Sign Language Sentiments 2 stamp set I Love You Card m

This is what it will look like once it is tied.

Sign Language Sentiments 2 stamp set I Love You Card n

Add your foam squares to to the back of the larger heart.

Sign Language Sentiments 2 stamp set I Love You Card o

Adhere the heart to the card base.

Sign Language Sentiments 2 stamp set I Love You Card Master wm

Here is the completed card using Sign Language Sentiments 2!

Although this is simple to make, I think the twine along with the offset hearts really make the creation sweet and heartfelt. Who wouldn’t love this card. Yes, my husband SURE DID! We hope you enjoyed this creation and enjoyed going on A Creative Journey with Melissa.

melissa-written-signature