

Birthday Gift Thank You Cards
Birthday Gift Thank you Cards is what we have for you today. My son (MY BABY!) Austin just had his 17th birthday. My how time flies! He was fortunate enough to get some birthday gifts so you know that what means… Thank you notes!
I have always taught my kids if someone is kind enough to send you a gift, you can at least thank them with a card or a call.. or even both!

Well, today I have Birthday Gift Thank you Cards that are not only easy to make, they are super duper cute too! Are you ready to get CREATIVE? Let’s get started!

Supplies Needed for the Birthday Gift Thank You Cards
A Creative Journey with Melissa Sentiments for all Occasions Stamp Set
Ink
1 1/4″ square punch
1 3/8″ square punch
Adhesive
3-D Foam Dots or Squares
Card Base
Paper to Stamp Sentiment On
Decorative Paper
Solid Color Paper for Mat for Sentiment
Solid Color Paper for Card Base
Scissors
Embossing Folder
Manual Die Cut Machine (Sizzix)
Twine
*Corner Rounder Optional
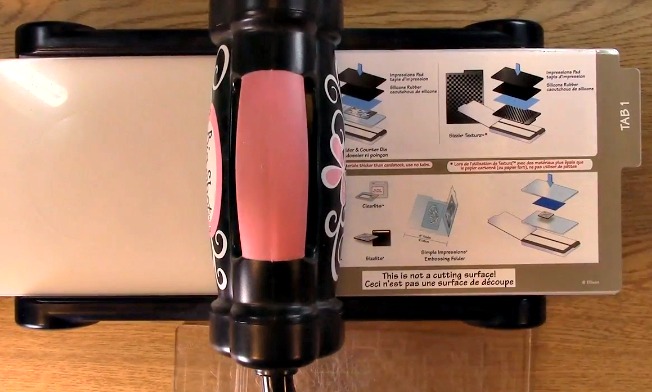
First you will need your manual die cut machine. I am using my Sizzix machine. I have the main platform on tab 1.

Take out your embossing folder.

Add your solid color paper to the inside of your embossing folder.

Close the embossing folder.

Place your clear platform on top of the tab 1 on the main platform. Place your embossing folder on top of the clear platform.

Take your second clear platform and place it on top of the embossing folder.

Using the handle, turn it so the embossing folder is run through the die cut machine.

Take out your embossing folder from under the clear platform.
This is what your paper will look like once it has been embossed. Cool, right?

The sample Birthday Gift Thank You Cards that I have done opens horizontally which is the most common type of card from my experience.

For this Birthday Gift Thank You Cards tutorial I am going to do the same card only with the card opening up vertically like shown above.

Using the adhesive, put adhesive on the back of the solid colored embossed mat.

Adhere the paper to the card base.

Apply adhesive to the back of the decorative paper.
NOTE: I had a scrap left over that happened to have the corners rounded. If you like the look, be sure you round your corners as well.

Apply decorative paper to the top of the solid colored paper as shown above.

Here are my very loved and USED stamps.
Later in this post I will show you how I used the stained stamps and how the stain doesn’t effect the integrity of the stamp or image. You can use your stamps over and over again even if they are stained. I use memento ink and sometimes forget to clean them.
I do not, however, recommend STAZON ink for our photopolymer stamps. It is not recommended for clear stamps as it can over time effect the integrity of the stamp as can the cleaner to keep it from staining.

I have pulled out the Thanks for being so generous stamps off of my stamp sheet. I have found an easy way to place my stamps so that it is almost fool proof! If you didn’t see my video last week showing you how, check it out here! I also do it below in this tutorial but not as detailed.

Place your stamp block on top of your sentiment and then lift up.

Here is a close up shot. You are ready to ink!

Ink your sentiment.

Stamp your sentiment on your paper.

Here is a close up shot of the stamped sentiment.

I have been asked if the stamps will work if they have stains on them. People have told me they don’t like it which is understandable and others thought they would mess up the image.
I wanted to show you how I will stamp with the stamps that have stains on them. This way you can see for yourself how the sentiment comes out.
I took off the Happy Birthday Sentiments from my stamp sheet. As you can see they are clearly stained.

Place your stamp block on top of the sentiment pushing down.

Here is a close up so you can the stained. You are ready to ink your stamp!

Apply ink to your sentiment.

Stamp your sentiment.
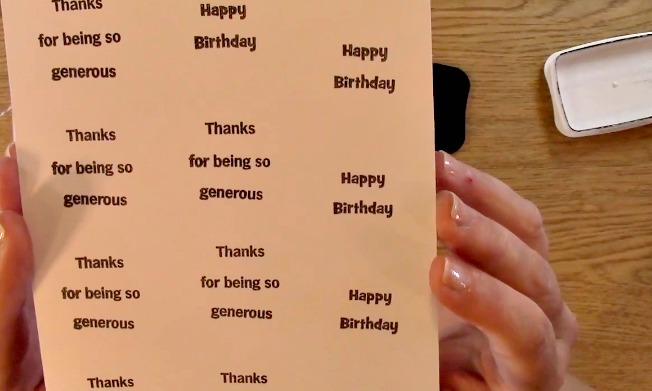
Here is a close up shot of both the unstained (on the left) and the stained stamps (on the right) As you can see, there is no difference in the image or the integrity of the stamp. YAHOO! So mystery solved LOL!

Now to continue the Birthday Gift Thank You Cards tutorial, take out your 1 1/4″ square punch and punch out your sentiment.

Take out your 1 3/8″ square punch and punch out your solid color mat for your sentiment.

Adhere your sentiment to your punched out mat.

Place the 3-D foam dots on the back of the matted sentiment.

Place your sentiment on the front of your card.

Take out your circle punch (I believe it is 1/8″) and punch a circle on the left top of the card as shown.
NOTE: Card is upside down when punching so it shows on the right side bottom.

This is what it will look like once you have punched the hole at the top.

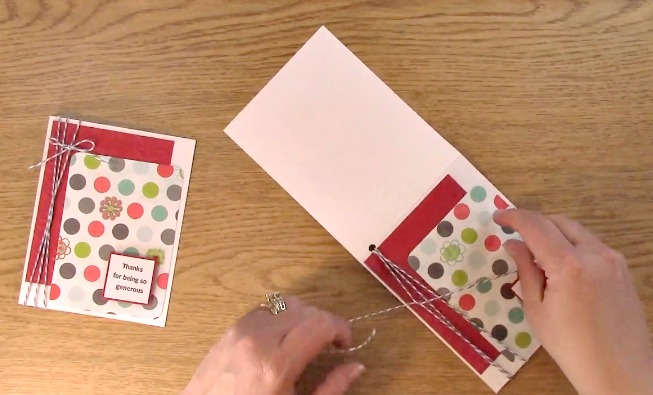
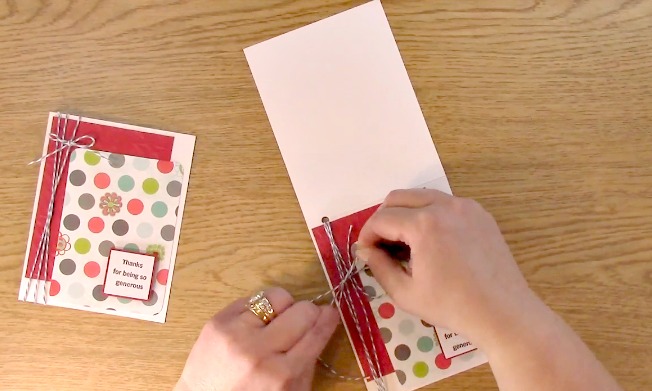
Take out your twine. Going up through the middle of the card, push your twine up leaving some to tie at the end. Then you will wrap the twine around the card and go up through the card again. You will repeat this twice.

I found that if I held the extra twine on the back of the card, it didn’t get in the way of me trying to pull the other twine through the middle of the card.

Once you have wrapped twine around twice, you will pull it around to the front and then cut off any excess twine.
You will then cross the two ends together as shown.
Make a bow making sure it is tight.

Trim off any excess twine.

I really didn’t like where the bow was at so I wanted to move it up.

Here is a simple trick to do this. Gently bend your card. This will allow you more room to move your twine to adjust it.

Gently using your finger, move the twine where you want it to be. YOU GOT IT!

Now you can see the card on the left opens horizontally.

The card on the right opens vertically.
You did it!


