
Quick and Easy: Gift Bag Set with Stamped Tissue
Quick and Easy: Gift Bag Set with Stamped Tissue is today’s project! I have focused this project for the holidays but this simple and cute concept can be used for any gift giving need. It’s so simple in fact, you may have all of the supplies in your home already! This project is not meant to take a lot of time and supplies. This project is meant for you to be able to dress up a gift with love and thought with little cost and time. The love will show through and your friend and loved one will be so grateful! Sooooo, let’s get started!
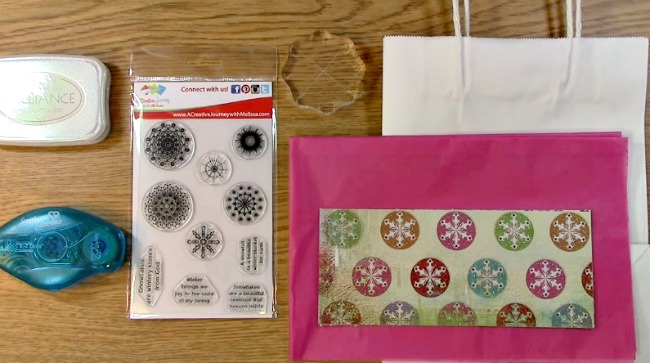
The supplies you will need:
Brilliance Ink
Plain gift bag
Tissue paper
Decorative card stock for bag
Directions and the free printable download for the tags can be found on this tutorial here.
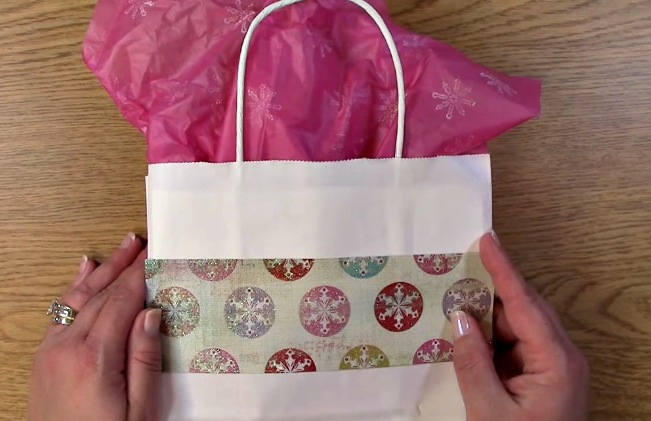
Get your gift bag, adhesive and decorative paper out. 
Apply adhesive to the back side of the decorative paper. Adhere to both the front and the back of the gift bag.
Be sure to line them up so they match on both sides. Set aside.

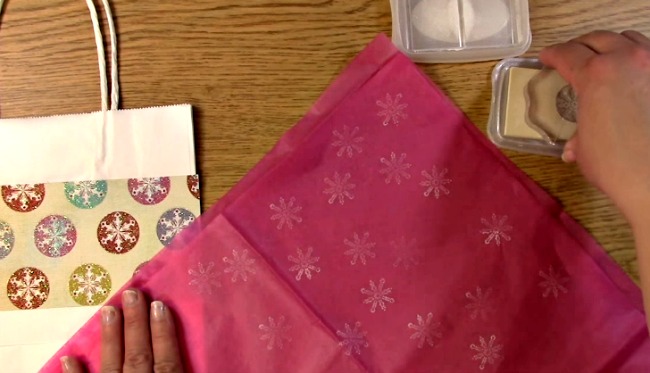
Take out your tissue paper, ink and Snowflake Beauty stamp set. Fold your tissue paper at an angle in half to make a triangle.
Stamp the corner area of this tissue paper. You will stamp all four corners of your tissue paper.
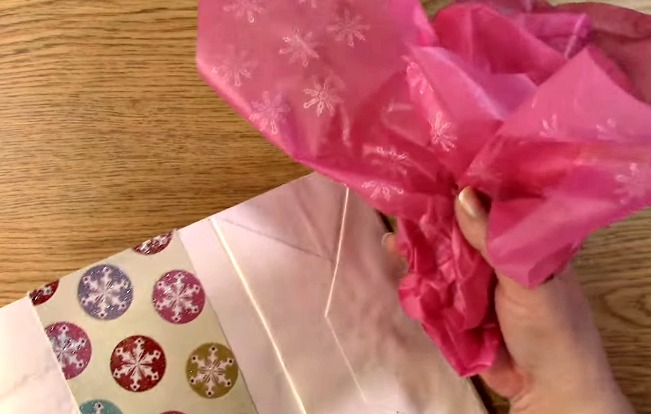
One you have stamped all four corners, take your tissue paper in the center of the paper and grab it as if to make a bouquet like shown.
Open up your bag and place your tissue paper inside of the bag ensuring some of it is sticking out to show your stamped design.
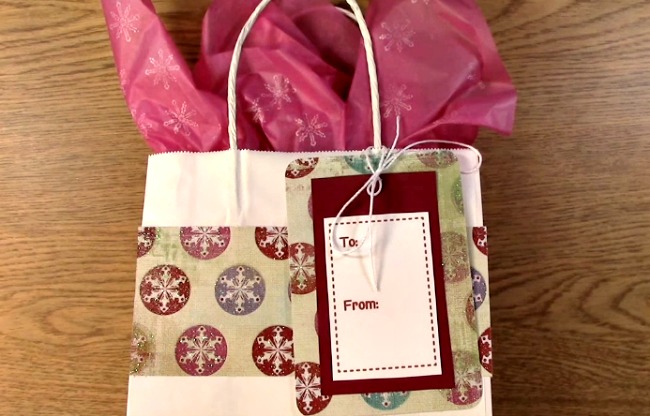
To add a little flair, create a matching gift tag for your gift packaging like shown below. For information and directions on the gift tag, please go to this post here for your free download and information.
Thank you for joining us! Please be sure to subscribe to our blog and YouTube channel for more projects and ideas.
We hope you enjoyed going on A Creative Journey with Melissa.


