DIY Planner, Card or Photo Holder

MERRY CHRISTMAS and HAPPY HOLIDAYS! DIY Planner, Card or Photo Holder is what we have for you today.  This is the perfect project for you to create to tuck in your purse, backpack or briefcase. With all of the pictures you take from the holidays, this would be a great way to send those wonderful memories to your friends and loved ones. EASY RIGHT? Let’s get started!

This is our project we are going to create. Super simple and cute as well as versatile!

Supplies Needed for the DIY Planner, Card or Photo Holder Project

12 x 12″ piece of paper (I used double sided card stock)

Stampin Up Paper Trimmer with Scoring Blade

Scissors

Coordinating Ribbon

Bone Folder

Take out your decorative paper and paper trimmer.

Line up your paper to 4″ on the paper trimmer.
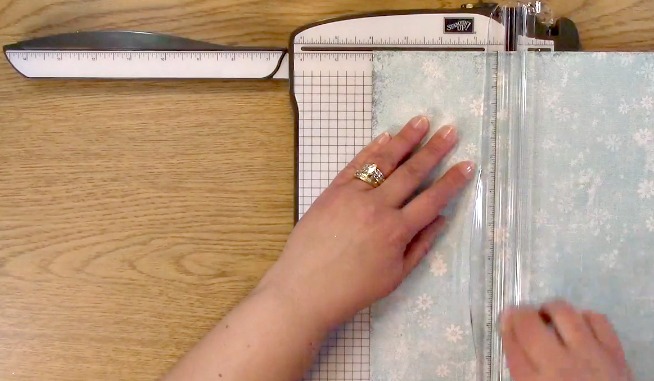
Score your paper at 4″ with your scoring blade.

Take your paper out from the trimmer and fold at the score lines.

Pull out your bone folder.

Using your bone folder, push down on the crease to ensure a crisp fold on your DIY Planner, Card or Photo Holder Project.
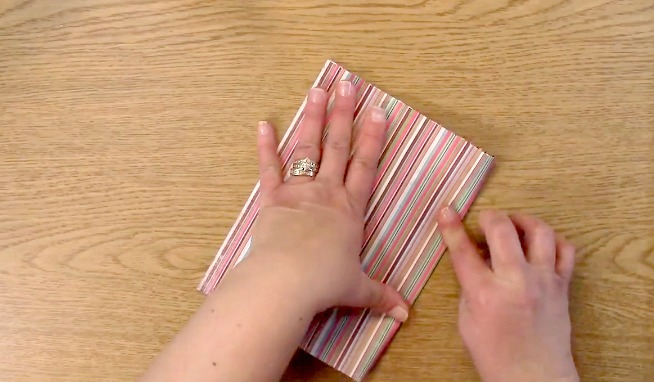
You can then either turn your paper 1/4 of the way and score your paper at 6″ or you can just fold your paper in half as shown above.

Once again, use the bone folder and press down on the fold to ensure a good crease.

This is what the DIY Planner, Card or Photo Holder Project looks like once it has been folded and creased.

Check to see where the fold is. You want to be sure you punch a hole above the folds.
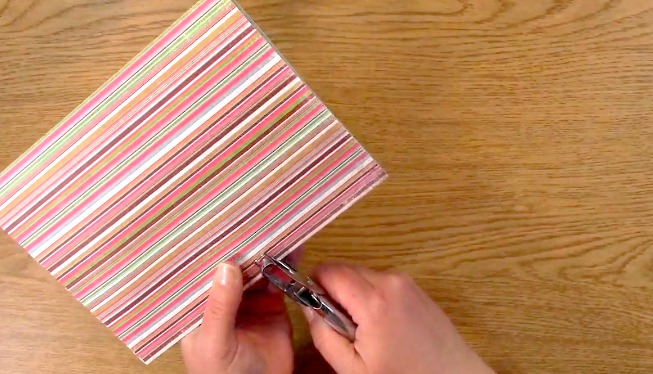
Punch the hole in your paper through all four layers.
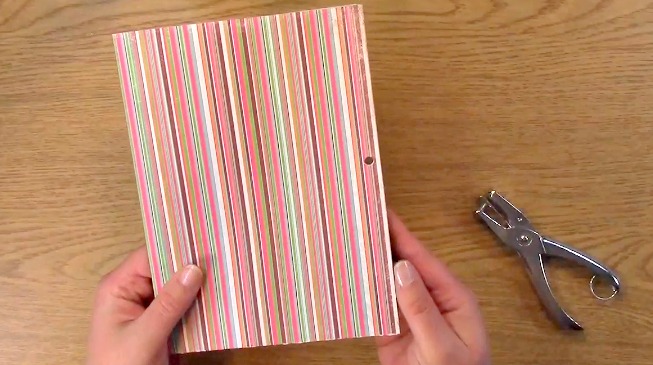
This is what it looks like once all holes are punched through.

Take out your ribbon and trim off approximately 8-12 inches for your DIY Planner, Card or Photo Holder Project.
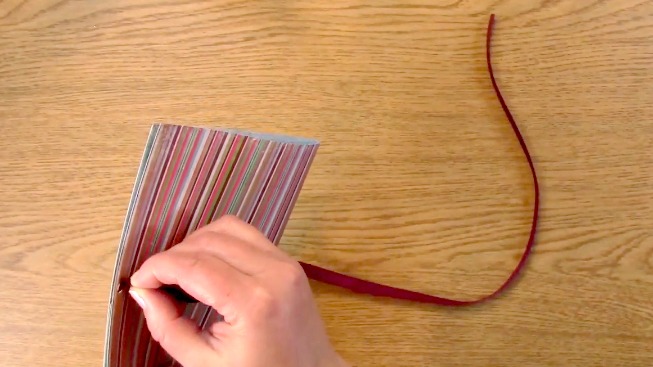
Put the ribbon in through the first hole,

Pull the ribbon all the way through all four layers.
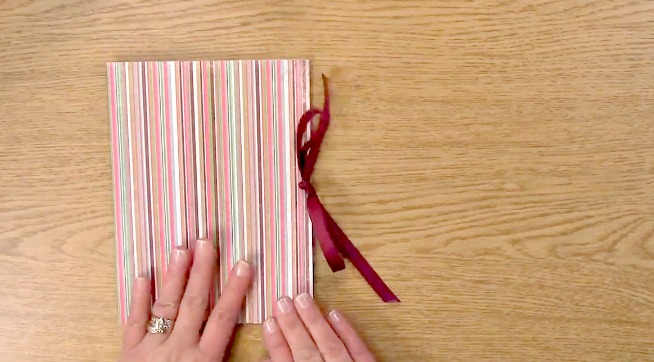
Tie your ribbon in a bow.

You have completed your project! Think of the endless possibilities! You can use this creation for different themes, celebrations, holidays and so much more!

For this weeks giveaway we are giving away a $15.00 credit to our store! Winner announced next week!

To qualify to win, you must be BOTH:

A public follower on YouTube, subscribe to our mailing list/blog posts and you may also comment on this blog post for an additional entry to win! Winners will be announced next week on our Mondays with Melissa blog post!

BE SURE TO check to see if you are a winner EVERY WEEK. If you do not contact me within two weeks of the announcement of winning, you will forfeit your prize. Thank you for your understanding.

Subscribe to BOTH with MATCHING NAMES to be eligible. If I am unable to match you with your subscription to both the email list and the YouTube Channel, you will miss your chance to win a prize. If I can’t decipher if you are a matching subscriber (if your profile doesn’t show publicly who you subscribe to) and I can’t confirm you have subscribed to both, you will not be eligible.

For last weeks giveaways we are giving away the A Creative Journey with Melissa Sentiments for All Occasion Stamp Set

and the Spellbinders Aristocrat Die Cut set.

The winners are  Kim Miller and Malika!

Winners, please send me your contact information via contact page on our website, which post you are a winner from and I will get your prize out to you! Thank you so much for being a YouTube follower and subscribing to our mailing list/blog posts!

Thank you for joining us for the DIY Planner, Card or Photo Holder Project. I hope I have inspired you to create something that can be given as a gift or used for yourself! BE SURE TO CHECK BACK!

Have a wonderful week and thank you for going on A Creative Journey with Melissa.

Quick and Easy! Coffee Cup Embossed Recycled Packaging Gift Card Holder

Quick and Easy! Coffee Cup Embossed Recycled Packaging Gift Card Holder is what we have for you today. I love to reuse packaging for my crafts. This is a tutorial on how to do just that!

Supplies Needed for the Quick and Easy! Coffee Cup Embossed Recycled Packaging Gift Card Holder Project

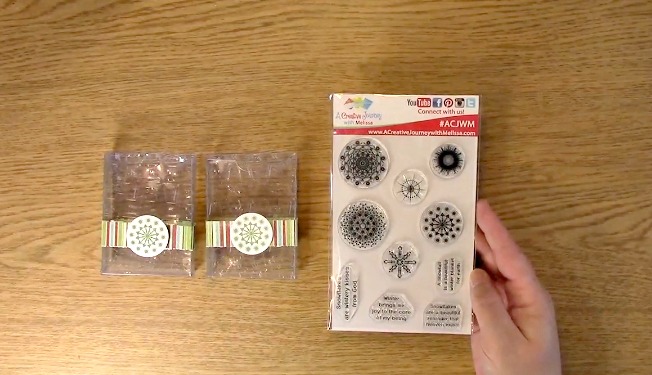
A Creative Journey with Melissa Snowflake Beauty Stamp Set

Acrylic Stamp Block

1.25″ Circle Punch

Sizzix Die # 660281 Box and Card Die

Sizzix or manual die cut machine

Scissors

Paper to stamp image on

Green Ink

.75″ x 12″ strip of patterned paper

Tim Holtz Coffee Cup Embossing Folder

Red Tape – Strong adhesive for the packaging

Adhesive for adhering paper to the box

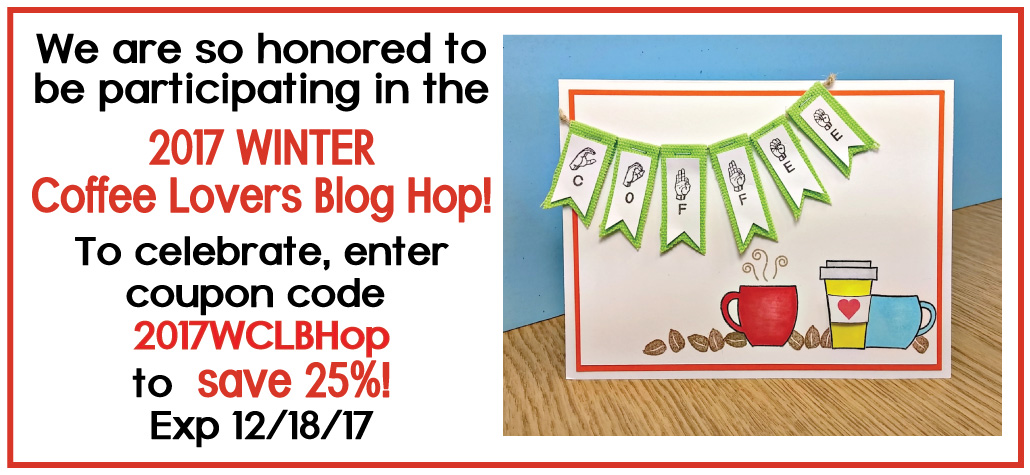
IF YOU ARE HERE FOR THE 2017 WINTER COFFEE LOVERS BLOG HOP PLEASE CLICK HERE. You are of course welcome to check this post out too and enter to win the prize on this post as well! If you aren’t.. Be sure to check it out as you can see lots of coffee project inspiration as well as win a number of prizes from some great sponsors!

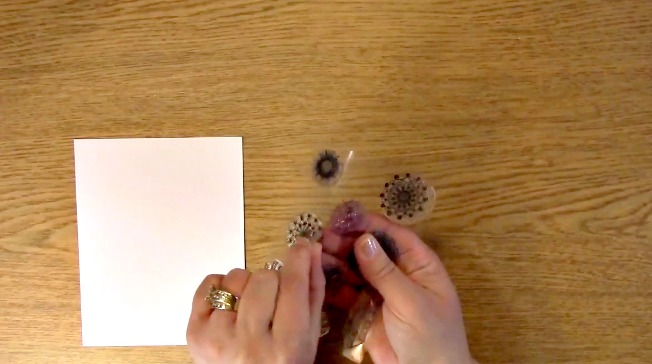
To begin the Quick and Easy! Coffee Cup Embossed Recycled Packaging Gift Card Holder project, Take out your paper to stamp on, your acrylic block and your A Creative Journey with Melissa Snowflake Beauty Stamp Set.

Adhere your stamp to your acrylic block. Take out your green ink.

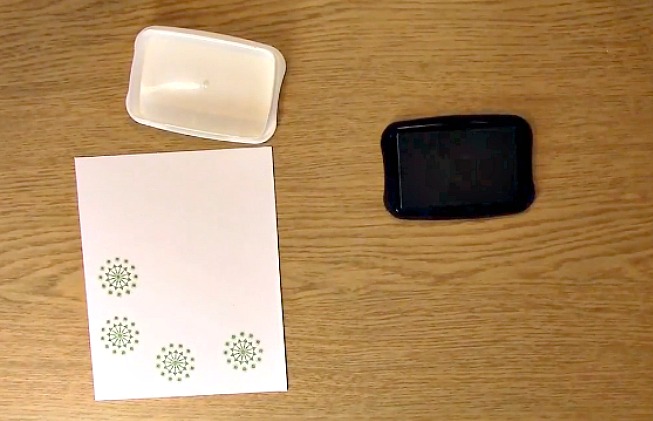
Stamp your snowflake onto your paper. I made a few extra so I can have them on hand in case I need to create an extra card.

Punch your snowflake images out with your circle punch.

This is a die inside it’s clear plastic packaging. When I get dies like this, I take them out of their packaging and cut the parts of the packaging that could be used in a die cut machine at a later time and set them aside. You would be amazed at how many times I have used them on my projects.

If you haven’t heard of this before, search in the box above or click on the menu for the icon and search for packaging and you will  find a few tutorials for some other ideas.

Here is a piece from a longer die that I have kept. This is what we are going to use to die cut our Quick and Easy! Coffee Cup Embossed Recycled Packaging Gift Card Holder Project. Sometimes you may have some blemishes on the packaging. You can solve that issue by embossing it!

Take out your manual die cut machine, two clear platforms and your die. Place a clear platform down on the base of the die cut machine. You will then place your die, clear recycled sheet of packaging and then your second clear platform. Using the handle, run your packaging through the die cut machine.

This is what it will look like once you have done that.

Take out your coffee cup embossing folder, regular platform, two clear platforms and your die cut machine. You can emboss just one side of your box like shown or you can do the entire box by folding your clear sheet in half and placing it in the folder.

This is what it looks like once it has been embossed!

Fold your box where all of the creases are from the die cut.

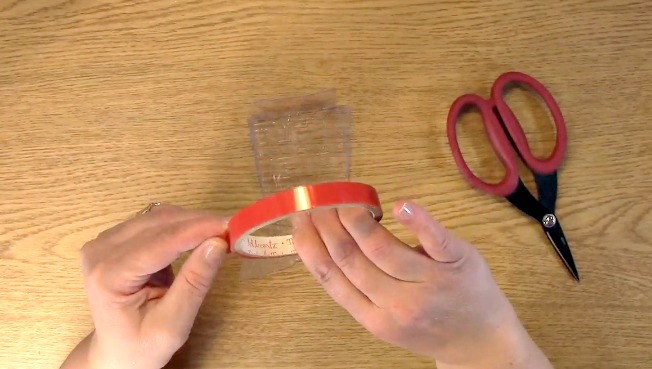
Take out your red tape or other strong adhesive.

Cut two pieces and adhere the two pieces of adhesive to the side of the box.

Remove the red protective piece revealing the adhesive.

Press firmly on the side of the box to the adhesive side ensuring its adhesion creating the box. You may lightly see some of the adhesive. If you do not care for that look, you can place paper on the outside of the box to cover it if you think it is too obvious. I personally thought it looked fine.

This is the die cut and embossed box before it has been put together completely and decorated.

Take out your strip of paper.

Using the gift card holder, measure how large of a piece you will need to wrap it around so it overlaps a little bit.

Trim excess paper off of your creation.

Apply adhesive to the back of the decorative paper.

Wrap your paper around the box ensuring the paper has adhered to the gift card holder.

Take out your stamped image, 3-D foam piece and box. Remove the adhesive back to the foam piece.

Place the foam piece on the back of the stamped image. Place the stamped image on the Quick and Easy! Coffee Cup Embossed Recycled Packaging Gift Card Holder Project.

Your Quick and Easy! Coffee Cup Embossed Recycled Packaging Gift Card Holder Project is complete!

For this weeks giveaway, we are giving away the above A Creative Journey with Melissa Snowflake Beauty Stamp Set.

 To qualify to win, you must be BOTH:

A public follower on YouTube, subscribe to our mailing list/blog posts and you may also comment on this blog post for an additional entry to win! Winners will be announced next week on our Mondays with Melissa blog post!

BE SURE TO check to see if you are a winner EVERY WEEK. If you do not contact me within two weeks of the announcement of winning, you will forfeit your prize. Thank you for your understanding.

Subscribe to BOTH with MATCHING NAMES to be eligible. If I am unable to match you with your subscription to both the email list and the YouTube Channel, you will miss your chance to win a prize. If I can’t decipher if you are a matching subscriber (if your profile doesn’t show publicly who you subscribe to) and I can’t confirm you have subscribed to both, you will not be eligible.

Now for last weeks GIVEAWAY we are giving away the A Creative Journey with Melissa Coffee, Tea and Wine – Oh My! Stamp Set.

Jaratzed. you are the winner! Please send me your contact information via contact page on our website, which post you are a winner from and I will get your prize out to you! Thank you so much for being a YouTube follower and subscribing to our mailing list/blog posts!

Thank you for joining us for the Quick and Easy! Coffee Cup Embossed Recycled Packaging Gift Card Holder Project. I hope I have inspired you to create something that can be a tradition and keepsake for years to come! We will be announcing the winners from the 2017 Winter Coffee Lovers Bloghop as well as this weeks giveaway next Monday. BE SURE TO CHECK BACK!

Have a wonderful week and thank you for going on A Creative Journey with Melissa.


2017 Winter Coffee Lovers Blog Hop

Welcome to the 2017 Winter Coffee Lovers Blog Hop!

If you happened to come by here by chance, WE ARE SO HONORED and thrilled that you did!! We are taking part in the AWESOME 2017 Winter Coffee Lovers Blog Hop! The hashtag is #winter2017clh and we are showcasing our love for Winter & COFFEE!! I LOVE Winter, the holidays and of course the cool crisp air.

I know this may sound crazy but I REALLY MISS SNOW AND COLD WEATHER. SERIOUSLY!

Being from Chicago I miss the REAL winter weather but now I live in California where I am still wearing shorts in December. Unfortunately, we were within a few miles of the #RyeFire you may have seen on TV which is very close to Magic Mountain. We are very fortunate that we are doing OK. Unfortunately, the winds are horrible until possibly as late as Saturday. Crossing fingers we stay OK. Now, are you ready for some cool stuff and giveaways? Let’s go!

Whether your drink of choice is hot chocolate, coffee, tea, or even a blended drink (which is what I ALWAYS prefer); you are going to really enjoy the 2017 Winter Coffee Lovers Blog Hop!

There are a number of companies participating and we are really honored and excited to be one of the SUPER SPONSORS & FLASH PRIZE SPONSOR for this amazing blog hop! We also have our own giveaways right here on our blog! Be sure to read the WHOLE POST for the details!

To start at the beginning of the 2017 Winter Coffee Lovers Blog Hop please click HERE.

The 2017 Winter Coffee Lovers Blog Hop runs Friday, December 8th starting at 6:00 AM Pacific Time thru Friday, December 15th. This allows you PLENTY of time to participate by hopping, creating or BOTH!

Winners for the entire hop will be announced on Sunday, December 17, 2017 HERE.

If you aren’t familiar with the Coffee Loving Papercrafters Group and would like to learn more, be sure to join their Facebook Group HERE to ensure you get the latest info on all of their blog hops! The group is SUPER fun with awesome creativity and inspiration throughout the year and of course.. GREAT SEASONAL HOPS with WONDERFUL COFFEE inspiration! We would hate for you to miss out om the inspiration and possibilities!!

Now, onto the projects we have for you today! The theme is Winter and of course… COFFEE! 

I’m not sure why but I have REALLY been getting into creating gift card holders. I have a number of them to give as gifts this year for the holidays and I thought I would share what I have created and various ways I do it.  We have a weekly YouTube video and Blog Post on Mondays. Ironic it is called #MondayswithMelissa.. maybe a bit too obvious? LOL At any rate, you will find a whole bunch of cool stuff, giveaways, tutorials and even recipes once a week so make sure you subscribe to both!

For my first creation and giveaway I used the A Creative Journey with Melissa You’re Snow Wonderful Stamp Set  and

For my second creation and giveaway we have the

A Creative Journey with Melissa Coffee, Tea and Wine – OH MY! Stamp Set.

If you aren’t familiar with my style it is pretty simple…. clean and SIMPLE – CAS. I like to have things that look nice but I personally am not one for a bunch of different layers and designs.

For me it is too chaotic for my ADHD so I tend to design and gravitate to clean and simple.

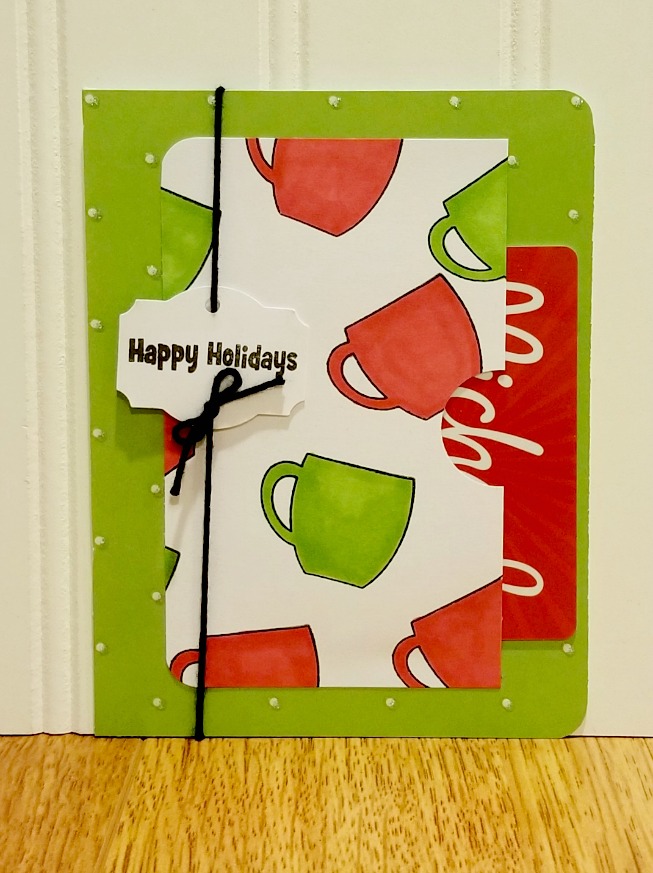
This creation can easily be made with scraps of your favorite holiday paper as it is not a card it is made with a paper base and holder for the gift card. Simple, clean and bright! MY FAVORITE! Can you tell what kind of gift card is in this?

For this creation, I created another gift card holder. The first creation I wanted to show you was the plainer creation of the two.

It is really amazing how just two changes and one extra step can make that much of a difference in a creation.

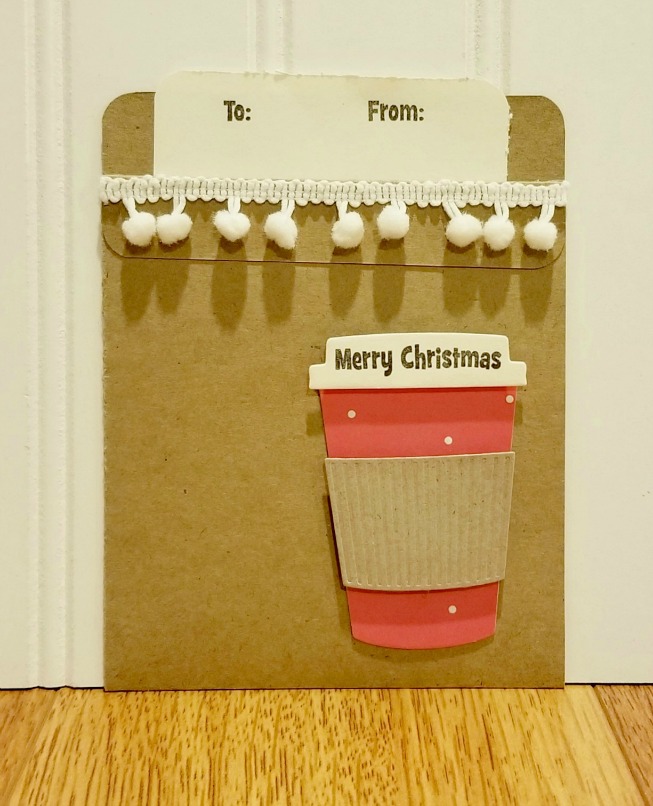
I used a little bit of trim, read decorative paper, cream paper for the lid, craft paper card folded and corner rounded, coffee cup, lid and sleeve die, decorative paper and the sentiments are from the A Creative Journey with Melissa You’re Snow Wonderful Stamp Set. I love how versatile the stamp set is and how cute the images are as well! You can create an entire Snow Family including Mom, Dad, birds, dogs, cats and of course KIDS!

Here is the SAME EXACT CARD. The only three differences are the green decorative paper, the smaller coffee cup die and I embossed the card base with a coffee bean embossing folder. THAT IS IT! Now for you to really see the difference.. I want to show them to you side by side…


Again, clean and simple with a little pop, right? Cute, Clean and SIMPLE!

Now for the fun stuff.. We have some giveaways for this blog hop and EVERY MONDAY we give something away!!

For all of our giveaways including this one, in order for you to qualify for an entry to win, you would need to be a follower on YouTube, subscribe to our mailing list/blog posts (found on our blog page) and you may also comment on this blog post for an additional entry to win! When you subscribe, you will receive an e-mail on Mondays with our latest blog post and BE SURE TO READ IT to check to see if you are a winner EVERY WEEK. If you do not contact me within two weeks of the announcement of winning, you will forfeit your prize. NO EXCEPTIONS. Thank you for your understanding.

NOTE: If you are subscribed with two different names and I am unable to match you with your subscription to both the blog and the YouTube Channel, unfortunately you will be ineligible to win as I can’t decipher if you are a matching subscriber to both. Thank you for your understanding.

Our blog winners for this blog hop will be announced on our blog post on Monday Dec 18, 2017. This is open to everyone, not only the US! 

We are honored you have come to visit today. Don’t forget to use the

coupon code 2017WCLBHop to save 25% on your purchase!

We hope you will subscribe to our YouTube Channel, Blog/Newsletter updates and check out our website!

Happy Hopping and we hope you enjoyed going on A Creative Journey with Melissa.

melissa-written-signature

Seasons Greetings Rudolph Card

Seasons Greetings Rudolph Card Project is what we have for you today. This card is perfect for anyone that you want to share some holiday cheer with. We are having an awesome sale on our website too! Be sure to check it out as it is the best sale of the year and it ends soon!

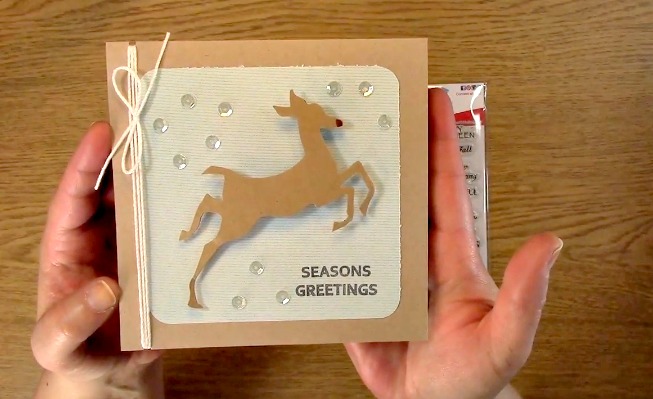
Now that we got the shopping out of the way… Are you ready to get crafty? Let’s get rollin! This is the adorable project we are creating – Seasons Greetings Rudolph Card Project!

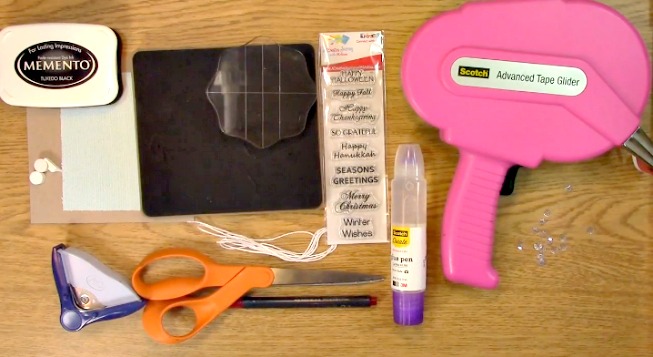
Supplies Needed for the Seasons Greetings Rudolph Card Project

A Creative Journey with Melissa Fall and Winter Holiday Sentiments Stamp Set

Acrylic Stamp Block

Card Base (5.5″ square)

Patterned Paper for Card Mat (4.5″ square)

Memento Ink

Corner Rounder

Tim Holtz Reindeer Flight Die

Iridescent Sequins

3-D Foam  Adhesive circles

Clear Liquid Adhesive

Tape Runner (ATG)

Sizzix Die Cut Machine and Platforms

Red Spica glitter pen

White Twine

Scissors

Beginning with the Patterned Card Mat Paper and corner rounder, round the corners of all four sides of your paper.

Take out your A Creative Journey with Melissa Fall and Winter Holiday Sentiments Stamp Set Acrylic Stamp Block  and Memento Ink.

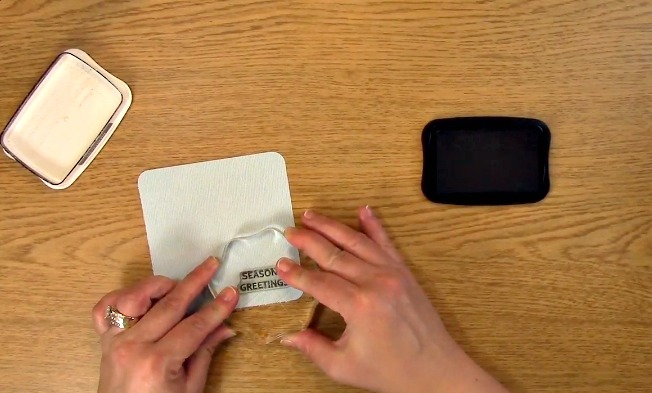
Peel off your Seasons Greetings Stamp and adhere to your acrylic stamp block.

Ink your stamp and stamp your sentiment on your patterned mat paper.


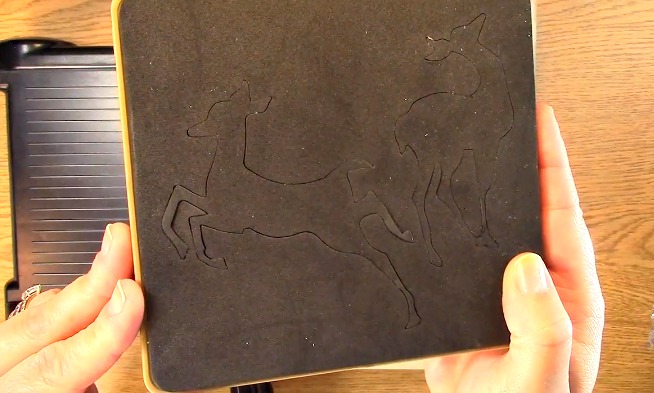
Take out your Tim Holtz Reindeer Flight Die.

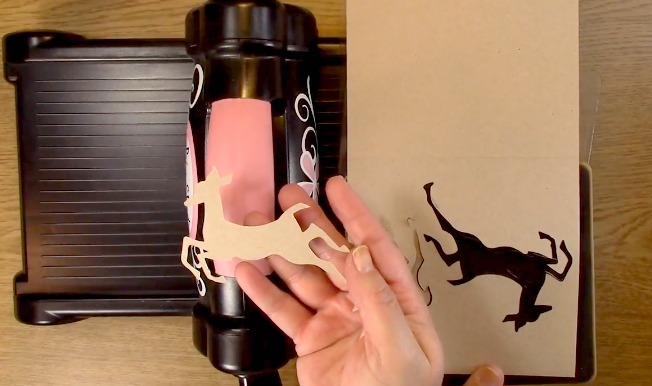
You will also need your Paper to die cut your reindeer as well as a Die Cut Machine and Die cut platforms. Place your paper on top of the die cut area on your die.

Using a clear platform, place one under your die and one on top of the paper you are cutting. Run the die cut “sandwich” through your die cut machine.

This is what the deer die cut will look like once cut for your Seasons Greetings Rudolph Card Project.

Take out your Red Spica glitter pen and color the end of the reindeer nose.

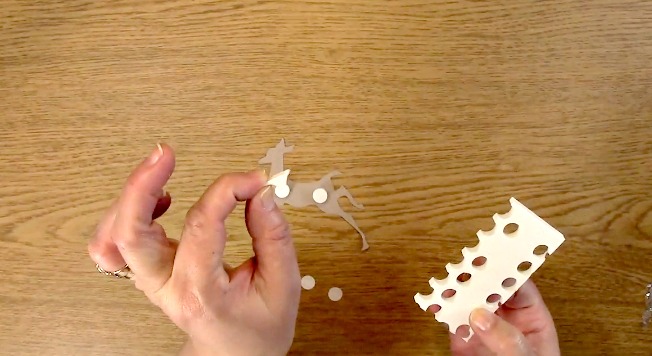
Take out your 3-D foam circles and place them on the back of the reindeer.

*Creative Tip: When you are finished using the foam circles, be sure to use the rest of the material as well. It works great for any area and you can cut it to any size or shape you need from what is left!

This is a perfect example of using the excess for a perfect shape of the head for the reindeer!

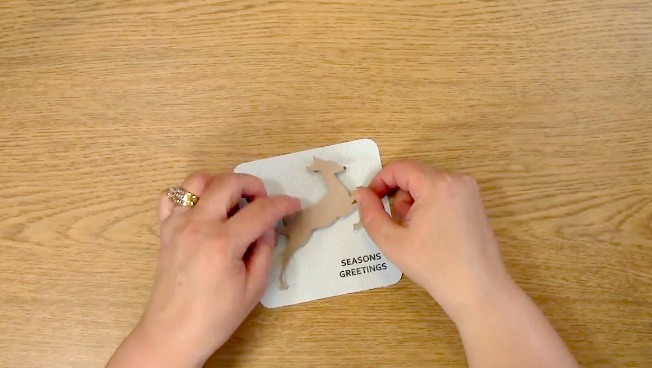
Remove the paper from the 3-D foam and place your reindeer on your stamped patterned card mat.


Place adhesive on your card front.

Place your reindeer card mat on top of the card front. Your Seasons Greetings Rudolph Card Project is coming along nicely.

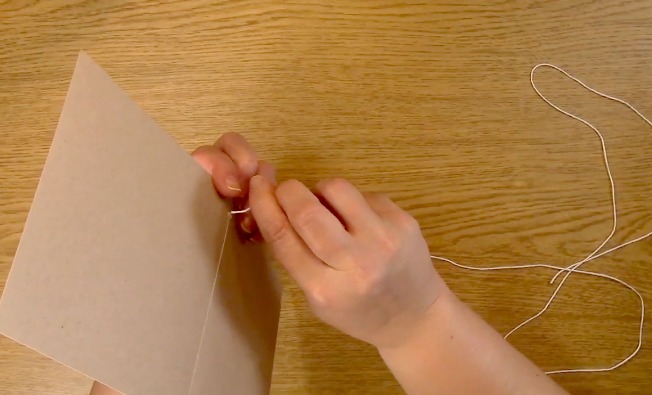
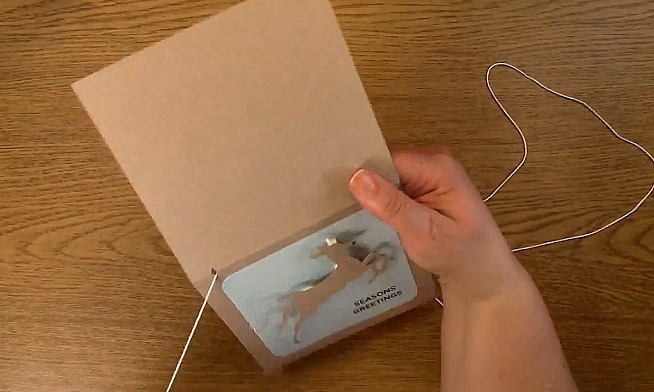
Cut a notch out of the top of the card and on the bottom only the front panel. You are doing this for the white twine.

Push your twine from the back of the card through to the front and repeat twice.

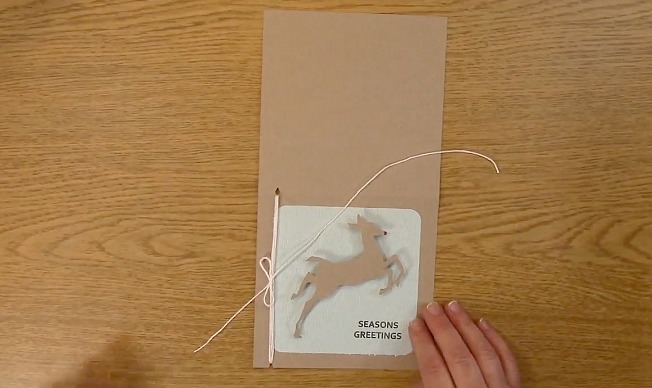
Tie your twine in a bow as shown and cut off the excess twine with your scissors.

*Creative Tip: Rather than retie your bow, if you gently bend your paper you can adjust where your bow is by moving your twine. Once you have it where you want it, gently release the bend and you are ready to go!

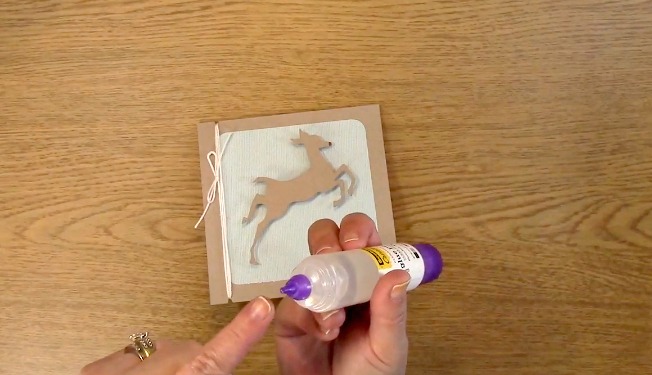
Using liquid adhesive with sequins, you will want a precise applicator tip. This liquid glue is perfect for the sequin application.

Place a small dot of liquid adhesive on each sequin and place on the card front.

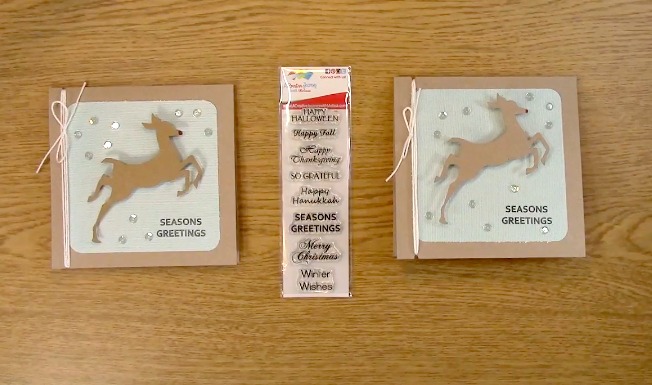
Here you can see on the left there is a more specific pattern for the Seasons Greetings Rudolph Card Project while the right card has a more scattered set of sequins on the card front.

For this weeks giveaway, we have the A Creative Journey with Melissa Fall and Winter Holiday Sentiments Stamp Set.

To qualify to win, you must be BOTH:

A public follower on YouTube, subscribe to our mailing list/blog posts and you may also comment on this blog post for an additional entry to win! Winners will be announced next week on our Mondays with Melissa blog post!

BE SURE TO check to see if you are a winner EVERY WEEK. If you do not contact me within two weeks of the announcement of winning, you will forfeit your prize. Thank you for your understanding.

Subscribe to BOTH with MATCHING NAMES to be eligible. If I am unable to match you with your subscription to both the email list and the YouTube Channel, you will miss your chance to win a prize. If I can’t decipher if you are a matching subscriber (if your profile doesn’t show publicly who you subscribe to) and I can’t confirm you have subscribed to both, you will not be eligible.

Now for last weeks GIVEAWAY we are giving away TWO STAMP SETS which means TWO WINNERS! We are giving away the A Creative Journey with Melissa You’re Snow Wonderful Stamp Set and the A Creative Journey with Melissa Snowflake Beauty Stamp Set.

The winners are Fit Kitty for the A Creative Journey with Melissa You’re Snow Wonderful Stamp Set

and Melissa Lopez wins the A Creative Journey with Melissa Snowflake Beauty Stamp Set.

Winners,  please send me your contact information via contact page on our website, which post you are a winner from and I will get your prize out to you! Thank you so much for being a YouTube follower and subscribing to our mailing list/blog posts!

Thank you for joining us for the Seasons Greetings Rudolph Card Project . I hope I have inspired you to create something that can be a tradition and keepsake for years to come! Please be sure to share what you come up with!

Have a wonderful week and thank you for going on A Creative Journey with Melissa.
Yearly Handmade Ornament Tradition

Yearly Handmade Ornament Tradition is what we have for you today. If you don’t already have a family tradition, no better time than the present to start one TODAY! This project is super easy and can be done every year for your tree, family, friends and even as gifts! Are you ready? Well, before we get started on the Yearly Handmade Ornament Tradition Project, we are having an awesome sale now through 11/30! Be sure to check it out and no coupon needed! Now, let’s get CREATIVE!

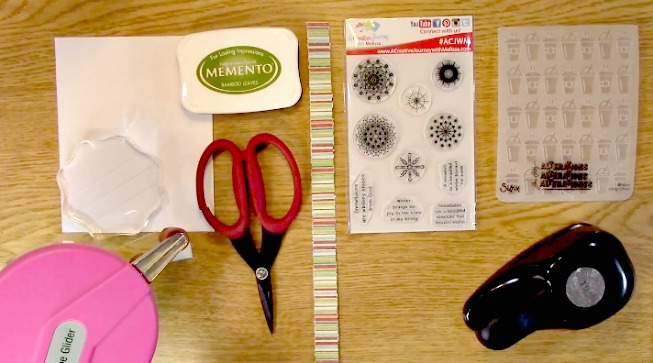
Supplies Needed for the Yearly Handmade Ornament Tradition Project

Crop A Dile

5- Patterned paper cut 1/2″ x 5″

5- Colored Paper without pattern cut 1/2″ x 5″

Red Twine 6″ long

Red Acid Free Pen

Scissors

2 Red Brads (mine have glitter to add a little sparkle)

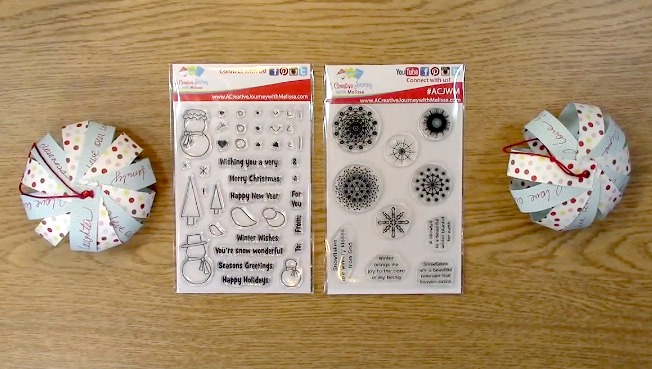
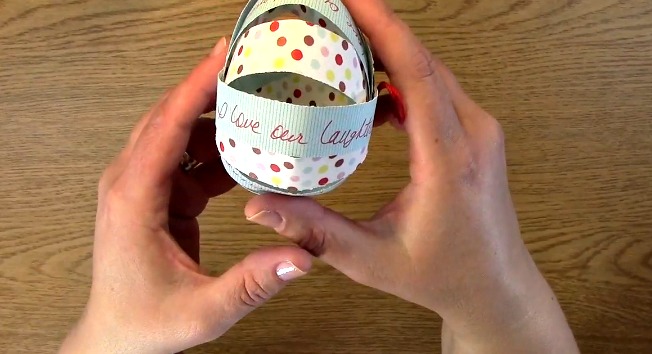
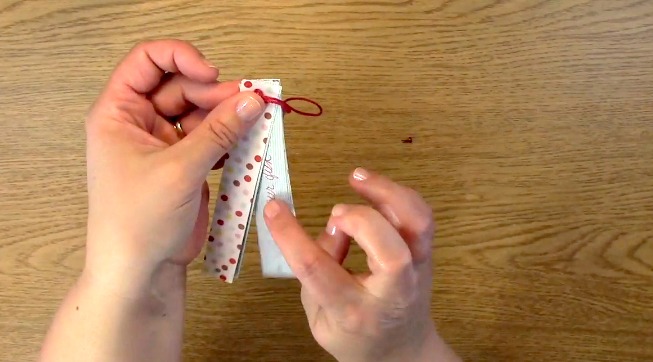
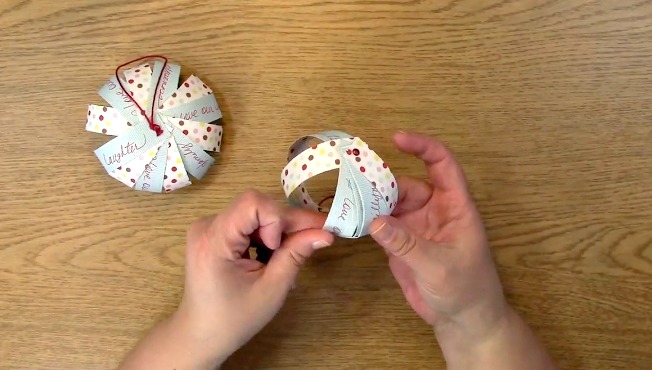
This is a side view of the Yearly Handmade Ornament Tradition Project I created. I written five of things that I love.. This shows  I love our laughter… And I really do!


To begin this project, take out your non patterned paper and acid free pen.

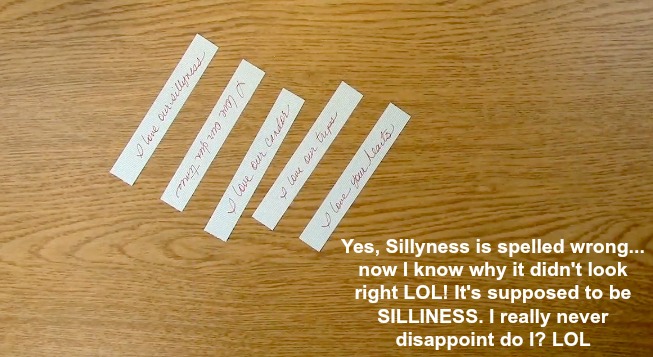
Using my red pen, I wrote five different things that I love about our family. I also spelled silliness wrong even said it didn’t look right in the video but it happens… lol

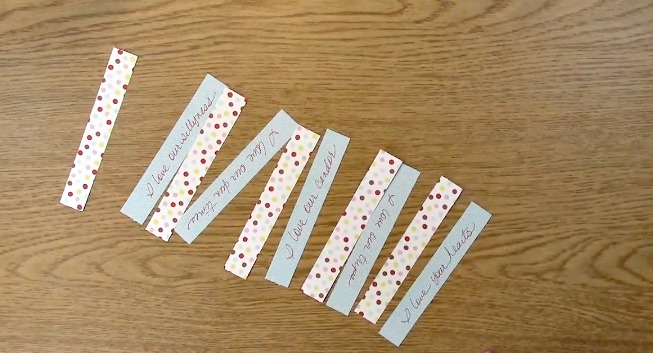
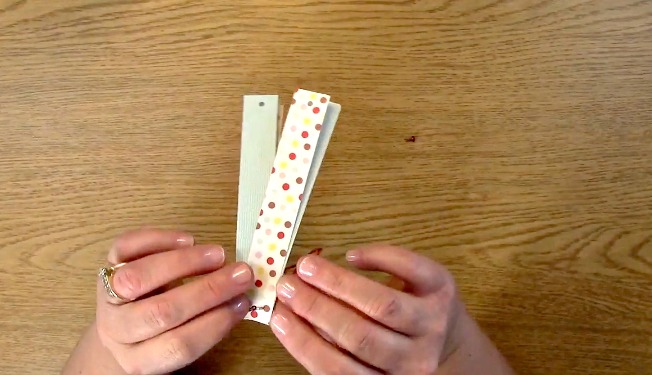
Take the written papers and patterned paper and switch every other one as shown above.

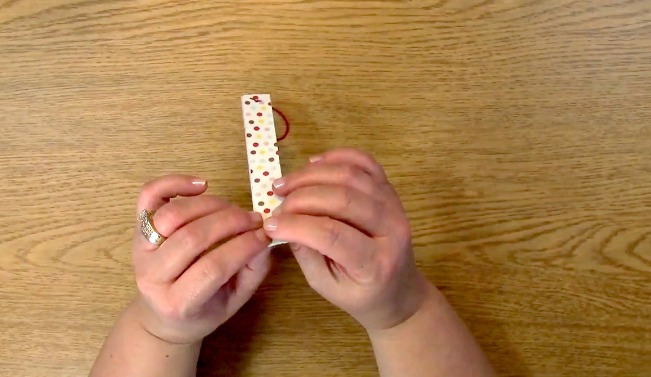
Put them in order in a concise pile as shown.

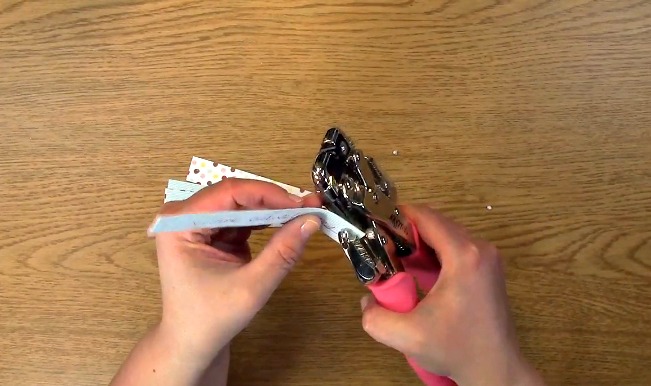
Using your Crop A Dile, punch holes in one side of the pile approximately 1/2 – 3/4 ” from the end of the paper.

Flip one of the papers around and use it as a guide. Punch a hole through the other side of the papers.

Now, you only have one paper with one side that doesn’t have a hole. Match that one up and punch the hold in the remaining side.

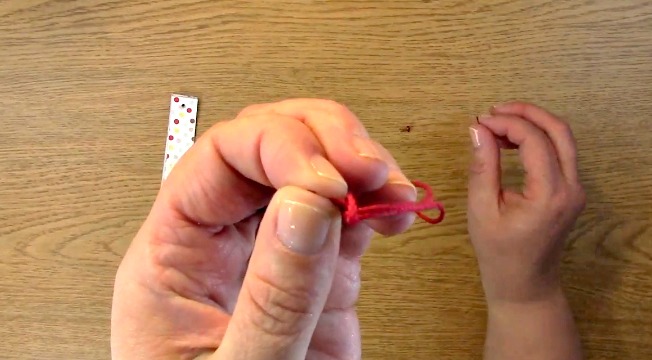
Take your twine and tie a knot at the end of the cut pieces. Do not make it a tight knot.

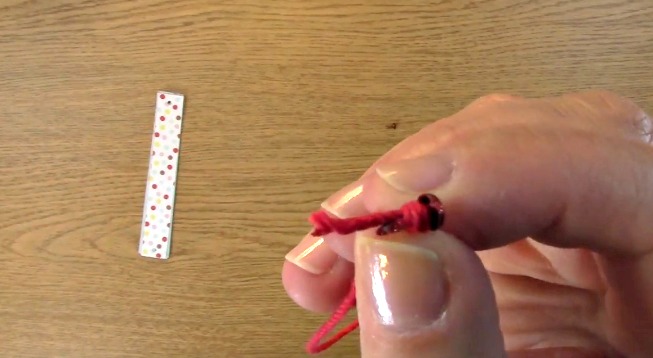
Take one of your brads and place the feet of the brad (pointy leg part LOL) and place it inside the knot as shown. Pull the knot tightly to keep it in place.

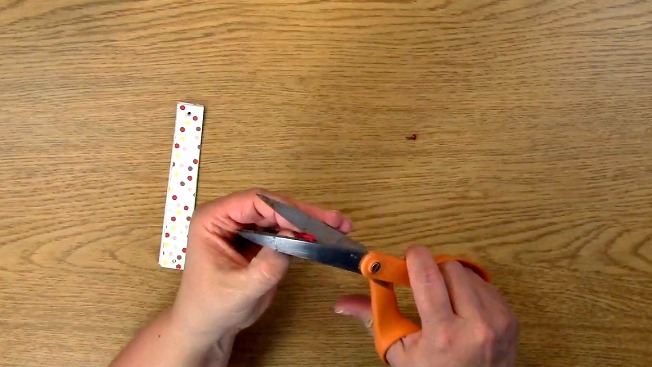
Trim the excess twine relatively close to the knot without unraveling it.

Place your brad/twine into the side where the writing is showing like above.

Open up the brad legs to keep the papers held together. You do not need to have it super tight or else you will not be able to manipulate the paper into an ornament.

Put your second brad into the hold on the other side of the paper as shown. Make sure the top of the brad is on the same side as the other one with the twine. This will give a cleaner look on the outside of the ornament once it is complete.

Like the other brad, you will also open the legs on the brad up so it keeps the paper in place but not too tight or else again, you won’t be able to create the ornament.

This is what the back of the paper looks like once brads are placed.

Here is what the front looks like with the brads and twine showing.

For the design of the Yearly Handmade Ornament Tradition Project, you can either make a slight rounded look or you can fold in half gently to give the look that I used. Either way looks great!

Separate your papers like shown above, one paper at a time.

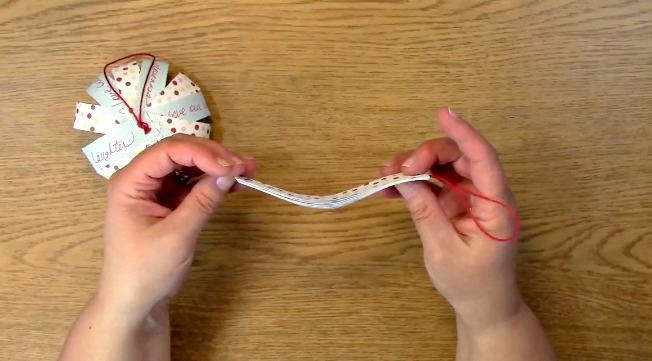
The best way to try to get it relatively even is to compress the ornament so that you can see how it lines up as shown. This will give you a much better visual to see where the papers align. You will NOT get it perfect. Trust me from experience LOL!

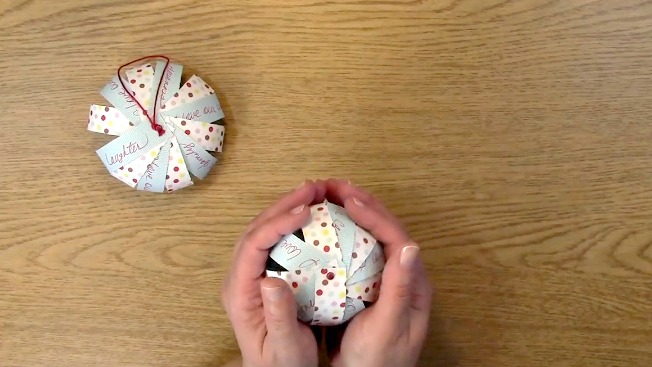
Now, take your ornament and squeeze it gently into a ball shape as shown. This gives a great rounded look as shown to the above left.

This is the completed Yearly Handmade Ornament Tradition Project. You can see the top on the left and the side on the right.

Now for this weeks GIVEAWAY we are giving away TWO STAMP SETS which means TWO WINNERS! We are giving away the A Creative Journey with Melissa You’re Snow Wonderful Stamp Set and the A Creative Journey with Melissa Snowflake Beauty Stamp Set.

To qualify to win, you must be BOTH:

A public follower on YouTube, subscribe to our mailing list/blog posts and you may also comment on this blog post for an additional entry to win! Winners will be announced next week on our Mondays with Melissa blog post!

If you do not contact me within two weeks of the announcement of winning, you will forfeit your prize. Thank you for your understanding.

Subscribe to BOTH with MATCHING NAMES to be eligible. If I am unable to match you with your subscription to both the email list and the YouTube Channel, you will miss your chance to win a prize. If I can’t decipher if you are a matching subscriber (if your profile doesn’t show publicly who you subscribe to) and I can’t confirm you have subscribed to both, I won’t be able to enter you in for the prize. **DO NOT COMMENT WITH YOUR ENTIRE EMAIL ADDY. Only give me the first 6 NOT INCLUDING YOUR HOST. Just enough for me to match your name will work perfectly.

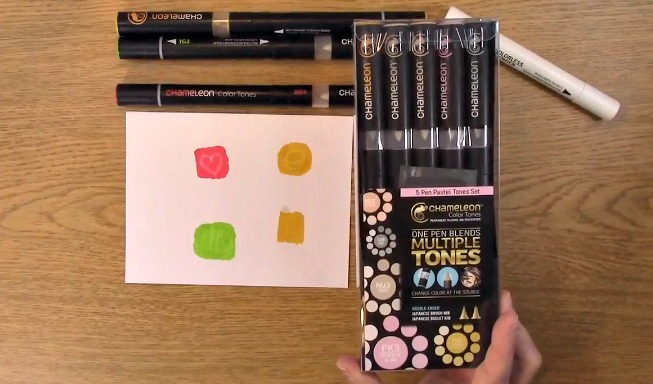
 Now for last  weeks GIVEAWAY we are giving away the Chameleon Pen set! The winner is Sue D!

Sue D,  please send me your contact information via contact page on our website, which post you are a winner from and I will get your prize out to you! Thank you so much for being a YouTube follower and subscribing to our mailing list/blog posts!

Thank you for joining us for the Yearly Handmade Ornament Tradition Project . I hope I have inspired you to create something that can be a tradition and keepsake for years to come! Please be sure to share what you come up with!

Have a wonderful week and thank you for going on A Creative Journey with Melissa.
 

Stampin Up Trim Your Stocking Outside of the Box

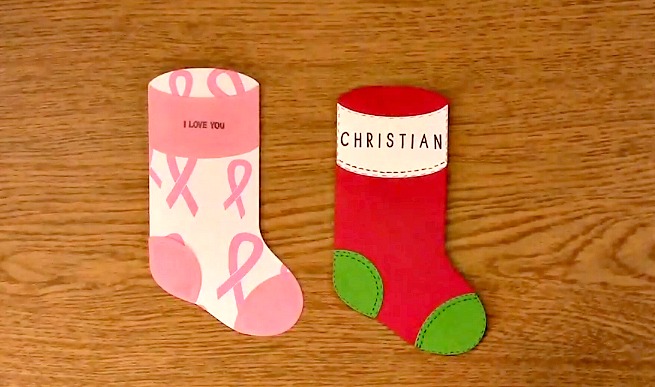
Stampin Up Trim Your Stocking Outside of the Box is what we have for you today. We have a die that we figured out how to use it for something outside of the box..

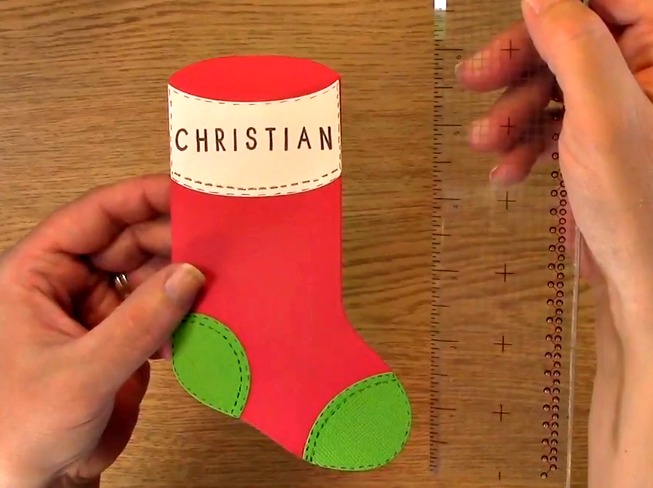
I made what you would expect, a Christmas stocking, with the die set. As you can see, this die is a nice size. It is approximately 6″ in length.

After making the Christmas stocking, I then thought why not think outside of the box? We created A Breast Cancer Awareness Gift Card and thought you would want to check it out too! Breast Cancer Awareness Month is October and what better way than to bring awareness to Breast Cancer than to put together a gift card holder for a loved one that is battling this horrible disease?

Supplies Needed for the Stampin Up Trim Your Stocking Outside of the Box Project

A Creative Journey with Melissa Awareness Ribbon #3 – Ready for a Fight Stamp Set

Trim Your Stocking Thinlits Dies by Stampin’ Up!

Acrylic Block for stamping

Adhesive

Black Memento Ink

Pink Ink

White card stock

Pink Paper (I used suede paper)

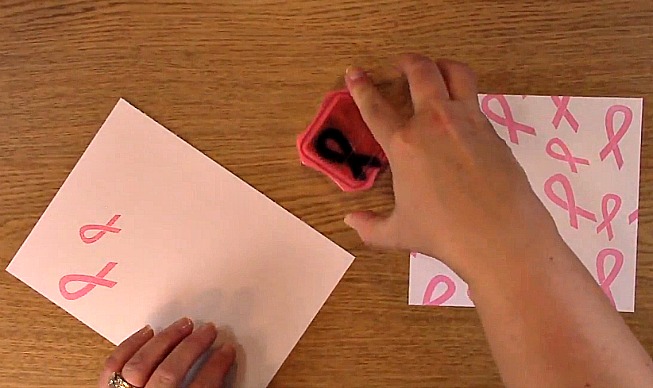
Place the awareness ribbon stamps on your stamp block. Ink your stamp block with pink ink and stamp on your white paper using a varying pattern.

This is how I made my own background paper for this creation.

Take out your manual die cut machine, base platform and clear platform.

Get your stocking die out from the set.

Place your awareness ribbon background paper down on your clear platform. Put your die on top of that cutting side down. Place your second clear platform on top of the die.

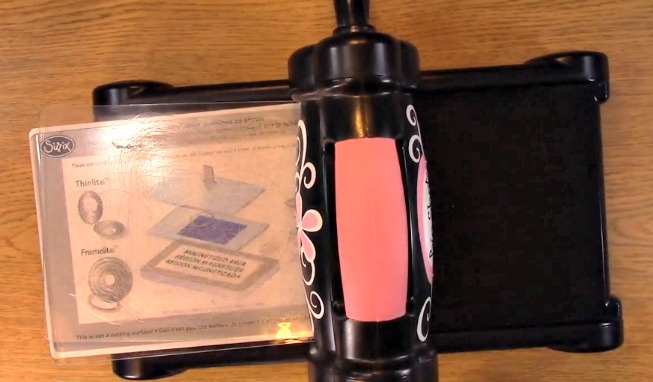
Run your die through the machine and set the die cut piece aside. Set the stocking die and the leftover paper aside as well.

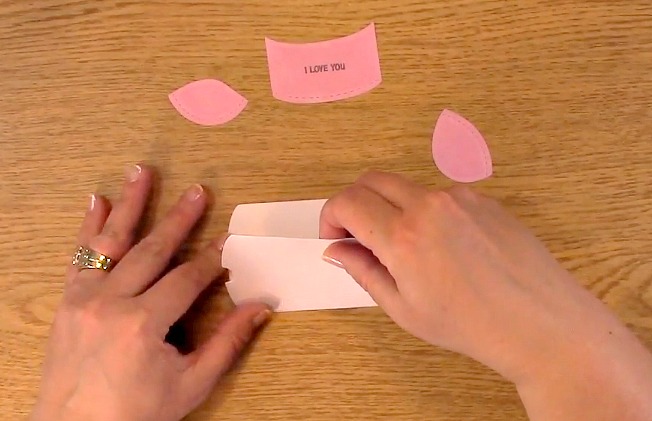
Take out your plain white paper and place pillow box die on top of it. Place your clear platform on top of the die. Run your pillow box die through the die cut machine.

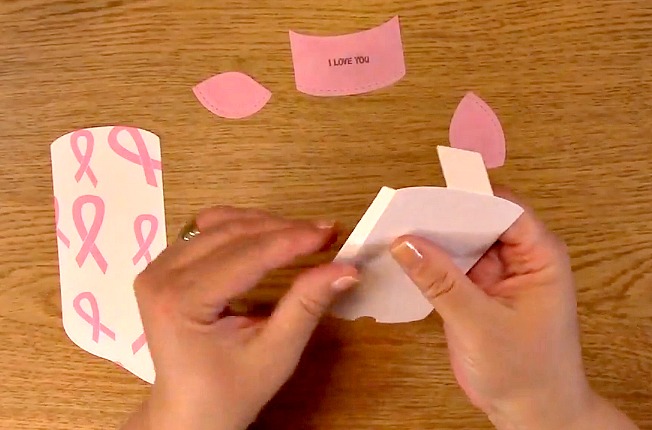
This is what your cut pieces from your dies will look like.

Using the A Creative Journey with Melissa Awareness Ribbon #3 – Ready for a Fight Stamp Set, take out the sentiment of your choice. I chose I love you for the sentiment.

Ink and stamp your sentiment on your pink paper.

Using the stocking trim dies, cut your stocking top, toes and heal parts from your pink paper. Center your sentiment in the top of the stocking die.

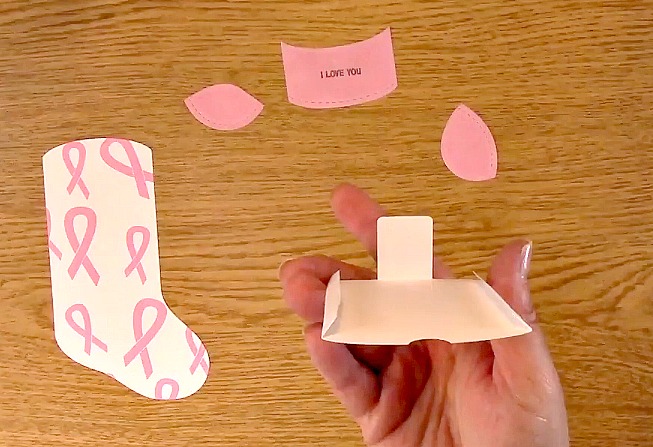
Here are the cut out pieces for the stocking. Set these pieces aside.

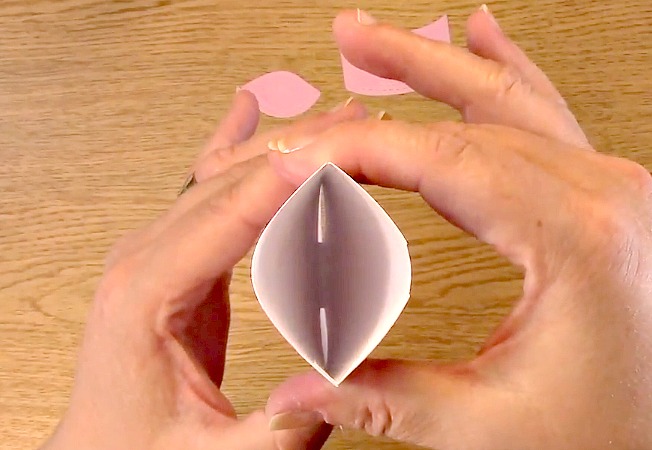
Take out your pillow box die cut. Fold in the tab at the bottom of the die. This tab will hold in your gift card once it is placed inside.

Fold in the two sides toward the center of the die. This is where you will be gluing it to the stocking.

Here it shows what it will look like once you have finished folding the pillow box for the Stampin Up Trim Your Stocking Outside of the Box Project.

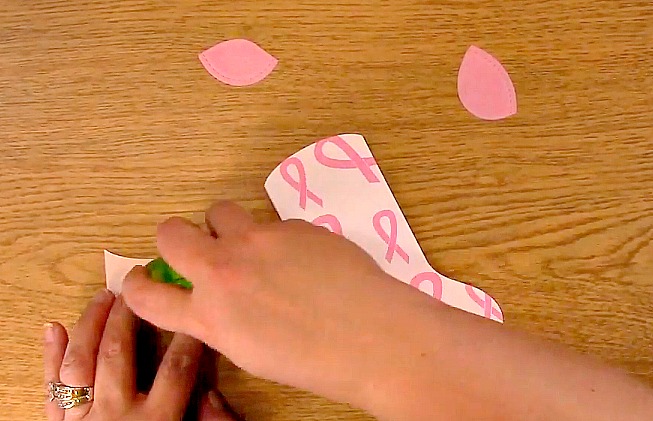
Apply adhesive to the tab as well as the two sides you folded in.

Line up the sides to the back of the stocking die. The stocking die and the pillow box die will not line up at the bottom.

Here is a side view of what it will look like once you have lined up the sides and them are compressing the two sides together.

Be sure to push down on all areas that were glued to ensure its adhesion.

This is the gift card holder once it is glued.

Place adhesive on the back of the three pink pieces for your stocking.

Notice the embossed curved line here? You will use this as a guide.

Line up the top of the stocking with the sentiment to the embossed curved line.

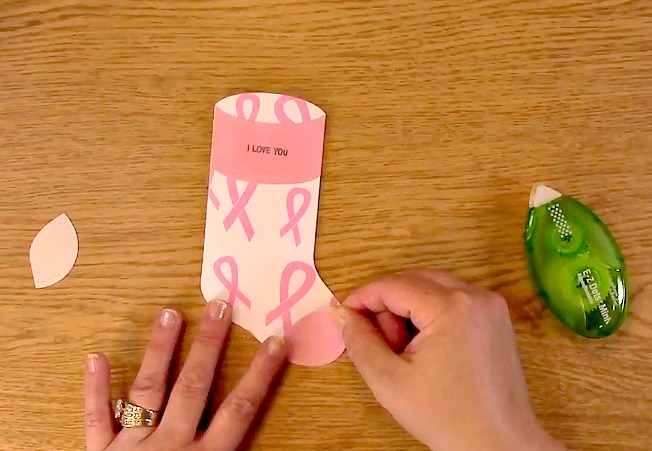
Place the larger die cut piece on the toe of the stocking.

Put the smaller remaining piece on the heal part of the stocking as shown.

They are complete! Isn’t it amazing what you can do if you just think outside of the box? If you are interested in any of the die sets or the paper trimmer from Stampin’ Up, check out Brandie’s Website Here and you can order your own!

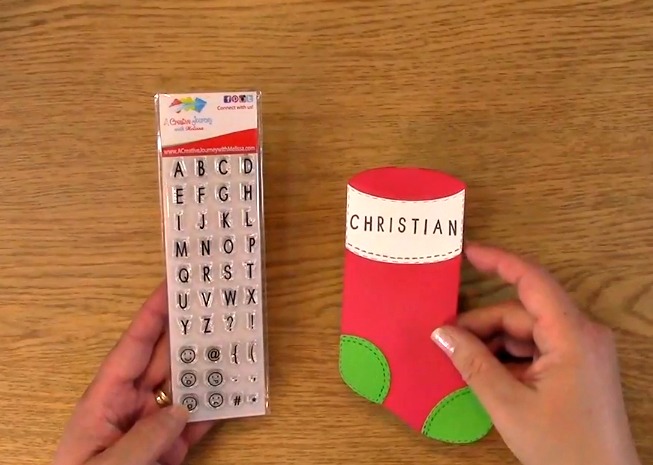
 Now for this weeks GIVEAWAY! We are giving away the A Creative Journey with Melissa Everyday Alphabet Upper Case and Emoticon stamp set

and the A Creative Journey with Melissa Awareness Ribbon #3 – Ready for a Fight Stamp Set

I have had a number of people say how much they love these stamp sets for organizing, their planners, lists and just about everything else under the moon so I thought this would be the perfect prize for this week. TWO winners – one for each set!

To qualify to win, you must be BOTH:

A public follower on YouTube, subscribe to our mailing list/blog posts and you may also comment on this blog post for an additional entry to win! Winners will be announced next week on our Mondays with Melissa blog post!

If you do not contact me within two weeks of the announcement of winning, you will forfeit your prize. Thank you for your understanding.

NOTE: You must be subscribed to BOTH with MATCHING NAMES. If I am unable to match you with your subscription to both the email list and the YouTube Channel, you will miss your chance to win a prize. If I can’t decipher if you are a matching subscriber (if your profile doesn’t show publicly who you subscribe to) and I can’t confirm you have subscribed to both, I won’t be able to enter you in for the prize. **DO NOT COMMENT WITH YOUR ENTIRE EMAIL ADDY. Only give me the first 6 NOT INCLUDING YOUR HOST. Just enough for me to match your name will work perfectly.

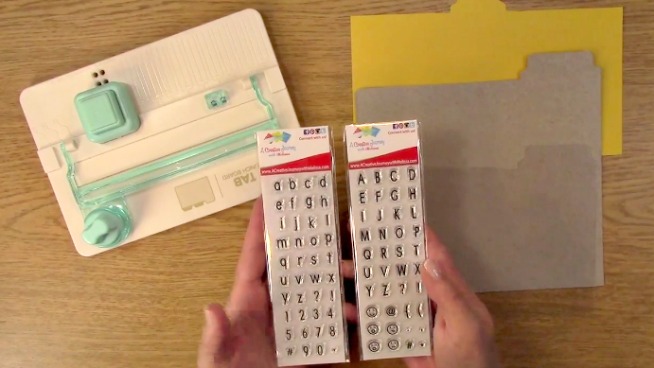
Here’s the GIVEAWAY from last weeks post which is the A Creative Journey with Melissa Everyday Alphabet Upper Case and Emoticon stamp set and the A Creative Journey with Melissa Everyday Alphabet Lower Case and Numbers Stamp Set.

The winner is Verna A. AGAIN!

Verna,  please send me your contact information via contact page on our website, which post you are a winner from and I will get your prize out to you! Thank you so much for being a YouTube follower and subscribing to our mailing list/blog posts!

 We hope you enjoyed our Stampin Up Trim Your Stocking Outside of the Box post!

Have a wonderful week and thank you for going on A Creative Journey with Melissa.
 

Crafting with Cereal Boxes

Crafting with Cereal Boxes is what we have for you today. Did you know you can repurpose cereal boxes? Did you know they are cuttable not only by your punches but by electronic cutting machines? They really are and I am going to show you how easy it is! You will be asking people for THEIR cereal boxes!

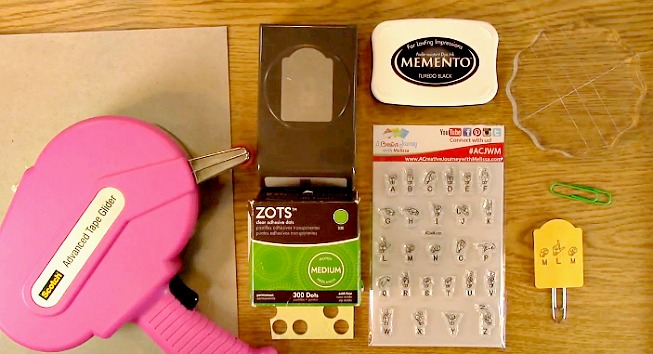
Supplies needed for the Crafting with Cereal Boxes Project

A Creative Journey with Melissa Sign Language Alphabet Stamp Set

Stamping Block

Adhesive

Ink

Cereal Box

Paper Clip

Foam Dots/Squares

Glue Dots

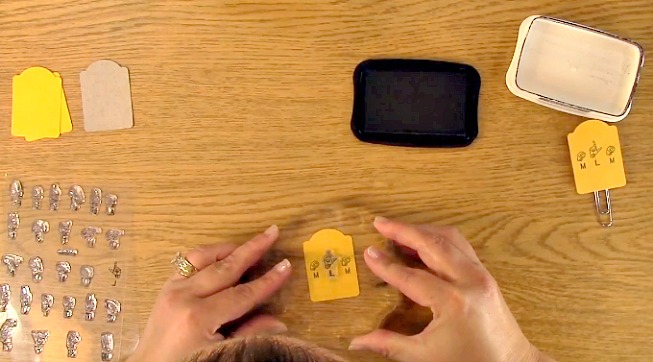
Here is the project we are going to create. It’s cute and is super quick BUT think about ALL OF THE AMAZING THINGS YOU CAN CREATE WITH CEREAL BOXES!!!  And your PUNCHES WORK TOO!!  YES! What great gifts you can make doing the Crafting with Cereal Boxes Project.

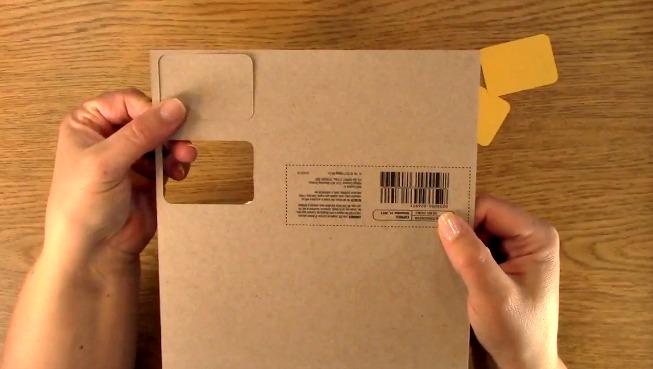
Here is close to the cereal box I started with.

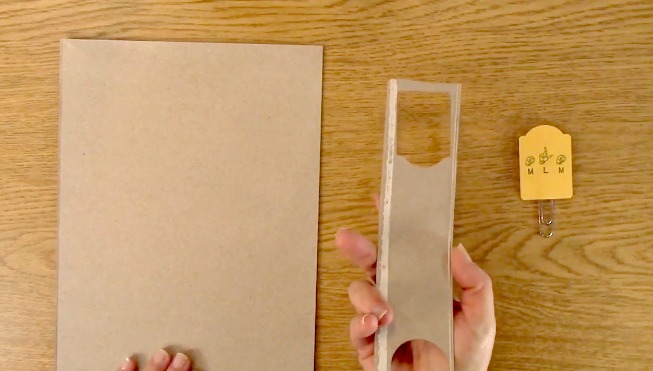
I cut off the areas that would not be useful. Keeping the sides for me was a good idea for small punched or cut out items. 

You can also use your ELECTRONIC DIE CUT MACHINE! Above, I used my Brother Scan and Cut 2. When using your electronic die cutting machine, be sure to change the settings so that the machine and the blade are for a much more rigid item.

Check with your machine’s manual or the manufacturers website for further information.

YOU CAN ALSO USE your punches on your cereal boxes! Perfect for  your Crafting with Cereal Boxes Project! Now let’s start creating!

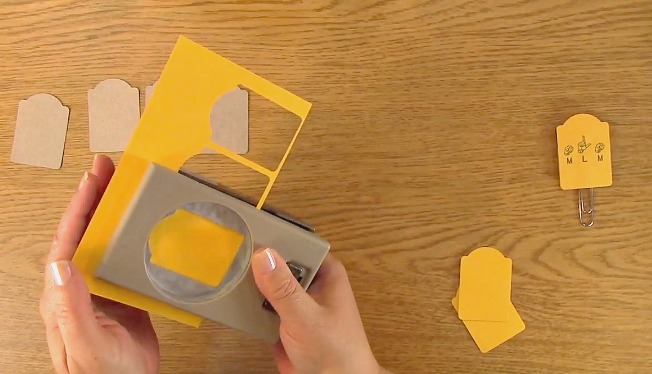
Take out your cereal box and punch. Punch your cereal box. Set box aside.

Take out your paper and punch out three pieces for your clip.

NOTE: If you are going to create this, I would suggest covering the inside back side of the clip so that the cereal box printing doesn’t show OR you can flip it over so it just shows the chipboard looking side. In my  video example, I covered both sides of the back which is why I punched three of the tag out.

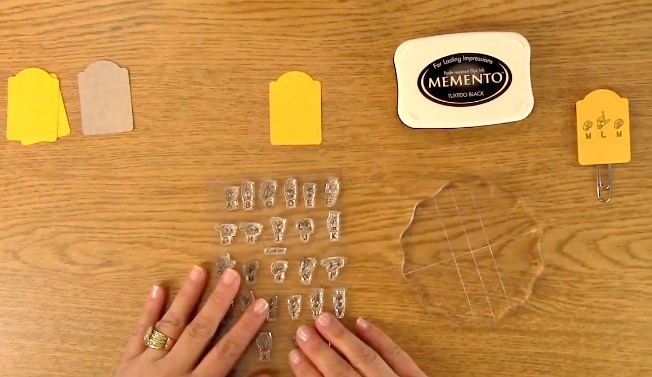
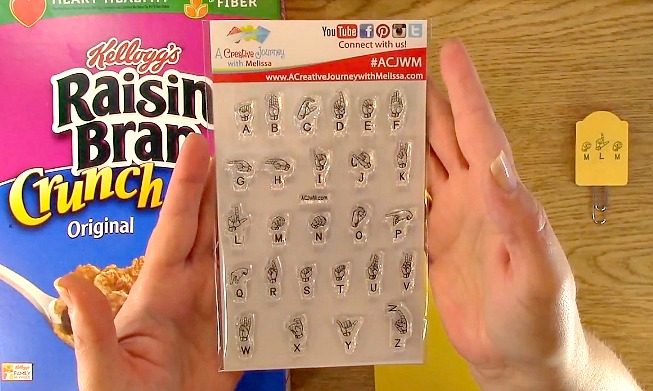
Take out your A Creative Journey with Melissa Sign Language Alphabet Stamp Set. Pick out the letters you wish to use for your clip. 

Place your stamps on your block.

Ink your stamp.

Stamp your image or images on your tag for you Crafting with Cereal Boxes Project.

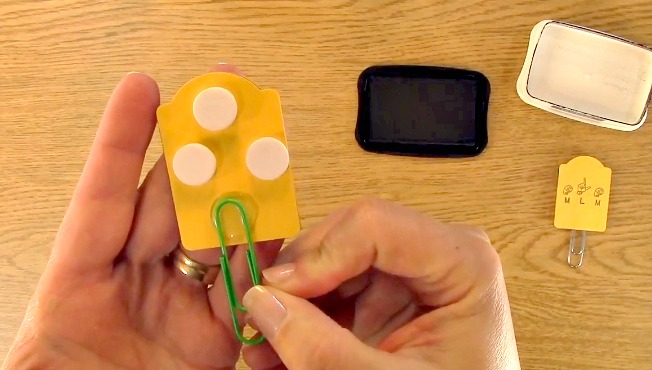
Place your foam dots on the back of your cereal/paper covered tag.

Put your glue dot on the bottom of your Crafting with Cereal Boxes Project tag.

Using your paperclip, place it on the glue dot.

Be sure you are placing it low enough so that your clip can be used and is not blocked by the adhesive.

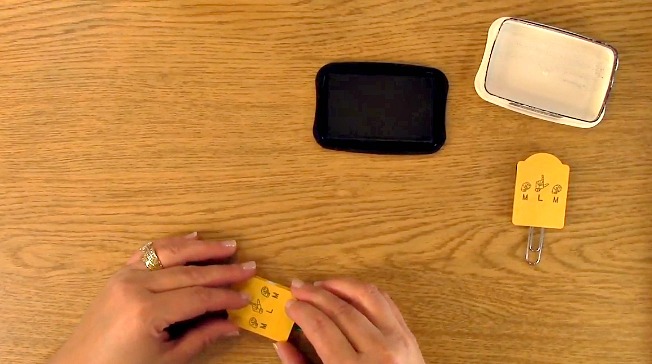
Place the stamped tag on top of your tag with the clip on it.

YOU ARE DONE with the Crafting with Cereal Boxes Project! Now what are YOU going to do with the cereal boxes you save? Please let me know what you create! I can’t wait to hear about it!

Now, for the GIVEAWAY!

 This week we are giving away the A Creative Journey with Melissa Sign Language Alphabet Stamp Set!

To qualify to win, you must be BOTH:

A public follower on YouTube, subscribe to our mailing list/blog posts and you may also comment on this blog post for an additional entry to win! Winners will be announced next week on our Mondays with Melissa blog post!

If you do not contact me within two weeks of the announcement of winning, you will forfeit your prize. Thank you for your understanding.

NOTE: Be sure you are subscribed to BOTH with MATCHING NAMES. If I am unable to match you with your subscription to both the email list and the YouTube Channel, you will miss your chance to win a prize. If I can’t decipher if you are a matching subscriber (if your profile doesn’t show publicly who you subscribe to) and I can’t confirm you have subscribed to both, I won’t be able to enter you in for the prize. **DO NOT COMMENT WITH YOUR ENTIRE EMAIL ADDY. Only give me the first 6 NOT INCLUDING YOUR HOST. Just enough for me to match your name will work perfectly.

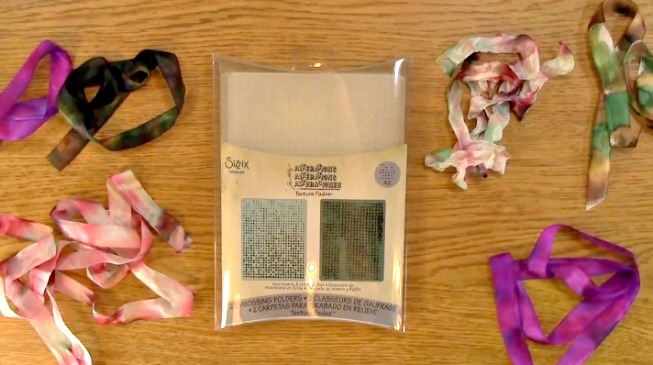
Now, for the last weeks GIVEAWAY of the double embossing folder set from Tim Holtz!

The winner is  Tonya!

Tonya, please send me your contact information via contact page on our website, which post you are a winner from and I will get your prize out to you! Thank you so much for being a YouTube follower and subscribing to our mailing list/blog posts!

 We hope you enjoyed our Crafting with Cereal Boxes Project! Have a wonderful week and thank you for going on A Creative Journey with Melissa.  
 

SAVE MONEY: Create Custom Candles using Stamps and Photos

SAVE MONEY: Create Custom Candles using Stamps and Photos is what we have for you today. Have you ever seen an awesome candle with a picture on it and thought WOW! That is cool? Well, you are going to learn not only how to do it but how simple it is too! Ready? Let’s get started!

Supplies Needed for the SAVE MONEY: Create Custom Candles using Stamps and Photos Project

A Creative Journey with Melissa For My Boys Stamp Set

Acrylic Stamp Block

Embossing/Heating Tool or Hair Dryer

Scissors

Memento Ink

Inexpensive Candle

Scotch Tape

Tissue paper

Wax Paper

Copy Paper

Candle

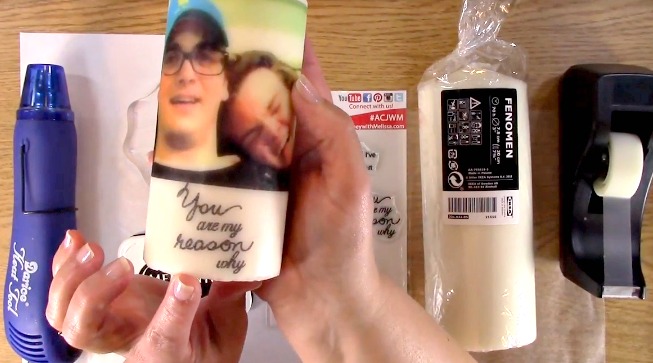
This candle was created with out using stamps.

I used the A Creative Journey with Melissa For My Boys Stamp Set for the sentiment on this candle.

To begin the Create Custom Candles using Stamps and Photos Project,

take out your scotch tape, copy paper and tissue paper. Cut a piece of tissue paper that will fit on the copy paper and in the area in which you wish to print.

Use the copy paper as a guide to where your picture will print and place your tissue paper accordingly.

sing the scotch tape, tape the edges of the tissue paper to the copy paper. specifically the corners and in between the corners.

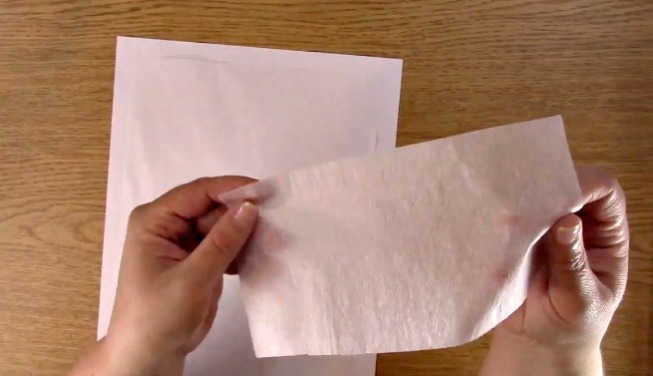
This is the tissue paper I used. This is not fancy tissue paper. This was generic white tissue paper and nothing fancy about it.

Double check to be sure that the edges of the tissue paper are not sticking up. You do not want them to get caught in the printer.

I used a rear feeding printer. My Epson 3640 feeds either way and this is not a fancy printer.

I believe I got it on sale for under $150.00 and I love it! The normal settings for general printing is what I used. I did not set it to the picture settings. The concern I had was that my front loading printer would rip the tissue paper or get caught. When the paper goes through the printer, it looks like the above picture which could cause more issues.

Now I am ready to print! I placed my paper in the printer facing up in the rear feeder. I simply used Microsoft word to print the picture.

This is what it looked like once it had been printed.

If you look closely (look at the circle) there is a little splotch of ink from the printer. I have no idea why but don’t worry! We will be cutting that area off so it won’t end up on the candle.

Take out your A Creative Journey with Melissa For My Boys Stamp Set for the sentiment for the Create Custom Candles using Stamps and Photos Project. Place your sentiment on your acrylic block.

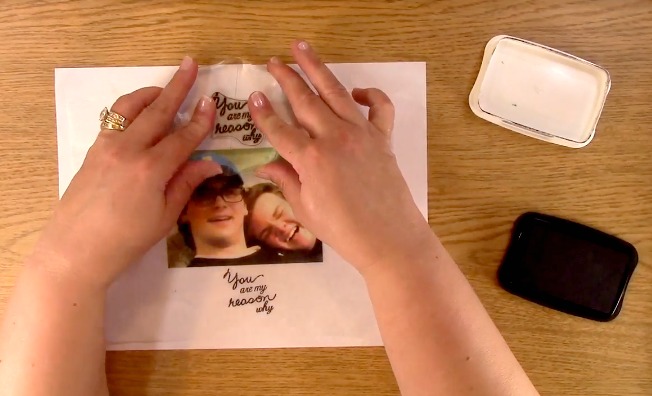
Ink your sentiment and stamp it where you would like it on your tissue paper.

Well, I don’t like what it looks like.. It is a little crooked.

Well, if this happens to you, don’t worry! Improvise for your Create Custom Candles using Stamps and Photos Project!

The good news? I can stamp it on the top of the picture and I actually think I like it more!

Take out your scissors. Trim the tissue paper so that it will fit on your candle only keeping the areas in which you want to end up on your candle.

This is what I ended up with. You can see how transparent it is.. you can even see my fingers through the picture! Pretty cool, huh?

Now for the fun! I used an Ikea candle but you could really use any candle. Dollar store candles would work fine.

Take out your wax paper. I used wax paper I had in the house. Again, nothing fancy. Cut a piece that will fit around your candle with a little extra. This helps to hold the candle when using the heating tool.

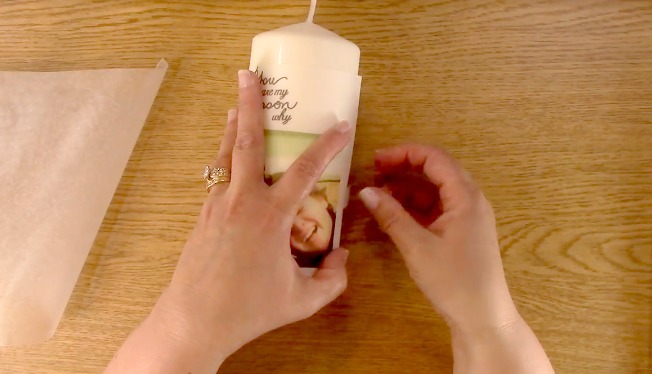
Place your tissue paper image on your candle.

I used scotch tape to line up the image on the candle and then removed it before I went any further.

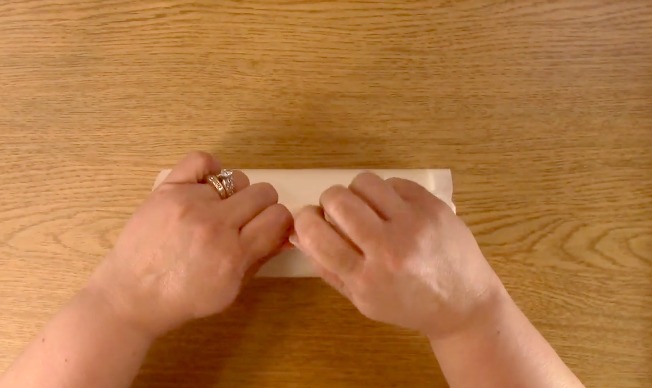
Take out your wax paper. Carefully, roll the candle with image so that it stays in place.

Roll up the other side of the wax paper.

Gather the wax paper at the top.

Fold over the wax paper as shown. This helps to create a small handle for you to hold onto.

This is a top view to show you how it looks once folded.

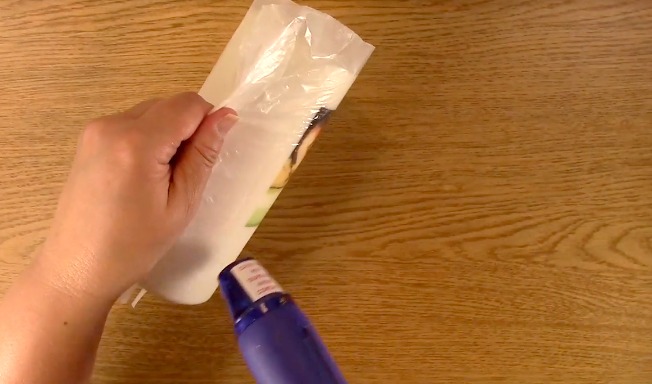
Take out your heating tool and turn it on. Moving the heating tool back and forth with some space between it and the candle, begin to heat the image. Notice how dull and how it looks like it has a matte finish.

As you heat the image, it starts to look shiny and almost 3-D of color compared to what it looked like in the beginning. Look at the difference between the top and the bottom of the image on the candle.

Make sure you heat the entire image. This is what allows the image to embed in the candle.

Take special care of the edges of the tissue paper.

You want to be sure it is heated thoroughly.

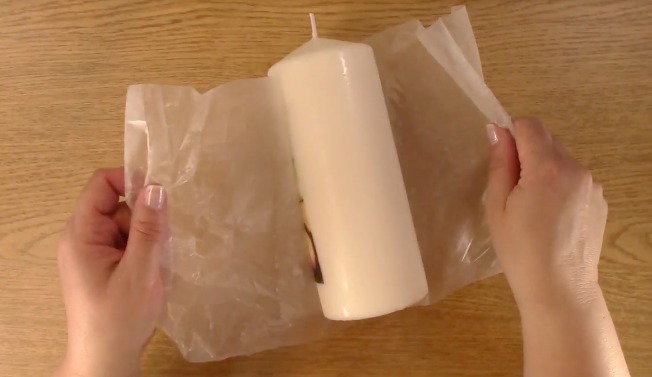
Once you have finished heating the image completely, slowly and carefully take off the wax paper.

This is what it looks like as it is coming out of the wax paper. PRETTY NEAT, HUH?

Here is a close up of what the candle looks like once it is complete.

Whether you like the SAVE MONEY: Create Custom Candles using Stamps and Photos Project  with a sentiment, a picture, stamped images or a combination of all of it, the possibilities are ENDLESS!

Now, for the GIVEAWAY!


 This week we are giving away the A Creative Journey with Melissa For My Boys Stamp Set as featured in this post and the above video!!

To qualify to win, you must be BOTH:

A public follower on YouTube, subscribe to our mailing list/blog posts and you may also comment on this blog post for an additional entry to win! Winners will be announced next week on our Mondays with Melissa blog post!

If you do not contact me within two weeks of the announcement of winning, you will forfeit your prize. Thank you for your understanding.

NOTE: Be sure you are subscribed with matching names. If I am unable to match you with your subscription to both the email list and the YouTube Channel, you will miss your chance to win a prize. If I can’t decipher if you are a matching subscriber (if your profile doesn’t show publicly who you subscribe to) and I can’t confirm you have subscribed to both, I won’t be able to enter you in for the prize. **DO NOT COMMENT WITH YOUR ENTIRE EMAIL ADDY. Only give me the first 6 NOT INCLUDING YOUR HOST. Just enough for me to match your name will work perfectly.

Now, for the last weeks GIVEAWAYS! We are giving away TWO STAMP SETS!

The winner of the A Creative Journey with Melissa Tie Die and Splatter Stamp Set is Babe O!

The winner of the A Creative Journey with Melissa Spring and Summer Holiday Celebrations Stamp Set  is KT!

Babe O. and KT, please send me your contact information via contact page on our website, which post you are a winner from and I will get your certificate prize out to you! Thank you so much for being a YouTube follower and subscribing to our mailing list/blog posts!

 We hope you enjoyed our SAVE MONEY: Create Custom Candles using Stamps and Photos Project! Have a wonderful week and thank you for going on A Creative Journey with Melissa.  


2017 Spring Coffee Lovers Hop

The 2017 Spring Coffee Lovers Hop is where you are! If you happened to come by here by chance, you are in LUCK! We are taking part in a PRIZE FILLED SUPER DE DUPER AWESOME (Did I just channel Barney? LOL) Spring Coffee Lovers Hop! The hashtag is #spring2017clh if you want to connect with us in the various social media platforms. Who doesn’t LOVE SPRING and COFFEE? Well that is EXACTLY what we are highlighting! Whether it is coffee, tea, or cocoa; you have come to the right place! Sounds great right? We are really honored and excited to be one of the SUPER SPONSORS & FLASH PRIZE SPONSOR for this amazing blog hop AND we are also doing a giveaway RIGHT HERE ON OUR BLOG!

Be sure to subscribe to our blog post/newsletter list and subscribe to our YouTube Channel to be eligible to win OUR 2017 Spring Coffee Lovers Hop GIVEAWAY.

To start at the beginning of the 2017 Spring Coffee Lovers Blog Hop please click HERE.

The 2017 Spring Coffee Lovers Hop runs

Friday, March 24 starting at 6:00 AM Pacific Time thru Friday, March 31.

Winners for the Coffee Lovers Hop will be posted on Sunday, April 2nd on the Coffee Lovers Blog HERE.

Winners from OUR BLOG  for the Coffee Lovers Hop will be announced on our APRIL 3, 2017 on the Monday’s with Melissa blog post so be sure to check it out!

If you aren’t familiar with the Coffee Loving Paper Crafters Group and would like to learn more, be sure to join their Facebook Group HERE to ensure you get the latest info on all of their blog hops! The group is SUPER fun with awesome creativity and inspiration throughout the year and of course.. GREAT HOPS with SUPER SPECTACULAR PRIZES! We would hate for you to miss out!

Now onto some CREATIVE Fun stuff from Alena on the A Creative Journey with Melissa Creative Crew!


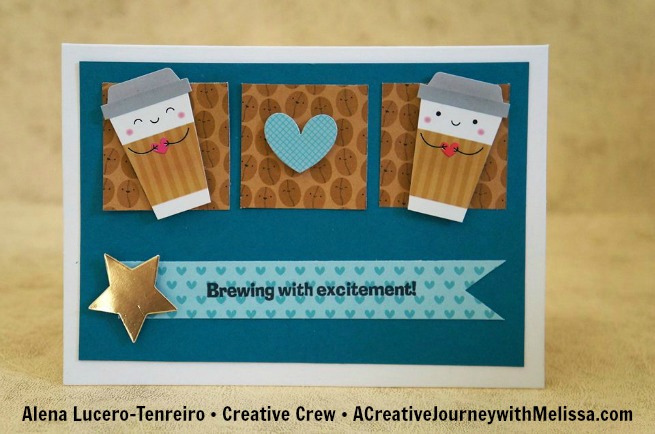
This creation from Alena was made using the A Creative Journey with Melissa Coffee is my Liquid Therapy Stamp Set and Doodlebug Designs Paper. Not only could you send this for a congratulations for anything exciting you would like to share, wouldn’t this be PERFECT for a NEW BABY CARD? I just love it!

This creation by Alena for the 2017 Spring Coffee Lovers Hop is bursting with color just like spring flowers would be! She combined the A Creative Journey with Melissa Coffee, Tea and Wine – OH MY! and the A Creative Journey with Melissa Coffee is my Liquid Therapy Stamp Sets.


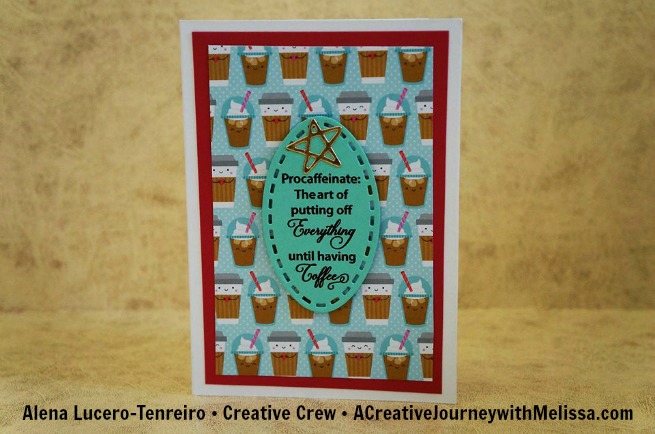
This creation from Alena using the A Creative Journey with Melissa Coffee, Tea and Wine – OH MY! Stamp Set highlights one of my favorite quotes. I love how she used the awesome Doodlebug Designs Paper to add some COFFEE to the creation.

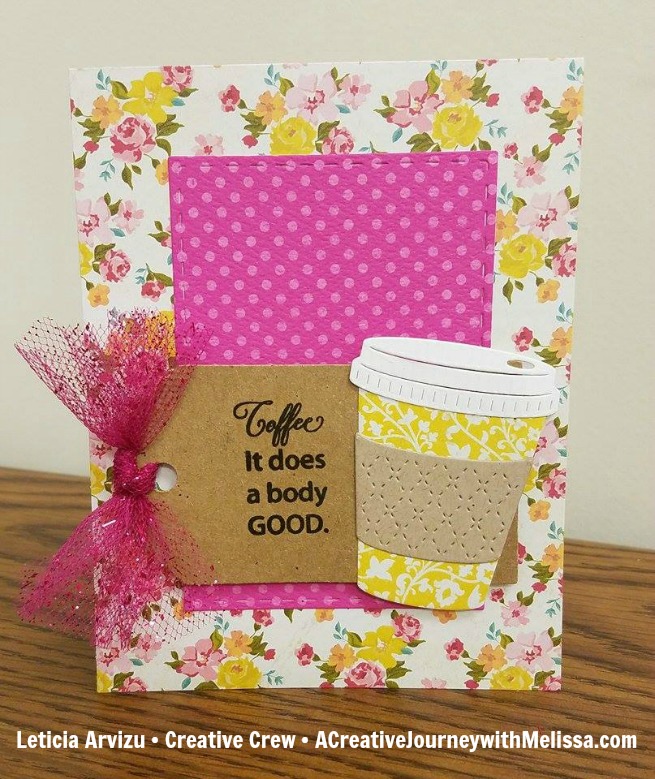
Now, we are going to show you the creations made by Leticia on our Creative Crew.

This planner clip made by Leticia was created using the A Creative Journey with Melissa Coffee is my Liquid Therapy Stamp Set and a coffee die set. Your planner needs one of these! Mine TOO!

This lovely gift card holder is perfect to share with a friend. Who doesn’t love a coffee gift card and handmade creation?

This beautiful card just has springtime written all over it which is perfect for the 2017 Spring Coffee Lovers Hop!

With the lovely bright colors, it looks like our flower beds are blooming! Perfect card for a friend for any occasion!

For our giveaway, we will be giving away both of the stamp sets highlighted in the creations above. We are giving away the the A Creative Journey with Melissa Coffee, Tea and Wine – OH MY! and the A Creative Journey with Melissa Coffee is my Liquid Therapy Stamp Sets. in order to qualify you need to be a subscriber to our blog post/newsletter list and subscribe to our YouTube Channel . If you want an extra entry, comment on this blog post with what you would like to see in our next coffee stamp set! That’s it!

Thank you for joining us for the 2017 Spring Coffee Lovers Hop! We hope you are a winner and thank you for going on A Creative Journey with Melissa.
SUPER EASY Craft Project – Planner Pom Pom Clip

SUPER EASY Craft Project – Planner Pom Pom Clip is what we have for you today. You can use this clip not only for your planner but also as a book mark, scrapbook marker, gift for a friend and so much more! I was reintroduced to the Pom Pom when I went to a crop hosted by my friends Esther and Leticia. I remember making them when I was younger and LOVED THEM! Leticia is on our Creative Crew and I along with Brandie and Rhoda on our Creative Crew were thrilled to support such an AWESOME crop. Esther did the demonstration of the Planner Pom Pom Clip.
If you are in the Los Angeles, California and are interested in going to one of their crops, send me a message and I will get you in contact with them!

Now, do you want to make your own? Let’s get started!

Supplies Needed

Twine or Yarn

Scissors

Paper Clips

Cut off a 4-6 inch piece of twine or yarn and set aside. You will use this to tie your Planner Pom Pom Clip.

Hold out your two fingers. Holding them apart approximately a quarter to a half of an inch apart. Starting at the bottom of your fingers as shown, wrap your yard around your fingers.

Wrap around your fingers with the yarn.

I wrapped the yarn twenty five times around my fingers.

If you want the Planner Pom Pom Clip to be more full, you would want to add more times wrapped with your yarn.

Cut off the yarn on the bottom once you have finished wrapping it to your desired thickness.

Take out the yarn piece you set aside. You will want to push the yarn piece in between your fingers as shown above where it is wrapped with the yarn.

Once you have pushed the yarn through, pull the yarn half way through so that there is yarn on both sides.

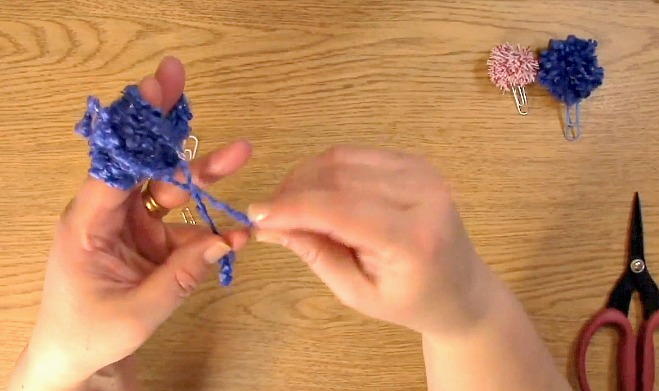
You will then take the ends of the pushed through yarn and tie them.

Remove the yarn from your fingers.

Pull the yarn tightly ensuring the yarn is in place securely.

You will then want to tie it again making a knot.

Once this is complete, take out your paper clip. Bend out your paper clip a little so you have a little bit of room between the outside edge and the inside.

Insert your paper clip either through the knot in the pom pom or behind it.

I chose to place the paper clip behind the knot. I feel like it is more secure this way.

Once it is securely attached, slide the paper clip around a full 360 degrees around the paper clip so that the paper clip is facing the correct way.

This is what the Planner Pom Pom Clip should look like once the paper clip is fully in place.

Now it’s time to trim your Planner Pom Pom Clip! It’s just like giving your clip a hair cut. Trim it to your liking whether it be short, long, even or uneven, it’s all up to you!

Here is my completed Planner Pom Pom Clip!

Here are the three Planner Pom Pom Clip creations I made! Aren’t they adorable? The possibilities are endless!

Again, a huge thank you to Esther and Leticia for inspiring my creativity today!

This week for our Giveaway, we are giving away the A Creative Journey with Melissa A Date to Remember Stamp Set shown in the video above which will work GREAT with your planner and NEW Planner Pom Pom Clip.

To qualify to win, you must be BOTH:

A follower on YouTube, subscribe to our mailing list/blog posts and you may also comment on this blog post for an additional entry to win! If you do not contact me within two weeks of winning, you will unfortunately, forfeit your prize. Thank you for your understanding.

NOTE: Be sure you are not subscribed with two different names. If I am unable to match you with your subscription to both the blog and the YouTube Channel, you will miss your chance to win a prize. If I can’t decipher if you are a matching subscriber (if your profile doesn’t show publicly who you subscribe to) and I can’t confirm you have subscribed to both, I won’t be able to enter you in for the prize. **DO NOT COMMENT WITH YOUR ENTIRE EMAIL ADDY. Only give me the first 6 NOT INCLUDING YOUR HOST. Just enough for me to match your name will work perfectly.  Your understanding is appreciated.

Now for last weeks WINNER!!

The WINNER IS Karen Ladd !!

Karen, please send me your contact information via contact page on our website and I will get your prize out to you! Thank you so much for being a YouTube follower and subscribing to our mailing list/blog posts!

We hope you enjoyed our Project Life Pocket Page Scrapbooking product overview. Have a wonderful week and thank you for going on A Creative Journey with Melissa.