Custom Tie Dye Ribbon Tutorial
Custom Tie Dye Ribbon Tutorial is what we have for you today. Do you ever look at a project and think Wow! Those two or three colors would look awesome with this creation but can’t figure out how? PROBLEM SOLVED! I have an inexpensive way for you to create your own Custom Tie Dye Ribbon for your projects that won’t break the bank! Ready? Let’s do this!

Supplies Needed for the Custom Tie Dye Ribbon Project
Alcohol Ink
Isopropyl Alcohol
Paper Clips
Seam Binding
Plastic Baggies or a Jar you don’t mind getting stained
Clothes Pins (yay remmebered!)
Paper towels or I used make up pads
GLOVES if you don’t want to get ink all over your hands because YOU WILL
 For this project, I used Chameleon Ink refill colors Y03, V04 and BG4 for the alcohol ink colors.

I also used white seam binding.

For the seam binding, there is a small pin in it to hold the ribbon. Take it out but be sure to keep it as it comes in handy for storage!

To begin, take the amount of ribbon you need for your project and cut it off of your roll. For this ribbon, I am making it a little bit messy looking on purpose to I am just randomly bunching my seam binding ribbon together as shown.

Twist the seam binding and clip one end of it in the clothespin.

Twist and clip the other end so it looks like the above and set aside.

For the second Custom Tie Dye Ribbon, wrap your ribbon neatly around your hand as shown above.

Take out four paper clips and place them on the ribbon as shown above.

This is the back side of the ribbon. Notice that the paperclips are placed differently to get a different effect.

Using your baggy as an ink catch all, place your ribbon inside the bag. Carefully place a small amount of alcohol ink inside your bag of the first color.

Add the second color to your bag. I put WAYYY too much of the first color in however you will see what I do with the extra in a little bit.

Close your baggy and Smoosh, yes I said SMOOSH, your colors inside the bag. This is what your bag will look like, A MESS! Set your Custom Tie Dye Ribbon aside.

Take out your second baggy and place a few drops of the colors you wish to use inside the baggy.

Using your clothes pin seam binding ribbon, strategically place the ink on various parts of the ribbon.

Take out your first inked creation and set aside to dry.

With the extra ink inside the baggy from the first creation, I placed some more seam binding ribbon and smooshed it to see what effect I would get. Set it aside to dry.

Take out the inked ribbon with the clothespins from the bag once they have dried. These are still a little bit wet.

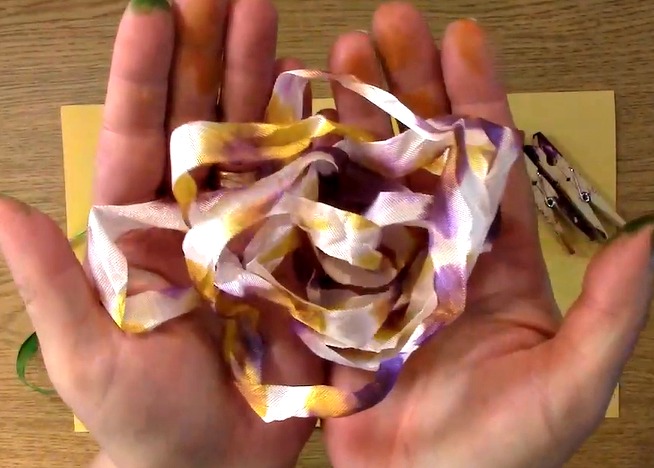
This is what it looks like! I love it! What do you think?

I used WAY TOO MUCH ink for the first ribbon project. LESSON LEARNED however, I do like how it came out so maybe it wasn’t so bad after all!
You will need to carefully take off the paperclips so the ribbon doesn’t snag. ANOTHER lesson I learned…

This is what the ribbon looks like although it is still quite wet as you can see by the look of my fingers.

The results of the ribbon as it is drying.

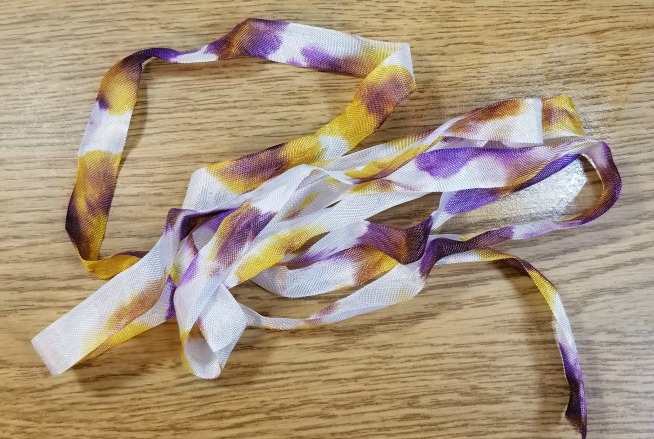
This is what the purple and yellow ribbon looks like once it is completely dry.

When the yellow and blue ribbon is completely dry, this is what it looks like. I am glad you can see more of the blue now and it doesn’t look all green!

This is the extra piece of ribbon I put in the baggy just to see what it looked like. I know I can use this on a future project!

Here are all of them side by side completely dry. Which would you want to try?

For this weeks giveaway, we are giving away $15 credit to our store!

For last weeks giveaway, we are giving away $15 credit to our store!
The winner is Teresa G.
Please be sure that you send me a message letting me know which post you won on and your contact info and I can send your code for your store credit to you!
Winners, please send me an message HERE and I will get your prize out to you!
For all of our giveaways including this one, in order for you to qualify for an entry to win, you would need to be a follower on YouTube, subscribe to our mailing list/blog posts (found on our blog page) and you may also comment on this blog post for an additional entry to win! When you subscribe, you will receive an e-mail on Mondays with our latest blog post. BE SURE TO READ IT to check to see if you are a winner EVERY WEEK. If you do not contact me within two weeks of the announcement of winning, you will forfeit your prize. NO EXCEPTIONS. Thank you for your understanding.
NOTE: If you are subscribed with two different names and I am unable to match you with your subscription to the blog and the YouTube Channel, you will be ineligible to win as I can’t decipher if you are a matching subscriber to both. Thank you for your understanding.
We hope you will subscribe to our YouTube Channel, Blog/Newsletter updates and check out our website!
As always, we appreciate your visit and we hope you enjoyed going on A Creative Journey with Melissa.


