
Create your own Cork Wreath Part Two: Putting it Together
Create your own Cork Wreath Part Two: Putting it Together is what we have for you today. We have a tutorial on video above as well as the pictorial below.
The original video was over an hour and a half long (1:48 to be exact).
In the editing process I sped up the time so that all you actually have slowed is when I am speaking with tips, techniques and suggestions. Everything else is sped up to not make the video longer. I really wanted to do this video so that you can see from beginning to end what is needed to be done. As I said in my video the wreath is not a difficult project.
It only takes about two hours of time for the larger wreath.
A little under an hour and a half for the smaller one. To find out exactly what you need to create one of the smaller wreaths, go to my first Create your Own Cork Wreath blog post here for info. Hopefully this will give you the courage to try it out! There are so many wine drinkers out there that this could be a great gift or even a great craft fair product to sell! Be sure to ask your friends to save their corks and you can TRY IT! Sooo… let’s get started!
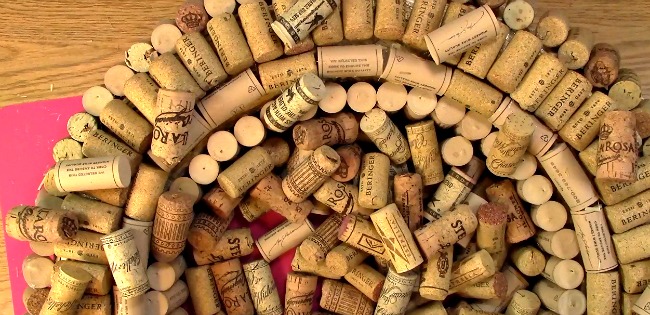
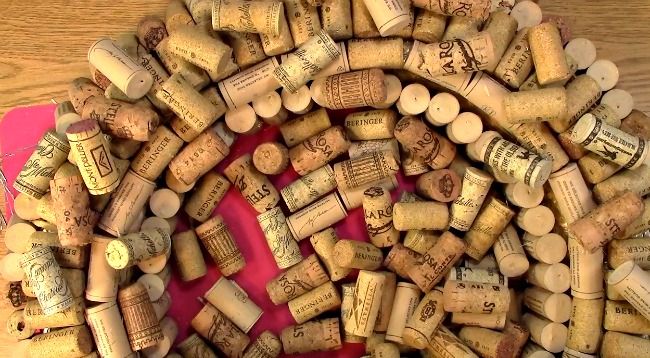
Here is the first of two wreaths that I have made. There are two different types of patterns I used to place the corks her
We are going to recreate this one again for this pictorial and the video.
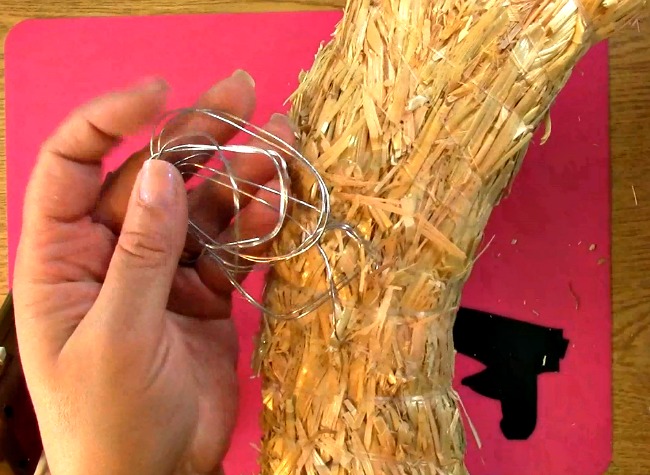
First, be sure you have your wire or whatever you plan to use to hang your wreath in place before you start to apply your corks. This will ensure it’s usability as well as ease for the person you are either gifting it, selling it or even for yourself!
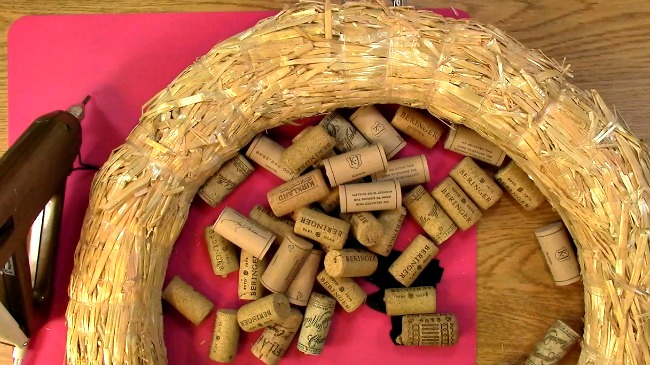
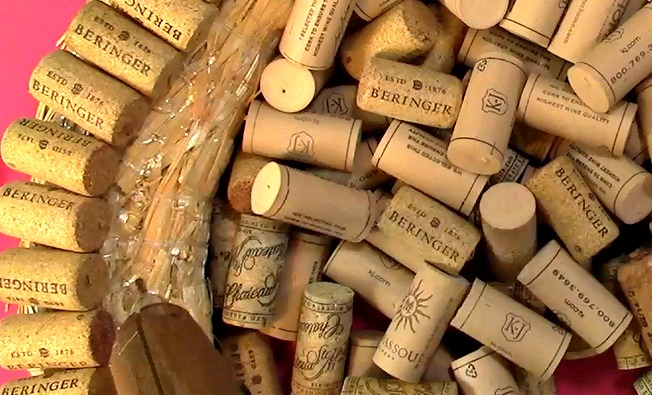
The first thing you are going to want to do for the Create your own Cork Wreath Part Two is get out your hot glue gun, corks and a protective mat (Hot Glue Gun Helpers set including the protective surface Mat) Place your protective mat down. I placed my corks on the inside of the wreath for visibility. Plug in your hot glue gun approximately twenty minutes before you plan on starting. What I did was I got my glue gun plugged in and then I pulled everything out and got situated to get ready to create. It worked out perfectly!
*NOTE* You will want to be sure that you have gone through your corks and made sure that you have enough to do this project.
I was so fortunate to have one of my BFF’s which I am also lucky enough to have as my next door neighbor, give me a whole box of corks that had been collected over some time. I was so excited I thought of a few ideas and here is one of them!
A HUGE thank you to ROBIN for the corks for these wreath projects!
Once your glue gun is heated properly, you will want to take out your unwrapped wreath with the flat part on the work surface. The flat side will be the back of the wreath. It is important that you use the flat side so when someone hangs the wreath, it will lay flat on the surface.
You will want to adhere corks to the wreath to essentially cover the wreath. There are a few different ways to do so. This is the first one. You can use this by itself (I would have been a little more careful, lined up the corks better and closer together so it was covered more had this been the final look of the wreath.)
The other way you can do it is the way we are going to show you in this tutorial.
There are a few ways you can adhere the corks.
The three ways I have done in this video are zig zag, directly on the corks and a long line. I have found the line isn’t the most effective when gravity is involved. The corks will slip down and I ended up doing more redo’s with that.
If you use the hot glue line technique, it works great for when you are doing the circle around the top of the wreath when the cork is supported like shown. This was very effective.
I would suggest the following as the best two to techniques to use for the majority of the corks.
The first is using a zig zag line approximately two to three inches wide and almost as tall as the corks that you are using. This works well as long as you make sure you have enough glue on the area where the corks are going to go.
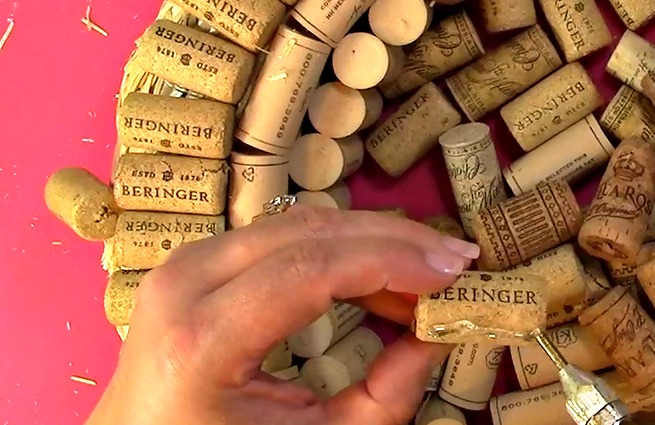
Another other way you can adhere them is to place the hot glue directly on the cork in a thick line.
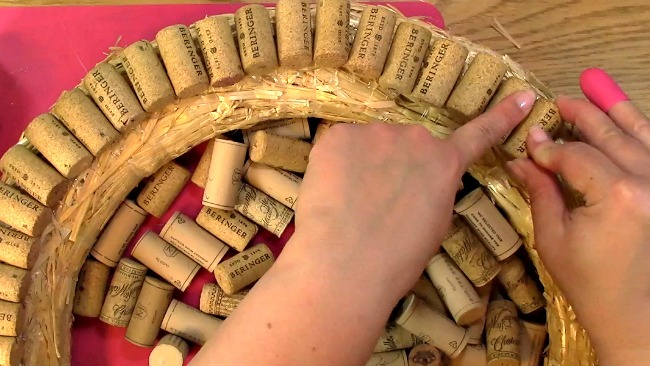
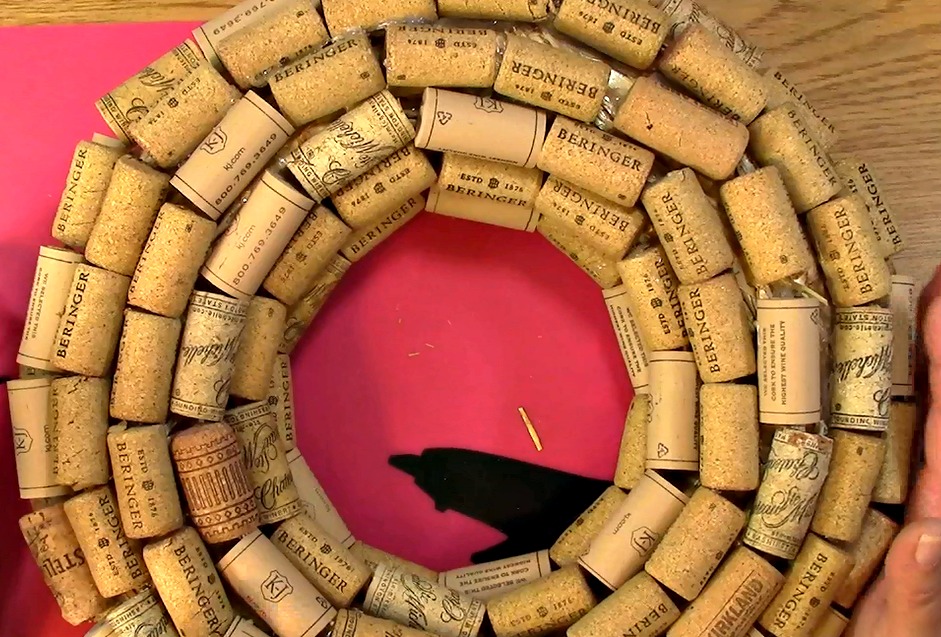
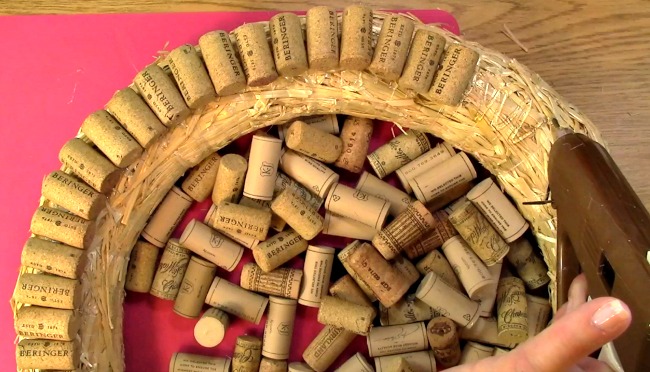
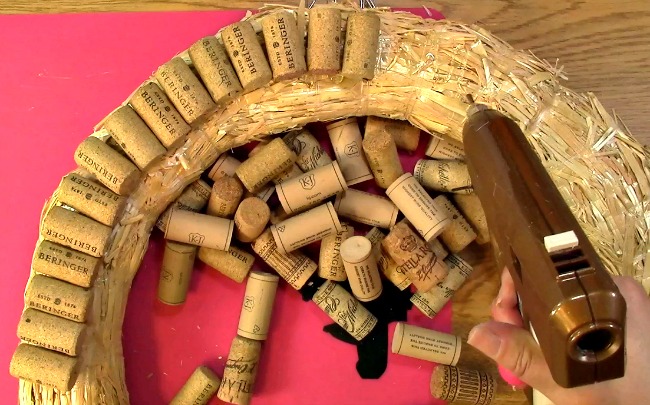
You are going to start gluing the corks on the top part of the wreath going all the way around. Once you have used either of those techniques, you will then press your corks on the desired area. Complete putting on corks all around the top of the wreath.
Next, you are going to put glue on the inside of the circle of corks you just placed.

Place them all of the way around the wreath.
The next layer so to speak of corks you are going to place is the inside of the wreath layer.
For this, you will want to turn your wreath upside down so that the back of the wreath is facing you. You can place a line of glue or I would suggest gluing each cork individually for the best adhesion.
 You will then place your corks vertically along the inside of the wreath as shown.
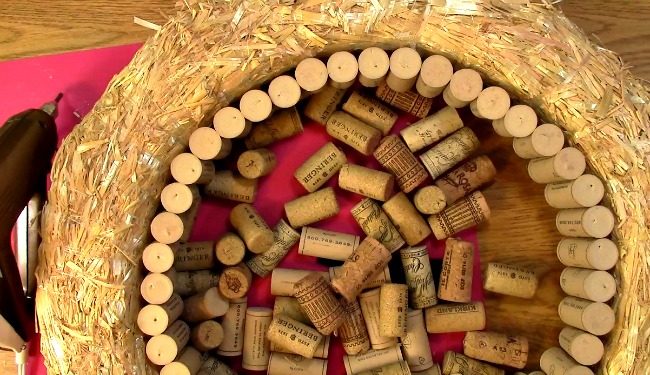
This is how it looks once completed.
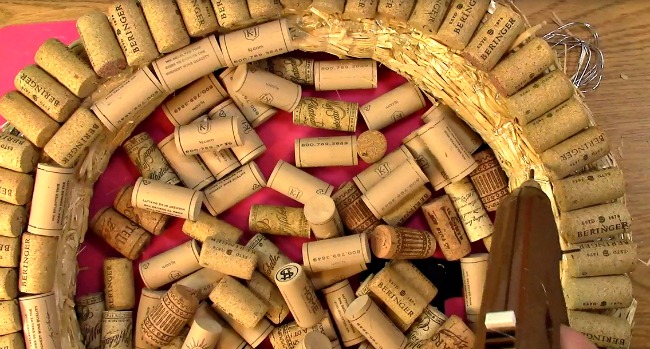
Just to be sure that all of the corks have adhered properly, gently run your fingers around the corks. If any feel loose or fall off, reapply them. It can happen so just be sure before you start your final layer that all of the corks are in place.

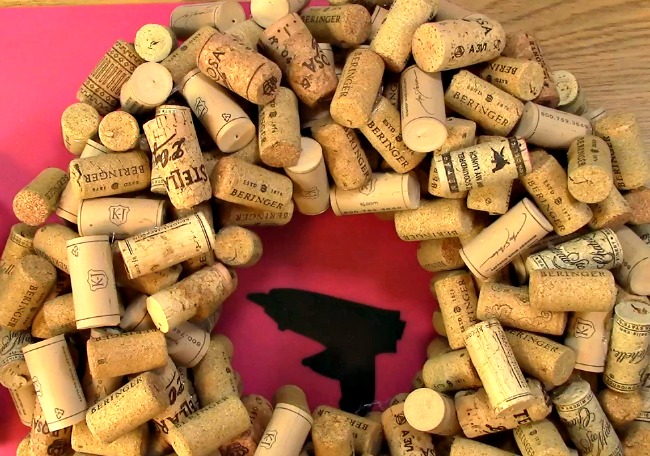
Now for my favorite part!
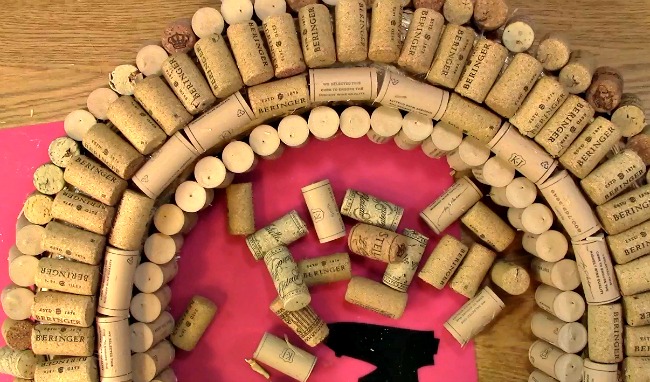
Turn your wreath back around so that the front of the wreath is facing you. Now you will be gluing corks in a random order to cover the top to give it a more 3-D decorated look for the Create your own Cork Wreath Part Two project. I have found it is best for you to individually apply hot glue to each cork. It helps with the random placement.
Apply glue and place the corks in random order on the wreath, filling areas where the base wreath may be showing through.
Add more to fill up the wreath to add more fullness to the desired look you are aiming for. Once you are done, this is where you would clean up any extra glue, glue strings, etc to give your wreath a great finished look. It is easier to clean up the excess glue once it has cooled.
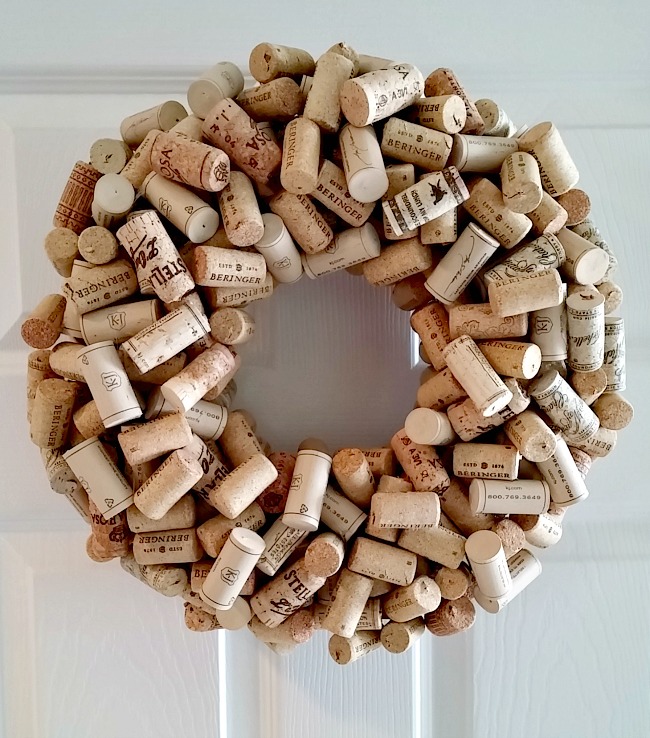
Here are full pictures of the cork wreaths I created.
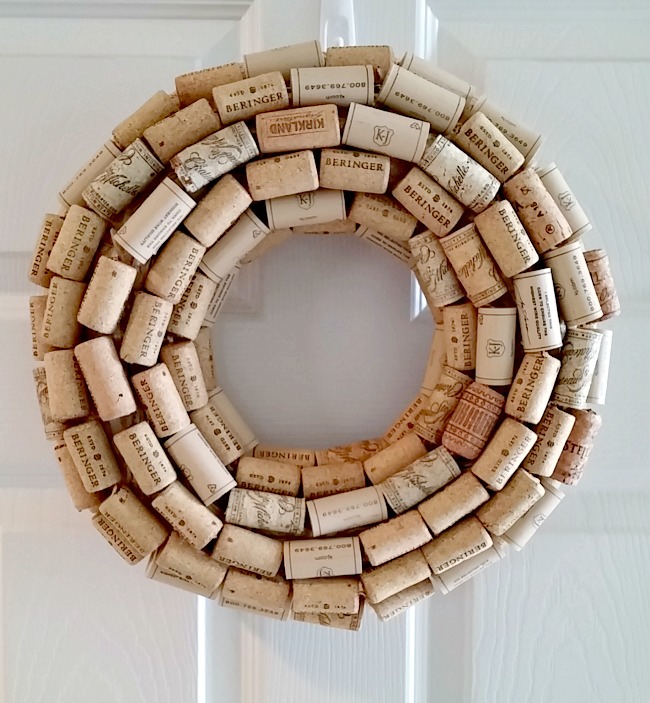
Wreath 1
Wreath 2 (smaller wreath)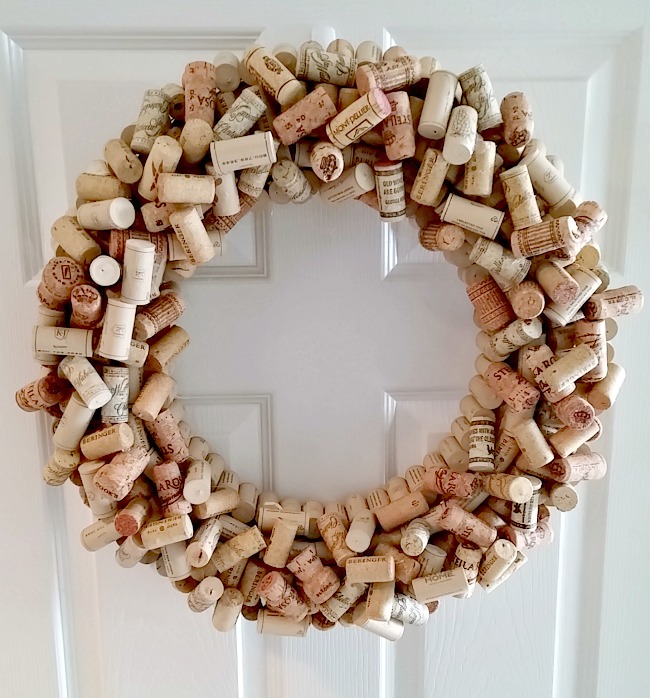
Wreath I made in the video (larger wreath)
Once you are done, you can add ribbon, berries, themed decorations for fall, Christmas, birthdays, even wine bottles and glasses! There are a number of things you can do. For next weeks tutorial I am going to show you how to tie and create a ribbon that will work perfectly for your wreath. I realize it may seem silly but there are different ways to tie a ribbon and they can have all of the difference in the world when creating a gift for someone. You will be able to use this technique not only for your wreath but for cards and future gifts too!
Thank you so much for joining us today for the Create your own Cork Wreath Part Two tutorial.
We are honored you took the time to visit and hope you will create a cork wreath yourself! we hope we have inspired you to get creative and appreciate you going on A Creative Journey with Melissa.


